
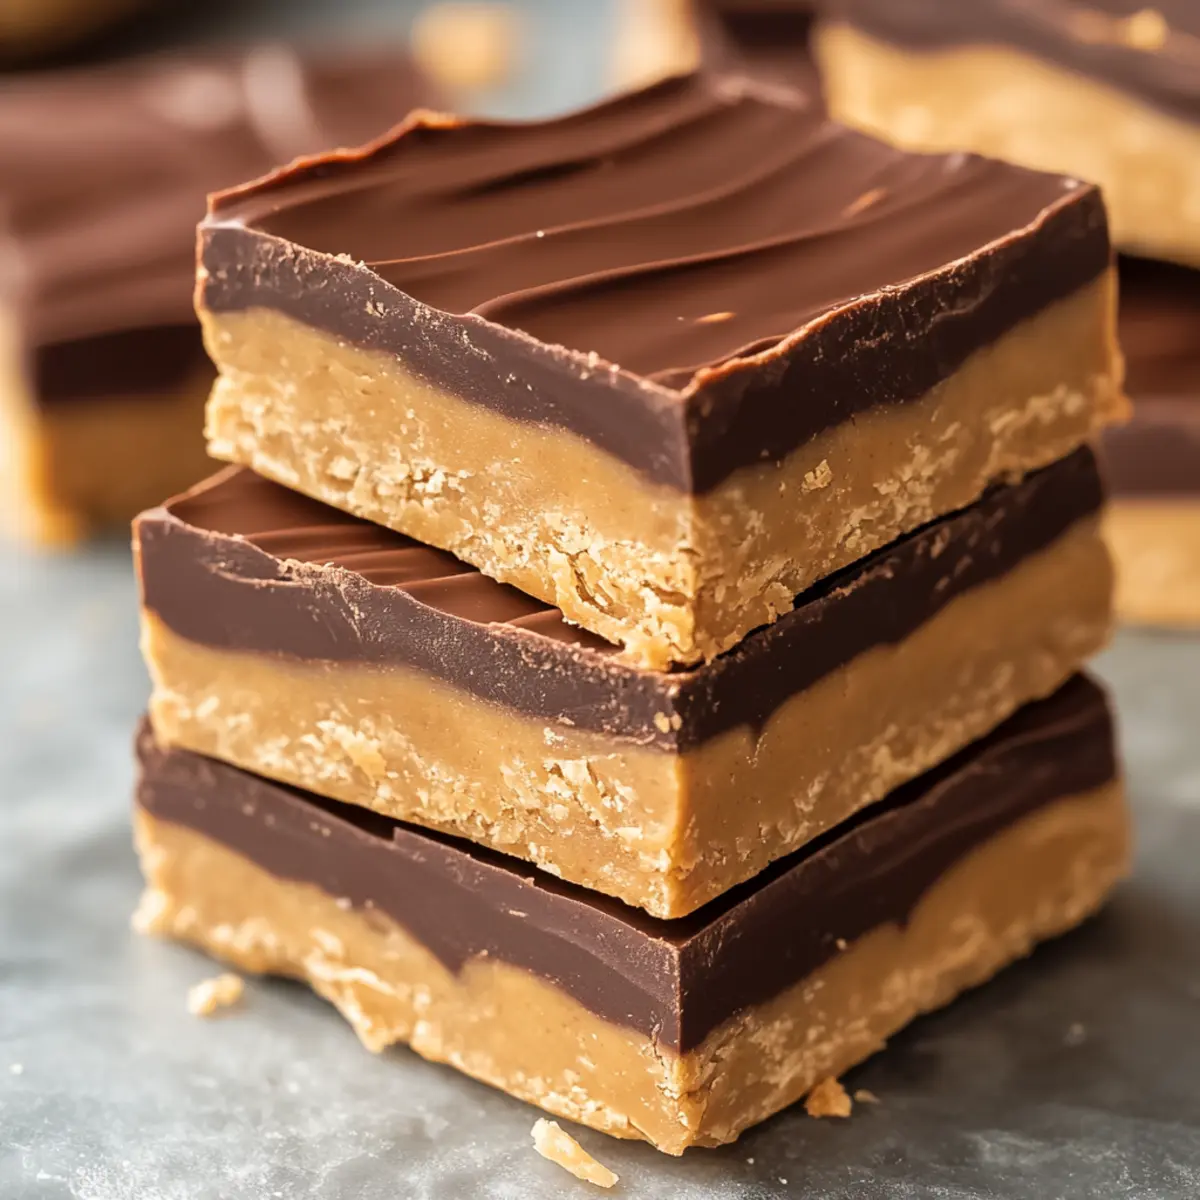
As I rummaged through my pantry, the thought of snacking on something nourishing yet indulgent sparked a sense of excitement. That’s when I stumbled upon the perfect recipe: No-Bake Peanut Butter Protein Bars. This delightful treat blends creamy peanut butter with a protein boost, making it not only quick to whip up but also exceptionally satisfying. Packed with high protein and low sugar, these bars offer a healthier alternative for anyone tired of sugary snacks and on-the-go fast food. Plus, they’re completely customizable—ready to cater to your unique taste! Whether you’re post-workout or simply craving a midday pick-me-up, these easy-to-make bars are bound to become your new favorite staple. What will you add to yours?
Why are Peanut Butter Protein Bars irresistible?
Customizable Delight: With these bars, you can tweak ingredients to fit any dietary preference, from vegan to paleo.
Quick and Easy: No baking required! Just mix, chill, and enjoy—perfect for busy days or last-minute cravings.
Guilt-Free Indulgence: Satisfy your sweet tooth with a treat that’s high in protein and low in sugar, unlike store-bought options packed with preservatives.
Versatile Snack: Whether paired with yogurt or enjoyed solo, they make for a nutritious boost any time of day. Don’t forget to check out my High Protein Pancake recipe for more wholesome ideas!
Crowd Pleaser: Kids and adults alike will love these chewy bars, making them a hit for family snacks or post-workout fuel.
Peanut Butter Protein Bars Ingredients
For the Base
• Peanut Butter – A creamy base that brings healthy fats; try almond or cashew butter for a twist.
• Protein Powder – Provides a protein boost; customize with whey or plant-based options based on your diet.
• Maple Syrup – A natural sweetener that binds the bars together; agave syrup or honey can be excellent substitutes for added sweetness.
For the Flavor
• Cocoa Powder (or Chocolate Chips) – Infuses the bars with rich chocolate flavor; omit for a non-chocolate version or opt for dairy-free chips for vegan Peanut Butter Protein Bars.
For Topping (optional)
• Sea Salt – A pinch can elevate the flavor profile, bringing out the sweetness beautifully.
• Chopped Nuts or Dried Fruits – Add for extra texture and flavor variety, making each bite unique and delightful!
Step‑by‑Step Instructions for Peanut Butter Protein Bars
Step 1: Combine Ingredients
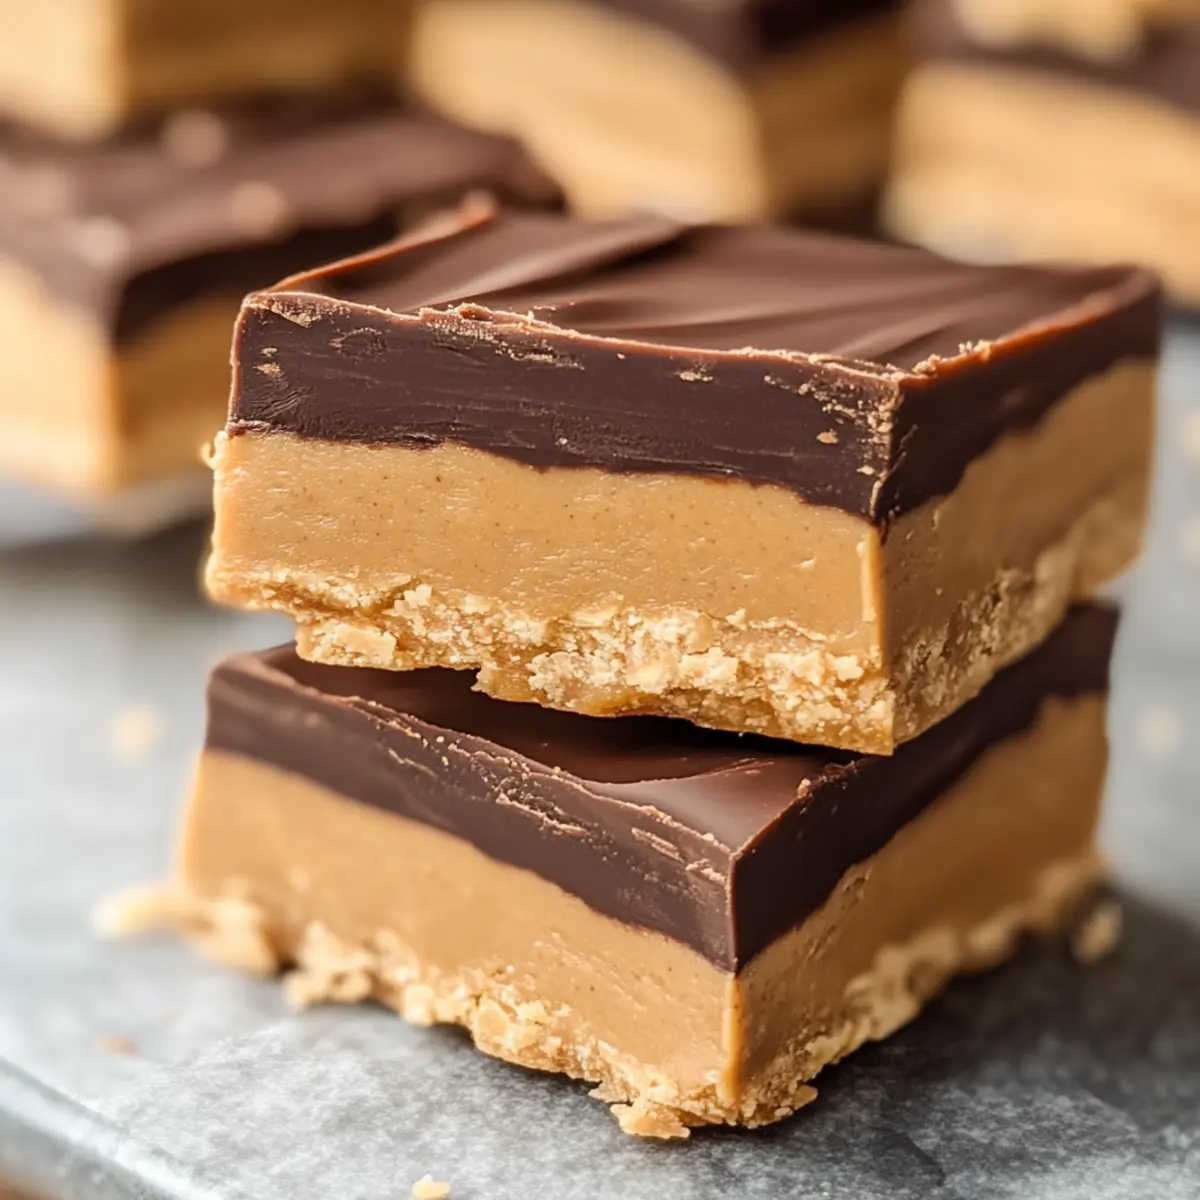
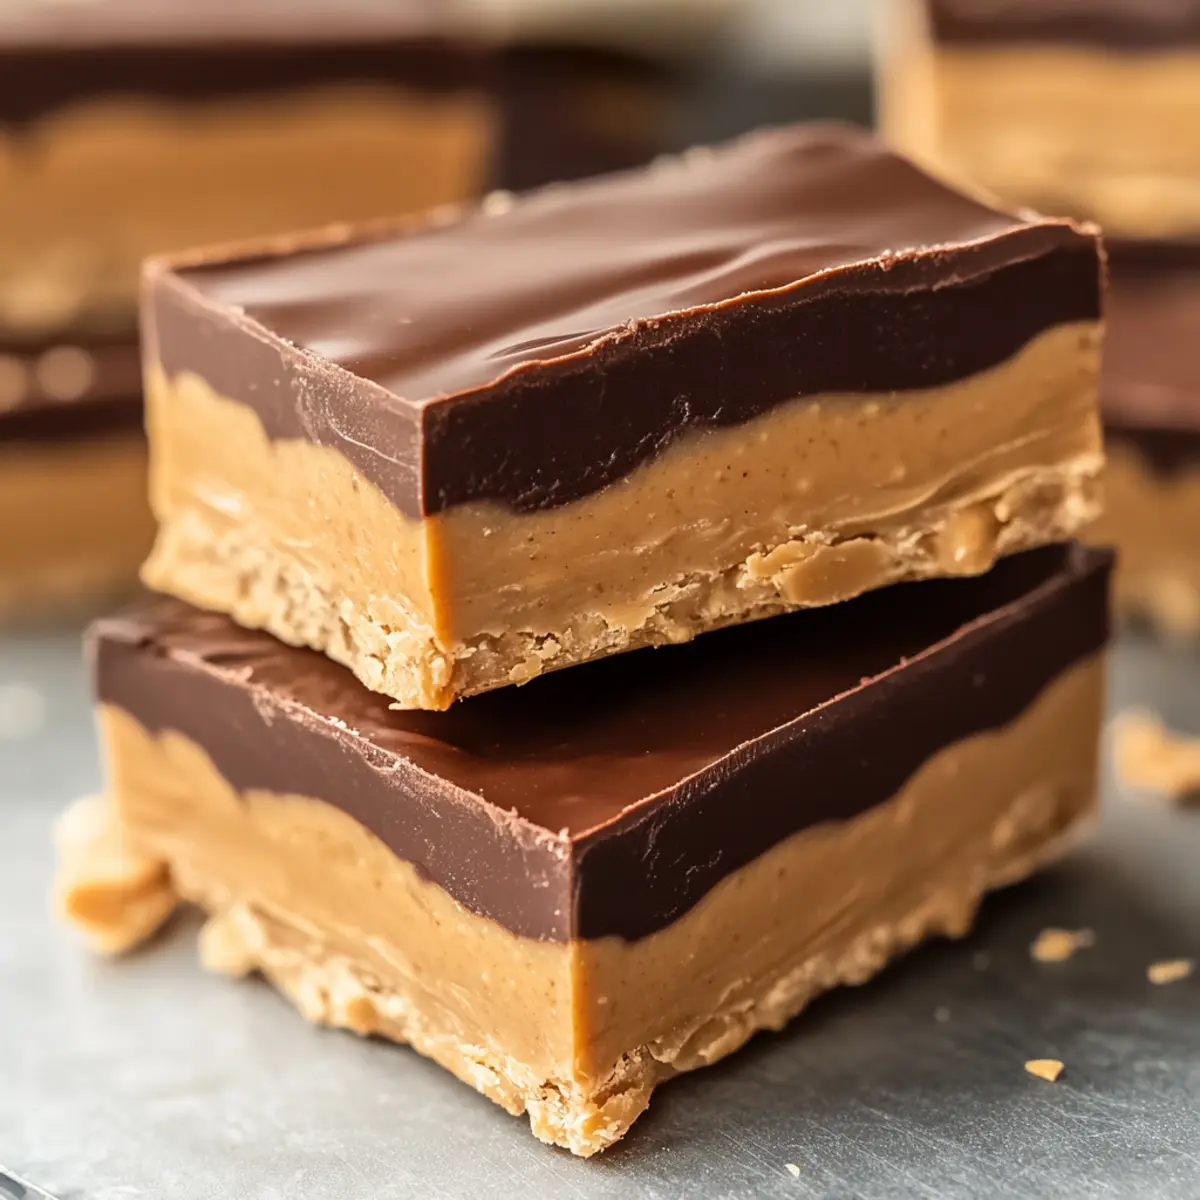
In a large mixing bowl, add 1 cup of creamy peanut butter, 1 cup of protein powder, and 1/4 cup of maple syrup. Use a spatula or spoon to mix these ingredients thoroughly for about 2–3 minutes until smooth and well combined. The mixture should be thick and sticky, ensuring a solid base for your Peanut Butter Protein Bars.
Step 2: Incorporate Cocoa
Once the base is well-mixed, gradually stir in 1/3 cup of cocoa powder or chocolate chips. If using chocolate chips, consider melting them slightly for easier integration. Mix for another 1–2 minutes until the cocoa is fully incorporated. The batter should develop a rich, chocolatey color, enticing you to savor these delightful bars.
Step 3: Prepare the Baking Dish
Line a square baking dish (8×8 inches) with parchment paper, allowing some overhang for easy removal later. This step is crucial to achieve the perfect texture without sticking. Make sure the parchment paper is smooth, fitting snugly in the corners, setting the stage for your delicious Peanut Butter Protein Bars.
Step 4: Press Mixture Into Dish
Pour the peanut butter mixture into the prepared baking dish. Using a spatula or your clean hands, evenly press the mixture into the bottom of the dish, creating a smooth and compact layer. Firmly pressing is essential to ensure the bars hold their shape once chilled. Aim for an even thickness across the entire surface.
Step 5: Chill to Firm Up
Place the filled baking dish in the refrigerator, allowing your mixture to chill for at least 1 hour. This step is essential for the bars to set properly, becoming perfectly firm and easy to cut. You’ll know they are ready when the top feels solid and the edges pull away slightly from the dish.
Step 6: Slice and Serve
After chilling, remove the dish from the refrigerator. Lift the mixture out using the parchment paper overhang, and place it on a cutting board. Using a sharp knife, cut the mixture into even bars or squares, about 1 inch wide. Your homemade Peanut Butter Protein Bars are now ready to be enjoyed—store extras in an airtight container in the fridge!
What to Serve with No-Bake Peanut Butter Protein Bars
Indulging in these protein-packed delights opens up a world of delicious pairings that elevate your snack game.
-
Fresh Fruit: Juicy apple slices or ripe bananas bring bright, refreshing flavors that balance the richness of the bars.
-
Greek Yogurt: A dollop of creamy yogurt adds a tangy kick, creating a delightful contrast to the sweet, nutty bars.
-
Nutty Granola: Crunchy granola provides a satisfying texture; sprinkle some on top for added flavor and heartiness.
-
Smoothies: Pair with your favorite protein-packed smoothie for a complete meal; the creaminess complements the bars beautifully.
-
Chocolate Drizzle: For an extra indulgence, drizzle melted dark chocolate on top, enhancing the sweet and nutty profiles.
-
Coffee or Tea: A warm cup of coffee or herbal tea serves as a cozy drink option, perfect for a relaxing afternoon snack.
With these pairings, you’ll create a well-rounded snack experience that nourishes your body and satisfies your taste buds!
Storage Tips for Peanut Butter Protein Bars
Fridge: Store your Peanut Butter Protein Bars in an airtight container in the refrigerator for up to 7 days, keeping them fresh and delicious.
Freezer: For longer storage, wrap individual bars in plastic wrap and place them in a freezer-safe bag. They can be frozen for up to 3 months, ensuring a ready-to-eat snack at any time.
Reheating: If you prefer them warm, simply microwave for 10-15 seconds to soften slightly before enjoying. This will enhance the creamy peanut butter flavor.
Check for Freshness: Always inspect your bars for any discoloration or off-smell after storage; freshness ensures the best taste and texture!
Make Ahead Options
These No-Bake Peanut Butter Protein Bars are a fantastic recipe for meal prep enthusiasts looking to save time during busy weeks! You can mix the base ingredients (1 cup of peanut butter, 1 cup of protein powder, and 1/4 cup of maple syrup) up to 24 hours in advance. Just store the mixture in an airtight container in the refrigerator to keep it fresh. When you’re ready to finish, simply press the mixture into the prepared baking dish and chill it in the refrigerator for at least 1 hour to firm up. This method ensures your bars remain just as delicious and satisfying, ready for snacking when you need a quick and nutritious boost!
Expert Tips for Peanut Butter Protein Bars
-
Choose Smooth Peanut Butter: Ensure you use smooth peanut butter for the best mixing. Chunky varieties can make the bars difficult to hold together.
-
Press Firmly: When pressing the mixture into the baking dish, apply firm pressure to avoid crumbly bars later on. This will help maintain a cohesive texture.
-
Avoid Over-Mixing: Mix just until combined; over-mixing can make the bars tough. You want that delightful chewy texture, not a dense lump!
-
Chill Long Enough: Don’t skip the chilling step! Ensure these bars firm up in the refrigerator for at least an hour, making them easier to cut and enjoy.
-
Experiment with Add-Ins: Get creative! Adding nuts, seeds, or dried fruits can enhance the flavor and texture of your Peanut Butter Protein Bars, making each bite a surprise.
-
Storage Matters: Store them in an airtight container in the fridge to keep your bars fresh for up to a week. You can also freeze them for longer storage!
Peanut Butter Protein Bars Variations
Feel free to make these bars your own with these delightful twists and substitutions!
-
Vegan Option: Use maple syrup and dairy-free chocolate chips to create a fully vegan snack that everyone can enjoy. It’s a wonderful way to share your treats without compromising anyone’s dietary needs.
-
Nut-Free: Replace peanut butter with sunflower seed butter for a nut-free version that still maintains that creamy texture. Just remember to adjust any additional sweeteners to balance the flavor.
-
Flavor Boost: Add a teaspoon of vanilla extract for a lovely aromatic touch. This small tweak can elevate your bars and make them even more delightful!
-
Extra Crunch: Toss in some chopped nuts or seeds for added texture. Almonds or pumpkin seeds pair beautifully with the peanut butter flavor—each bite will offer a satisfying crunch!
-
Heat it Up: For a spicy kick, try mixing in a dash of cayenne pepper or chili powder. This unexpected flavor combination will awaken your taste buds and provide an adventurous snack experience!
-
Protein Packed: Double the amount of protein powder for an extra boost on those busy days. If you’re into protein-packed options, consider using a chocolate vegan protein powder for a chocolatey delight.
-
Decadent Swirl: Drizzle a layer of melted dark chocolate on top before chilling. Not only does it look stunning, but it also adds a rich chocolatey indulgence that’s hard to resist.
-
Fruit Infusion: Mix in some dried fruits like cranberries or raisins, or even add mashed bananas for natural sweetness. The fruity bursts will complement the bars beautifully, adding both flavor and nutrition.
Feel inspired by these suggestions? There’s a world of possibilities waiting for you, just like in my Breakfast Butter Swim recipe that welcomes creativity too!

Peanut Butter Protein Bars Recipe FAQs
What type of peanut butter should I use?
Absolutely! I recommend using smooth peanut butter for the best mixing and texture. Chunky varieties can create a drier consistency and make the bars more crumbly, making it harder for them to hold together.
How should I store my Peanut Butter Protein Bars?
For optimal freshness, store your Peanut Butter Protein Bars in an airtight container in the refrigerator for up to 7 days. If you’re making them in larger batches, wrapping individual bars in plastic wrap and keeping them in a freezer-safe bag allows you to freeze them for up to 3 months. This way, you’ll always have a delicious on-the-go snack on hand!
Can I freeze the Peanut Butter Protein Bars?
Yes, indeed! To freeze, wrap each bar tightly in plastic wrap or parchment paper, then place them in a freezer-safe bag. They can be stored in the freezer for up to 3 months. Thaw them in the fridge overnight or enjoy them slightly warmed by microwaving for 10-15 seconds before serving.
What should I do if the mixture is too crumbly?
If your mixture is crumbly, don’t worry! You can add just a touch more peanut butter or a little additional maple syrup to bind it together better. Mixing thoroughly also helps, but avoid over-mixing—this can toughen your bars. Aim for a thick and sticky consistency that will hold its shape when pressed into the dish.
Are there any allergy considerations for these bars?
Yes, definitely! While peanut butter is a common ingredient, always double-check for any nut allergies among those who will be enjoying the bars. For a nut-free option, sunflower seed butter is an excellent alternative! Ensure that all other ingredients, like protein powder or sweeteners, are also free from allergens.
Peanut Butter Protein Bars That Are Deliciously Customizable
Ingredients
Equipment
Method
- In a large mixing bowl, add creamy peanut butter, protein powder, and maple syrup. Mix until smooth and well combined for about 2-3 minutes.
- Gradually stir in cocoa powder or chocolate chips. Mix for another 1-2 minutes until fully incorporated.
- Line an 8x8 inch baking dish with parchment paper, allowing for overhang. This prevents sticking.
- Pour the peanut butter mixture into the dish and press evenly into the bottom. Aim for an even thickness.
- Chill in the refrigerator for at least 1 hour until solid and easy to cut.
- Remove from the fridge, lift out using parchment, and cut into even bars about 1 inch wide.
Leave a Reply