
As I stood in my kitchen, the tempting aroma of warm, buttery crescent rolls filled the air, transporting me back to family gatherings where homemade comfort food took center stage. That’s when the idea struck: Chicken Crescent Roll-Ups are not just a dish—they’re a heartwarming experience that brings everyone together! In under 30 minutes, you can whip up these kid-friendly delights, each one boasting a creamy filling of tender chicken and rich cream cheese wrapped in flaky dough. Perfect for busy weeknights or as a savory appetizer for gatherings, these roll-ups promise satisfaction with every bite. Curious about how to make this crowd-pleaser? Let’s dive into the delightful world of Chicken Crescent Roll-Ups!
Why are Chicken Crescent Roll-Ups a must-try?
Quick and Easy: With prep time under 30 minutes, these roll-ups are perfect for those hectic evenings when you crave something homemade without the hassle.
Kid-Friendly Delight: Both children and adults alike will love the creamy chicken filling, making it a hit at any family meal.
Versatile Snacking: Whether you serve them as an appetizer or a main course, these roll-ups fit seamlessly into any occasion—just like our Cinnamon Roll French bites!
Comfort in Every Bite: The combination of flaky crust and savory filling warms the soul and transports you to comforting family dinners.
Make-Ahead Option: Prepare these roll-ups ahead of time and bake when ready for an effortless meal.
Elevate your home cooking with these delicious rolls and keep everyone coming back for more!
Chicken Crescent Roll-Ups Ingredients
Here’s everything you need to create these delicious Chicken Crescent Roll-Ups!
For the Filling
- Cream Cheese – Adds creaminess and richness; substitute with ricotta for a lighter version.
- Shredded Chicken – The main protein source; can use turkey or rotisserie chicken for convenience.
- Green Onion – Provides a fresh, mild onion flavor; can be replaced with chives or shallots.
- Milk – Helps achieve a creamy filling; almond or oat milk works as dairy-free alternatives.
- Salt – Essential for enhancing flavors; use sea salt or kosher salt as preferred.
- Pepper – Adds seasoning depth; opt for freshly ground black pepper for the best flavor.
- Melted Butter – Enhances flavor and aids in dough browning; olive oil can be a lighter alternative.
For the Dough
- Crescent Roll Dough – The main structure for wrapping the filling; gluten-free versions are available if necessary.
For the Topping
- Melted Butter – For brushing before baking, ensuring a golden crust.
- Bread Crumbs – Adds crunchiness to the rolls; panko works great for extra texture.
- Grated Parmesan – Provides a salty, savory topping; nutritional yeast makes a great dairy-free substitute.
Now you’re all set to bring warmth and joy to your table with these Chicken Crescent Roll-Ups—enjoy the cooking journey!
Step‑by‑Step Instructions for Chicken Crescent Roll-Ups
Step 1: Preheat the Oven
Start by preheating your oven to 350°F (175°C). This ensures a consistently hot environment for baking your Chicken Crescent Roll-Ups, allowing them to achieve that golden-brown, flaky exterior we all love. While the oven is heating, gather your ingredients and prepare for the next delicious steps.
Step 2: Mix the Filling
In a mixing bowl, combine the cream cheese and melted butter. Use a hand mixer or a sturdy spatula to blend them until the mixture is smooth and creamy, about 2-3 minutes. Next, stir in the shredded chicken, salt, pepper, milk, and finely chopped green onions. Mix until all ingredients are fully incorporated and have a lovely, cohesive texture.
Step 3: Prepare the Crescent Dough
Carefully unroll the crescent roll dough onto a flat surface. Gently separate the triangles along the perforated lines. Make sure to keep them intact as you work. This dough will serve as the delightful outer layer of your Chicken Crescent Roll-Ups, holding in that rich, creamy filling.
Step 4: Fill the Dough
At the base of each crescent triangle, spoon about ¼ cup of the creamy chicken mixture. Be sure not to overfill; this helps prevent any bursting during baking. Starting from the base, roll the dough around the filling towards the tip, pinching the seams to ensure they are well sealed. This will help keep all that delicious goodness inside.
Step 5: Prepare the Topping
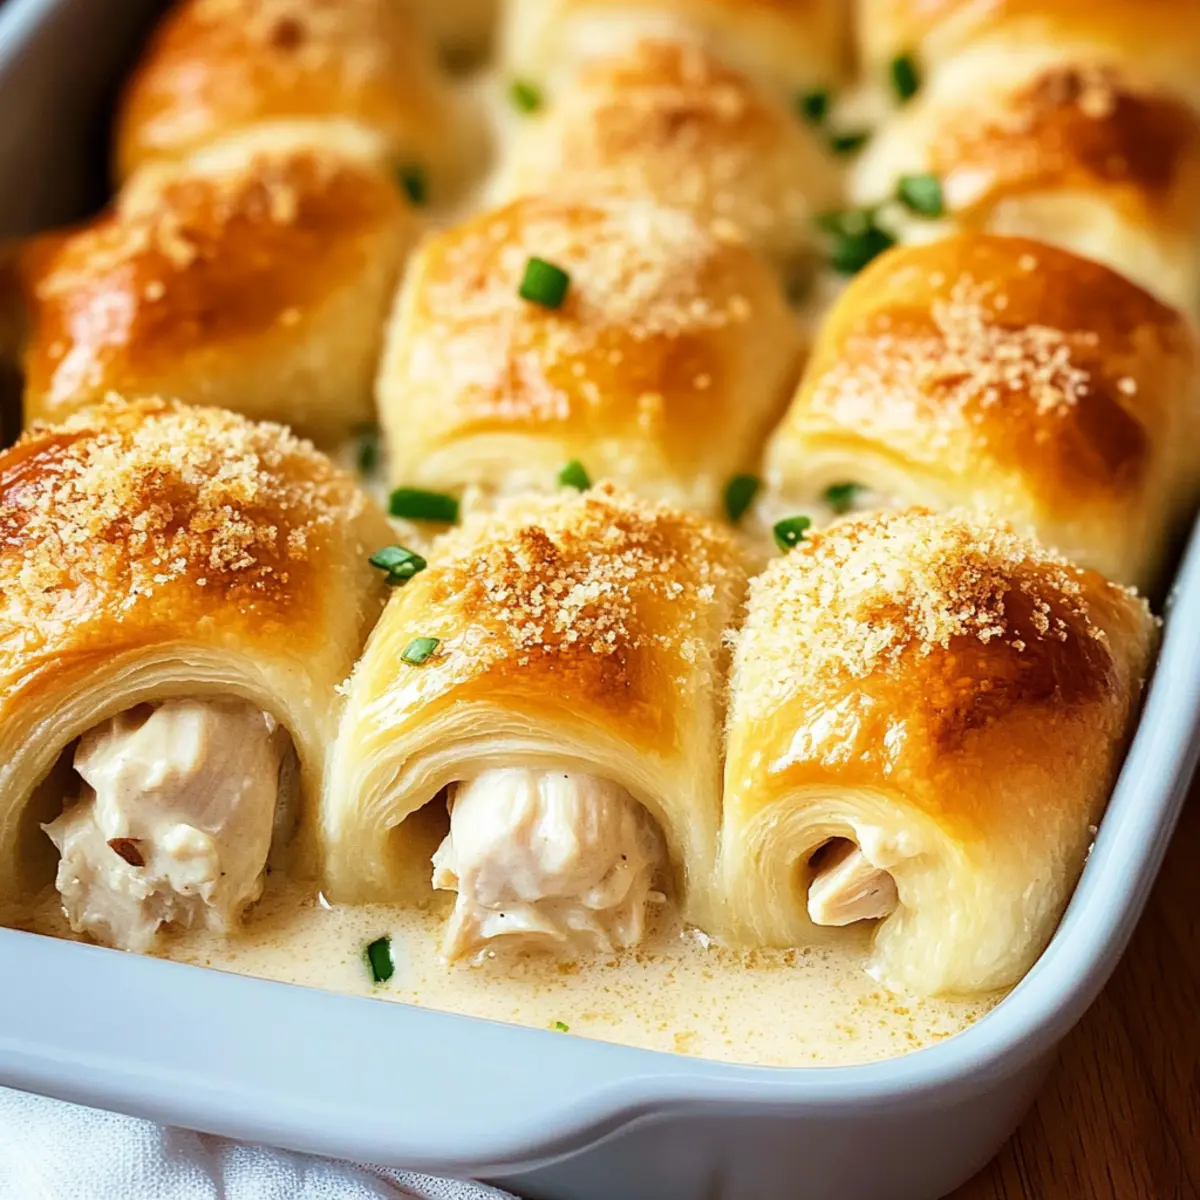
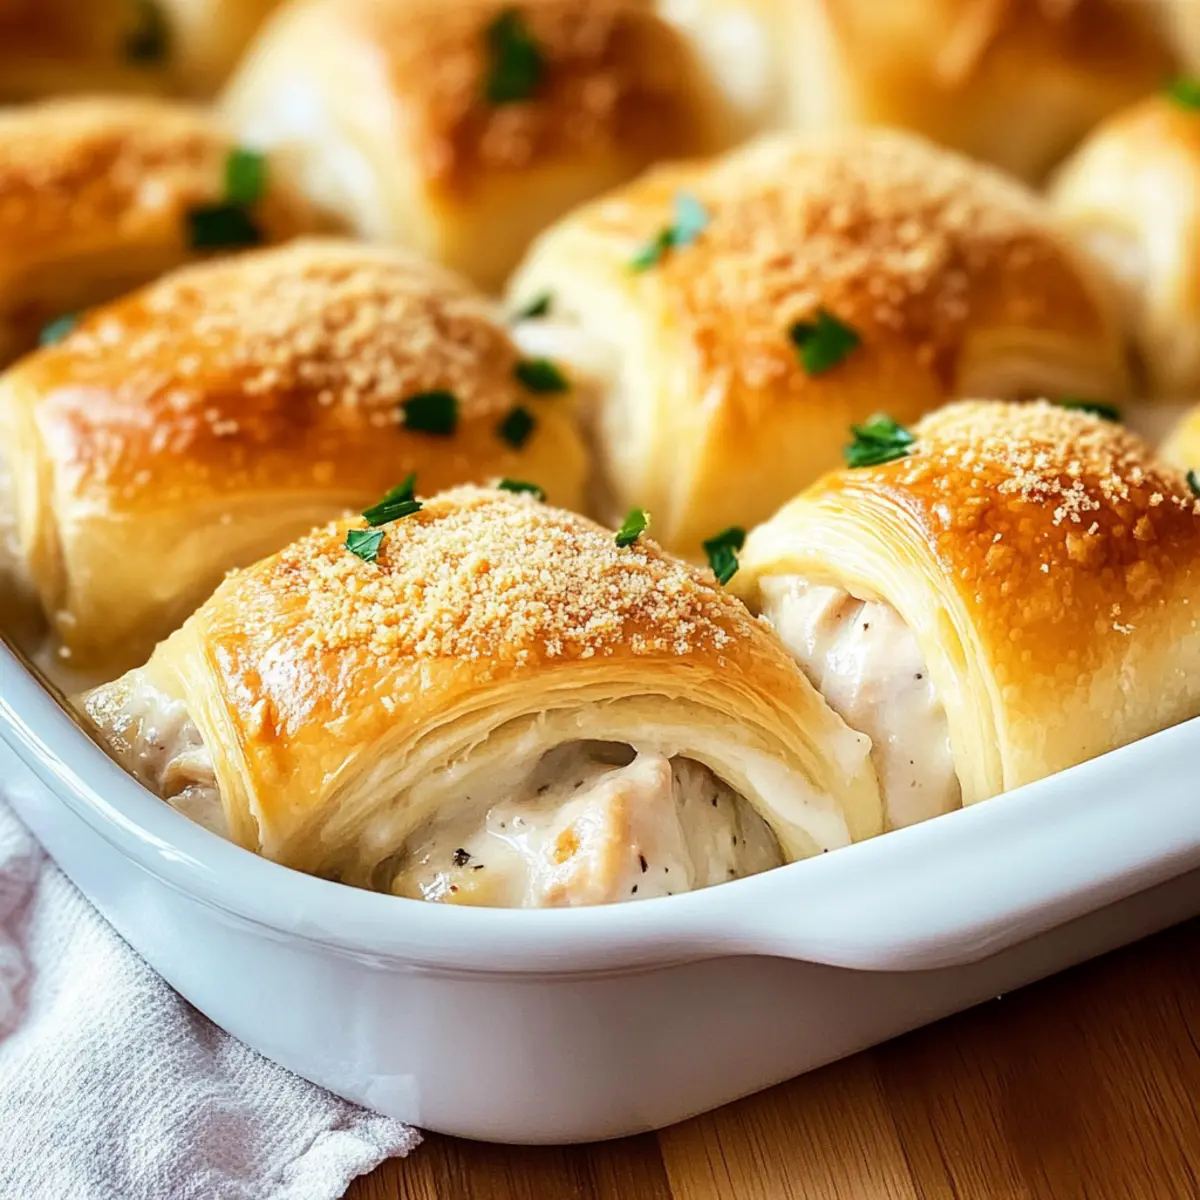
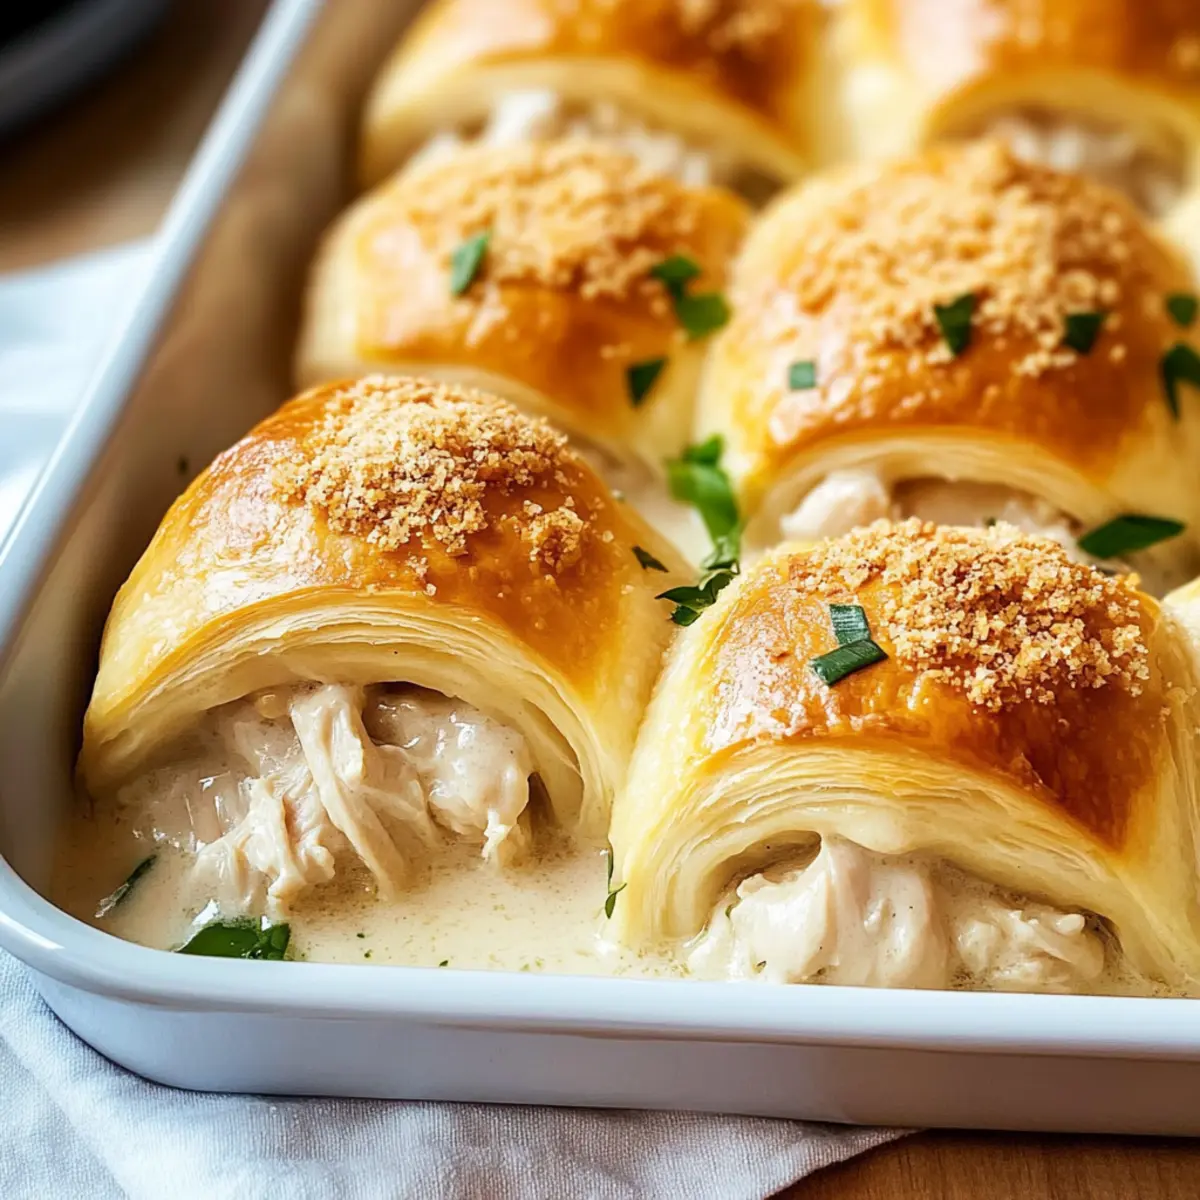
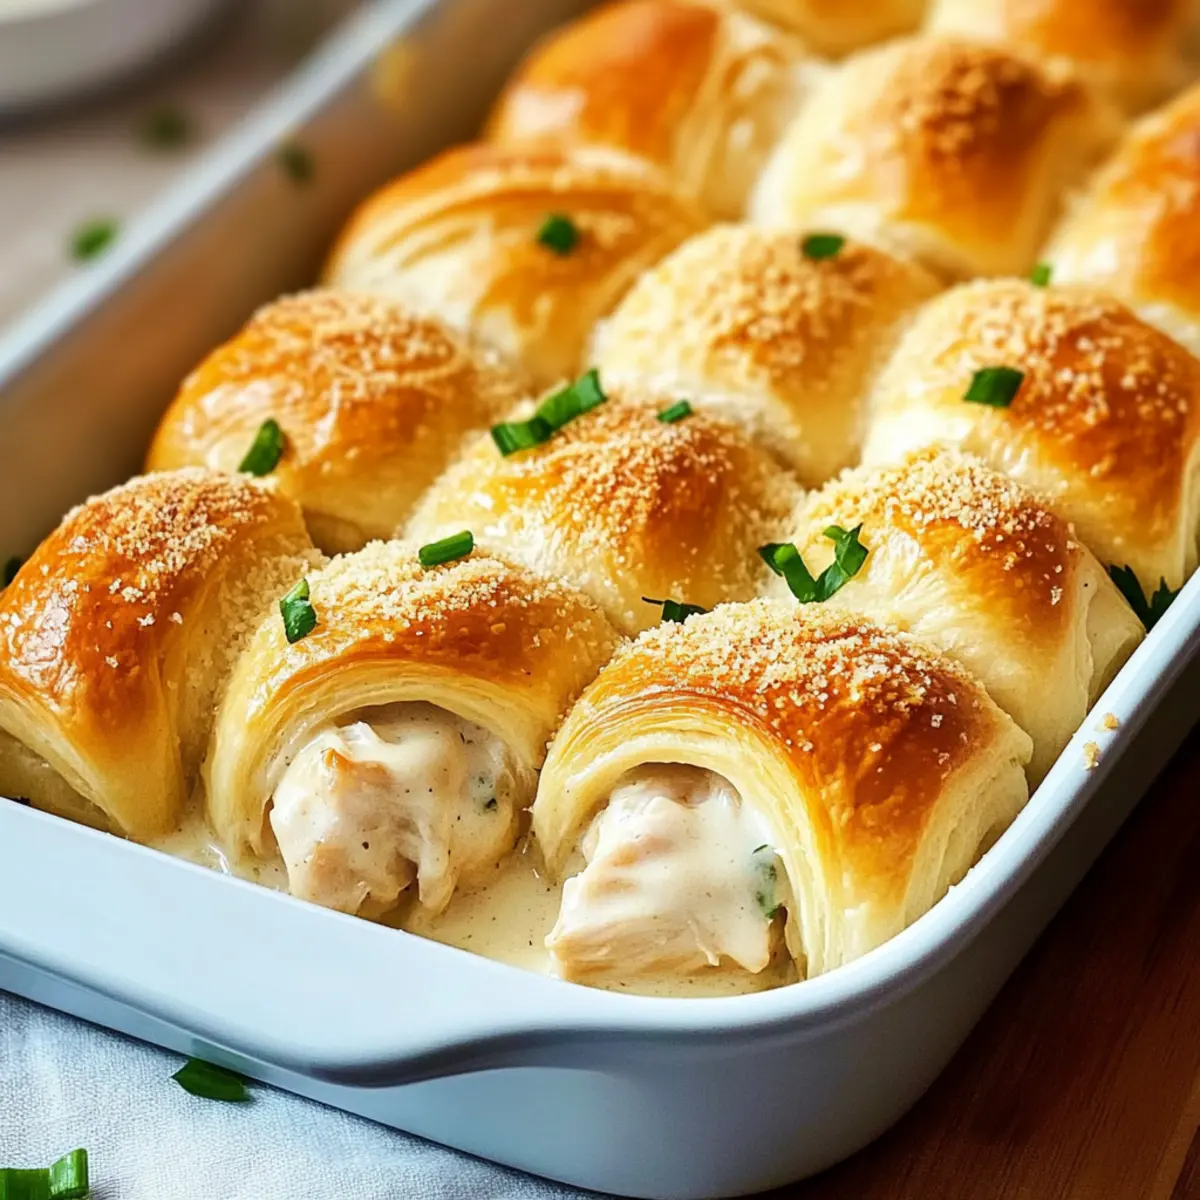
In a small bowl, mix together the grated Parmesan cheese and bread crumbs. This blend will create a crunchy, savory topping that adds texture to your Chicken Crescent Roll-Ups. Once combined, set this mixture aside while you brush the rolls with butter.
Step 6: Brush and Add Topping
Using a pastry brush, gently brush each rolled crescent with melted butter. This not only enhances the flavor but also encourages the topping to adhere. After brushing, sprinkle the Parmesan and breadcrumb mixture generously over each roll to create a delightful crust that will contrast beautifully with the soft insides.
Step 7: Arrange and Bake
Place the assembled Chicken Crescent Roll-Ups into a greased casserole dish or directly onto a baking sheet, ensuring they are spaced apart for even baking. Slide the dish into your preheated oven and bake for 25-30 minutes. Keep an eye on them, as they should turn golden brown and puff up beautifully when ready.
Step 8: Serve Hot
Once baked, carefully remove the Chicken Crescent Roll-Ups from the oven and let them cool for a few minutes. This cooling period will help the filling set slightly, ensuring a safer and more enjoyable eating experience. Serve these warm, whether as a hearty snack or as part of a family meal, paired with your favorite dipping sauces.
Make Ahead Options
These Chicken Crescent Roll-Ups are a fantastic meal prep solution for busy weeknights! You can assemble the roll-ups up to 24 hours in advance and refrigerate them before baking, ensuring they are always ready when you need a quick dinner or snack. To prepare ahead, just follow the instructions up to the point of baking, then cover the dish tightly with plastic wrap and refrigerate. When you’re ready to serve, simply remove the wrap and bake as directed, adding an extra minute or two if they’re chilled. This method helps maintain their delicious flakiness and creamy filling, making your Chicken Crescent Roll-Ups just as delightful as if you had prepared them fresh!
How to Store and Freeze Chicken Crescent Roll-Ups
Fridge: Store cooled Chicken Crescent Roll-Ups in an airtight container for up to 3 days. Reheat in the oven at 350°F (175°C) for about 10-15 minutes to retain crispiness.
Freezer: For longer storage, freeze individual roll-ups wrapped tightly in plastic wrap and then in aluminum foil. They can be frozen for up to 3 months. Bake directly from frozen, adding 5-10 minutes to the baking time.
Make-Ahead: Assemble the roll-ups and refrigerate before baking for up to 24 hours. This allows for easy, quick meals without hassle on busy evenings.
Reheating: To reheat, place in the oven at 350°F (175°C) for a quick, even warming, ensuring a delightful crispy texture even after storage.
What to Serve with Chicken Crescent Roll-Ups
Looking to create a meal that’ll make your heart sing alongside these delightful roll-ups?
- Simple Green Salad: A fresh salad with mixed greens and a zesty vinaigrette balances the richness of the filling and adds lightness.
- Crispy Roasted Vegetables: Season your favorite seasonal veggies and roast them until caramelized for a savory, colorful side.
- Creamy Mashed Potatoes: The buttery, creamy texture of mashed potatoes complements the crunchy roll’s exterior, making for a comforting duo.
- Buttery Corn on the Cob: Sweet, tender corn brushed with melted butter provides a delightful crunch and sweetness that pairs perfectly with the savory rolls.
- Garlic Bread Sticks: Soft and buttery bread sticks infused with garlic enhance the comfort food vibe, perfect for dipping in sauces.
- Tangy Ranch Dressing: Serve this crowd favorite on the side for an extra flavorful dip that elevates each bite.
- Sparkling Lemonade: A refreshing drink that cuts through the richness, bringing a citrusy brightness to the table.
- Decadent Chocolate Cake: For dessert, a slice of moist chocolate cake rounds out the meal on a sweet note that everyone will love.
- Fruit Salad: A vibrant mix of seasonal fruits can cleanse the palate and provide a refreshing contrast to the savory roll-ups.
- Homemade Chicken Gravy: Drizzle warm gravy over the roll-ups for an added layer of comfort and flavor that hugs each bite wonderfully.
Expert Tips for Chicken Crescent Roll-Ups
-
Proper Shredding: Ensure your chicken is shredded finely for an even filling. This avoids large chunks that can cause the rolls to burst during baking.
-
Avoid Overfilling: Be cautious not to overstuff the crescent dough. Overfilling can lead to messy roll-ups and spillage while baking, so stick to about ¼ cup of the mixture.
-
Cooling Time: Allow the roll-ups to cool for a few minutes after baking. This prevents burns from the hot filling and makes them easier to handle.
-
Use Fresh Ingredients: Fresh green onions and high-quality cream cheese elevate flavor, making your Chicken Crescent Roll-Ups even more delightful.
-
Experiment with Toppings: Don’t hesitate to get creative with toppings! A mix of herbs or different cheeses can add extra flavor and visual appeal to your rolls.
Chicken Crescent Roll-Ups Variations
Feel free to explore exciting twists on this comforting recipe that will delight your palate!
-
Extra Veggies: Incorporate spinach or bell peppers into the filling for a colorful and nutrient-packed addition that balances the creaminess.
-
Cheesy Goodness: Swap the cream cheese for your favorite cheese, like cheddar or mozzarella. The melted cheese will add additional flavor and gooeyness!
-
Protein Alternatives: Try using shredded turkey or rotisserie chicken for a quicker option, or go completely meatless with mushrooms or tempeh for a delightful veggie version.
-
Bold Flavors: Add a splash of barbecue sauce or buffalo sauce to the chicken filling for a zesty kick that livens up each bite.
-
Fresh Herbs: Mix in some fresh herbs like parsley or dill to elevate the flavor profile. Freshness brings brightness and a touch of elegance to your rolls.
-
Spice It Up: Want some heat? A dash of cayenne pepper or some finely chopped jalapeños in the filling will give these roll-ups a spicy twist!
-
Nutty Crunch: For added texture, sprinkle toasted nuts like almonds or walnuts into the filling. The crunch complements the softness of the crescent dough beautifully.
-
Gourmet Touch: Experiment with a gourmet twist by adding caramelized onions or sundried tomatoes in the mixture, which will round out the flavors beautifully.
With these variations, you can create a new experience every time you make these roll-ups, just like you’d enjoy with our tasty Egg Roll Ups or Garlic Chicken Gnocchi. Get inspired and happy cooking!
Chicken Crescent Roll-Ups Recipe FAQs
How do I choose ripe ingredients for Chicken Crescent Roll-Ups?
Absolutely! For the best flavor, ensure your cream cheese is smooth and spreadable, ideally at room temperature. Choose fresh green onions with bright green tops and firm white bases, avoiding any that appear wilted or slimy. When it comes to shredded chicken, leftover rotisserie chicken works great—just make sure it’s fully cooked and tender for that mouthwatering filling.
How should I store leftover Chicken Crescent Roll-Ups?
You can store your cooled Chicken Crescent Roll-Ups in an airtight container in the fridge for up to 3 days. Just make sure they’re completely cooled first to avoid condensation, which can make them soggy. When you’re ready to enjoy them again, simply reheat in the oven at 350°F (175°C) for about 10-15 minutes for that freshly baked taste.
Can I freeze Chicken Crescent Roll-Ups?
Yes, you can! For freezing, individually wrap each Chicken Crescent Roll-Up tightly in plastic wrap and then in aluminum foil to protect against freezer burn. They can be frozen for up to 3 months. When you’re ready to bake them, preheat your oven and place them directly from the freezer onto a baking sheet, adding 5-10 extra minutes to the baking time.
What should I do if my crescent roll-ups burst while baking?
Very! To prevent bursting, don’t overfill the crescent dough. Stick to about ¼ cup of the chicken mixture at the base of each triangle, and pinch the seams tightly to seal them well. If you do experience a little spillage, it’s helpful to line your baking sheet with parchment paper for easy cleanup.
Are there any allergy considerations for Chicken Crescent Roll-Ups?
Absolutely! If you’re serving these rolls to guests with dietary restrictions, consider using gluten-free crescent roll dough and substitute dairy elements like cream cheese and milk with alternatives such as almond or oat milk. Always check labels for ingredients and consult with your guests regarding specific allergies, especially for common allergens like dairy or gluten.
How do I make Chicken Crescent Roll-Ups ahead of time?
Certainly! You can assemble your Chicken Crescent Roll-Ups a day in advance. Just prepare them up to the point of baking, cover them tightly, and refrigerate. When it’s time for dinner, simply pop them in the oven as directed, adjusting the time if they are cold from the fridge. This method is ideal for those busy nights or gathering with family and friends, ensuring you can whip up a comforting treat quickly!
Savory Chicken Crescent Roll Ups: Quick Family Comfort Food
Ingredients
Equipment
Method
- Preheat your oven to 350°F (175°C).
- In a mixing bowl, combine the cream cheese and melted butter until smooth and creamy.
- Stir in the shredded chicken, salt, pepper, milk, and finely chopped green onions.
- Unroll the crescent roll dough onto a flat surface and separate the triangles.
- At the base of each crescent triangle, spoon about ¼ cup of the creamy chicken mixture.
- Starting from the base, roll the dough around the filling and pinch the seams to seal.
- Mix grated Parmesan cheese and bread crumbs in a small bowl for the topping.
- Brush each rolled crescent with melted butter and sprinkle with the topping mixture.
- Place in a greased casserole dish and bake for 25-30 minutes until golden brown.
- Let them cool for a few minutes before serving warm.
Leave a Reply