
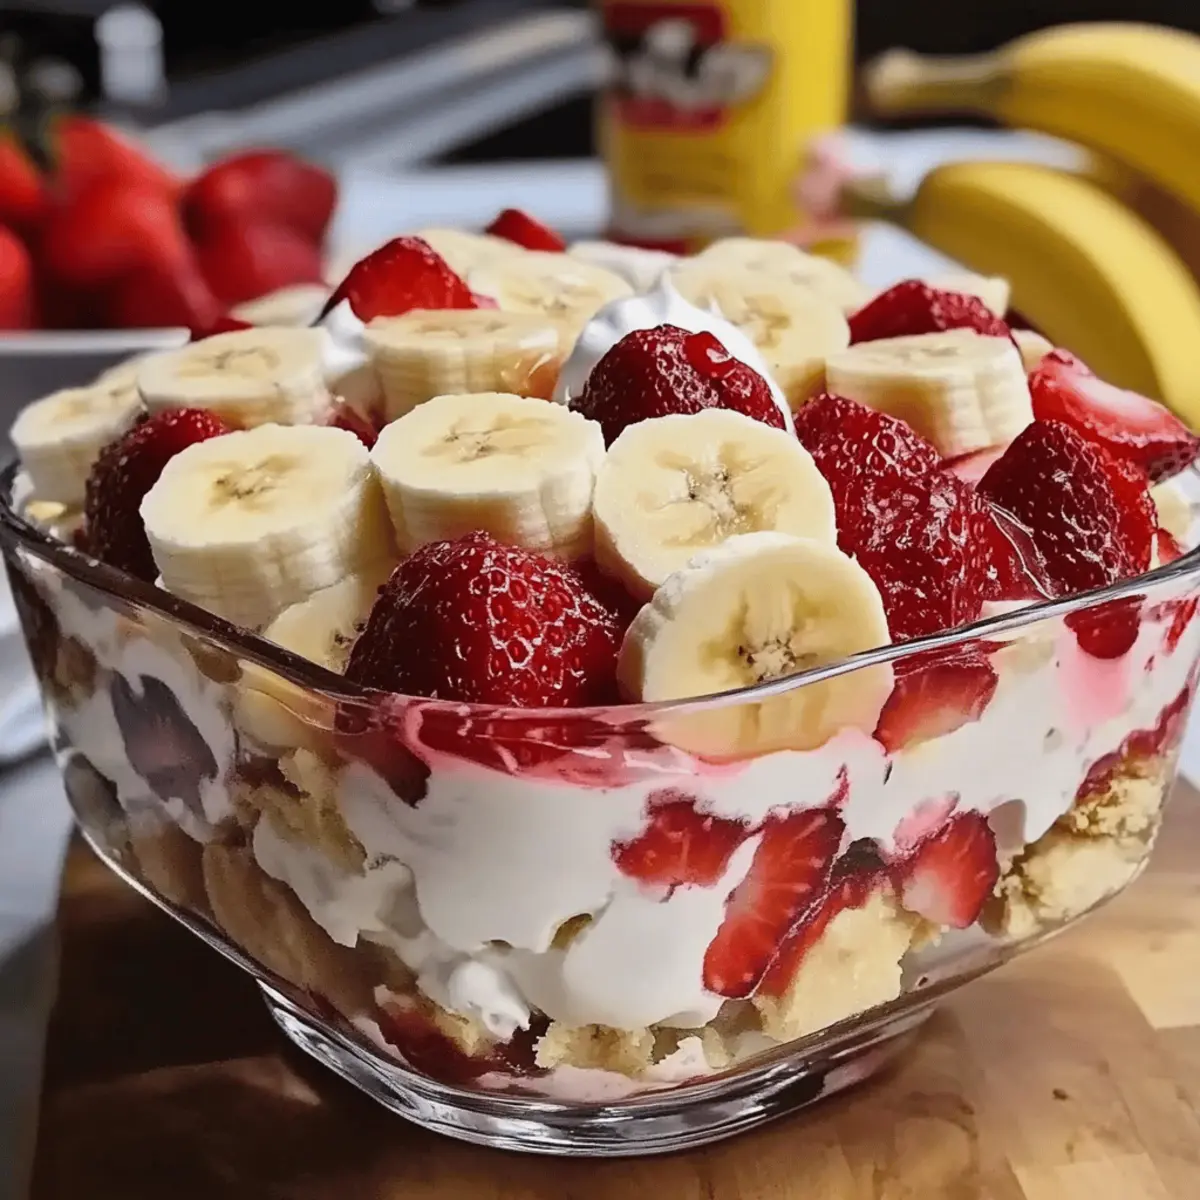
You know that feeling when you taste something that instantly transports you back to lazy summer days? That’s exactly what my No-Bake Strawberry Banana Pudding Dream does! With a delightful combination of ripe strawberries and bananas layered in creamy pudding, this dessert whisks you away to happy memories with every spoonful. What I love most about this recipe is its ease; you can whip it up in just 20 minutes, making it an ideal choice for busy evenings or spontaneous gatherings. Plus, it’s perfect for impressing guests without spending hours in the kitchen—who wouldn’t love that? Get ready to dive into a refreshing treat that’s sure to please both kids and adults alike. Ready to indulge in this creamy delight? Let’s get started!
Why is this Strawberry Banana Pudding Dream irresistible?
Simplicity: This no-bake dessert is a breeze to make, requiring only 20 minutes of your time.
Bursting with Flavor: The sweet freshness of ripe strawberries and bananas mingles perfectly with the creamy pudding base, creating a vibrant experience with every bite.
Crowd-Pleasing: Ideal for potlucks and family gatherings, it brings smiles all around, making it a go-to dessert for any occasion.
Versatile: Feel free to mix it up! Swap vanilla wafers for graham crackers or add an extra layer of chocolate to satisfy your cravings.
Effortless Prep: Minimal ingredients mean less hassle, allowing you to enjoy quality time with loved ones rather than being stuck in the kitchen.
If you love desserts that impress without the stress, you might also enjoy my refreshing Strawberry Shortcake Whipped or the delightful Chocolate Chip Banana. Get ready for a sweet adventure!
Strawberry Banana Pudding Dream Ingredients
Get ready to gather the perfect components for this creamy delight!
For the Crunchy Base
• Vanilla Wafers – Provides a crunchy texture and base layers; substitute with gluten-free wafers for a gluten-free version.
For the Creamy Filling
• Cream Cheese – Adds richness and creaminess; for a lighter option, substitute with Greek yogurt or dairy-free cream cheese.
• Sweetened Condensed Milk – Enhances sweetness and creaminess; can be omitted for a lighter mix.
• French Vanilla Pudding Mix – Forms the dessert’s creamy base; instant pudding mix is recommended for ease.
• Milk – Helps dissolve the pudding mix; any milk variety (dairy or non-dairy) can be used.
For the Fresh Flavors
• Bananas – Adds natural sweetness and creaminess; use ripe bananas for the best flavor.
• Strawberries – Provides fresh, vibrant flavor and color; frozen strawberries can substitute if thawed and drained well.
For the Light Finish
• Whipped Topping – Offers a light, fluffy finish; whipped coconut cream can be an alternative for a dairy-free option.
Step‑by‑Step Instructions for Strawberry Banana Pudding Dream
Step 1: Mix the Creamy Base
In a mixing bowl, combine 8 ounces of softened cream cheese and one 14-ounce can of sweetened condensed milk. Using an electric hand mixer, blend the ingredients on medium speed for about 2-3 minutes until the mixture is smooth and creamy, with no lumps. This creamy base will set the foundation for your delicious Strawberry Banana Pudding Dream.
Step 2: Incorporate the Pudding and Milk
Add one 3.4-ounce package of French vanilla pudding mix and 2 cups of milk to the cream cheese mixture. Using the hand mixer, blend on low speed for another 2 minutes until fully combined. You’ll notice the pudding mixture thickening as it combines, creating a rich and velvety texture that will coat your layers beautifully.
Step 3: Prepare the Serving Dish
Grab a large glass serving dish or a trifle bowl, where you’ll layer the ingredients for your Strawberry Banana Pudding Dream. Start by placing a layer of vanilla wafers evenly across the bottom. You’ll want a generous layer to provide a crunchy texture, so be sure to cover the surface completely without overlapping them.
Step 4: Layer the Fresh Fruit
Slice 2 to 3 ripe bananas and 1 to 2 cups of fresh strawberries, arranging them evenly over the layer of vanilla wafers. You want to create a vibrant, colorful display. Ensure the fruit is spread out to allow the creamy pudding to envelop each slice, making for a deliciously fruity bite in every scoop.
Step 5: Add the Pudding Mixture
Pour half of the pudding mixture over the fruit and wafers layer, ensuring it settles into the nooks and crannies. Use a spatula to gently spread the mixture evenly across the fruits, allowing for complete coverage. This will create a luscious and creamy layer that complements the freshness of your bananas and strawberries.
Step 6: Repeat the Layers
Now it’s time to repeat the layering process! Start with another layer of vanilla wafers, followed by the remaining sliced bananas and strawberries. Pour the rest of the pudding mixture over this second layer, using the spatula to smooth it out. Making these layers beautiful and even will enhance both the aesthetic and flavor of your Strawberry Banana Pudding Dream.
Step 7: Finish with Whipped Topping
Top your creation with a generous layer of whipped topping. Use a spatula to spread it smoothly over the pudding layer, covering it completely. This whipped topping adds a light, fluffy finish that enhances the overall creaminess of your dessert. For an extra touch, feel free to garnish with additional fruit or cookie crumbles.
Step 8: Chill and Serve
Cover your dish securely with plastic wrap or a lid, and transfer it to the refrigerator. Chill for at least 4 hours, but overnight is ideal for deeper flavor. After the chilling period, unwrap and serve your Strawberry Banana Pudding Dream chilled, spooning out servings to reveal the beautiful layers within!
Strawberry Banana Pudding Dream Variations
Feel free to jazz up your Strawberry Banana Pudding Dream with these fun twists and substitutions!
-
Gluten-Free Base: Substitute vanilla wafers with gluten-free wafers to accommodate dietary needs. Your dessert remains just as delightful!
-
Mixed Berries Delight: Swap out strawberries for a mix of blueberries, raspberries, or blackberries. This berry medley adds a burst of color and flavor.
-
Chocolate Indulgence: Introduce chocolate chips or shavings between fruit layers for a touch of decadence. Chocolate lovers will rejoice!
-
Creamy Twist: For an extra creamy experience, replace some cream cheese with mascarpone cheese. It adds a luxurious richness that will wow your guests.
-
Nutty Crunch: Sprinkle chopped nuts, like pecans or almonds, between layers for added texture. The crunch elevates the overall satisfaction of every spoonful.
-
Dairy-Free Delight: Use almond milk and dairy-free cream cheese for a completely plant-based version. You won’t sacrifice creaminess while pleasing dairy-free friends!
-
Caramel Drizzle: Drizzle caramel sauce over the top before chilling for an unexpected layer of sweetness. It’ll make your dessert even more irresistible!
If you love experimenting with flavors, I think you’ll also enjoy trying my refreshing Strawberry Shortcake Whipped or the deliciously moist Chocolate Chip Banana. Enjoy the sweetness!
Tips for the Best Strawberry Banana Pudding Dream
• Use Ripe Fruit: The flavor of your dessert hinges on ripe strawberries and bananas. They bring the natural sweetness and creaminess needed for a delightful experience.
• Avoid Lumps: Ensure your cream cheese is fully softened before mixing. This guarantees a smooth, creamy base for your Strawberry Banana Pudding Dream without any lumps disrupting the texture.
• Layering Precision: Take your time when layering. A well-structured dessert not only looks beautiful but also ensures every spoonful has balanced flavors.
• Chill for Flavor: Allowing your dessert to chill overnight enhances the flavors significantly. The waiting time is worth it for a tastier treat!
• Storage Secrets: Keep your pudding Dream covered tightly in the fridge to prevent it from absorbing other odors, extending its refreshing taste for up to three days.
• Alternatives: If you’re in a time crunch, consider pre-made whipped topping or pudding mix to save time while still enjoying a delicious Strawberry Banana Pudding Dream.
What to Serve with Strawberry Banana Pudding Dream
As you prepare to delight in this creamy, fruity dessert, consider pairing it with a few complementary side dishes that will enhance the experience.
- Crispy Biscotti: These crunchy Italian treats offer a delightful texture contrast, perfect for dipping alongside each sweet bite.
- Fresh Fruit Salad: A mix of seasonal fruits can brighten your plate, echoing the fresh flavors of strawberries and bananas.
- Mint-Infused Iced Tea: This cooling beverage balances the sweetness of the pudding, providing a refreshing sip between bites.
- Chocolate Drizzle: A warm, rich chocolate sauce drizzled over the top adds a decadent twist that beautifully complements the fruity layers.
- Lemon Sorbet: The tartness of lemon sorbet cleanses the palate, creating a lovely balance to the dessert’s sweetness.
- Almond Cookies: These delicate, nutty cookies add a satisfying crunch and a touch of elegance to your dessert table.
- Coconut Whipped Cream: Elevate your layers further with a luscious dollop of coconut cream for added richness and tropical flair.
- Sliced Almonds: A sprinkle of these nutty morsels on top gives extra crunch and a hint of flavor harmony with the fruits.
Make Ahead Options
Preparing the Strawberry Banana Pudding Dream ahead of time is a game changer for busy home cooks! You can create the creamy filling (the mixture of cream cheese, sweetened condensed milk, pudding mix, and milk) up to 24 hours before serving; just store it in an airtight container in the refrigerator to maintain its freshness. Additionally, you can layer the wafers and fruits in your serving dish and cover it tightly, refrigerating for up to 3 days. When ready to serve, simply top with the whipped topping and let it chill for a few minutes to ensure it’s just as delicious as if made fresh. By taking these steps, you’ll have a delightful dessert ready to impress with minimal effort!
How to Store and Freeze Strawberry Banana Pudding Dream
Fridge: Keep your Strawberry Banana Pudding Dream tightly covered in the refrigerator for up to 3 days, preserving its freshness and creamy texture.
Freezer: While freezing is not recommended, if you must, freeze individual portions in airtight containers for up to 1 month. Thaw overnight in the fridge before enjoying.
Reheating: This dessert is best served cold, so there’s no need to reheat! Just take it out of the fridge and enjoy its chilled, delightful layers.
Wrap It Well: To avoid any unwanted fridge odors, ensure the pudding is covered well before storing.
Strawberry Banana Pudding Dream Recipe FAQs
How can I ensure my bananas and strawberries are ripe enough for the dessert?
Absolutely! For the best flavor, choose bananas that are slightly speckled with brown spots, indicating they are ripe and sweet. Strawberries should be vibrant red, firm, and fragrant. Avoid any that have dark spots or are overly soft, as these can spoil the fresh taste of your pudding.
What’s the best way to store leftovers of the Strawberry Banana Pudding Dream?
To keep your Strawberry Banana Pudding Dream fresh, cover it tightly with plastic wrap or a lid, ensuring no air can enter. It can be stored in the refrigerator for up to 3 days. Make sure to check for any changes in texture or flavor before serving; it should remain creamy and delicious!
Can I freeze the Strawberry Banana Pudding Dream?
While I recommend savoring this dessert fresh, you can freeze individual portions in airtight containers for up to 1 month. To freeze, scoop the pudding into the containers, leaving some space for expansion, and seal tightly. When you’re ready to enjoy, thaw overnight in the refrigerator for the best texture before serving.
What if my pudding mixture ends up lumpy?
Don’t worry—this can happen, but it’s an easy fix! First, make sure your cream cheese is at room temperature before mixing. If you still end up with lumps, try using an immersion blender to smooth it out. Alternatively, you can strain the mixture through a fine-mesh sieve to achieve a velvety texture.
Can this dessert accommodate dietary restrictions such as allergies?
Very! This recipe can be versatile for various dietary needs. Use gluten-free vanilla wafers for those avoiding gluten. For lactose intolerance, consider substitutions like dairy-free cream cheese and coconut or almond milk. Just ensure to check the labels of the products to be safe for any allergies.
How do I make this dessert ahead of time?
Making the Strawberry Banana Pudding Dream a day ahead is the perfect plan! Simply follow the recipe steps, layering your pudding, fruit, and whipped topping, then cover and refrigerate. This gives the flavors time to meld beautifully, making it even more delightful when served.

Strawberry Banana Pudding Dream: A Creamy No-Bake Delight
Ingredients
Equipment
Method
- In a mixing bowl, combine cream cheese and sweetened condensed milk until smooth and creamy.
- Add pudding mix and milk, blending on low speed until fully combined.
- Layer vanilla wafers on the bottom of a serving dish.
- Arrange sliced bananas and strawberries evenly over the wafers.
- Pour half of the pudding mixture over the fruit and wafers, spreading evenly.
- Repeat the layering with more wafers, fruit, and the remaining pudding mixture.
- Top with whipped topping and smooth it out.
- Cover and chill for at least 4 hours before serving.
Leave a Reply