
As the leaves turn and the nights grow longer, I find myself craving a little holiday magic in the kitchen. If you’re planning a Halloween gathering, you’re in for a treat with these Spooky Spiders and other whimsical snacks that are bound to enchant your guests. These easy party food ideas are not only fun to make but also ideal for bringing everyone together, turning your celebration into a festive feast without the stress of complicated recipes. Whether you’re a seasoned home chef or just looking to switch things up from traditional fast food, these playful creations will delight both kids and adults alike. Ready to add a dash of spookiness to your Halloween party? Let’s dive into some creative presentations that will give your table the perfect eerie vibe!

Why Will You Love These Spooky Spiders?
Irresistible Fun: These Spooky Spiders are not only adorable but also a fantastic conversation starter at any Halloween party. Quick and Easy: You’ll whip these up in no time, allowing you to focus on enjoying the festivities. Flavorful Treats: With a delightful combination of peanut butter and oats, they’re a crowd-pleaser, especially for dessert lovers. Customizable Options: Feel free to play with toppings or substitutions; consider trying different fruits for the caramel apples or using almond butter for a twist. Perfect Presentation: Arrange them on a spooky platter for added flair and fun!
Spooky Spiders Ingredients
• Get ready to make these fun and festive Spooky Spiders with simple ingredients that pack a punch of flavor!
For the Cookie Base
- Peanut Butter – A chewy foundation that adds scrumptious flavor to your cookies.
- Oats – Provides texture and helps bind the cookies while offering a wholesome touch.
- Sugar – Sweetens the mix; consider using brown sugar for a richer taste.
- Egg – Binds everything together; substitute with a flax egg for a vegan version.
- Chocolate Chips – Adds a delightful burst; mini chocolate chips work great for spider bodies.
For the Spider Decorations
- Black Licorice – Perfect for creating spooky spider legs; cut them into sections for the perfect look.
- Candy Eyes – Bring your spiders to life with these cute little details that everyone will adore.
Optional Enhancements
- Almond Butter – A tasty alternative to peanut butter for those with nut allergies.
- Sprinkles – Add colorful sprinkles on top for an extra festive twist if desired.
Create your own spooky twist on these delicious spiders with the simple ingredients to set your Halloween celebration buzzing with excitement!
Step‑by‑Step Instructions for SPOOKY SPIDERS
Step 1: Prepare the Cookie Mixture
In a large mixing bowl, combine 1 cup of smooth peanut butter, 1 cup of oats, ½ cup of sugar, and 1 egg. Mix until well blended and a dough forms, about 2-3 minutes of vigorous stirring. Preheat your oven to 350°F (175°C) while ensuring the dough is thick enough to hold its shape when formed into balls.
Step 2: Shape the Cookies
Scoop out tablespoon-sized portions of the cookie dough and roll them into balls using your hands. Place each ball on a lined baking sheet, leaving some space in between. Aim for about 12 cookies per sheet. Bake in your preheated oven for 10-12 minutes, or until the edges turn golden brown and the cookies feel set to the touch.
Step 3: Add the Spider Legs
Once the cookies are baked, remove them from the oven and let them cool on the baking sheet for about 5 minutes. While they cool, cut black licorice into 2-3 inch pieces. Gently press 4 licorice pieces into each cookie to create spooky spider legs, ensuring they stick out for a creepy effect.
Step 4: Decorate with Candy Eyes
After the cookies have fully cooled on a wire rack for another 10 minutes, it’s time to give life to your Spooky Spiders. Dot each cookie with a small dollop of peanut butter and press two candy eyes on top. This will add a delightful finish, making them look eerily adorable and perfect for your Halloween gathering.
Step 5: Present Your Spooky Spiders
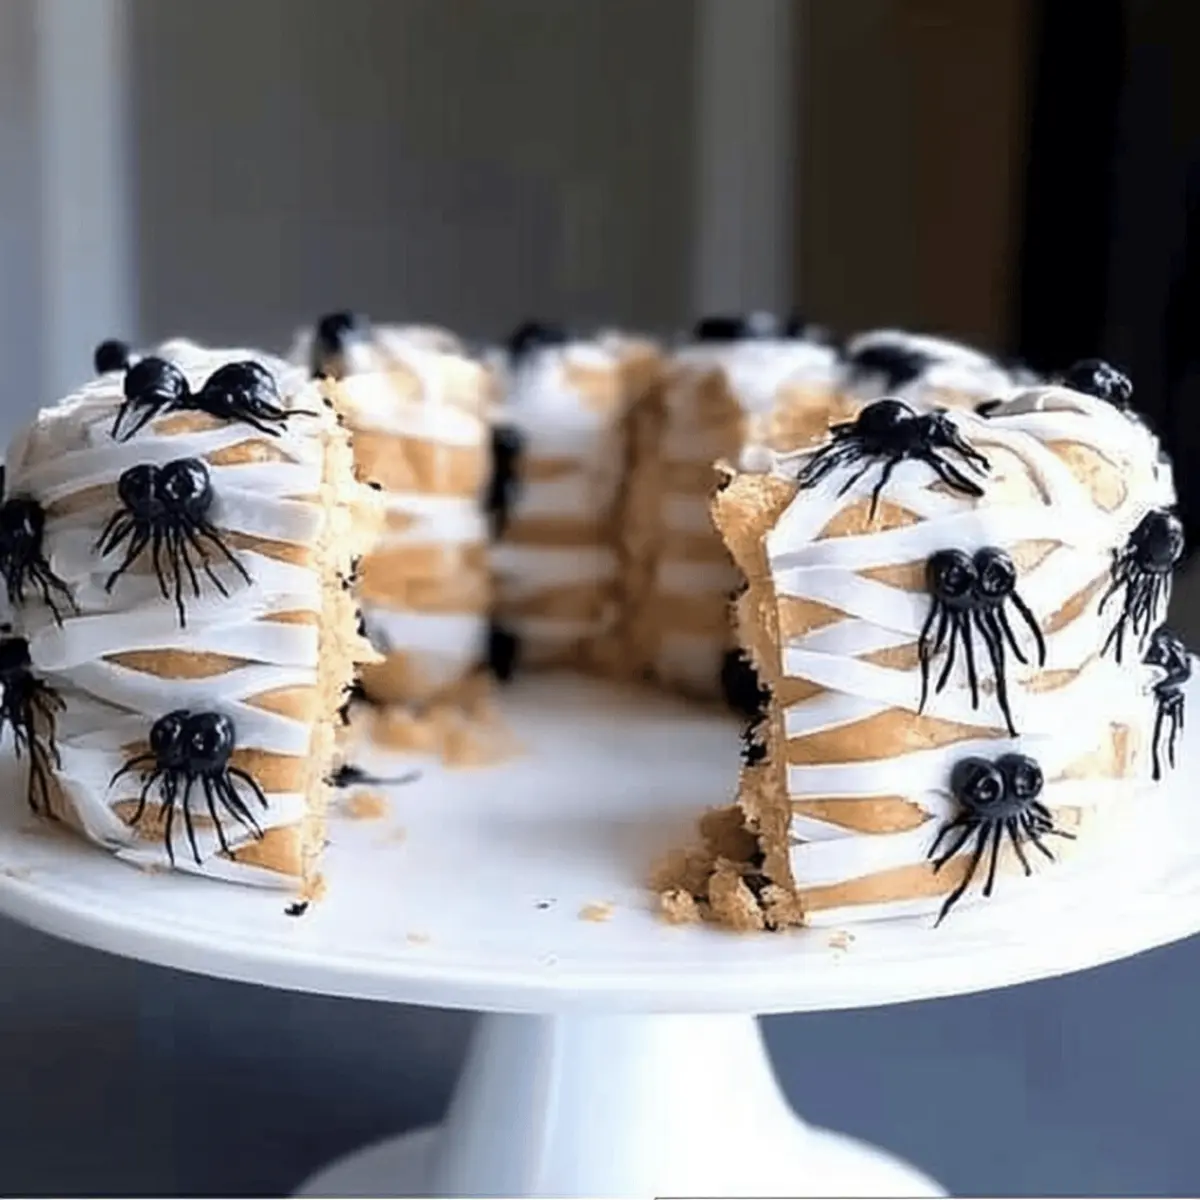
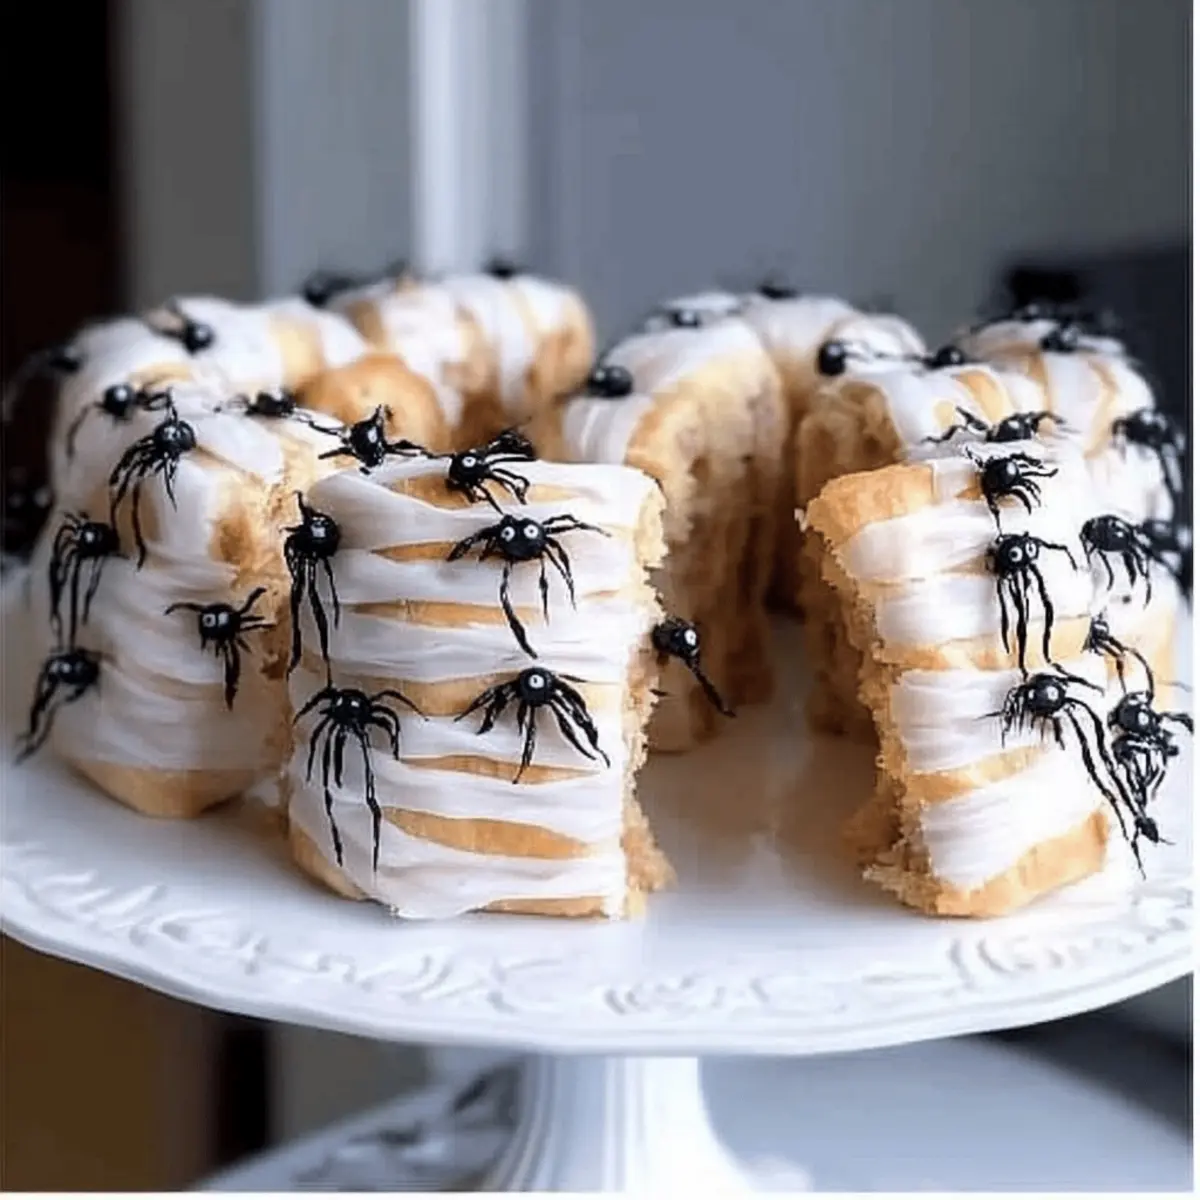
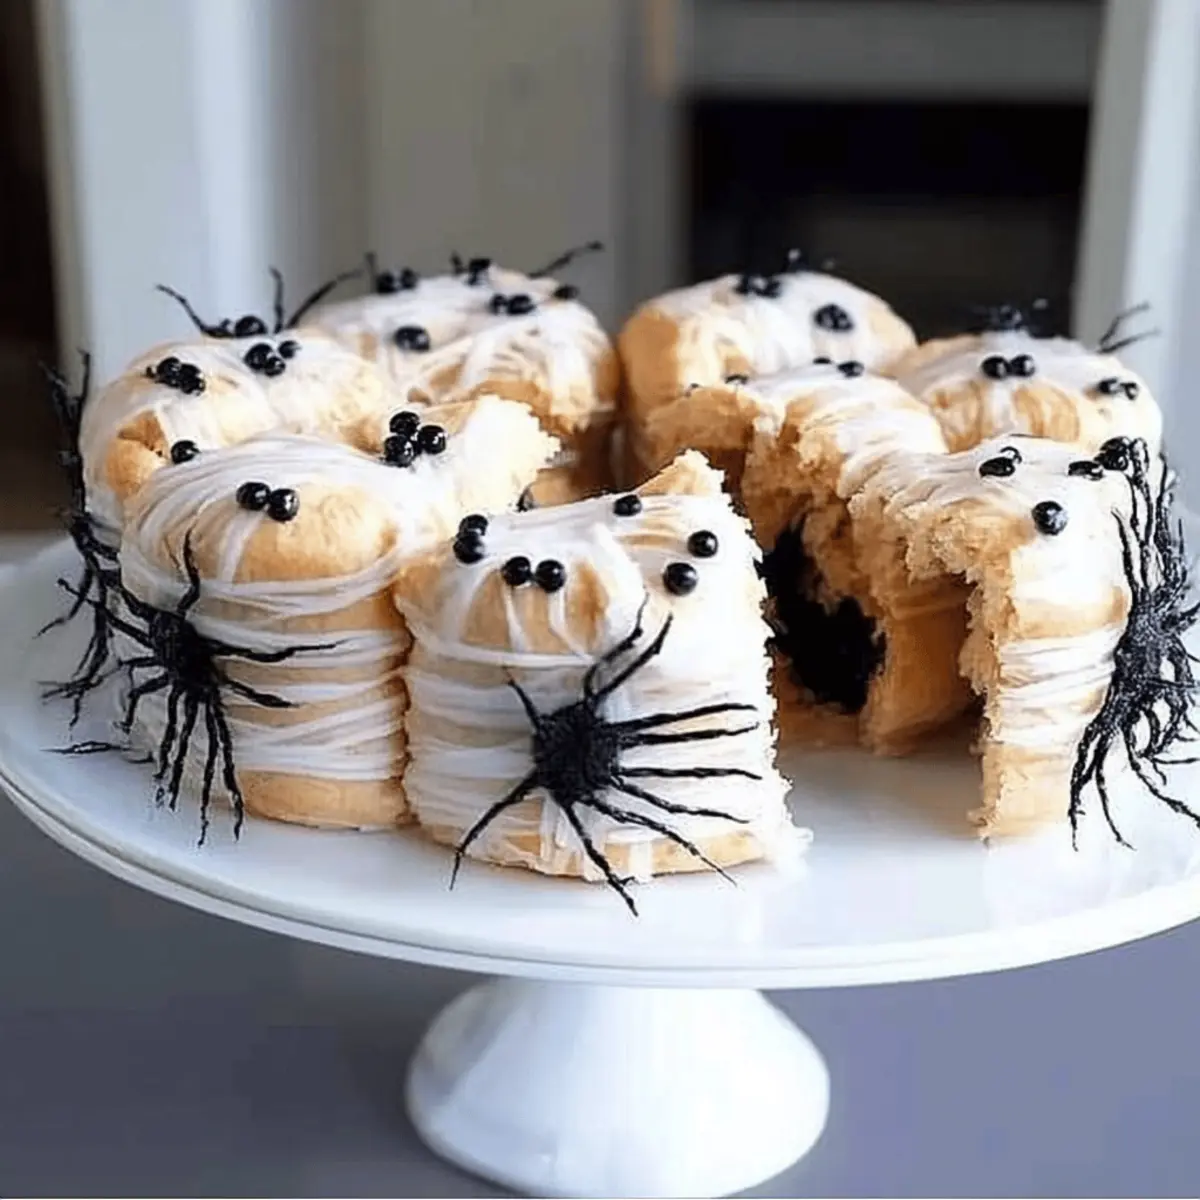
Arrange your Spooky Spiders on a decorative platter to make a striking centerpiece for your Halloween festivities. Incorporate fun decorations like mini pumpkins or cobwebs around the platter to enhance the spooky theme, inviting your guests to dig in and enjoy these whimsical treats!
Tips for the Best Spooky Spiders
-
Chill the Dough: Refrigerate the cookie dough for 30 minutes before shaping. This prevents spreading, helping your Spooky Spiders hold their shape beautifully.
-
Mixing Technique: Use a sturdy spatula or a hand mixer; avoid overmixing once the oats are incorporated to ensure a chewy texture.
-
Cutting Licorice: Use kitchen scissors for easier cutting of licorice. Make sure to create uneven lengths for a more natural spider leg appearance.
-
Cooling Time: Allow the cookies to cool completely before decorating to prevent the peanut butter from melting and the eyes from sliding off.
-
Storage Tips: Store any uneaten Spooky Spiders in an airtight container for up to a week; they’ll maintain their chewy goodness!
SPOOKY SPIDERS: Delicious Variations Await!
Feel free to let your creativity shine and customize these Spooky Spiders with some flavorful twists that will add excitement to your Halloween spread!
-
Nut-Free: Substitute almond butter for peanut butter, and enjoy a delightful taste without the nuts. Perfect for gatherings with guests who have allergies.
-
Gluten-Free: Swap regular oats for certified gluten-free oats, making these treats suitable for everyone and still deliciously chewy!
-
Vegan Twist: Replace egg with a flax egg (1 tablespoon ground flaxseed mixed with 2.5 tablespoons water) for a plant-based version that doesn’t compromise on flavor.
-
Fruity Fun: Add chopped dried fruits like cranberries or apricots into the dough for a chewy texture and a burst of natural sweetness in every bite.
-
Chocolate Lovers: Incorporate mini chocolate chips into the dough along with the oats for an extra chocolaty experience that will excite chocolate enthusiasts.
-
Spicy Surprise: Add a pinch of cinnamon or cayenne to the dough for a warm bite, providing an unexpected but delightful kick that complements the sweetness!
-
More Legs: Besides black licorice, consider using pretzel sticks to create crunchy spider legs for added texture and a delightful salty-sweet combination!
-
Decorative Dazzle: Use colorful sprinkles or edible glitter on top of the peanut butter dollops for a festive touch that will make your spooky treats even more appealing.
Feel encouraged to play around with these ideas or try your hand at mixing different elements. Just like transitioning from fast food to homemade feasts, creating your unique Spooky Spiders will not only impress your guests but also add a layer of fun to your Halloween celebrations. Explore the joy of customized cooking with these suggestions for a thrilling and unforgettable Halloween party!
Make Ahead Options
These Spooky Spiders are perfect for meal prep, allowing you to save time on your busy party day! You can prepare the cookie dough up to 24 hours in advance by mixing all the dry and wet ingredients and storing the dough in an airtight container in the refrigerator. Additionally, you can bake the cookies ahead of time (up to 3 days prior) and store them at room temperature in a sealed container to retain their chewy texture. When it’s time to serve, simply add the black licorice “legs” and candy eyes right before presenting, ensuring they are just as delightful and festive as the last-minute creations!
How to Store and Freeze Spooky Spiders
Room Temperature: Keep your Spooky Spiders in an airtight container for up to 5 days at room temperature to maintain their delightful chewiness.
Fridge: For a longer shelf life, store them in the refrigerator for up to 7 days. This helps preserve freshness while giving them a slightly firmer texture.
Freezer: You can freeze these treats for up to 3 months. Place them in a single layer on a baking sheet to freeze, then transfer to an airtight container, separating layers with parchment paper.
Reheating: To enjoy your frozen Spooky Spiders, thaw them overnight in the fridge and let them come to room temperature before serving.
What to Serve with Spooky & Creative Halloween Party Treats
As you set the stage for your Halloween gathering, consider pairing these whimsical snacks with delightful sides and beverages that enhance the festive atmosphere.
- Crispy Apple Slices: Fresh and crunchy, these add a healthy contrast to the richness of your treats. They’re perfect for dipping in leftover caramel or spreadable goodness.
- Muddy Monster Dessert Cups: Chocolate pudding topped with crushed cookies and gummy worms offer a fun, spooky twist that complements your creative snacks.
- Cheesy Ghost Crostini: Toasted bread with creamy cheese spread and artfully placed olives to mimic ghosts bring a savory flavor and playful touch.
- Golden Cornbread: Slightly sweet and fluffy, cornbread adds a cozy element to the party spread, perfect alongside any of the themed treats you have prepared.
- Witch’s Brew Punch: A refreshing, tart beverage garnished with floating eyeball-shaped ice cubes will enchant both kids and adults, complementing the whimsical mood.
- Decorative Veggie Platter: Arrange assorted colorful vegetables with hummus for dipping. This creates a balance of freshness and crunch, offering a healthful option on your festive platter.
These pairings will create a complete Halloween feast, enhancing the experience of sharing spooky spiders and other playful delights while tantalizing your guests’ taste buds!
Spooky Spiders Recipe FAQs
How do I choose the best peanut butter for my Spooky Spiders?
Absolutely! Look for a natural peanut butter without added sugars or oils for the best flavor and texture. The creaminess helps the cookies hold their shape while adding that delicious nutty taste we all love.
How should I store my Spooky Spiders?
You can keep your Spooky Spiders in an airtight container at room temperature for up to 5 days, or pop them in the fridge for up to 7 days. If you want to store them longer, freeze them for up to 3 months. Just ensure they’re in a single layer and separated with parchment paper to avoid sticking.
Can I freeze Spooky Spiders?
Absolutely! To freeze, arrange the cookies in a single layer on a baking sheet and freeze until solid. Then transfer them to an airtight container with parchment paper between layers. Thaw in the fridge overnight before serving!
What if my Spooky Spiders lose their shape?
No worries! If your cookie dough feels too soft, chill it in the refrigerator for 30 minutes before shaping. This helps prevent spreading and keeps your spiders looking spooky and cute.
Can I make these Spooky Spiders nut-free?
Very! Simply substitute peanut butter with a sunbutter or soy nut butter to make them safe for those with nut allergies. The flavors will still be delightful, and it ensures everyone can enjoy these treats!
Are there any dietary considerations for this recipe?
Great question! If you’re catering to guests with various dietary needs, consider using a flax egg instead of a regular egg for a vegan alternative, and swap in allergen-friendly chocolate chips if necessary.
Spooky Spiders: Easy Halloween Treats That Delight All!
Ingredients
Equipment
Method
- In a large mixing bowl, combine peanut butter, oats, sugar, and egg. Mix until well blended, about 2-3 minutes of vigorous stirring.
- Preheat your oven to 350°F (175°C). Ensure the dough is thick enough to hold its shape.
- Scoop tablespoon-sized portions of the dough, roll into balls, and place on a lined baking sheet.
- Bake for 10-12 minutes, until edges are golden brown and cookies feel set.
- Allow to cool on the baking sheet for about 5 minutes.
- Press cut licorice pieces into each cookie to create spider legs.
- After cooling completely, add a dollop of peanut butter and press candy eyes on top.
- Arrange the cookies on a decorative platter.
Leave a Reply