
As the sun sets on Halloween night, the air fills with whispers of playful spirits and the scent of sugary treats wafting through the cool breeze. It’s the perfect time to celebrate with a Spooky Graveyard Cake that is sure to captivate both children and adults alike. With a combination of eerie decorations and no-bake convenience, this dessert not only adds a fun twist to your Halloween gathering but also allows you to spend more time celebrating and less time in the kitchen. Imagine the delight on your guests’ faces as they uncover layers of chocolate and creepy crawly “worms” hiding within the cake. Ready to elevate your Halloween festivities? Let’s dive into some spine-chilling deliciousness!
Why Will You Love This Spooky Cake?
Eerie Appeal: The Spooky Graveyard Cake is a showstopper at any Halloween celebration, designed to be as delightful to look at as it is to eat.
No-Bake Convenience: With minimal prep, you’ll have more time to enjoy the festivities, making it perfect for anyone, from busy parents to novice bakers.
Layered Surprise: Every slice reveals rich chocolate layers and hidden gummy worms, surprising your guests with both flavor and fun!
Creative Decor: Get artistic! Customize your cake with cookie tombstones and candy eyes for a personal touch that showcases your creativity.
Crowd-Pleaser: This dessert can easily feed a group, ensuring everyone leaves the party with full bellies and smiles—an instant classic for your Halloween gatherings!
Spooky Graveyard Cake Ingredients
For the Cake Layers
• Chocolate Cake Mix – Use a box mix for convenience or your favorite homemade recipe for a personal touch.
• Eggs – Understand that they help bind the cake together; substitute with applesauce for a vegan option.
• Vegetable Oil – Adds moisture; can be replaced with melted coconut oil for a different flavor.
• Water – Hydrates the cake mix; you can substitute with coffee for a richer chocolate taste!
For the Filling
• Chocolate Pudding – Adds a creamy layer that complements the cake perfectly; try vanilla pudding for a lighter twist.
• Gummy Worms – These creepy crawlers create the perfect “graveyard” vibe; candy insects can also add a fun spin.
For the Topping
• Whipped Cream – Light and fluffy, it adds a fun contrast to the cake layers; use whipped coconut cream for a dairy-free version.
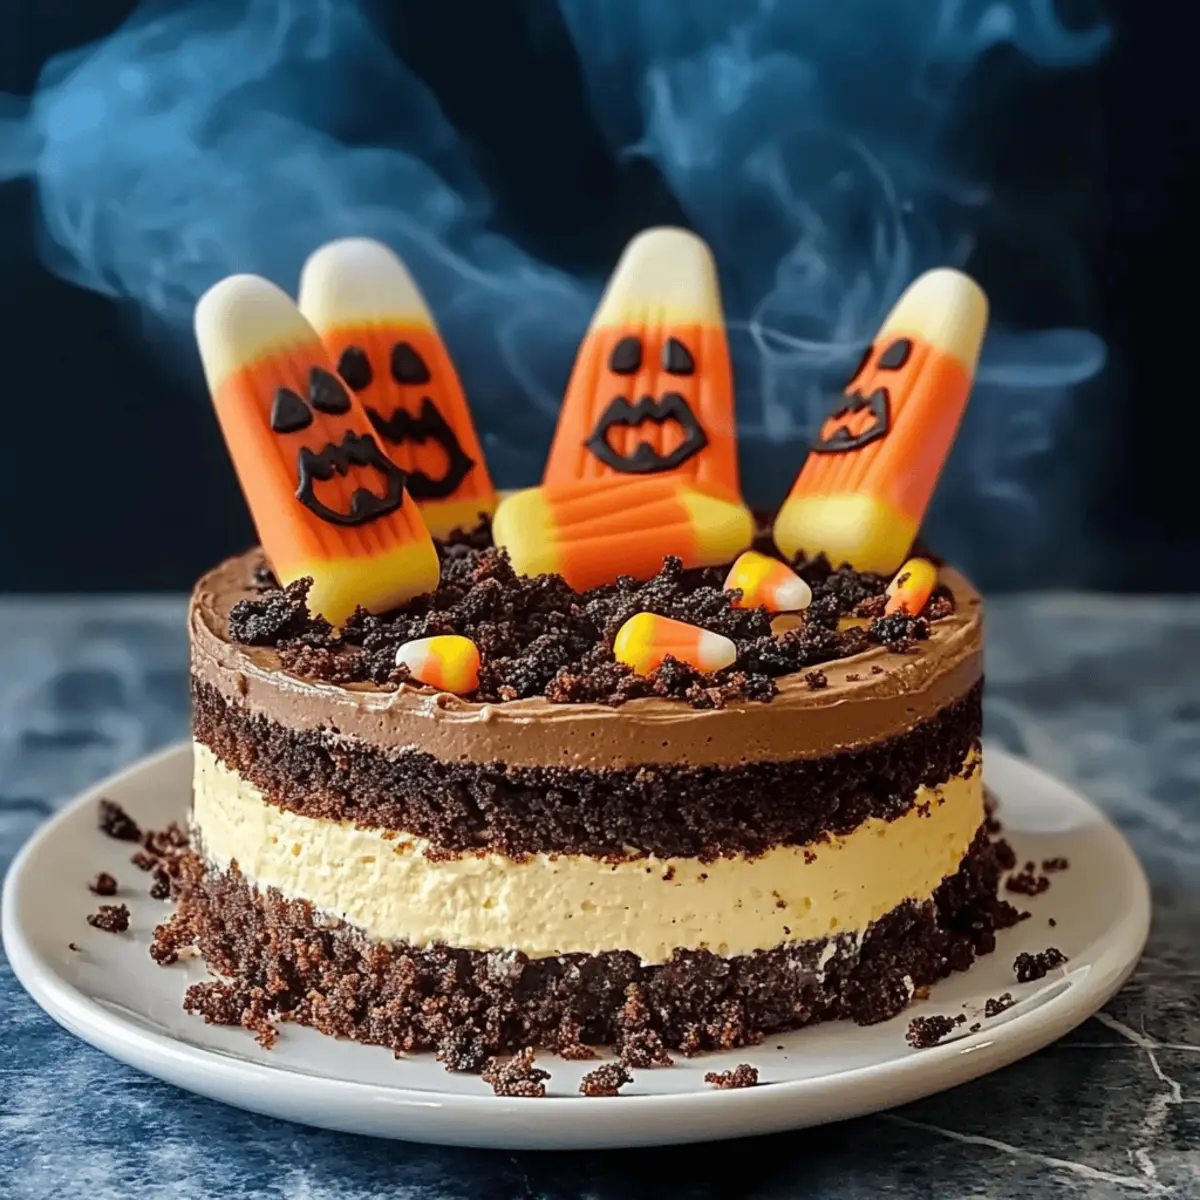
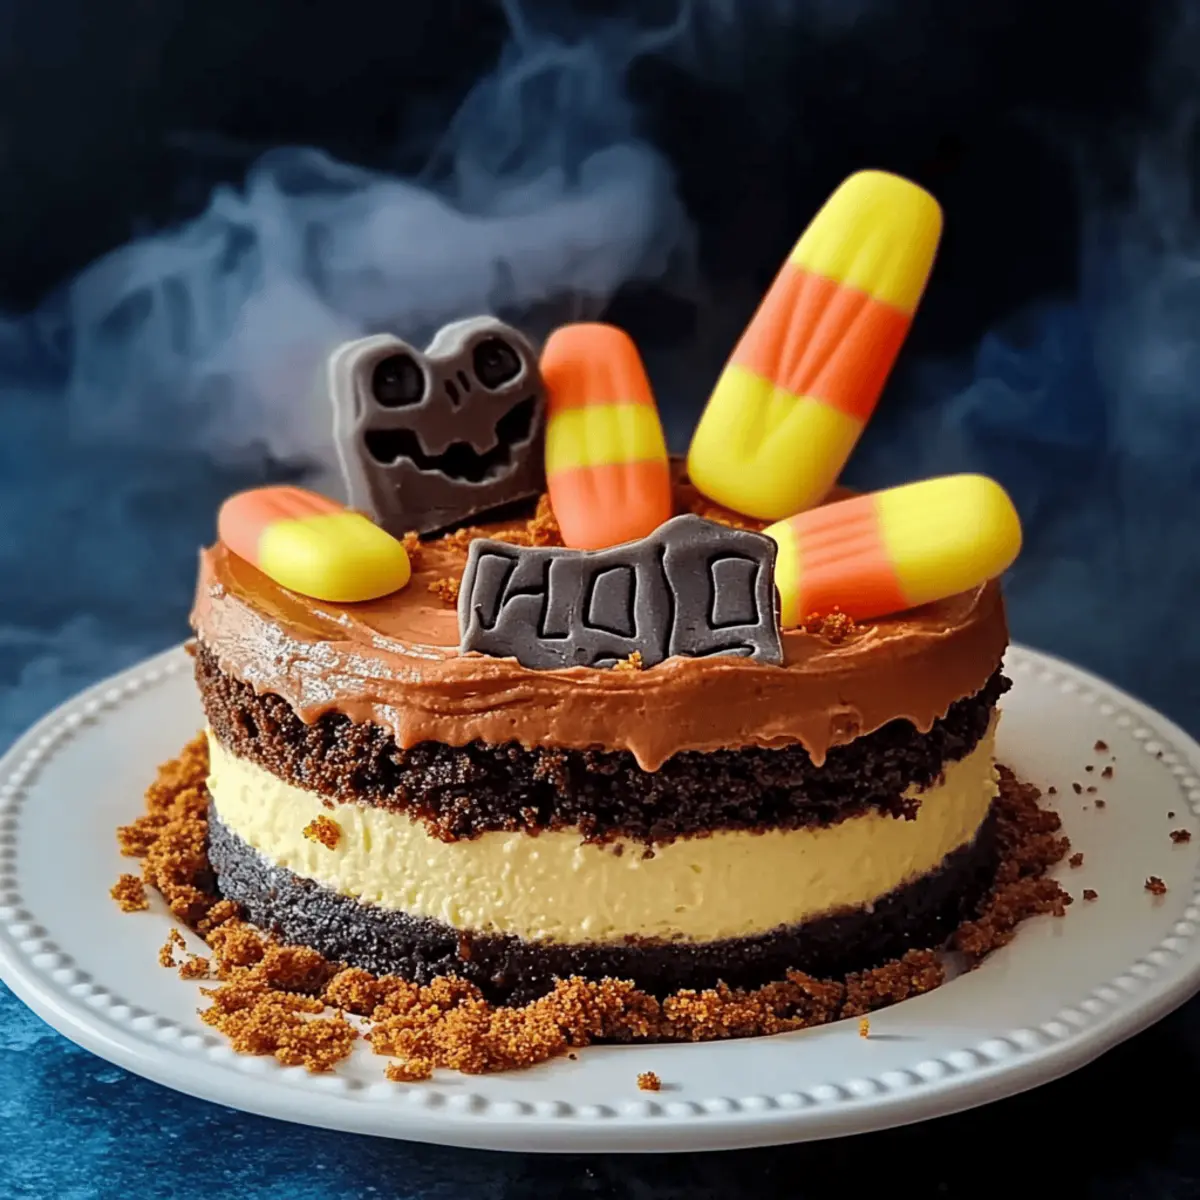
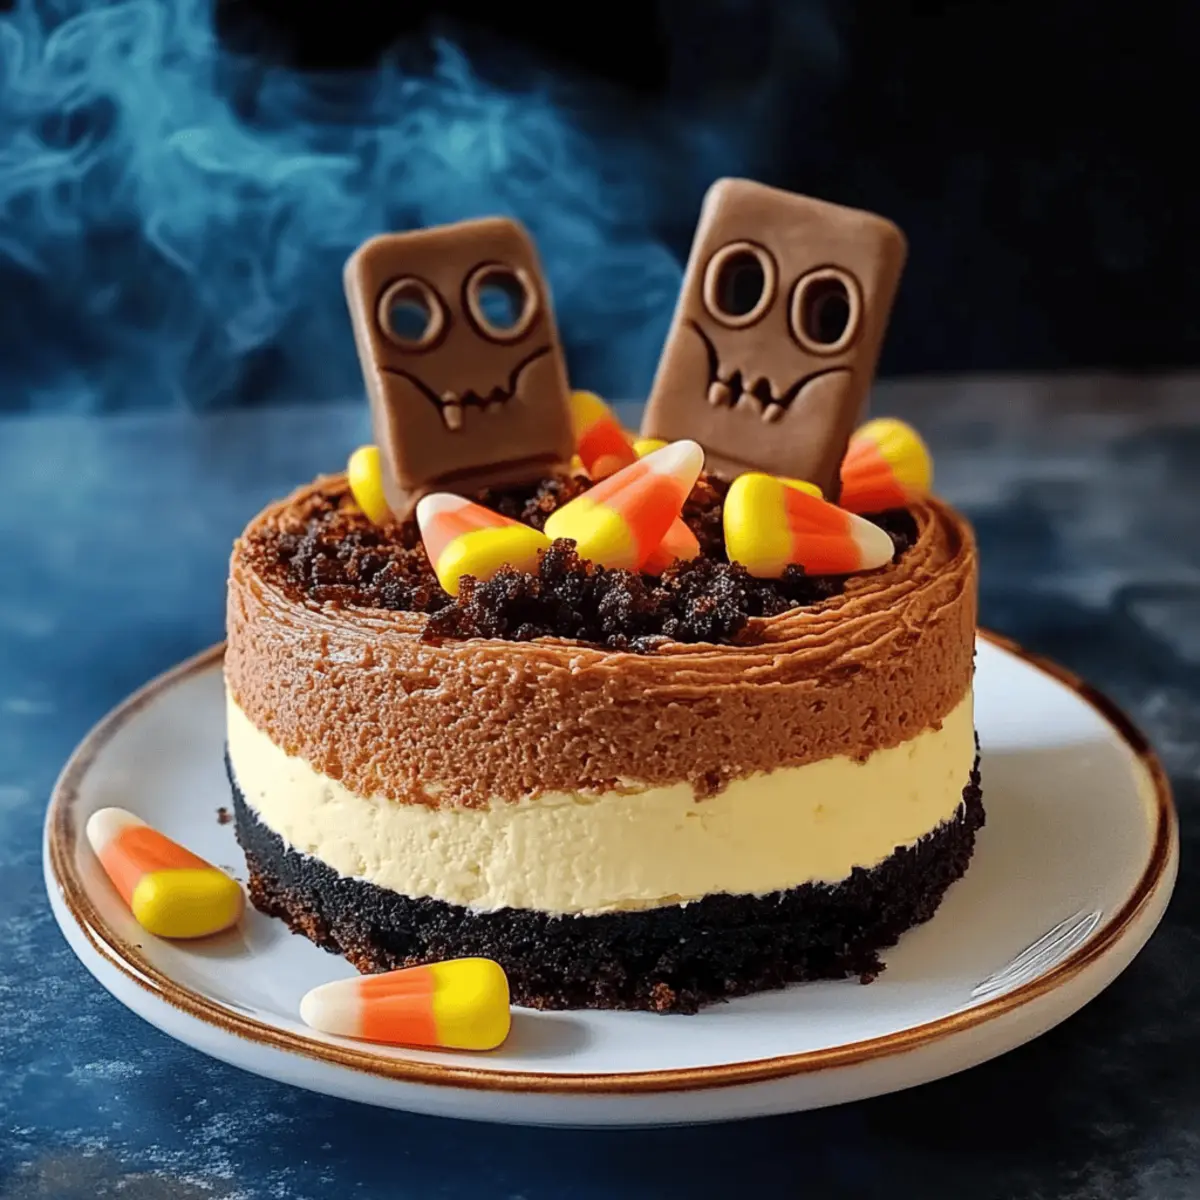
• Crushed Oreos – Sprinkle on top for an “earthy” effect, mimicking soil; chocolate graham crackers could be a great alternative.
• Cookie Tombstones – Personalize your cake with chocolate wafers decorated with writing gel; make them spooky or silly!
• Candy Eyes – Quirky and fun, they enhance the creepy look; edible decorations can add a fun finishing touch.
Decoration Essentials
• Decorative Candies – Like edible bones and seasonal sweets; use an assortment to really bring the graveyard theme to life!
• Edible Glitter – For a magical touch, sprinkle some over the whipped cream; it adds a festive charm to your spooky creation!
Now that you have all the delicious ingredients lined up, let’s get ready to whip up a Spooky Graveyard Cake that will haunt your taste buds!
Step‑by‑Step Instructions for Spooky Graveyard Cake
Step 1: Prepare the Cake Layers
Start by preheating your oven to 350°F (175°C). In a large mixing bowl, combine your chocolate cake mix, eggs, vegetable oil, and water (or coffee for an extra chocolatey kick). Mix until well combined, then pour the batter into greased cake pans. Bake for 25–30 minutes, or until a toothpick comes out clean. Let the cakes cool completely before moving on to the next step.
Step 2: Make the Chocolate Pudding Filling
While your cake layers are cooling, prepare a luscious chocolate pudding. In a medium bowl, whisk together the chocolate pudding mix and milk according to package instructions, usually about 2-3 minutes until thickened. Once your pudding has set, stir in some gummy worms, allowing them to be hidden within the filling, creating that spooky graveyard effect. Chill in the refrigerator until you are ready to layer.
Step 3: Assemble the Cake
Once the cake layers are cool, carefully level them with a serrated knife if needed. Place one layer on your serving platter, then spread a generous layer of chocolate pudding over the top. Add another layer of cake on top of the pudding, pressing down gently to secure it. Repeat the process with any additional layers, finishing with the final layer of cake at the top, ready for decoration.
Step 4: Prepare the Topping
To decorate your Spooky Graveyard Cake, whip cream using an electric mixer until stiff peaks form, about 3-5 minutes. Gently spread the whipped cream over the top and sides of the cake, creating an enticing, fluffy texture. For an earthy touch, crush Oreos and sprinkle them generously on top, letting the crumbs fall down the sides to resemble soil.
Step 5: Add Creepy Decorations
Now comes the fun part! Use cookie tombstones you prepared with chocolate wafers and writing gel, and place them strategically around the cake. Stick in more gummy worms and candy eyes to enhance the spooky vibe and engage your guests’ imaginations. Feel free to get creative, layering in decorative candies and edible bones to complete the graveyard theme.
Step 6: Chill and Serve
Once fully decorated, refrigerate your Spooky Graveyard Cake for at least 30 minutes to let the flavors meld and to firm up the cream topping. When it’s time to serve, slice into the cake and watch as the layers reveal their delightful surprise! Present it on a spooky-themed platter for maximum impact and enjoy the smiles it brings to your Halloween gathering.
What to Serve with Spooky Graveyard Cake
Imagine the laughter and delight that will fill the room as your guests discover the mysteries hidden within each slice of this haunted dessert.
- Witch’s Brew Hot Chocolate: This creamy, chocolatey drink enhances the spooky vibe, perfect for warming up chilly Halloween nights.
- Ghostly Meringue Cookies: Light and airy, these sweet treats make a visually appealing addition that playfully complements the rich flavors of the cake.
- Candy Corn Salad: Add a splash of color and sweetness to the table with this festive salad, featuring vibrant layers that mimic the Halloween theme.
- Graveyard Punch: A refreshing blend of fruit juices and soda, this playful drink can be served in a cauldron for a festive display that pairs perfectly with the cake.
- Pumpkin Spice Ice Cream: For an extra indulgent treat, this ice cream delivers seasonal flavors that bridge the chocolate layers and festive ambiance beautifully.
- Decorative Cheesecake Bites: Little bites of cheesecake adorned with Halloween candies offer a rich and creamy complement to the cake, making each bite an adventure.
With these delightful pairings, your Halloween gathering is sure to be chilling and thrilling!
Expert Tips for Spooky Graveyard Cake
• Even Layers: Ensure your cake layers are even for a stable structure. Trim tops with a serrated knife if necessary, creating a perfectly stacked masterpiece.
• Chill the Pudding: Allow the chocolate pudding to chill thoroughly before layering; this ensures it stays firm and creates a delightful, decadent filling for your spooky graveyard cake.
• Make Ahead: Consider preparing the cake layers and pudding the day before. This not only saves time but also enhances flavor as it sits.
• Creative Decorations: Experiment with various candies—try adding gummy spiders or even edible glitter to elevate the creepy factor. Make your graveyard cake uniquely yours!
• Watch the Whipped Cream: Avoid over-whipping the cream to maintain a smooth texture; gentle mixing is key for that light, fluffy finish on top of your cake.
Storage Tips for Spooky Graveyard Cake
Room Temperature: Allow the cake to cool completely before leaving it out; it can sit at room temperature for up to 2 hours during serving.
Fridge: If you have leftovers, store the Spooky Graveyard Cake in an airtight container in the fridge for up to 3 days to keep it fresh and moist.
Freezer: For longer storage, wrap slices tightly in plastic wrap, then foil, and freeze for up to 2 months. Thaw in the fridge overnight before serving.
Reheating: While best served chilled, use a microwave for a few seconds to warm individual slices if you prefer a gooey treat!
Make Ahead Options
These Spooky Graveyard Cakes are perfect for meal prep enthusiasts looking to save time on Halloween! You can bake the cake layers up to 3 days in advance, allowing them to cool completely before wrapping them tightly in plastic wrap and refrigerating. The chocolate pudding filling can also be made a day ahead; simply prepare it and store it in the fridge until you’re ready to assemble. When it’s time to finish your cake, layer the chilled pudding between the cake, top it with whipped cream, and then add your creepy decorations right before serving to maintain freshness. This way, you can enjoy stress-free celebrations while impressing your guests with this fun, festive treat!
Spooky Graveyard Cake Variations & Substitutions
Unleash your creativity and personalize this spooky dessert to make it your own!
-
Vegan Option: Swap eggs for flaxseed meal mixed with water and use almond milk in the pudding for a plant-based delight. It’s surprisingly delicious and maintains that spooky allure!
-
Gluten-Free: Use a gluten-free chocolate cake mix, ensuring everyone can enjoy this haunting treat without worry. The flavors remain decadent and satisfying!
-
Flavor Twist: Exchange chocolate pudding for pumpkin spice pudding to give your cake a fall-inspired twist. The warm flavors will resonate with the Halloween vibe, making it unforgettable!
-
Decorative Fun: Instead of gummy worms, consider using chocolate spiders or candy bones for decoration. These add an eerie touch that will have your guests intrigued!
-
Textural Surprise: Layer in crushed graham crackers between cake layers for an unexpected crunch, mimicking a real “graveyard” feel. It adds a delightful depth to each bite.
-
Mini Versions: Bake cupcakes instead of a full cake for individual servings that bring the spooky fun right to guests’ hands. Top with mini tombstone cookies for a playful finish!
-
Colorful Layers: For a vibrant appearance, alternate layers of chocolate cake with layers of red velvet or vanilla for a visually stunning effect. The more colors, the more festivity!
-
Whipped Cream Delight: Swap regular whipped cream for pumpkin-infused whipped cream for a seasonal flair. This adds lightness and enhances the overall flavor.
For more delightful ideas, consider checking out our Strawberry Shortcake Whipped or our Coconut Dream Cake for additional flavor inspirations!

Spooky Graveyard Cake Recipe FAQs
How do I select the best chocolate cake mix for my Spooky Graveyard Cake?
Absolutely! When choosing a chocolate cake mix, look for one that has high cocoa content for a richer flavor. A box promising moistness is ideal, as it will lend a delightful texture to your cake. If you prefer a homemade touch, I recommend using a well-tested recipe to ensure a perfectly fluffy and moist cake!
What’s the best way to store the Spooky Graveyard Cake, and how long will it stay fresh?
Very! To store your cake, allow it to cool completely, then place it in an airtight container in the fridge for up to 3 days. If covered properly, it will retain moisture and flavor. For longer storage, wrap slices tightly in plastic wrap, followed by foil, and freeze for up to 2 months. When you’re ready to enjoy it again, simply thaw in the fridge overnight!
Can I make this cake ahead of time? How should I prepare it?
Absolutely! You can prepare the cake layers and chocolate pudding filling the day before. Just assemble the components, leaving the decorations until the day of the party to maintain their visual charm. This not only saves time but also allows the flavors to meld, creating an even more delectable cake for your Halloween gathering!
What’s a good way to customize the decorations for my cake?
The more the merrier! You can switch it up and use various candies like gummy spiders, edible glitter, or even homemade cookies shaped like ghosts for a personalized touch. Don’t hesitate to let your creativity shine—these customizations will make your Spooky Graveyard Cake uniquely yours and sure to wow your guests!
How can I ensure my whipped cream topping stays fluffy and doesn’t melt?
Great question! To achieve that perfect, stable whipped cream, use chilled heavy cream and mix it just until stiff peaks form—usually around 3-5 minutes. Avoid over-whipping, as this can cause the cream to become grainy. You can also consider adding a tablespoon of powdered sugar or cornstarch to enhance stability. Enjoy your spooky dessert!
Spooky Graveyard Cake That Will Haunt Your Taste Buds
Ingredients
Equipment
Method
- Preheat your oven to 350°F (175°C). In a large mixing bowl, combine chocolate cake mix, eggs, vegetable oil, and water (or coffee). Mix until well combined, then pour into greased cake pans. Bake for 25–30 minutes until a toothpick comes out clean. Let cool completely.
- Prepare chocolate pudding by whisking pudding mix and milk according to instructions until thickened. Stir in gummy worms and chill.
- Once the cake layers are cool, level them if needed. Place one layer on a platter, spread chocolate pudding on top, add another cake layer, and repeat.
- Whip cream until stiff peaks form. Spread whipped cream over the top and sides of the cake. Sprinkle crushed Oreos on top.
- Decorate with cookie tombstones, gummy worms, and candy eyes to enhance the spooky vibe. Get creative with decorative candies and edible bones.
- Refrigerate the cake for at least 30 minutes to let flavors meld. Slice and serve on a spooky-themed platter.
Leave a Reply