
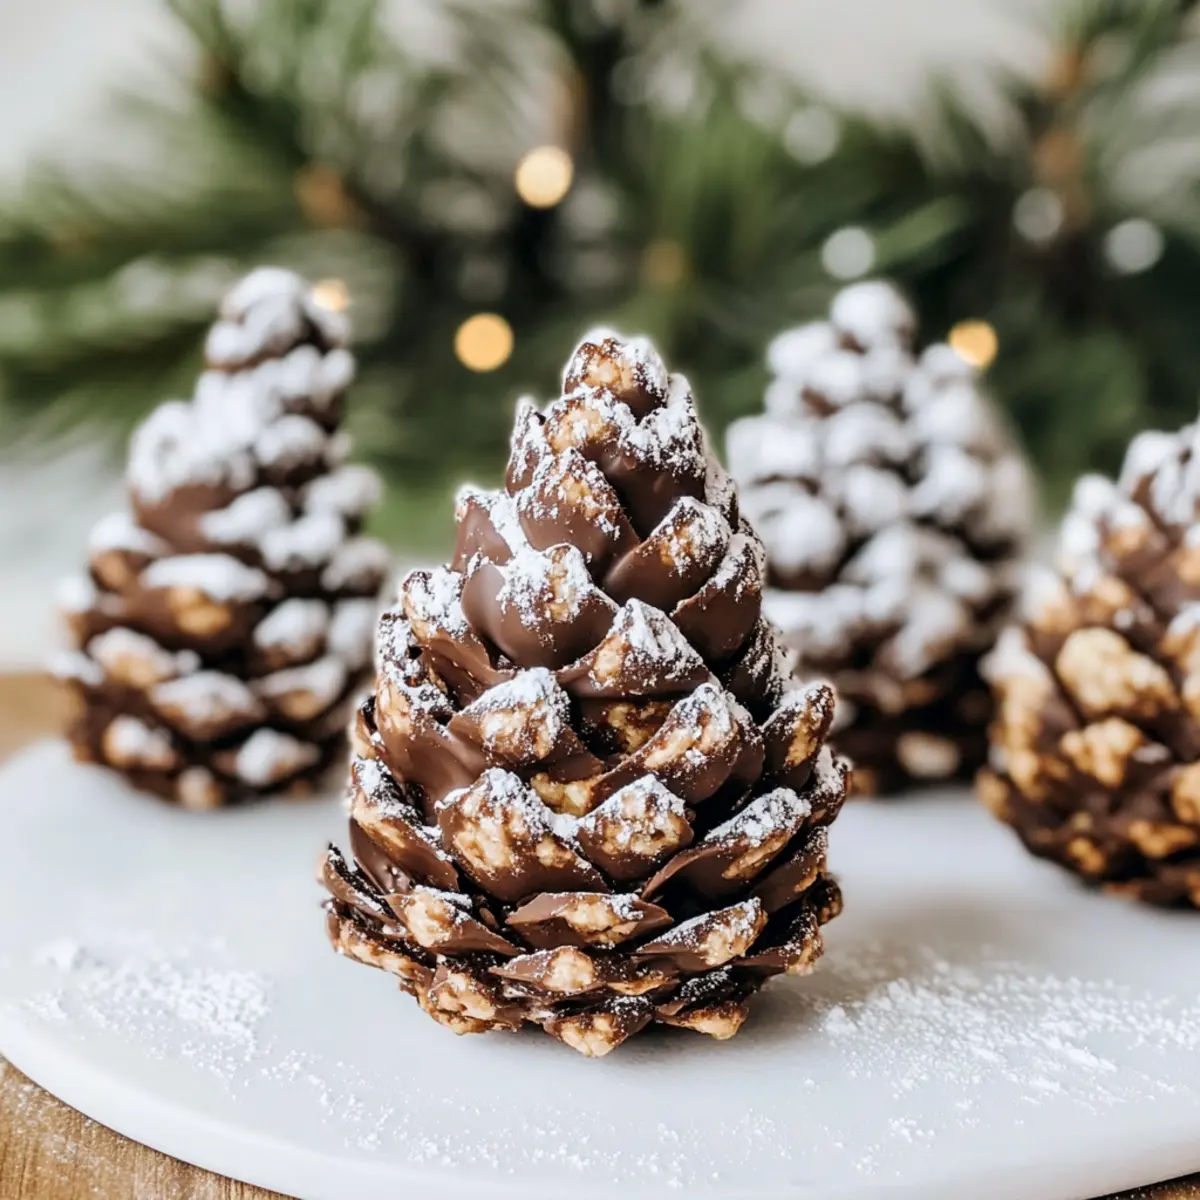
As I carefully unwrapped a box of holiday treats, the delightful aroma of sweet chocolate wafted through the air, instantly lifting my spirits. That’s when I spotted them—Pine Cone Truffles—stunning little confections that not only catch the eye but also promise a rich, chocolatey indulgence. This no-bake recipe is my go-to festive dessert, combining easy prep with a creative twist that makes them perfect for any gathering or as charming edible gifts. With a combination of moist cake and crunchy cereal, these truffles deliver a satisfying texture, all while being surprisingly simple to make. Whether you’re hosting a holiday party or looking for a fun family activity, these treats are sure to impress—not to mention their enchanting snowy finish! Have you ever tried making holiday desserts that double as conversation starters? Let’s dive into the world of Pine Cone Truffles!
Why are Pine Cone Truffles a must-try?
Uniqueness: These truffles not only look enchanting but also add a festive charm to any dessert table. No-Bake Ease: Say goodbye to the oven! This is a hassle-free recipe perfect for busy holiday schedules. Rich Flavor: The combination of moist cake and chocolate creates a decadent experience, complemented by a delightful crunch from the cereal coating. Creative Fun: Shaping the truffles offers a fun activity for family and friends, making it an ideal holiday project. Crowd-Pleasing Appeal: Trust me, these eye-catching treats will be a favorite at any gathering! For more festive delights, check out our Delightful Mini Pineapple or Pineapple Coconut Dream recipes!
Pine Cone Truffles Ingredients
• Craft these delightful no-bake treats with ease!
For the Truffle Base
- Chocolate Sheet Cake – A delicious foundation; feel free to use your favorite store-bought or homemade recipe.
- Chocolate Frosted Flakes – Adds the perfect crunch to mimic the pine cone scales; you can substitute with traditional Frosted Flakes if you’re in a pinch.
For the Chocolate Coating
- Chocolate Almond Bark – Delivers a rich, smooth finish to your truffles; you can swap it for melted white chocolate for a snowy effect.
For Dusting
- Powdered Sugar – Provides that magical snowy appearance, making your Pine Cone Truffles even more festive; optional but highly recommended for visual appeal.
Step‑by‑Step Instructions for Pine Cone Truffles
Step 1: Prepare the Cake
Start by removing your baked chocolate sheet cake from the oven and allow it to cool for about 10-15 minutes. Once cooled, crumble the cake into a large bowl or a stand mixer. Mix on low speed until it becomes moist and has a dough-like consistency, ensuring an even texture for your Pine Cone Truffles.
Step 2: Shape the Truffles
Take small portions of the cake mixture, about 2 inches in diameter, and roll them into balls. Gently mold each ball into a cone shape, making sure the base is flat to provide stability when displayed. You’re creating the signature look of Pine Cone Truffles, so let your creativity shine during this fun shaping process.
Step 3: Coat with Cereal
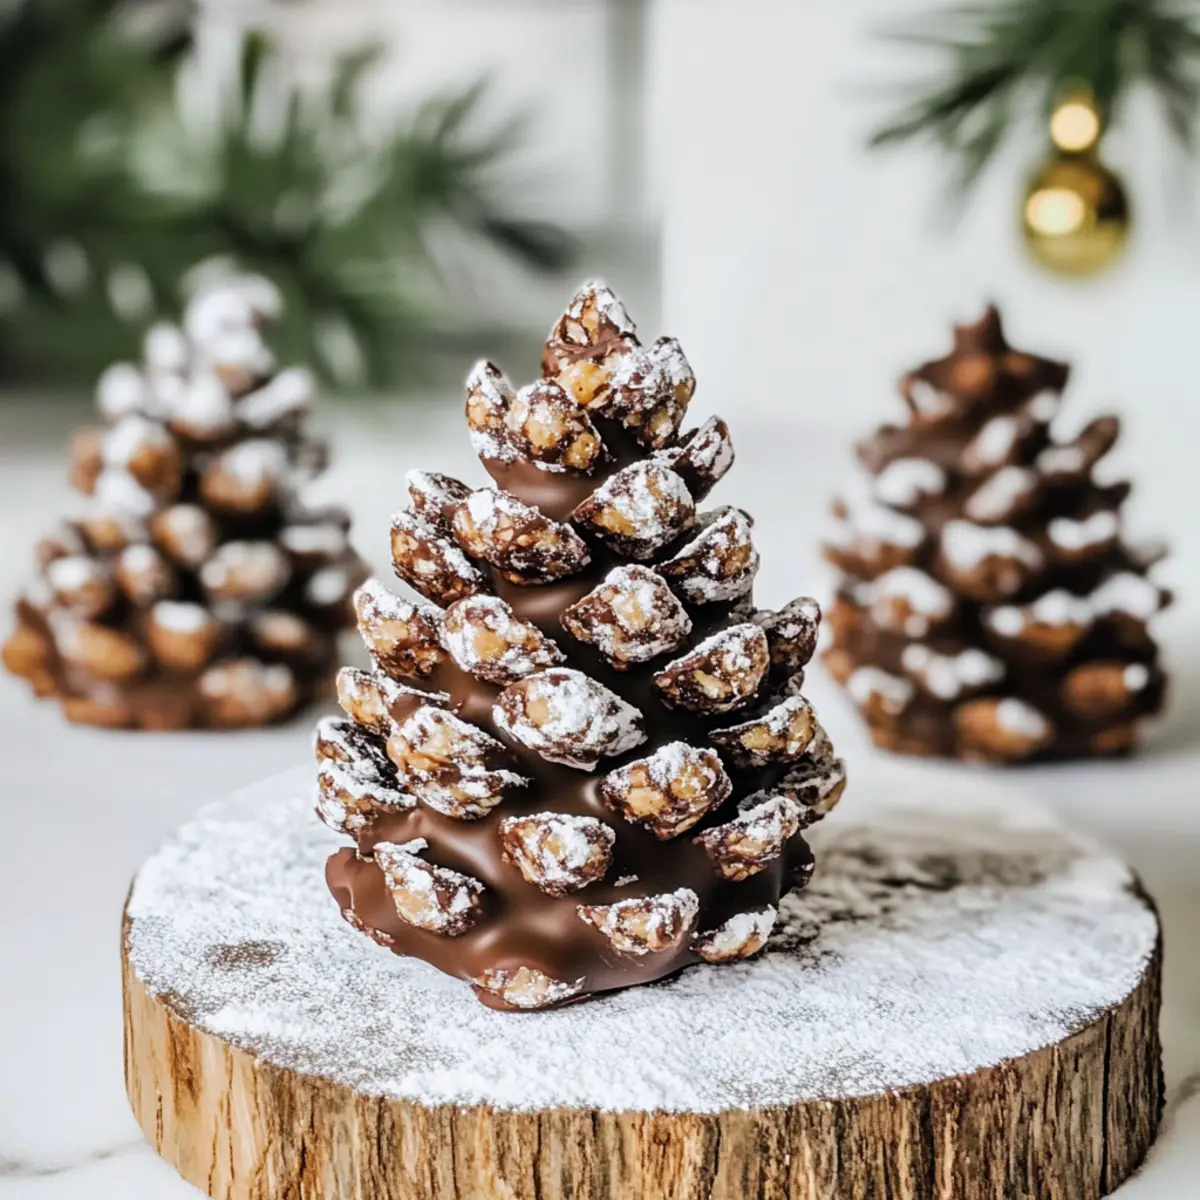
Grab your Chocolate Frosted Flakes and begin pressing them into the shaped cones, starting at the bottom and working your way up. Aim to cover the entire surface, allowing the flakes to mimic the natural scales of a pine cone. This crunchy layer adds texture and a festive flair to your truffles, making them irresistibly appealing.
Step 4: Freeze the Cones
Arrange the shaped cones on a parchment-lined baking sheet and place them in the freezer for about 1 hour. This chilling time helps the truffles firm up, ensuring they hold their shape better when coated with chocolate. Check periodically for firmness, as you want them solid but not overly hard.
Step 5: Melt the Chocolate
While the cones are chilling, prepare to melt the chocolate almond bark. Place it in a microwave-safe bowl and heat in 30-second intervals, stirring after each until smooth and fully melted. Aim for a glossy consistency, as this will serve as the delightful coating for your Pine Cone Truffles.
Step 6: Dip the Truffles
Once your truffles are firm, carefully dip each frozen cone into the melted chocolate. Make sure they are fully coated, allowing any excess chocolate to drip off. Use a fork to help lift them and place them back onto the parchment paper. This step adds a rich and decadent layer to your Pine Cone Truffles.
Step 7: Chill and Dust
If desired, return the dipped truffles to the freezer for an additional 10 minutes to ensure the chocolate sets perfectly. After setting, dust the truffles lightly with powdered sugar to create that snowy appearance. This final touch not only enhances the visual appeal but adds an enjoyable sweetness to your beautiful holiday treats.

Make Ahead Options
These Pine Cone Truffles are a fantastic option for busy home cooks looking to save time during the holiday season! You can prepare the truffle base and shape it into cones up to 24 hours in advance; just be sure to refrigerate them to maintain freshness. After shaping, simply press in the Chocolate Frosted Flakes and freeze the cones for about 1 hour until firm. When you’re ready to serve, melt the chocolate and dip the frozen cones—this quick step offers a delightful finishing touch that keeps your truffles just as delicious as if they’d been made fresh. With these make-ahead strategies, you’ll have impressive, festive treats ready to wow your guests!
Expert Tips for Pine Cone Truffles
-
Temperature Control: Keep the cake mixture cool while shaping; if it feels too soft, refrigerate for a bit to avoid messy handling.
-
Cereal Variety: Use a mix of chocolate and traditional Frosted Flakes for texture variation, enhancing the natural pine cone look.
-
Smooth Coating: Mixing a teaspoon of coconut oil into melted chocolate helps achieve a smoother dip for your Pine Cone Truffles, making them shine.
-
Make Ahead: Prepare your truffles a day or two in advance; they store well in the fridge, allowing you to enjoy stress-free holiday festivities.
-
Dusting Trick: Add the powdered sugar immediately after dipping the truffles while the chocolate is still slightly warm for better adherence.
What to Serve with Pine Cone Truffles?
Elevate your holiday treats by pairing these whimsical Pine Cone Truffles with delightful accompaniments that balance their richness and charm.
- Creamy Hot Chocolate: This indulgent drink complements the truffles’ chocolate richness and enhances the cozy vibe of festive gatherings.
- Peppermint Bark: A crunchy, minty sweet treat that brings a refreshing contrast and a holiday flair that everyone loves.
- Snowy Coconut Macaroons: Their chewy texture and coconut flavor play off the truffles’ creaminess, creating a match made in dessert heaven.
- Sparkling Cider: This refreshing, bubbly drink is an uplifting choice that brings cheer and complements the festive spirit of the season.
- Fruit Platter: Bright, colorful fruits like strawberries and oranges add freshness and a light touch to an otherwise indulgent dessert spread.
- Mini Cheesecake Bites: Offering a creamy texture with a hint of tanginess, these bite-sized delights provide an enjoyable contrast to your rich truffles.
- Gingerbread Cookies: Their warm spices and comforting flavors evoke holiday nostalgia and pair beautifully with the chocolatey goodness of the truffles.
- Coffee or Espresso: A cup of rich coffee elevates the taste experience and balances the sweetness, making it perfect for dessert time conversations.
- Vanilla Ice Cream: Serve a scoop alongside the truffles for a delightful balance of temperatures, with creamy smoothness contrasting the crunchy truffle.
Storage Tips for Pine Cone Truffles
Fridge: Store your Pine Cone Truffles in an airtight container in the refrigerator for up to 5 days. This keeps them fresh and delicious for your holiday gatherings.
Freezer: If you want to make these delightful treats ahead of time, freeze them for up to 2 months. Just be sure to wrap them individually or place them in a freezer-safe container to prevent freezer burn.
Thawing: When ready to serve, allow the truffles to thaw in the refrigerator for a few hours before enjoying. This way, they’ll maintain their rich flavors and textures.
Reheating: While these truffles are best enjoyed chilled, you can let them sit at room temperature for 10-15 minutes before serving, enhancing their taste and texture.
Pine Cone Truffles Variations & Substitutions
Feel free to mix things up and create your own version of these delightful truffles that will warmly charm your holiday gatherings!
-
Dairy-Free: Substitute chocolate almond bark with coconut or dairy-free chocolate for a delicious vegan option that everyone can enjoy.
-
Nutty Twist: Incorporate crushed nuts like pecans or walnuts into the base mixture for an added crunch that perfectly complements the chocolate. These little treasures can elevate both flavor and texture!
-
Seasonal Spice: Add a dash of cinnamon or nutmeg to the cake mixture for a wonderfully festive flavor that evokes the essence of holiday baking. It’ll bring an aromatic warmth to your truffles!
-
Flavored Extracts: Enhance your truffles by mixing in flavored extracts such as almond or peppermint to create exciting flavor profiles. A hint of mint can make for a refreshing touch during the holiday season.
-
Snowy Finish: For a winter wonderland look, use melted white chocolate instead of dark for coating, giving your truffles a snowy appearance. It’s a feast for the eyes and taste buds!
-
Cereal Mix: Use a combination of Chocolate Frosted Flakes with rice cereal or even crushed pretzels for a sweet and salty mix that will add delightful contrast and intrigue to each bite.
-
Additional Toppings: Experiment with sprinkles, shredded coconut, or colored sugars on the finished truffles for an extra festive touch. This creates a playful and vibrant assortment that can wow your guests.
-
Chocolate Variety: Mix things up by using semi-sweet, dark, or even caramel chocolate for coating. Each will bring a unique richness and depth of flavor to your Pine Cone Truffles.
These variations will ensure that your truffles stand out, making them truly unforgettable. If you’re looking for other festive ideas, don’t miss our Pineapple Coconut Dream or consider some refreshing Pineapple Strawberry Swirled treats to complement your holiday spread. Happy baking!
Pine Cone Truffles Recipe FAQs
How do I choose the right chocolate sheet cake for my truffles?
Absolutely! You can use either a homemade or store-bought chocolate sheet cake. If you’re opting for store-bought, look for one with a moist texture and rich chocolate flavor to ensure your Pine Cone Truffles turn out deliciously. If you decide to bake your own, just make sure it has fully cooled before crumbling to avoid a gooey mess.
What is the best way to store Pine Cone Truffles?
For maximum freshness, store your truffles in an airtight container in the refrigerator for up to 5 days. The cool environment helps maintain their texture and flavor. If you have leftovers, you can freeze them for up to 2 months. Just wrap each truffle individually or place them in a freezer-safe container to avoid freezer burn.
Can I freeze Pine Cone Truffles? If so, how?
Yes, you can definitely freeze these delightful treats! To do so, place the shaped and coated truffles on a parchment-lined baking sheet in a single layer, allowing them to firm up in the freezer for about an hour. Once set, transfer them to an airtight container or freezer bag and store them for up to 2 months. When ready to enjoy, let them thaw in the refrigerator for several hours before serving.
What are common troubleshooting tips if my truffles are too soft?
Very! If your cake mixture feels too soft to shape, try chilling it in the refrigerator for 30 minutes. This will firm it up, making it easier to mold into the desired cone shape. If the dough is overly warm when you’re shaping it, it can be challenging to handle. Additionally, ensure your shaped truffles are sufficiently frozen before coating them in chocolate to maintain their form.
Are there any dietary considerations I should keep in mind for this recipe?
Certainly! If you’re catering to specific dietary concerns, you can simplify substitutions. For those with nut allergies, select nut-free chocolate almond bark. If you’re making these for pets or those allergic to chocolate, consider using a white chocolate alternative (ensure it’s safe for your dietary needs). Always label your treats clearly if you’re serving them at a gathering so everyone can feel safe and included!

Pine Cone Truffles: Decadent No-Bake Holiday Delights
Ingredients
Equipment
Method
- Prepare the Cake: Cool baked chocolate sheet cake for 10-15 minutes, then crumble into a large bowl.
- Shape the Truffles: Roll small portions of the cake mixture into balls, then mold into cones.
- Coat with Cereal: Press Chocolate Frosted Flakes into the shaped cones to cover the surface.
- Freeze the Cones: Place shaped cones on a parchment-lined baking sheet and freeze for 1 hour.
- Melt the Chocolate: Microwave chocolate almond bark in intervals until smooth.
- Dip the Truffles: Dip each frozen cone into melted chocolate and allow excess to drip off.
- Chill and Dust: Return to freezer for 10 minutes, then dust with powdered sugar.
Leave a Reply