
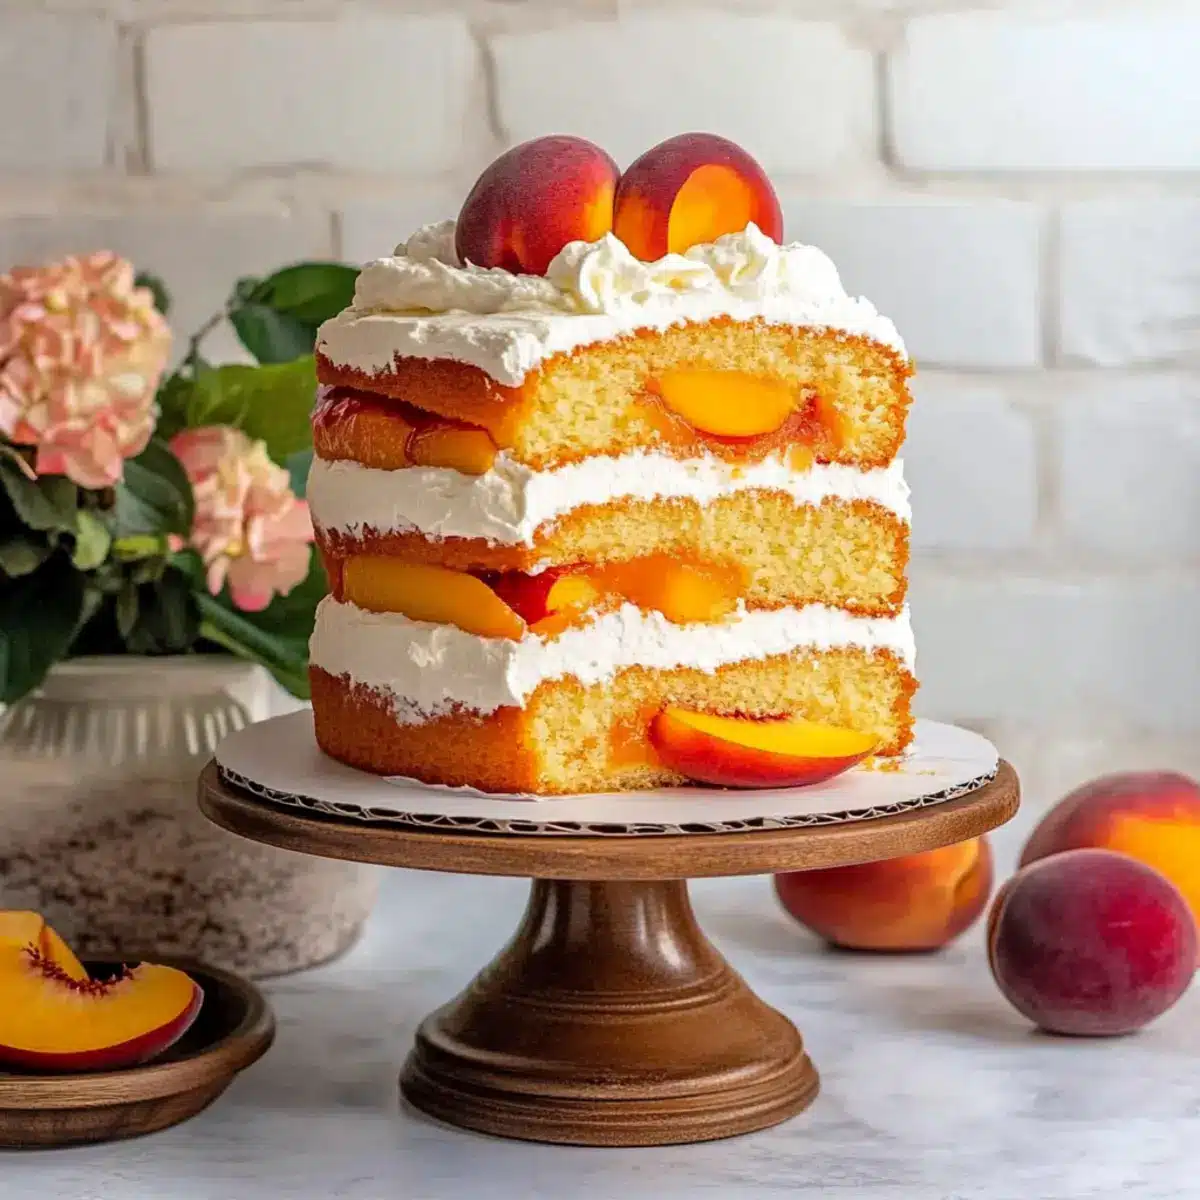
As summer whispers its warm embrace, the thought of a light and fruity dessert dances in my mind. This Peaches and Cream Layer Cake is my go-to indulgence, bringing together layers of fluffy vanilla cake that cradle succulent fresh peaches and airy, vanilla bean whipped cream. With an effortless elegance, this cake not only captivates the eyes but also delights the taste buds, making it a sure crowd-pleaser. Plus, it comes together quickly, allowing you to spend more time enjoying sweet moments with loved ones. Whether you’re hosting a backyard barbecue or just treating yourself on a sun-soaked afternoon, this recipe offers a refreshing escape from everyday sweets. So, are you ready to experience the ultimate summer dessert? Let’s get baking!
Why is this cake so refreshing?
Light and Airy Texture: The Peaches and Cream Layer Cake features fluffy vanilla layers that melt in your mouth, making it the perfect summer dessert.
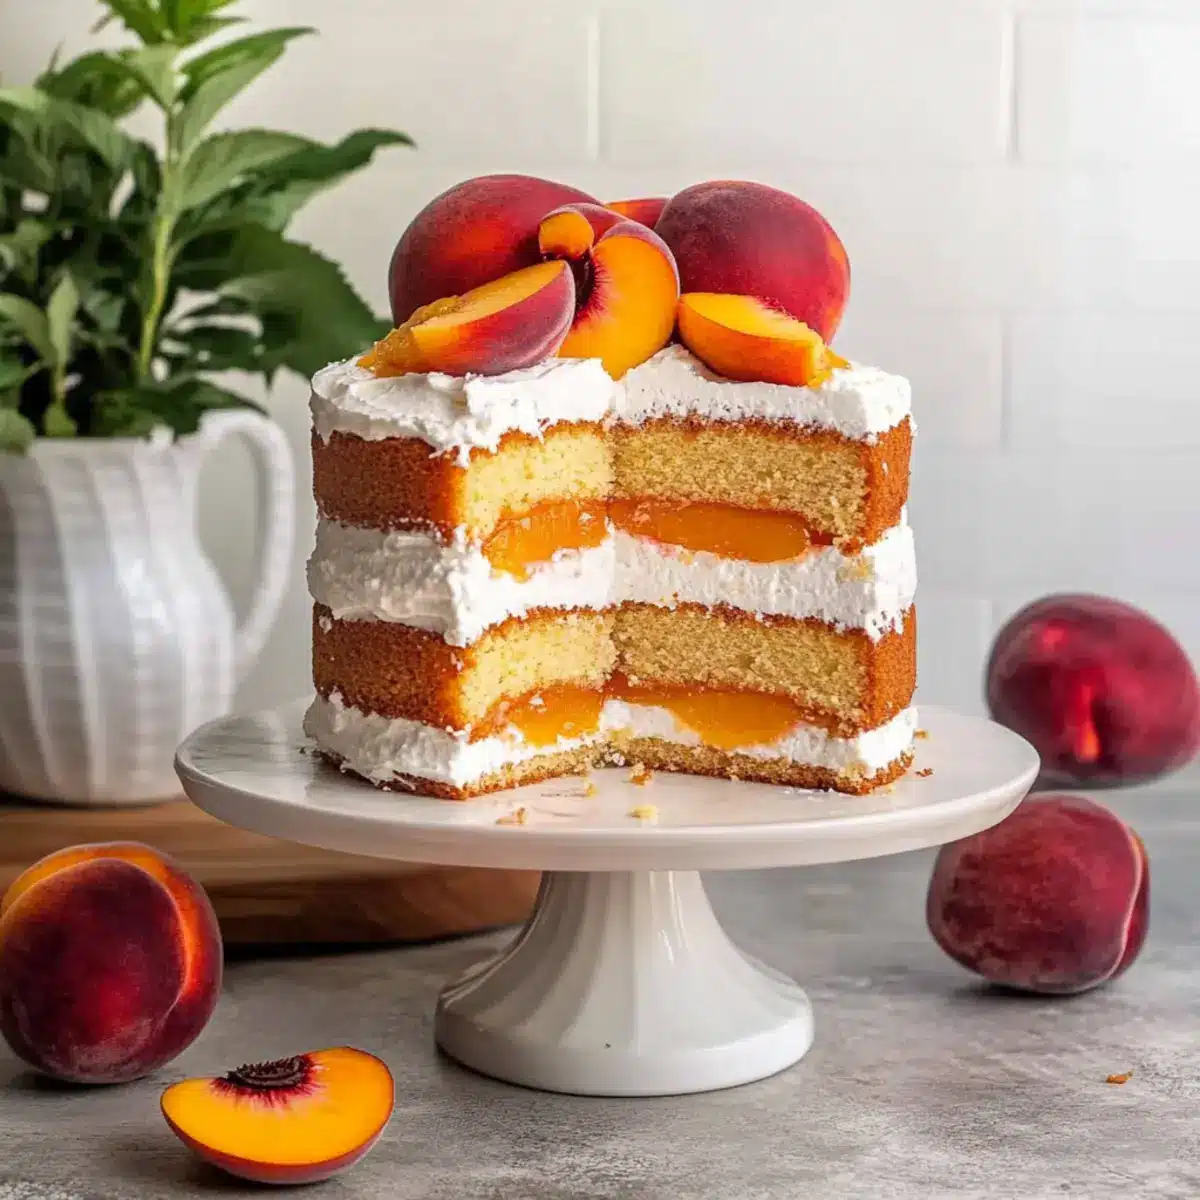
Bursting with Freshness: Each bite is enhanced by sweet, juicy peaches that bring a burst of flavor, leaving you craving more.
Quick and Easy Assembly: Whipping up this cake is a breeze, allowing you to enjoy sweet moments with friends and family without the hassle.
Impressive Presentation: With its elegant layers and a luscious whipped cream topping, this cake is sure to impress guests at any gathering.
Versatile Delight: You can easily experiment with other fruits or flavors, ensuring there’s always a delightful twist to savor. Whether you fancy a slice at a summer barbecue or as a sweet afternoon treat, this dessert fits the bill perfectly!
Peaches and Cream Layer Cake Ingredients
Get ready to create a show-stopping dessert!
For the Cake
- Cake Flour – Provides structure and light texture; substitute with all-purpose flour if needed, but the texture may vary.
- Baking Powder – Helps the cake rise and become fluffy; check expiration for effectiveness.
- Baking Soda – Enhances browning and texture; ensure to balance with acidic components like buttermilk.
- Salt – Enhances flavor and is essential for balancing sweetness.
- Unsalted Butter – Provides moisture and richness; make sure it’s at room temperature for proper creaming.
- Buttermilk – Adds moisture and a slight tang; can be substituted with milk plus vinegar or lemon juice.
- Granulated Sugar – Adds sweetness and helps with moisture retention.
- Vanilla Bean Paste – Provides a rich vanilla flavor with specks of vanilla bean; can be substituted with pure vanilla extract.
- Eggs – Adds structure and moisture; use at room temperature for best results.
For the Filling and Topping
- Fresh Peaches – Offers natural sweetness and moisture; other soft fruits may be substituted, but they may alter flavor.
- Powdered Sugar – Sweetens the whipped cream while ensuring a smooth texture.
- Heavy Whipping Cream – Creates a light, fluffy whipped topping; must be very cold for best results.
With these Peaches and Cream Layer Cake ingredients, you’re one step closer to baking a delightful summer treat that will leave everyone wanting a second slice!
Step‑by‑Step Instructions for Peaches and Cream Layer Cake
Step 1: Preheat the Oven
Begin by preheating your oven to 350°F (175°C). This ensures the ideal environment for baking the Peaches and Cream Layer Cake. While the oven warms up, gather your ingredients and prepare three 6-inch round cake pans by greasing them with butter and lining the bottoms with parchment paper for easy removal.
Step 2: Cream the Butter and Sugar
In a large mixing bowl, combine softened unsalted butter and granulated sugar. Using a hand mixer or stand mixer fitted with a paddle attachment, beat them together on medium speed until the mixture is light and fluffy—about 3–5 minutes. This critical step creates a structure that will help your cake rise beautifully, so be sure to watch for a pale color change indicating it’s ready.
Step 3: Add Eggs and Vanilla
Next, crack in the room temperature eggs, one at a time, mixing until just combined. Follow this with adding the vanilla bean paste, stirring gently to avoid over-mixing. Continue until the batter is smooth and creamy. The incorporation of these ingredients adds moisture, flavor, and richness to the cake.
Step 4: Mix in Buttermilk
Pour in the buttermilk and mix until fully combined. This addition enhances the cake’s moisture and contributes a slight tang that balances the sweetness. Ensure your mixture is homogeneous, with no lumps remaining, which should take about a minute. The batter will appear slightly thinner than typical cake batters, which is perfectly normal.
Step 5: Sift and Combine Dry Ingredients
In a separate bowl, sift together the cake flour, baking powder, baking soda, and salt. Gradually add this dry mix to the wet ingredients, folding gently using a spatula until just incorporated. Avoid overworking the batter, as this will help maintain the light and airy texture for your Peaches and Cream Layer Cake.
Step 6: Divide the Batter and Bake
Evenly distribute the cake batter among the three prepared pans, smoothing the tops. Place them in the preheated oven and bake for 35-38 minutes or until a toothpick inserted in the center comes out clean. Keep an eye on the cakes towards the end of baking; they should be golden brown and spring back when lightly pressed.
Step 7: Cool the Cakes
Once baked, remove the pans from the oven and allow the cakes to cool in the pans for 5 minutes. Then, carefully transfer each layer to a wire rack to cool completely. Cooling the cakes is crucial for assembling them, as it prevents the whipped cream from melting and keeps everything beautifully structured.
Step 8: Prepare the Peaches
While your cakes cool, prepare the fresh peaches by slicing them thinly. Toss these peach slices in a sprinkle of sugar and set aside for about 10-15 minutes to allow them to release their juices. This process will create a natural syrup that enhances the flavor of the filling.
Step 9: Whip the Cream
In a chilled mixing bowl, pour in the heavy whipping cream. Using an electric mixer, whip the cream on medium speed until it begins to thicken. Gradually add powdered sugar and a splash of vanilla bean paste, then continue whipping until stiff peaks form—usually about 3-5 minutes. Chilling your bowl and whisk beforehand can help achieve optimal volume.
Step 10: Assemble the Cake
To assemble your Peaches and Cream Layer Cake, trim the tops of each cooled cake layer for even stacking. On the first layer, spread a generous amount of peach syrup, followed by a layer of the sweetened peaches and a dollop of whipped cream. Repeat this process with the second layer before placing the final layer on top.
Step 11: Finish with Toppings
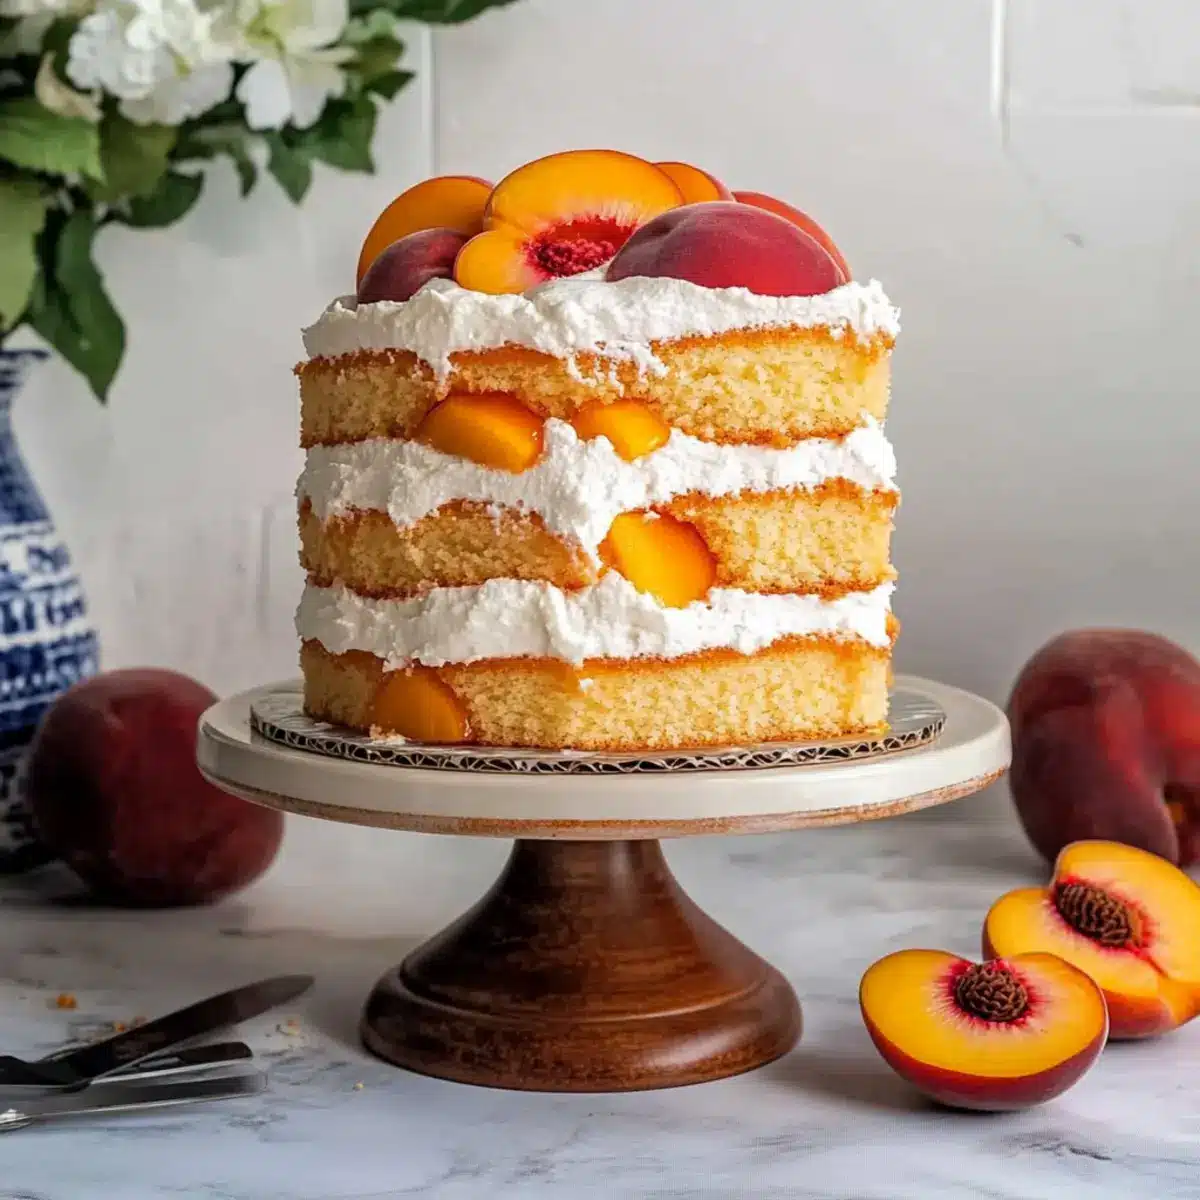
Spread the remaining whipped cream over the top and sides of the cake, creating a smooth finish. Adorn the cake with the extra peach slices and drizzle any leftover peach syrup over the top for a beautiful presentation. This final touch adds sweetness and makes the Peaches and Cream Layer Cake truly shine.
Step 12: Serve and Enjoy
Slice your masterpiece and serve it chilled for a refreshing delight. This Peaches and Cream Layer Cake is perfect for summer gatherings or simply as a special treat for yourself. With its lightness and burst of flavors, it’s sure to be a crowd-pleaser!

Expert Tips for Peaches and Cream Layer Cake
-
Room Temperature Ingredients: Ensure all wet ingredients, such as eggs and buttermilk, are at room temperature for a lighter cake texture that enhances the Peaches and Cream Layer Cake.
-
Sifting Matters: Always sift your dry ingredients, as this helps to aerate them, contributing to a fluffy cake that rises beautifully and ensures even mixing.
-
Pans and Parchment: Use parchment paper in the bottoms of your cake pans to avoid sticking, making it easier to remove your layers without breaking them apart.
-
Whip It Right: For the best whipped cream, chill your mixing bowl and beaters beforehand. This helps achieve better volume and a stable texture for topping your cake.
-
Layering Tips: Trim the tops of your cooled cake layers to create a flat base for stacking, ensuring that your Peaches and Cream Layer Cake is both pretty and stable.
Storage Tips for Peaches and Cream Layer Cake
Fridge: Store leftover slices in an airtight container in the refrigerator for up to 2 days. Covering the cake helps preserve its moisture and creaminess.
Freezer: Freeze unfrosted cake layers tightly wrapped in plastic wrap and then in foil for up to 3 months. Thaw in the fridge before assembling with cream and peaches.
Reheating: If stored in the fridge, enjoy at room temperature or briefly warm in the microwave for 10-15 seconds for a delightful, melty experience.
Assembling Later: For ultimate freshness, assemble the Peaches and Cream Layer Cake on the day you plan to serve it, especially if using whipped cream, which is best right after preparation.
Peaches and Cream Layer Cake Variations
Feel free to get creative with your Peaches and Cream Layer Cake by trying out these delightful variations!
-
Berry Bliss: Replace fresh peaches with strawberries or blueberries for a colorful twist. Each berry brings a unique burst of sweetness that’s simply irresistible.
-
Citrus Kick: Add a layer of lemon curd between the cream and fruit for a refreshing zing. The tangy lemon perfectly complements the sweetness of the peaches, creating a balanced flavor profile.
-
Almond Essence: Swap out the vanilla bean paste in the whipped cream for almond extract. This will give your cake a warm, nutty undertone that adds depth to each slice.
-
Cream Cheese Swirl: Incorporate a cream cheese layer for a richer filling. Simply mix softened cream cheese with a bit of powdered sugar and vanilla before layering it in with the peaches.
-
Spiced Up: Add a pinch of cinnamon or nutmeg to the cake batter for a cozy, spiced flavor. This subtle warmth beautifully enhances the sweetness of the peaches.
-
Nutty Crunch: Toss in some chopped nuts like pecans or almonds between the layers for an added crunchy texture. It’s a delightful contrast to the soft sponge and creamy filling.
-
Chocolate Drizzle: For the chocolate lovers, drizzle some melted chocolate over the finished cake. It not only adds a decadent flair but also creates a beautiful presentation.
-
Tropical Twist: Use ripe mango slices instead of peaches for a tropical spin. Paired with coconut whipped cream, this variation transports you to a sunny paradise with every bite.
Don’t hesitate to explore these ideas or mix and match them—after all, the joy of baking is all about personal touches! And if you enjoy creative desserts, you might also love our Strawberry Shortcake Whipped or a fun twist on classic flavors like Honey Pepper Cheese. Enjoy your baking adventure!
Make Ahead Options
This Peaches and Cream Layer Cake is perfect for busy home cooks looking to save time without sacrificing flavor! You can prepare the cake layers up to 3 days in advance; simply bake, cool, and wrap them tightly in plastic wrap before refrigerating. The peach filling can also be prepped 24 hours ahead; just slice the peaches, coat them in sugar, and let them sit to draw out juices. When you’re ready to serve, whip the cream fresh for the best texture. Assemble the cake with peach syrup, fresh peaches, and whipped cream just before your gathering for a magnificent dessert that tastes just as delightful!
What to Serve with Peaches and Cream Layer Cake
This delightful cake is perfect for brightening up any gathering, pairing beautifully with a variety of sides that enhance its fruity elegance.
-
Fresh Fruit Salad: A colorful mix of seasonal fruits provides a refreshing balance to the sweet cake, adding a burst of flavor to each bite.
-
Ice Cream: Creamy vanilla or peach ice cream creates a luxurious contrast, melting slowly into the cake for a decadent dessert experience.
-
Chilled Lemonade: The zesty brightness of homemade lemonade cuts through the richness, quenching your thirst while complementing the dessert’s fruity notes.
-
Whipped Cream: Extra whipped cream on the side allows guests to indulge further, enhancing the airy texture of each slice.
-
Minty Infused Water: Refreshing and light, mint-infused water serves as a palate cleanser, beautifully balancing the sweetness of the Peaches and Cream Layer Cake.
-
Almond Biscotti: Crunchy, nutty biscotti add a delightful texture contrast, making for a satisfying nests of flavors when enjoyed together.
Pair any of these delightful choices with your Peaches and Cream Layer Cake for an unforgettable summer spread!
Peaches and Cream Layer Cake Recipe FAQs
How do I select ripe peaches for this cake?
Absolutely! Choose peaches that are slightly soft to the touch but not overly mushy. Look for peaches with a sweet aroma, bright color, and no dark spots or blemishes. If they are not quite ripe, place them in a paper bag at room temperature for a day or two until they yield slightly to pressure.
What is the best way to store leftovers?
Very! Store any leftover Peaches and Cream Layer Cake in an airtight container in the refrigerator for up to 2 days. I recommend covering it tightly with plastic wrap to keep the cake moist and the whipped cream fluffy. Enjoy it chilled for a refreshing dessert!
Can I freeze the cake? What’s the best method?
Absolutely! To freeze your Peaches and Cream Layer Cake, I suggest freezing the unfrosted cake layers first. Wrap them very tightly in plastic wrap, then in aluminum foil, and place them in the freezer for up to 3 months. When you’re ready to enjoy, thaw the layers in the fridge overnight before assembling with whipped cream and peaches.
What should I do if my whipped cream doesn’t thicken?
Don’t worry! If your whipped cream isn’t reaching stiff peaks, it may be due to the cream being too warm or not cold enough. To fix this, chill your mixing bowl and beaters in the freezer for about 10 minutes before whipping. If that doesn’t work, try adding a tablespoon of powdered sugar and re-whipping; the sugar can help stabilize the cream.
Are there any dietary concerns with this cake for allergy sufferers?
Very! The Peaches and Cream Layer Cake contains common allergens like eggs, dairy, and wheat. For those with gluten allergies, consider using a gluten-free cake flour substitute. If you’re making it for someone with a dairy allergy, you can try using a dairy-free whipped topping and a non-dairy milk alternative instead—always check the labels to ensure they meet specific dietary needs!
Can I make the cake layers in advance?
Absolutely! You can prepare the cake layers ahead of time. Bake them, then let them cool completely. Wrap each layer tightly in plastic wrap and store them in the refrigerator for up to 2 days or freeze them for up to 3 months. This makes assembly quick and easy when you’re ready to serve your Peaches and Cream Layer Cake!
Irresistibly Moist Peaches and Cream Layer Cake Recipe
Ingredients
Equipment
Method
- Preheat your oven to 350°F (175°C) and prepare three 6-inch round cake pans by greasing them and lining with parchment paper.
- In a large mixing bowl, cream the softened unsalted butter and granulated sugar until light and fluffy, about 3-5 minutes.
- Add the eggs one at a time, mixing well after each addition, followed by the vanilla bean paste.
- Mix in the buttermilk until fully combined.
- Sift together the cake flour, baking powder, baking soda, and salt; add to the wet mix and fold gently.
- Divide batter among the prepared pans and bake for 35-38 minutes until a toothpick comes out clean.
- Cool in the pans for 5 minutes, then transfer to a wire rack to cool completely.
- While cooling, slice peaches and toss them with sugar; set aside for 10-15 minutes.
- In a chilled bowl, whip the heavy cream until thickened; add powdered sugar and vanilla, and whip until stiff peaks form.
- Assemble the cake by trimming tops of layers, then layering peach syrup, peaches, and whipped cream between each layer.
- Finish with whipped cream on the top and sides, topping with peach slices and any leftover syrup.
- Serve chilled for a refreshing treat.
Leave a Reply