
As I arranged my kitchen into a mini haunted house, the thought of a festive snack danced in my mind. Enter the Spooky Meaty Mummies Charcuterie Board—a Halloween masterpiece that marries fun and flavor in one hearty treat! Perfect for both kids and adults, this easy and visually striking recipe transforms your ordinary charcuterie into an event centerpiece brimming with edible charm. Not only will it bring smiles to your Halloween gathering, but it’s also a quick dish to whip up, leaving you more time to mingle. With a delightful mix of meats, cheeses, and playful candy eyes, this charcuterie board is ready to steal the show. So, are you ready to unwrap the secrets to this spooky delight?
Why is this Meaty Mummies Board a Must-Try?
Playful Presentation: The Meaty Mummies Charcuterie Board transforms ordinary snacks into a festive centerpiece that delights all ages.
Quick to Assemble: With minimal prep time, you can whip up this treat in no time, making it perfect for last-minute gatherings or Halloween parties.
Crowd-Pleasing Flavors: The combination of savory meats and creamy cheese creates a flavor explosion that will impress your guests, whether they’re kids or adults.
Versatile Options: Customize your board by swapping in different cheeses or dips—a great way to suit any palate! Plus, try adding seasonal veggies for an extra festive touch.
Memorable Experience: Not only does it taste amazing, but the fun presentation adds an interactive element to your celebration. Just wait for the giggles when everyone sees the candy eyes!
Meaty Mummies Charcuterie Board Ingredients
For the Mummies
- Frigo® Cheese Heads® String Cheese – Cut into strips to create spooky mummy bandages that add creaminess.
- Assorted Meats (e.g., salami, prosciutto) – These hearty meats offer a salty contrast and structure that make the mummies distinctive.
- Candy Eyes – Essential for adding personality to your mummies; any variety will add fun!
For the Dipping Sauce
- Dipping Sauce (green dip) – A vibrant, spooky green dip adds an exciting contrast; craft it using cream cheese mixed with food coloring for the perfect Halloween hue.
Step‑by‑Step Instructions for Meaty Mummies Charcuterie Board
Step 1: Preheat the Oven
Start by preheating your oven to a low broil setting to ensure the perfect melt without overdoing it. This usually takes around 10 minutes, and you’ll know it’s ready when the indicator lights up. As the oven warms, gather your non-stick baking sheet and other ingredients to streamline the process.
Step 2: Prepare the Cheese and Meat
Remove the packaging from the Frigo® Cheese Heads® String Cheese and assorted meats like salami and prosciutto. Carefully slice the string cheese into thin strips lengthwise, aiming for a uniform thickness to facilitate even melting. Lay out the meats on your baking sheet, ensuring they’re slightly overlapping for stability.
Step 3: Assemble the Mummies
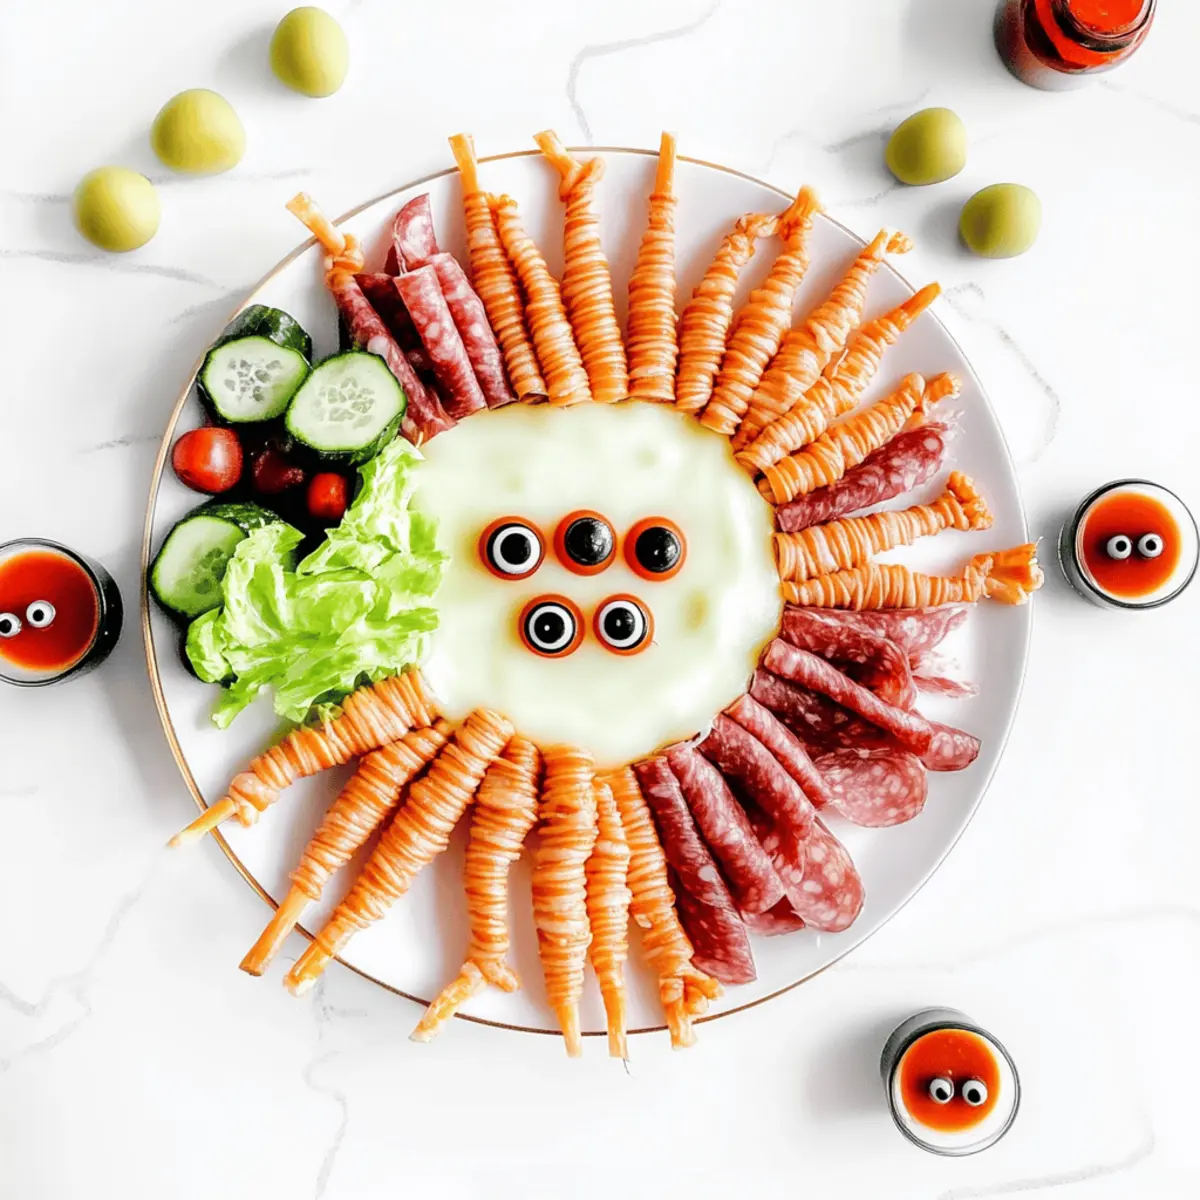
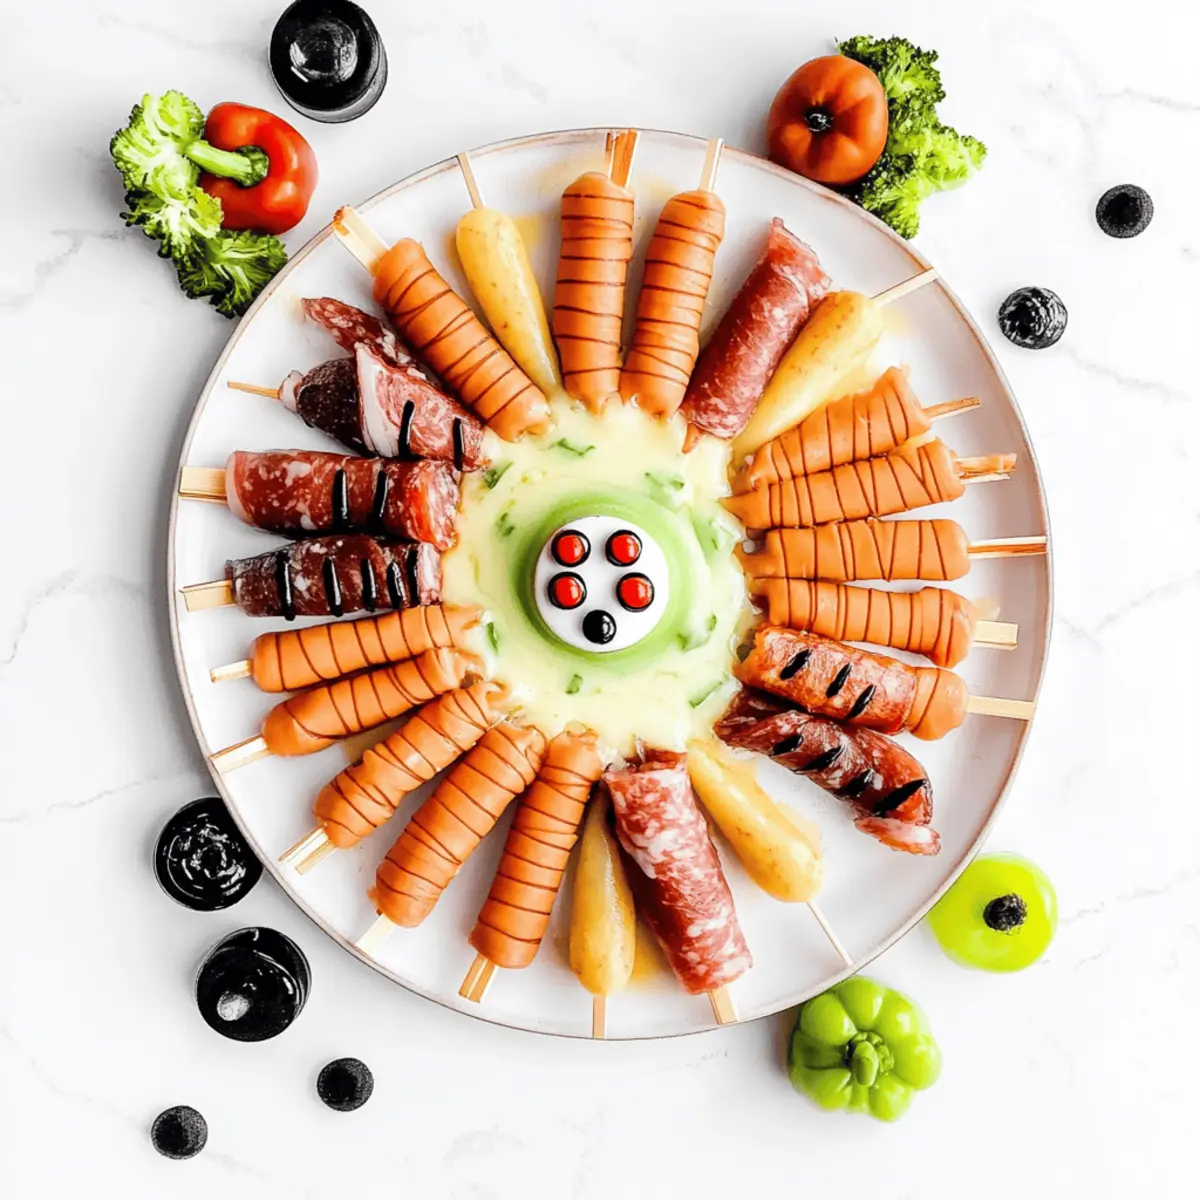
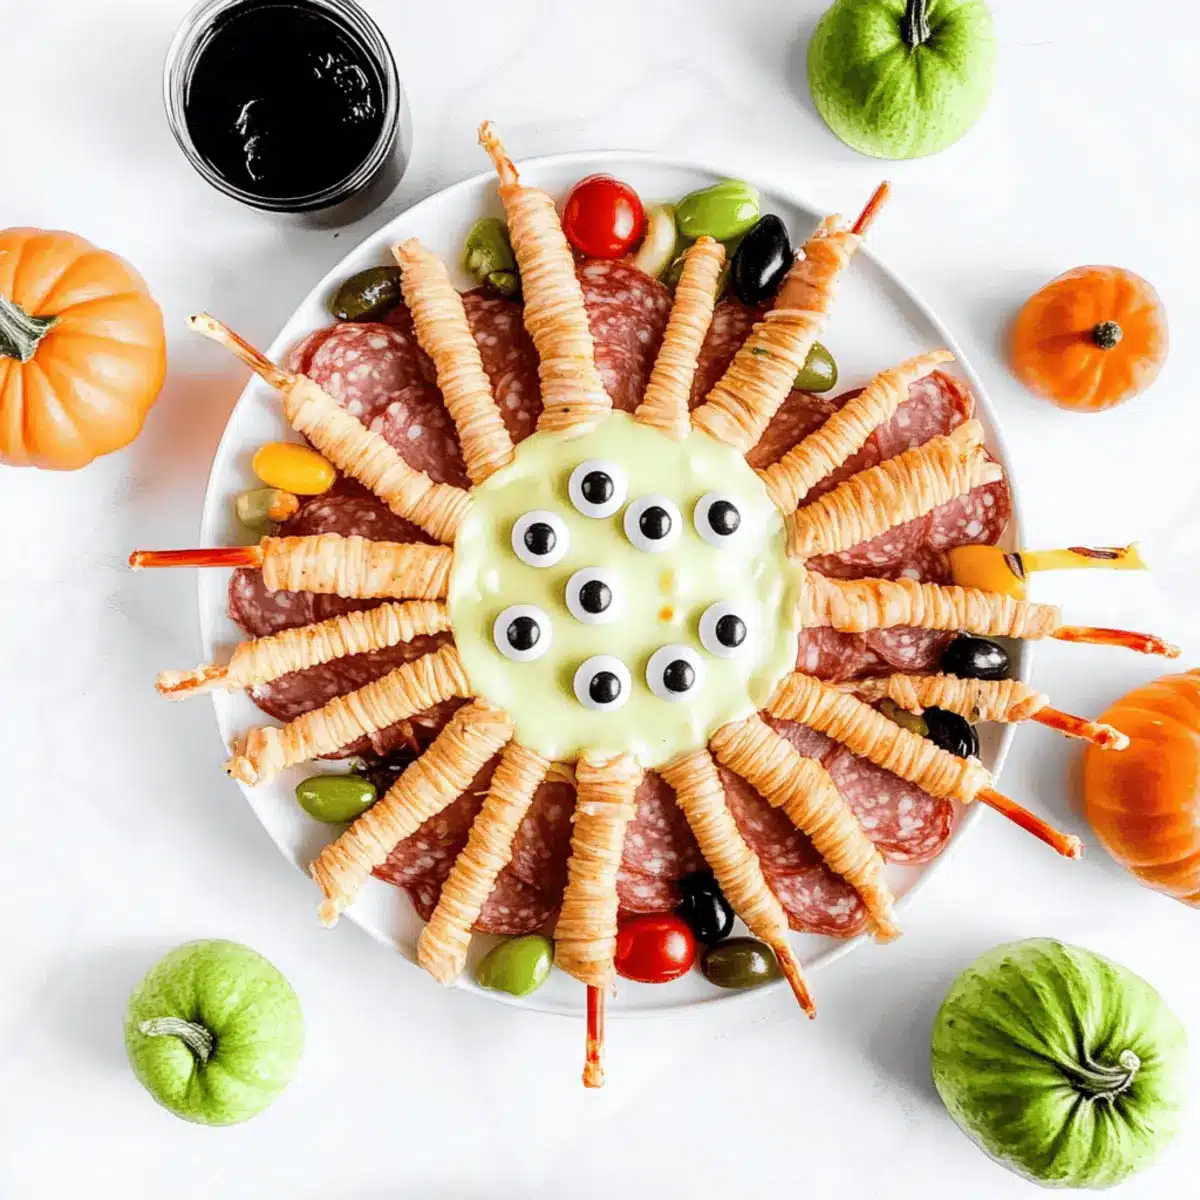
Now, take your cheese strips and place them over the assorted meats, mimicking mummy bandages. Aim for a crisscross pattern, allowing some meat to peek through for added contrast. The visual effect will be delightful as you create your Meaty Mummies Charcuterie Board, making it perfect for Halloween festivities.
Step 4: Broil the Mummies
Once assembled, place the baking sheet in the preheated oven. Broil for about 1 minute, keeping a close watch to prevent the cheese from sliding off or burning. The goal is to achieve a slight melt and a golden hue without losing the shapes you’ve crafted—the perfect mix of spooky and scrumptious.
Step 5: Cool and Decorate
After broiling, carefully remove the baking sheet from the oven and let your mummies cool for a minute. This step is essential to prevent the candy eyes from melting. Once slightly cooled, add candy eyes to your mummies using a dab of your green dip as “glue” for extra fun and flair.
Step 6: Prepare the Green Dip
In a mixing bowl, create your spooky green dip by combining cream cheese with a few drops of green food coloring. Stir until you achieve a vibrant shade that excites the senses. This lively dip pairs beautifully with the mummies, adding an engaging visual contrast that will impress your guests.
Step 7: Present the Charcuterie Board
To finish, arrange your Meaty Mummies Charcuterie Board on a festive platter, making sure to artfully display the mummies alongside the green dip. Feel free to enhance the presentation with seasonal veggies or decorative elements. Your spooky charcuterie creation is now ready to inspire smiles and laughter at the Halloween gathering!
Meaty Mummies Charcuterie Board Variations
Feel free to unleash your creativity and customize your spooky creation with these fun twists!
-
Cheese Swap: Opt for gouda or sharp cheddar for a rich and festive flavor. The sharpness adds extra depth that pairs beautifully with the savory meats.
-
Flavorful Dips: Try using ranch or hummus instead of the green dip. These flavorful options can offer a delightful contrast to the mummies’ cheesy goodness, making the experience even more exciting.
-
Seasonal Veggies: Add some bell pepper strips or carrot sticks to your board. They not only bring vibrant colors but also provide a crunchy texture perfect for dipping.
-
Spicy Twist: If you enjoy heat, consider using spicy meats like chorizo or adding a sprinkle of crushed red pepper to your dip. This way, you can craft a hauntingly delicious experience for the bold taste buds at your gathering.
-
Extra Garnish: Incorporate mini sweet peppers or black olives as playful accents. They can resemble pumpkins or other Halloween-themed treats, enhancing both the presentation and flavor variety.
-
Sweet Finish: For a fun surprise, include some chocolate-covered pretzels on your board. The sweet and salty combination creates a delightful blend that will keep everyone reaching for more!
-
Kid-Friendly Options: For younger guests, consider using dairy-free cheese to cater to different dietary needs. This ensures that everyone can enjoy your spooky snack without feeling left out.
-
Creative Presentation: Use a skull-shaped platter or bat-themed serving tray to really amp up the festive spirit. The right presentation can create a memorable experience to go along with your flavor delights!
Remember, each variation can spark joy and conversation during your Halloween festivities! For more ideas on assembling the perfect festive platter, check out our guide on making entertaining easy and fun with charcuterie board tips.
Helpful Tricks for Meaty Mummies Charcuterie Board
-
Broiling Watch: Keep a vigilant eye while broiling to prevent the cheese from over-melting and sliding off the meat.
-
Cool Before Eyes: Let the mummies cool slightly after broiling; this prevents the candy eyes from melting into a gooey mess.
-
Cheese Variations: Don’t hesitate to swap Frigo® Cheese Heads® String Cheese for other kid-friendly options like Gouda or cheddar for a flavor twist!
-
Dip Color: Adjust the amount of food coloring in the dip to achieve a darker or lighter green based on your spooky theme.
-
Stability Matters: Ensure that the meats slightly overlap on the baking sheet; this offers better structure for your mummies, keeping them intact.
-
DIY Extras: Enhance your Meaty Mummies Charcuterie Board by adding festive veggies or olives for a colorful and fun presentation!
What to Serve with Spooky Meaty Mummies Charcuterie Board?
Complement your Halloween gathering with a selection of delightful bites that will enchant guests of all ages.
-
Crispy Veggie Sticks: Add a refreshing crunch with carrots and celery sticks! They offer a great, vibrant contrast that pairs perfectly with the creamy dip.
-
Haunted Apple Slices: Slice apples and toss them in lemon juice to prevent browning. These sweet, tangy wedges appeal to both kids and adults, bringing seasonal fruit fun to the table.
-
Chilling Grape Bats: Use black grapes as bite-sized bat snacks. Their juicy sweetness balances the savory flavors of the mummies, making them a whimsical addition to your spread.
-
Witch’s Brew Punch: Whip up a fun green drink using lime soda and a splash of fruit juice! This bubbly concoction sets a lively mood and completes your festive theme beautifully.
-
Mini Pumpkin-shaped Cheese Balls: Create small cheese balls, roll them in orange cheese powder, and stick a pretzel as the stem. These cheesy pumpkins perfectly accompany the meats and bring an extra Halloween touch!
-
Monster Marshmallow Pops: Dip marshmallows in melted chocolate and decorate them with candy eyes. These cute treats add an element of surprise and sweetness, delightful for all ages.
-
Savory Spinach Dip: Serve alongside tortilla chips or bread. This creamy dip boosts the flavors of your board while enticing guests with its vibrant color.
-
Pumpkin Spice Brownies: End the meal on a sweet note with these pumpkin-flavored treats—rich and fudgy, they are sure to be adored by your family and friends!
Make Ahead Options
These Spooky Meaty Mummies Charcuterie Board components are perfect for meal prep, making your Halloween gathering effortless! You can assemble the mummies (without the candy eyes) up to 24 hours in advance, simply placing them on a non-stick baking sheet and covering them with plastic wrap to refrigerate. As they chill, the flavors meld beautifully, ensuring they remain just as delicious. When it’s time to serve, broil them for about 1 minute until the cheese is perfectly melted, then add the candy eyes for an exciting finishing touch. This streamlined approach will save you time on party day, allowing you to enjoy the festivities instead!
How to Store and Freeze Meaty Mummies Charcuterie Board
-
Fridge: Store assembled mummies in an airtight container for up to 3 days. When ready to serve, simply reheat gently in the oven to preserve textures.
-
Freezer: Avoid freezing once assembled, as the cheese and meats may not retain their quality. However, you can freeze leftover cooked mummies for up to 1 month; thaw in the fridge before reheating.
-
Reheating: Reheat the mummies in the oven at 300°F for about 5 minutes, ensuring they warm through without losing their fun shape or melting away.
-
Dip Storage: Keep the green dip in a sealed container in the fridge. It’s best enjoyed fresh, but will last for up to 5 days.

Meaty Mummies Charcuterie Board Recipe FAQs
How do I choose the best Frigo® Cheese Heads® String Cheese?
Absolutely! Select cheese that is firm and without dark spots. The best string cheese should have a smooth texture and a fresh appearance. Check the expiration date to ensure maximum freshness for your Meaty Mummies Charcuterie Board.
How should I store my assembled Meaty Mummies?
For optimal freshness, store your assembled mummies in an airtight container in the refrigerator. They will stay delicious for up to 3 days. When you’re ready to serve, simply reheat them gently in the oven to restore their delightful texture.
Can I freeze the meaty mummies?
While it’s best not to freeze the assembled mummies, you can freeze any leftovers for up to 1 month. Simply lay them in a single layer on a baking sheet to freeze first, then transfer them to a freezer-safe bag. Thaw in the refrigerator overnight before reheating.
What should I do if my cheese slides off during broiling?
No worries if that happens! If your cheese starts to slide off, simply remove them from the oven immediately to prevent burning. Allow them to cool for a moment, then try subtly reshaping them and re-broil for a few seconds. Keeping an eye on the oven is key!
Is this recipe safe for individuals with dairy allergies?
Oh, it’s good to be cautious! This recipe contains dairy ingredients, so if you’re preparing it for someone with a dairy allergy, I recommend substituting the cheese with dairy-free cheese options and using a dairy-free dip alternative.
Can I customize the dips used with the mummies?
Very much so! Feel free to get creative with your dips. While the spooky green dip adds fun, other options like hummus, ranch, or guacamole can make an easy and delicious alternative. Don’t hesitate to mix and match to suit your guests’ preferences or dietary needs!
Irresistible Meaty Mummies Charcuterie Board for Halloween Fun
Ingredients
Equipment
Method
- Preheat your oven to a low broil setting, approximately 10 minutes.
- Remove the packaging from the string cheese and assorted meats. Slice the string cheese into thin strips lengthwise.
- Lay out the meats on the baking sheet, overlapping slightly for stability.
- Place the cheese strips over the meats, mimicking mummy bandages.
- Broil in the oven for about 1 minute until the cheese is slightly melted and golden.
- Let the mummies cool for a minute, then add candy eyes using a dab of green dip as glue.
- Mix cream cheese with green food coloring to create the dipping sauce.
- Arrange the charcuterie board on a platter, displaying the mummies and green dip.
Leave a Reply