
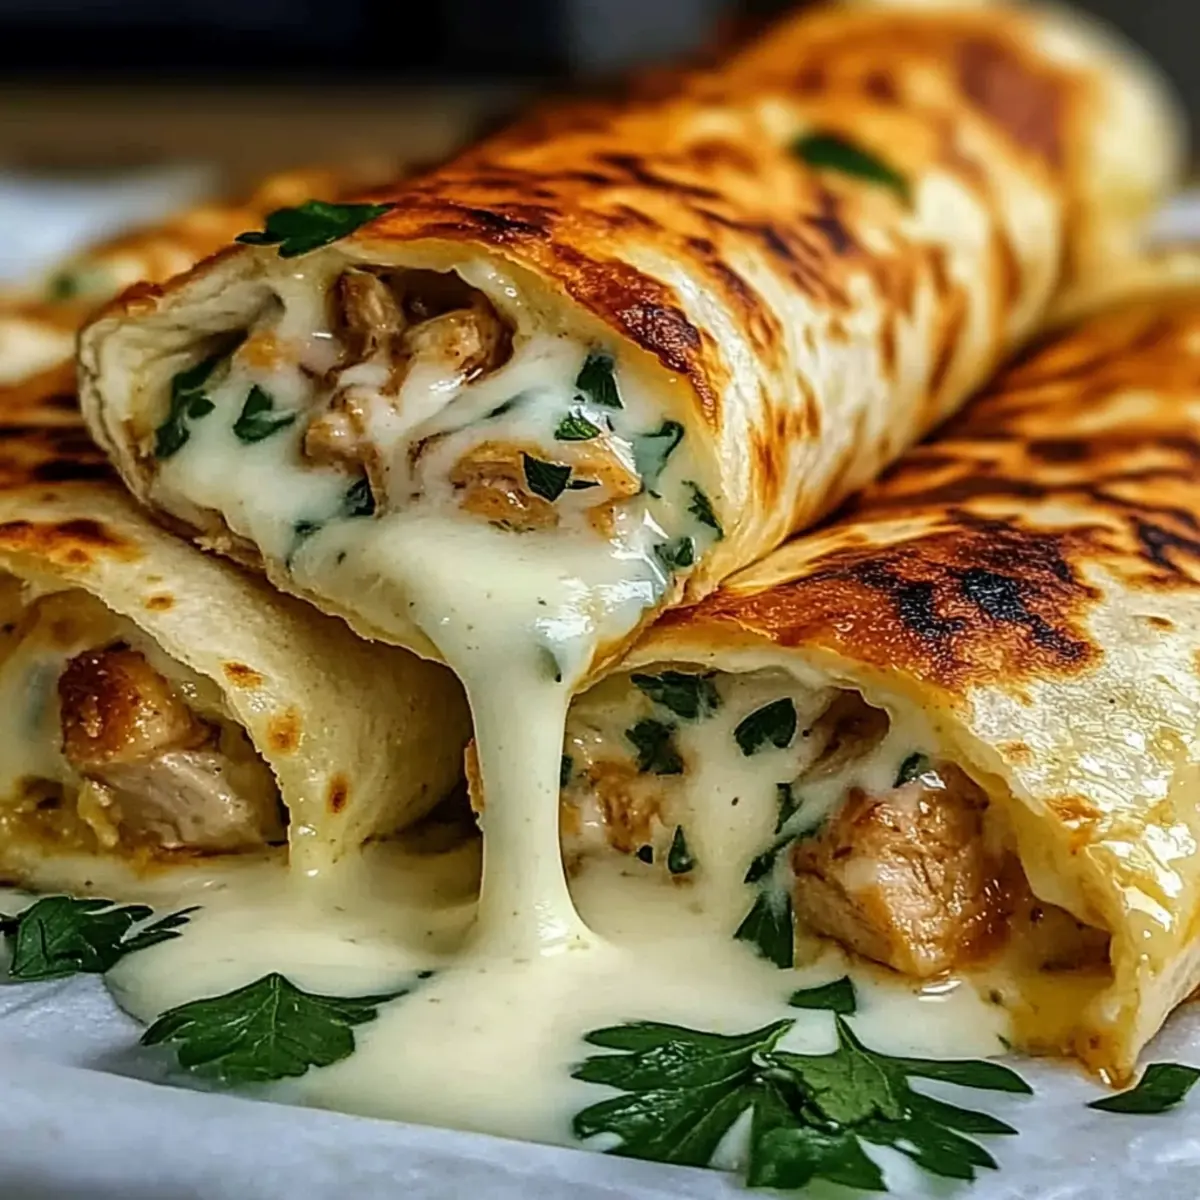
The sizzle of garlic hitting a hot skillet is music to my ears. This tantalizing sound signals that something delicious is on the way, and today it’s all about my Low Carb Cheesy Garlic Chicken Wraps. In just 20 minutes, you can whip up this satisfying, high-protein dish that’s perfect for those busy weeknights or casual weekends. With a crispy exterior enveloping cream cheese, grilled chicken, and melted cheeses, these wraps offer the comfort of traditional takeout without the carb overload. Plus, they’re keto-friendly, making them a great option for anyone keen on maintaining a lower-carb lifestyle. Are you ready to elevate your dinner routine and indulge in these cheesy delights without the guilt? Let’s dive in!
Why Are These Wraps Irresistible?
Simplicity: These Low Carb Cheesy Garlic Chicken Wraps are a breeze to make, taking just 20 minutes from preparation to plate. Perfect for weeknight cooking!
Flavor Explosion: With a delightful blend of garlic, creamy cheese, and moist chicken, each bite is bursting with satisfying flavors that you’ll crave time and again.
Versatile: Customize these wraps to your liking; swap out chicken for turkey or add toppings like crumbled bacon for an extra layer of deliciousness.
Guilt-Free Indulgence: Enjoy the comfort of your favorite takeout knowing that these wraps are low carb and high protein, keeping those cravings in check without a carb crash.
Crowd-Pleaser: Whether it’s dinner with friends or a casual family meal, these wraps are sure to impress everyone at the table. Pair them with a refreshing arugula salad for a complete meal!
Try these delights in combination with our other cozy options like Cheesy Garlic Bread for an unforgettable experience.
Low Carb Cheesy Garlic Chicken Wraps Ingredients
For the Filling
• Cooked Chicken Breast – Adds essential protein and substance; rotisserie chicken enhances flavor and saves time.
• Shredded Mozzarella Cheese – Melts beautifully for a gooey texture that brings the wraps together.
• Shredded Cheddar Cheese – Provides a sharp flavor that complements the other ingredients beautifully.
• Minced Garlic – Infuses the wraps with an aromatic flavor that’s hard to resist.
• Cream Cheese – Creates a rich, creamy filling that binds the other ingredients together; soften for easier mixing.
• Fresh Parsley – Adds a bright, fresh touch to enhance flavor.
For Cooking
• Olive Oil – Used for cooking the wraps, contributing to that desired crispy exterior.
• Salt and Pepper – Essential seasonings that enhance the overall taste of the wraps.
For the Wraps
• Low-Carb Tortillas – The sturdy base that holds the cheesy filling; brands like Mission Carb Balance work well.
• Baby Spinach (optional) – Boosts nutritional content without adding extra carbs.
Grab these delightful ingredients, and you’ll be well on your way to creating these scrumptious Low Carb Cheesy Garlic Chicken Wraps! Enjoy the love and warmth of homemade food with a modern twist!
Step‑by‑Step Instructions for Low Carb Cheesy Garlic Chicken Wraps
Step 1: Preheat Your Skillet
Begin by preheating a skillet or grill pan over medium heat. Pour a tablespoon of olive oil into the pan, allowing it to heat up until shimmering. This will ensure a beautifully crispy finish on your Low Carb Cheesy Garlic Chicken Wraps.
Step 2: Prepare the Tortillas
While the skillet heats, take your low-carb tortillas and place them on a microwave-safe plate. Cover them with a damp paper towel and warm them in the microwave for 10-15 seconds. This step softens the tortillas, making them easier to roll without cracking.
Step 3: Create the Filling
In a mixing bowl, combine the cooked shredded chicken, shredded mozzarella, shredded cheddar, softened cream cheese, minced garlic, and chopped parsley. Season the mixture with salt and pepper to taste. Mix well until all ingredients are fully combined and creamy, creating a flavorful filling for your wraps.
Step 4: Assemble the Wraps
Lay a warmed tortilla flat on a clean surface. Evenly distribute about 1/2 cup of the cheesy chicken mixture in the center of each tortilla. Roll the tortilla tightly from one edge to the other, tucking in the sides as you go, to seal in all that scrumptious filling.
Step 5: Cook the Wraps
Carefully place the assembled wraps seam-side down in the preheated skillet. Cook for 2-3 minutes on each side, watching for a golden brown color to develop on the outside. This ensures that the cheese inside melts beautifully and oozes out just a bit for that irresistible touch in your Low Carb Cheesy Garlic Chicken Wraps.
Step 6: Slice and Serve
Once the wraps are crispy and golden, remove them from the skillet. Let them cool for a moment before slicing each wrap diagonally for easy serving. Serve immediately to enjoy the melty goodness, accompanied by your favorite dipping sauce or salad for a complete meal!
Low Carb Cheesy Garlic Chicken Wraps Variations
Feel free to get creative with your wraps and make them uniquely yours with these delicious twists!
-
Turkey Swap: Substitute leftover turkey for chicken; the flavor remains delightful and perfect for post-holiday meals.
-
Bacon Boost: Add crumbled bacon for a smoky twist that melds perfectly with the cheesy goodness inside.
-
Different Cheeses: Experiment with pepper jack for a spicy kick or gouda for an extra layer of richness. Each cheese brings its own personality!
-
Veggie-Loaded: Mix in finely chopped bell peppers or mushrooms to add texture and colorful nutrition to your wraps.
-
Herbaceous Finish: Swap out parsley for fresh basil or cilantro to infuse an entirely new flavor profile. These fresh herbs brighten the dish!
-
Spicy Touch: Add a teaspoon of red pepper flakes to the filling for a warmth that kicks up the flavor without overwhelming the dish.
-
Crunch Factor: Toss in some sliced jalapeños for a satisfying crunch and an added spicy punch. It’s a great way to keep things exciting!
-
Saucy Addition: Drizzle with a homemade chimichurri or spicy garlic sauce before wrapping to add moisture and a zesty finish.
For more recipes that complement your new favorite wraps, try pairing them with our delicious Garlic Chicken Gnocchi or indulge in Cheesy Chicken Crescent for a comforting meal full of flavors. Enjoy your meal adventure!
Make Ahead Options
These Low Carb Cheesy Garlic Chicken Wraps are perfect for busy home cooks looking to save time during the week! You can prepare the filling (chicken, cheeses, garlic, and seasonings) and refrigerate it for up to 3 days. Just keep it covered in an airtight container to maintain freshness. When you’re ready to enjoy your wraps, simply heat the tortillas for a few seconds in the microwave, fill them with the prepped mixture, and then cook as instructed. This way, you can have delicious, satisfying meals ready with minimal effort on those hectic weeknights, ensuring your family enjoys the same cheesy goodness without the hassle of last-minute prep!
Storage Tips for Low Carb Cheesy Garlic Chicken Wraps
-
Fridge: Store leftovers in an airtight container for up to 2 days. To prevent sticking, layer each wrap with parchment paper before sealing.
-
Freezer: These wraps can also be frozen for up to 2 months. Place them in a freezer-safe bag or container to keep them fresh.
-
Reheating: For the best texture, reheat in the oven at 350°F (175°C) for 10-15 minutes until they are crispy and warmed through. Avoid microwaving, as this can make them soggy.
-
Room Temperature: Enjoy these Low Carb Cheesy Garlic Chicken Wraps immediately after cooking for the best flavor and texture. Don’t let them sit out for more than 2 hours!
Expert Tips for Low Carb Cheesy Garlic Chicken Wraps
- Avoid Overfilling: Keep your filling to about 1/2 cup per tortilla to prevent splitting and ensure easy rolling.
- Shred Your Cheese: Use block cheese and shred it yourself instead of pre-shredded for better melting qualities in your wraps.
- Toast for Texture: Always cook your wraps until golden brown for a crispy exterior that enhances the overall experience of your Low Carb Cheesy Garlic Chicken Wraps.
- Watch the Heat: If your wraps brown too quickly, lower the heat to medium-low; this allows the filling to warm through without burning the outside.
- Make It Ahead: For meal prep, assemble your wraps and store them uncooked in the fridge, then simply pan-fry when you’re ready to enjoy!
What to Serve with Low Carb Cheesy Garlic Chicken Wraps
Elevate your meal with delightful pairings that harmonize with the rich flavor and crispy texture of these delicious wraps.
-
Simple Arugula Salad: A light and peppery salad that adds freshness, cutting through the richness of the cheese and garlic.
-
Roasted Vegetables: Seasonal vegetables roasted to perfection bring earthy flavors and a satisfying crunch, complementing the wraps beautifully.
-
Cucumber Tomato Salad: This refreshing, cool combination balances the warmth of the wraps, making for a perfectly harmonious meal.
-
Garlic Butter Green Beans: Tender green beans tossed in garlic butter echo the flavors in the wraps while adding vibrant color to your plate.
-
Creamy Avocado Dip: A luscious avocado dip provides a creamy contrast to the wraps and introduces healthy fats to your meal, enhancing satisfaction.
-
Sparkling Water with Lemon: A bubbly beverage helps cleanse the palate, letting you fully appreciate the rich flavors of the cheesy garlic filling.
-
Cheesy Cauliflower Bake: For a comforting, low-carb side option, cheesy cauliflower melds perfectly with the taste profile of the wraps.
-
Dark Chocolate Square: For a sweet finish, a small piece of dark chocolate offers just the right amount of richness after your savory meal.
Low Carb Cheesy Garlic Chicken Wraps Recipe FAQs
What type of chicken should I use for the filling?
Absolutely! For the best flavor and convenience, I highly recommend using cooked chicken breast, such as rotisserie chicken. It not only saves you time on preparation but also adds an extra depth of flavor to your wraps.
How long can I store leftover wraps in the fridge?
You can keep leftovers in an airtight container in the fridge for up to 2 days. For best results, layer each wrap with parchment paper before sealing the container; this will prevent them from sticking together.
Can I freeze these wraps, and how should I do it?
Very! You can freeze your Low Carb Cheesy Garlic Chicken Wraps for up to 2 months. To do this, place the uncooked, assembled wraps in a single layer on a baking sheet and freeze until solid. Then, transfer them to a freezer-safe bag or container. This method keeps them fresh and ready to pan-fry whenever you crave them!
What should I do if my wraps split when I cook them?
If your wraps split, it’s likely due to overfilling or the tortillas being too cold. To prevent this, keep the filling to about 1/2 cup per tortilla and ensure the tortillas are warm enough to roll easily. If they begin to brown too quickly on the outside, lower the heat to medium-low for a more gentle cooking process.
Are these wraps suitable for people with dietary restrictions, like gluten sensitivity?
Absolutely! These wraps can be gluten-free if you choose suitable low-carb tortillas. Always check the packaging to ensure the brand you select is gluten-free if that’s a concern. Additionally, feel free to adjust the cheese or filling ingredients to accommodate any allergies or dietary preferences!
How do I reheat the wraps for the best texture?
For a perfectly crispy exterior when reheating, place your Low Carb Cheesy Garlic Chicken Wraps in the oven at 350°F (175°C) for about 10-15 minutes. This ensures they’ll warm through nicely without losing that delicious crunch. Avoid microwaving, as that can make them soggy!

Melt-In-Your-Mouth Low Carb Cheesy Garlic Chicken Wraps
Ingredients
Equipment
Method
- Preheat a skillet or grill pan over medium heat, adding olive oil until shimmering.
- Warm low-carb tortillas in the microwave for 10-15 seconds covered with a damp paper towel.
- Combine cooked chicken, mozzarella, cheddar, cream cheese, garlic, and parsley in a mixing bowl; season with salt and pepper.
- Lay a tortilla flat and fill with about 1/2 cup of the cheesy mixture; roll tightly.
- Cook wraps seam-side down in the skillet for 2-3 minutes per side until golden brown.
- Slice each crispy wrap diagonally before serving.
Leave a Reply