
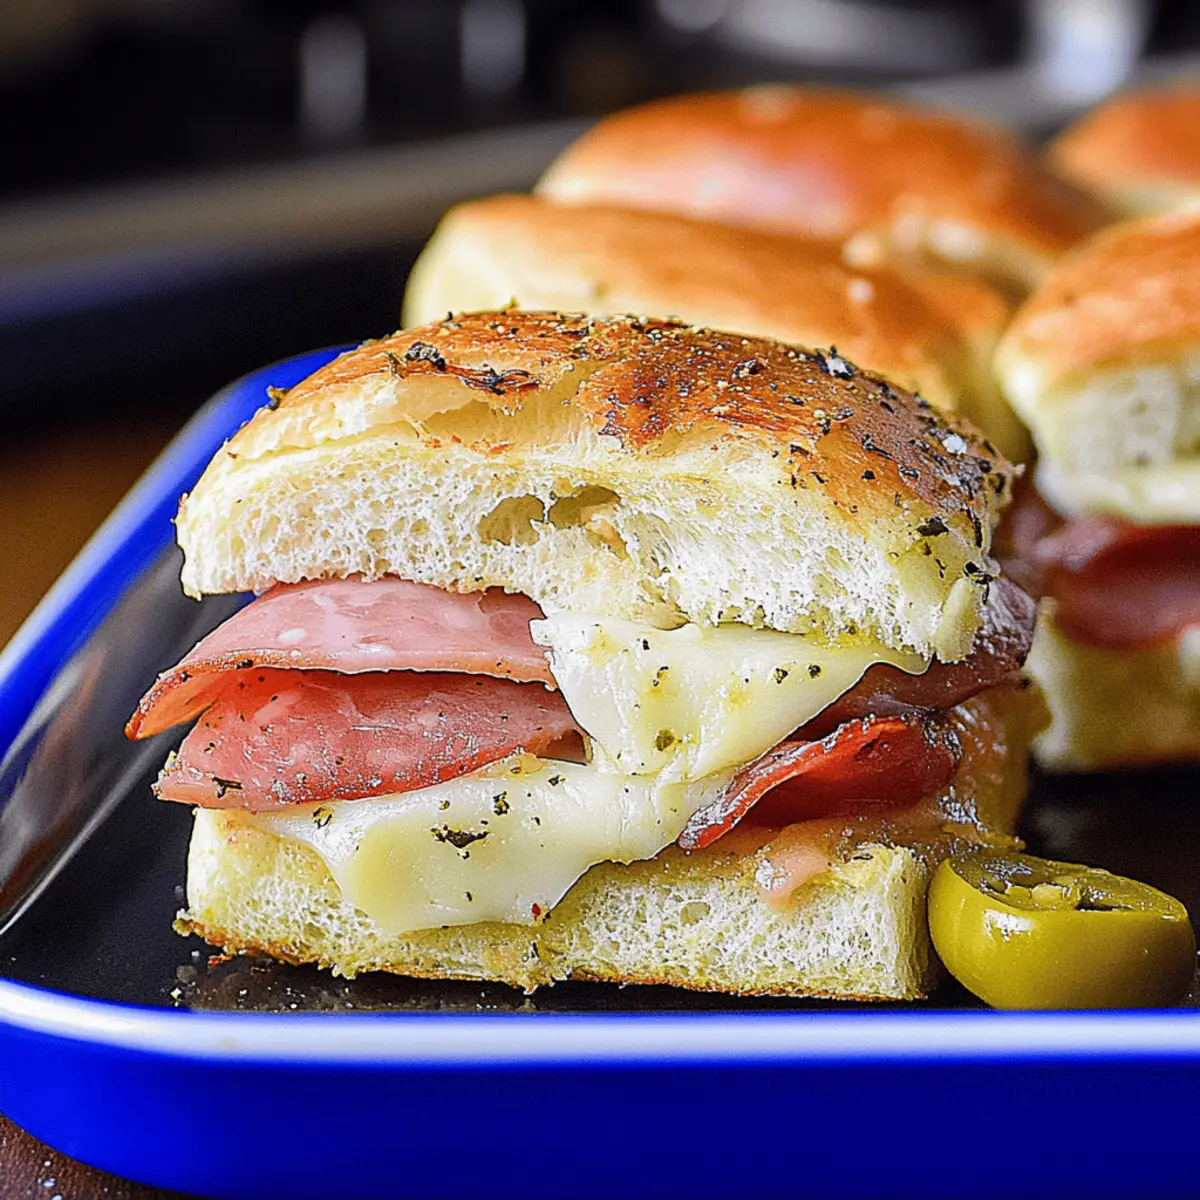
As the air fills with the scent of warm, melted cheese and savory deli meats, it’s hard not to feel a thrill when making these Hot Italian Sub Sliders. These delightful little sandwiches are not only quick to whip up in just 30 minutes, but they also make for the perfect crowd-pleaser at tailgates or casual get-togethers. With their golden, buttery tops and flavor-packed layers, you’ll find them disappearing faster than you can say “cheesy goodness.” Whether you enjoy them solo or dunk them in marinara sauce, I promise you’ll be coming back for seconds. Ready to elevate your next gathering? Let’s dive into creating this irresistible dish!
Why are Hot Italian Sub Sliders a must-try?
Quick and Easy: You can whip up these sliders in just 30 minutes, perfect for busy weeknights or last-minute gatherings.
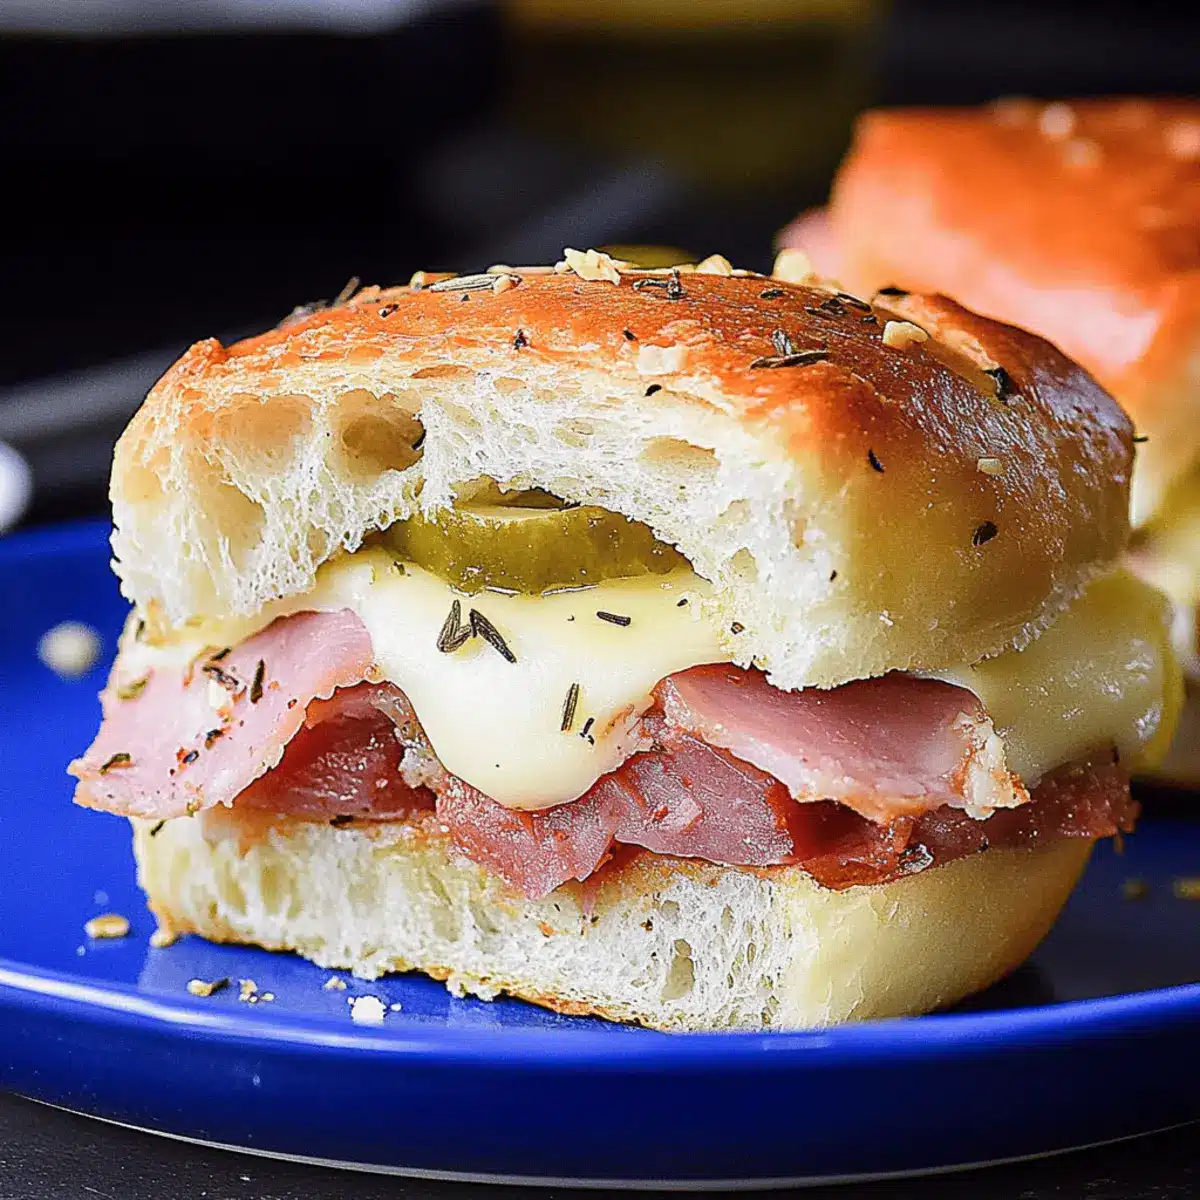
Savory Layers: Each bite is a flavor explosion with a delicious mix of ham, salami, and pepperoni, complemented by gooey provolone cheese.
Crowd-Pleaser: Ideal for tailgates or casual get-togethers, these sliders will impress your friends and family, disappearing in no time!
Customizable Delight: Feel free to experiment with different meats or spice levels, making it adaptable to everyone’s taste—like with a side of Strawberry Swirled Slushies for something refreshing!
Delightful Presentation: Golden brown with a buttery top, they’re as pleasing to the eye as they are to the palate!
Hot Italian Sub Sliders Ingredients
For the Sliders
• Kings Hawaiian Rolls – Sweet, fluffy base crucial for holding all the ingredients; other soft rolls can substitute if needed.
• Ham – Main protein component that adds savory flavor; thinly sliced is preferred for better layering.
• Salami – Adds a rich and spicy depth to the sliders; you may swap for Italian beef for a different flavor.
• Pepperoni – Provides an extra punch of flavor and texture; can be omitted for a milder option.
• Provolone Cheese – Melts beautifully, adding creaminess to each bite; mozzarella works well for those preferring milder cheese.
For the Kick
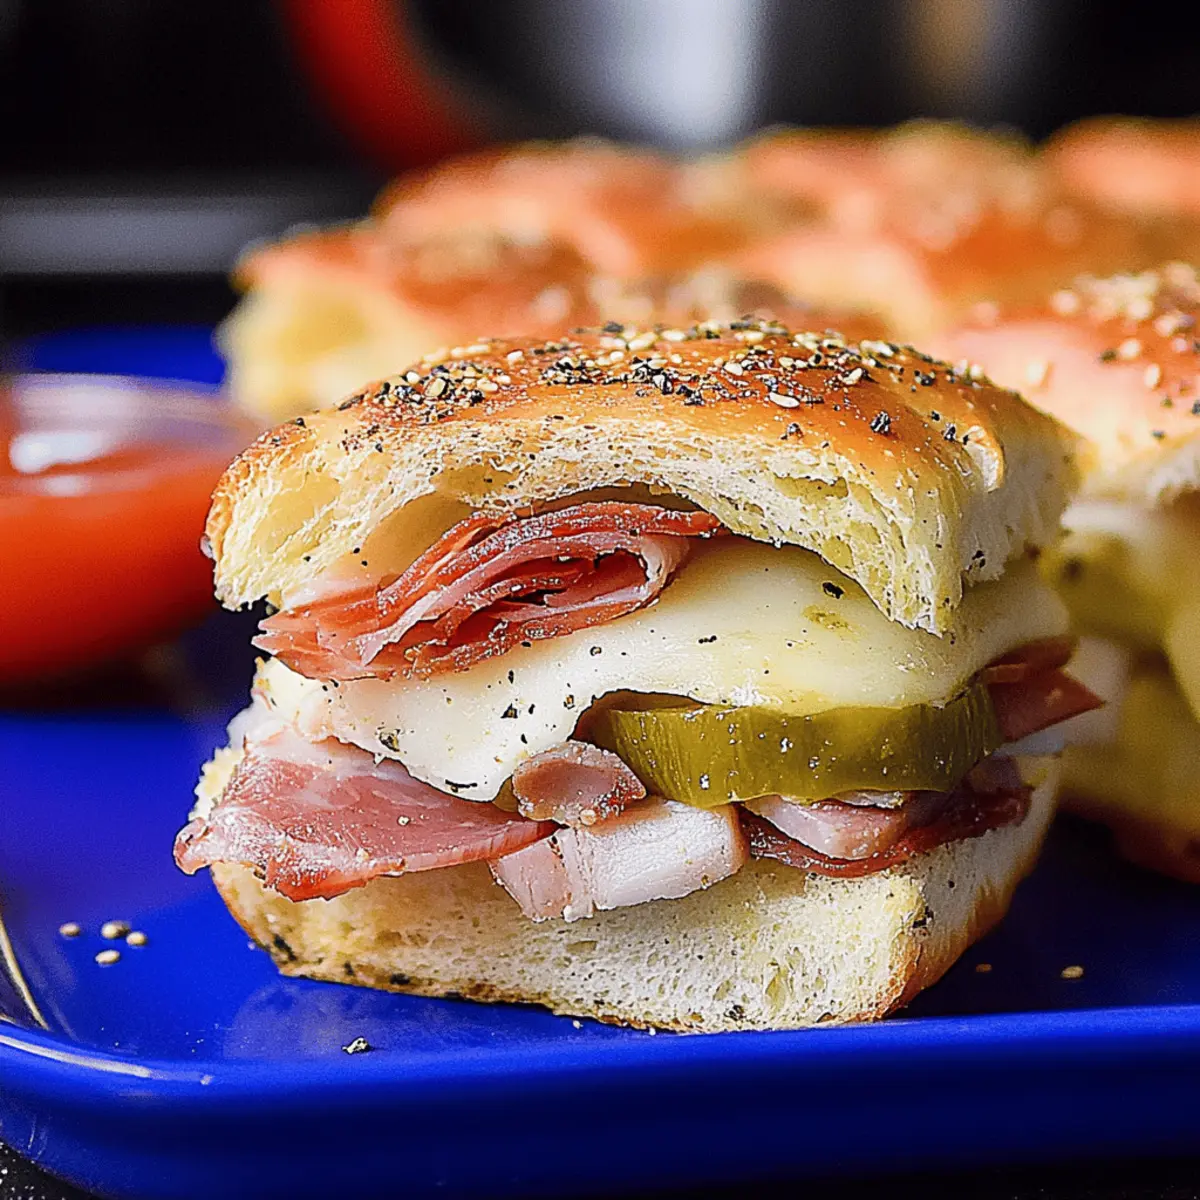
• Pepperoncini – Brings a tangy and slightly spicy kick; jalapeños can be substituted for more heat.
• Pickled Hot Cherry Peppers – Introduces a vibrant spice; roasted red peppers can be used for less heat.
For the Topping
• Salted Butter – Helps achieve a golden brown color and rich flavor; unsalted can be used if preferred.
• Italian Seasoning – Adds a robust herb flavor; no direct substitution, but a blend of oregano, basil, and thyme can work.
• Garlic – Enhances the savory depth; fresh garlic is recommended for the best flavor.
Step‑by‑Step Instructions for Hot Italian Sub Sliders
Step 1: Preheat the Oven
Begin by preheating your oven to 350°F (175°C). This will ensure that when your Hot Italian Sub Sliders are ready to bake, they will achieve that perfect golden-brown exterior. Preheating is key, so allow about 10 minutes for this process before moving on to the next steps.
Step 2: Prepare the Rolls
Next, take a baking sheet and lay the bottom half of your Kings Hawaiian Rolls on it. Ensure they’re placed close together to give a snug fit while baking. These delightful sliders will serve as the base for all the delicious layers to come, so make sure they are evenly aligned for an appealing presentation.
Step 3: Layer the Meats
Now it’s time to build your flavor foundation! Layer on the thinly sliced ham, followed by the spicy salami and pepperoni, distributing them evenly over the rolls. This combination of meats contributes to the savory richness of the Hot Italian Sub Sliders. Press down gently to compress the layers slightly for maximum flavor integration.
Step 4: Add the Cheese
Sprinkle a generous layer of provolone cheese over the meats. The creamy texture of the melted cheese will meld beautifully with the savory components, creating a delightful core. Make sure you cover all the meats so that every bite will be cheesy and luscious when you take a bite later!
Step 5: Incorporate the Peppers
Add sliced pepperoncini and pickled hot cherry peppers on top for that tangy kick. These ingredients provide a refreshing contrast to the richness of the meats and cheese. Spread them evenly across the cheesy layer, ensuring that each slider gets a fair share of that zesty flavor.
Step 6: Cap the Sliders
Carefully place the top halves of the Hawaiian rolls over the completed layers. Align them properly so that the sliders maintain their shape while baking. This step seals in all the flavors and keeps the cheese from oozing out too much during the baking process.
Step 7: Mix the Topping
In a small bowl, combine the melted salted butter, Italian seasoning, and crushed garlic. Stir until well mixed. This seasoned butter will add a beautiful flavor and rich sheen to your sliders, enhancing their appeal and taste as they bake to perfection.
Step 8: Brush the Sliders
Using a pastry brush, generously coat the top of the sliders with the seasoned butter mixture. Ensure every part of the surface is covered, as this will help achieve that mouth-watering golden crust during baking. This step is crucial for the ultimate buttery finish that elevates your Hot Italian Sub Sliders.
Step 9: Bake to Perfection
Cover the sliders loosely with aluminum foil and place them in the preheated oven. Bake for 30 minutes, or until they’re golden brown and the cheese is melted, bubbling with deliciousness. The foil will help keep them moist initially; remove it halfway through the baking for a crispier top.
Step 10: Slice and Serve
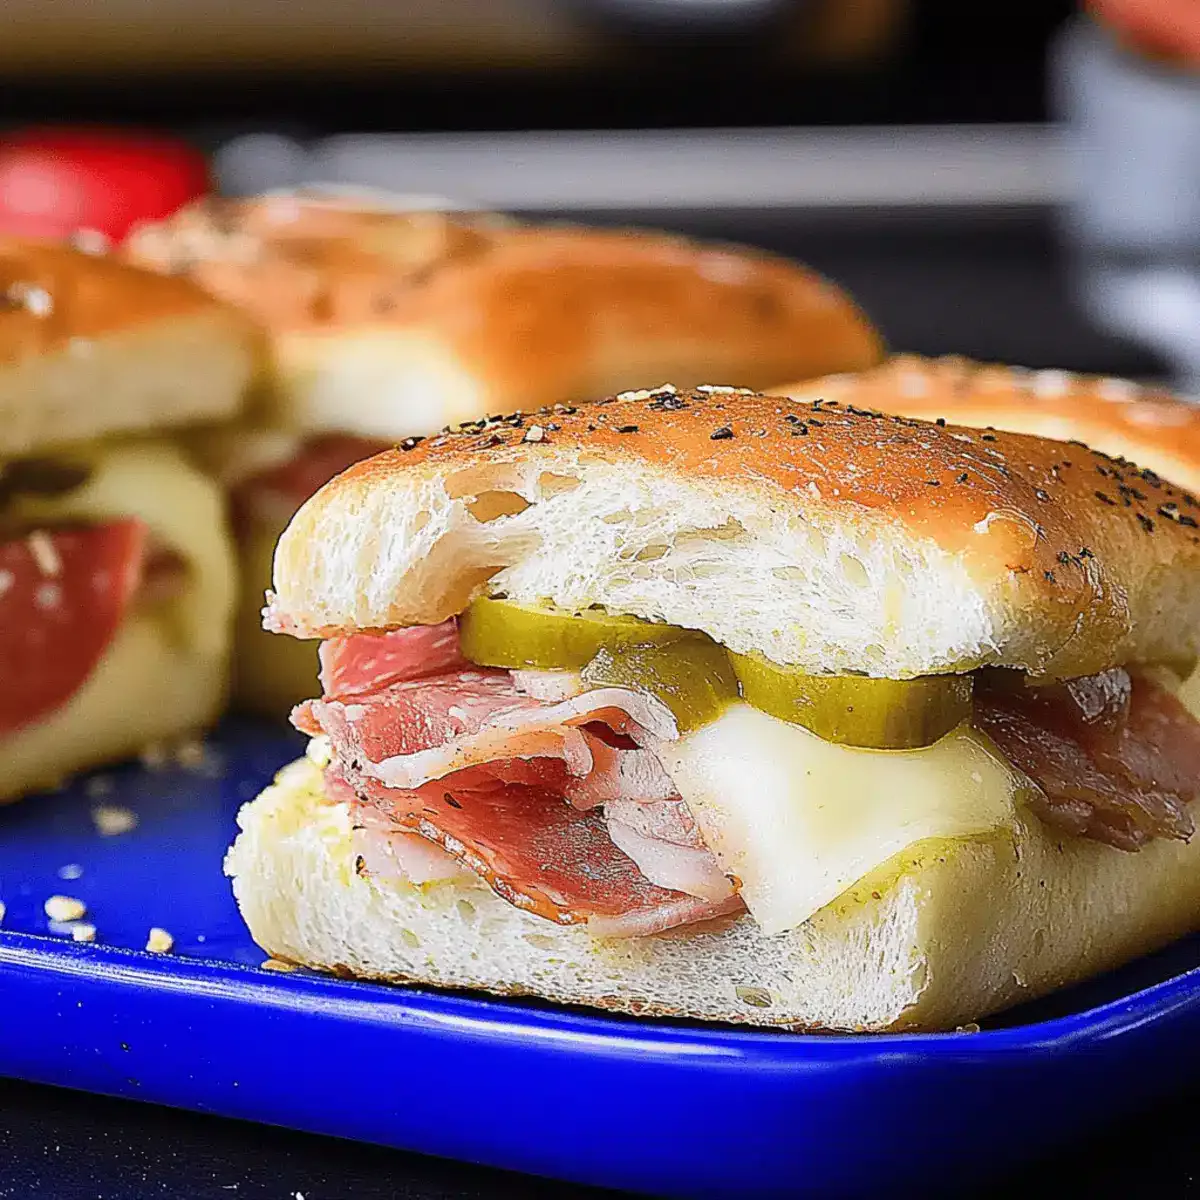
Once baked to perfection, remove the sliders from the oven and let them cool for a few minutes. Slice them into individual portions and serve with a side of marinara sauce for dipping. Your Hot Italian Sub Sliders are ready to delight your guests, bursting with flavors and cheesy goodness that will have everyone coming back for more!
What to Serve with Hot Italian Sub Sliders
Pair your sliders with a delightful spread to elevate your meal with warm flavors and fresh tastes.
-
Creamy Coleslaw: A cool, crunchy side that cuts through the richness of the sliders, adding a refreshing contrast. The tangy dressing complements the savory elements beautifully.
-
Garlic Bread: This buttery, toasted side offers a satisfying crunch and great flavor. It’s perfect for dipping in marinara sauce alongside the sliders, making it a versatile addition.
-
Caprese Salad: Made with fresh mozzarella, tomatoes, and basil, this light salad introduces a burst of freshness. A drizzle of balsamic glaze enhances the dish with a sweet-tangy touch.
-
Sweet Potato Fries: Crispy and slightly sweet, these fries add a comforting texture to your meal. They pair well with the zesty sliders, bringing another layer of flavor to the plate.
-
Italian Pasta Salad: Filled with colorful vegetables and a zesty vinaigrette, this dish complements the sliders while adding a hearty element. The pasta’s chewiness provides a satisfying contrast to the soft sliders.
-
Marinara Sauce: Enhance the sliders by serving with a side of warm marinara sauce for dipping. The rich tomato flavor creates a delicious combination that folks will love.
-
Sparkling Lemonade: Refreshing and slightly tart, this bubbly drink will cleanse the palate perfectly between bites. It’s an easy way to keep the crowd lively and satisfied!
-
Chocolate Chip Cookies: For a sweet finish, serve warm cookies that bridge the savory experience with a delightful dessert touch. They add warmth and nostalgia, always a hit!
Make Ahead Options
These Hot Italian Sub Sliders are perfect for busy cooks who want to save time during party prep! You can assemble the sliders up to 24 hours in advance, layering the meats, cheese, and peppers, then covering and refrigerating them until you’re ready to bake. To maintain their delicious quality, remember to brush on the seasoned butter just before baking; this ensures a golden crust and an incredible flavor. When ready to serve, simply pop the covered sliders in the oven at 350°F for about 30 minutes, adding an extra 5-10 minutes if they’re coming straight from the fridge. Enjoy the ease of prepped sliders that are just as delightful as if made fresh!
How to Store and Freeze Hot Italian Sub Sliders
Fridge: Store leftover sliders in an airtight container for up to 3 days. This helps maintain their flavor and texture while keeping them fresh.
Freezer: For longer storage, wrap fully cooled sliders tightly in foil and place them in a freezer-safe bag. They can be frozen for up to 3 months.
Reheating: To enjoy the sliders, reheat them in a 350°F oven, covered with foil, until warmed thoroughly, usually about 15-20 minutes.
Make-Ahead Tip: Prepare sliders in advance and refrigerate them, adding about 5-10 extra minutes to the baking time if they are cold.
Expert Tips for Hot Italian Sub Sliders
• Prep Ahead: Prepare sliders in advance before applying the butter. Refrigerate covered and increase baking time by 5-10 minutes if cold.
• Avoid Soggy Bottoms: Use a baking sheet to avoid direct contact with the oven, preventing a soggy bottom on your sliders.
• Customize Flavors: Feel free to swap meats or cheese for a unique twist on the classic hot Italian sub sliders that suits your taste preferences.
• Monitor Baking: Keep an eye on the sliders towards the end of baking; remove foil halfway through for a crispy, golden top.
• Freezing for Later: If you want to make them ahead of time, freeze fully cooled sliders wrapped in foil and reheat in the oven when needed.
Hot Italian Sub Sliders Variations
Feel free to customize and elevate your Hot Italian Sub Sliders with these delicious variations!
-
Dairy-Free: Use dairy-free cheese alternatives like cashew cheese to keep the creamy texture without the dairy.
-
Vegetable Boost: Add roasted red peppers or sautéed mushrooms for a hearty veggie twist. These additions are not only healthy but also add a burst of flavor that complements the savory meats beautifully.
-
Spicy Zing: Replace pepperoncini with sliced jalapeños for a fiery kick that spice lovers will adore. This twist emphasizes the sliders’ name while enticing your taste buds.
-
Lean Meats: For a healthier option, swap out traditional meats for turkey or chicken breast. Ensuring the meat is thinly sliced will keep your sliders juicy and flavorful.
-
Herb Explosion: Consider adding fresh basil or arugula after baking. This gives a fresh, peppery note that brightens the overall flavor profile of the sliders.
-
Crunch Factor: Top with crispy fried onions or potato chips inside the slider for an unexpected crunch. This adds a delightful contrast to the gooey cheese and savory meats.
-
Mediterranean Flair: Integrate feta cheese, kalamata olives, and a drizzle of olive oil to give your sliders a Mediterranean makeover. It’s a unique spin that brings new flavors to the table.
-
Extra Cheesy: Layer on multiple cheeses like mozzarella and cheddar for those who can’t resist that cheesy goodness. Pair with a side of marinara sauce for a dip that complements every cheesy bite perfectly.
These variations make each batch special, just like the delicious Stuffed Italian Meatloaf or refreshing Strawberry Swirled Slushies to accompany them. Enjoy exploring your palate with these fun twists on your Hot Italian Sub Sliders!
Hot Italian Sub Sliders Recipe FAQs
How do I choose the best ingredients for my Hot Italian Sub Sliders?
Absolutely! To ensure the best flavor, select ripe and fresh ingredients. For instance, choose Kings Hawaiian Rolls that are soft and not stale, and make sure the deli meats like ham and salami are thinly sliced for the best layering. If you’re using garlic, fresh minced garlic gives the sliders a rich savory depth compared to jarred garlic, which can be less flavorful.
How should I store leftover Hot Italian Sub Sliders?
Store your leftover sliders in an airtight container in the fridge for up to 3 days. This keeps them fresh and helps maintain their flavor and texture. Just reheat and enjoy! For longer storage, wrap fully cooled sliders in foil and place them in a freezer-safe bag or airtight container; they will stay good for up to 3 months.
Can I freeze Hot Italian Sub Sliders and how do I reheat them?
Yes, you can freeze them! Once they’re fully cooled, wrap individual sliders tightly in foil, then place them into a freezer-safe bag. When you’re ready to enjoy them, preheat your oven to 350°F (175°C), place the wrapped sliders in for about 15–20 minutes, or until heated throughout, keeping the foil on to retain moisture.
What should I do if my sliders come out soggy?
To avoid a soggy bottom, ensure you are using a baking sheet instead of placing the sliders directly on the oven rack. The baking sheet provides a barrier that prevents excess moisture from getting trapped underneath. Additionally, if you prepare them in advance and refrigerate, remember to increase your baking time by 5–10 minutes to ensure they heat through.
Are Hot Italian Sub Sliders pet-friendly or safe for allergenic diets?
These sliders contain several ingredients that may pose risks for pets, such as spices and processed meats, so it’s best to keep them away from your furry friends. For dietary restrictions, if anyone has allergies to gluten or dairy, consider using gluten-free rolls and substituting dairy cheese with a plant-based alternative to accommodate their needs.
Hot Italian Sub Sliders That Will Wow Your Taste Buds
Ingredients
Equipment
Method
- Preheat your oven to 350°F (175°C).
- Lay the bottom half of your Kings Hawaiian Rolls on a baking sheet.
- Layer on the thinly sliced ham, followed by the spicy salami and pepperoni.
- Sprinkle a generous layer of provolone cheese over the meats.
- Add sliced pepperoncini and pickled hot cherry peppers on top.
- Place the top halves of the Hawaiian rolls over the completed layers.
- In a small bowl, combine the melted salted butter, Italian seasoning, and crushed garlic.
- Brush the tops of the sliders with the seasoned butter mixture.
- Cover the sliders loosely with aluminum foil and bake for 30 minutes.
- Once baked, let them cool for a few minutes and slice into individual portions.
Leave a Reply