
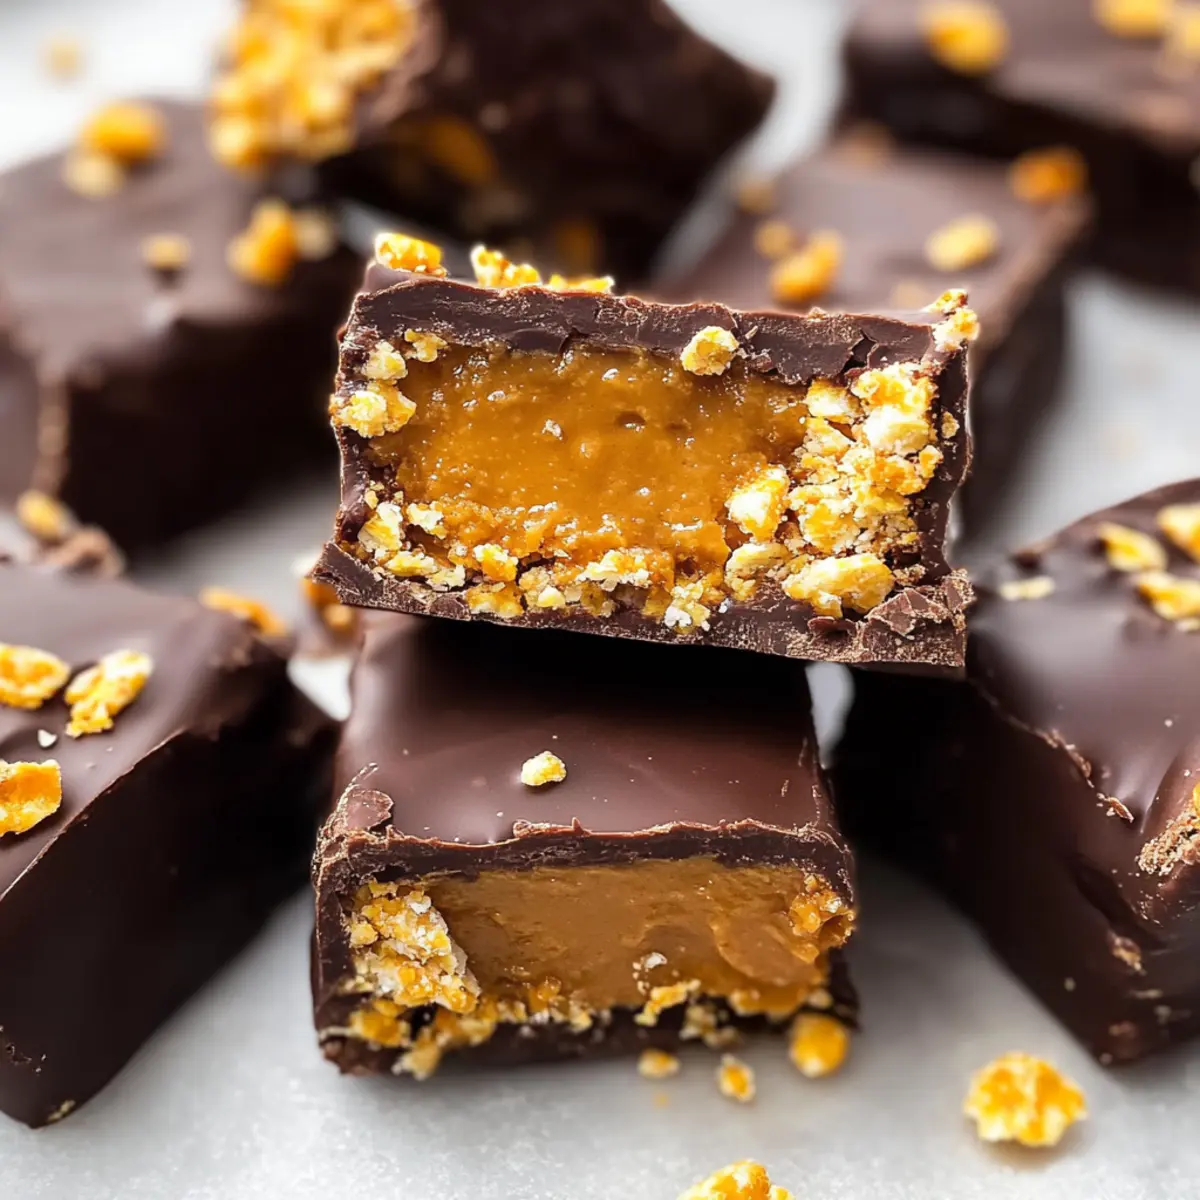
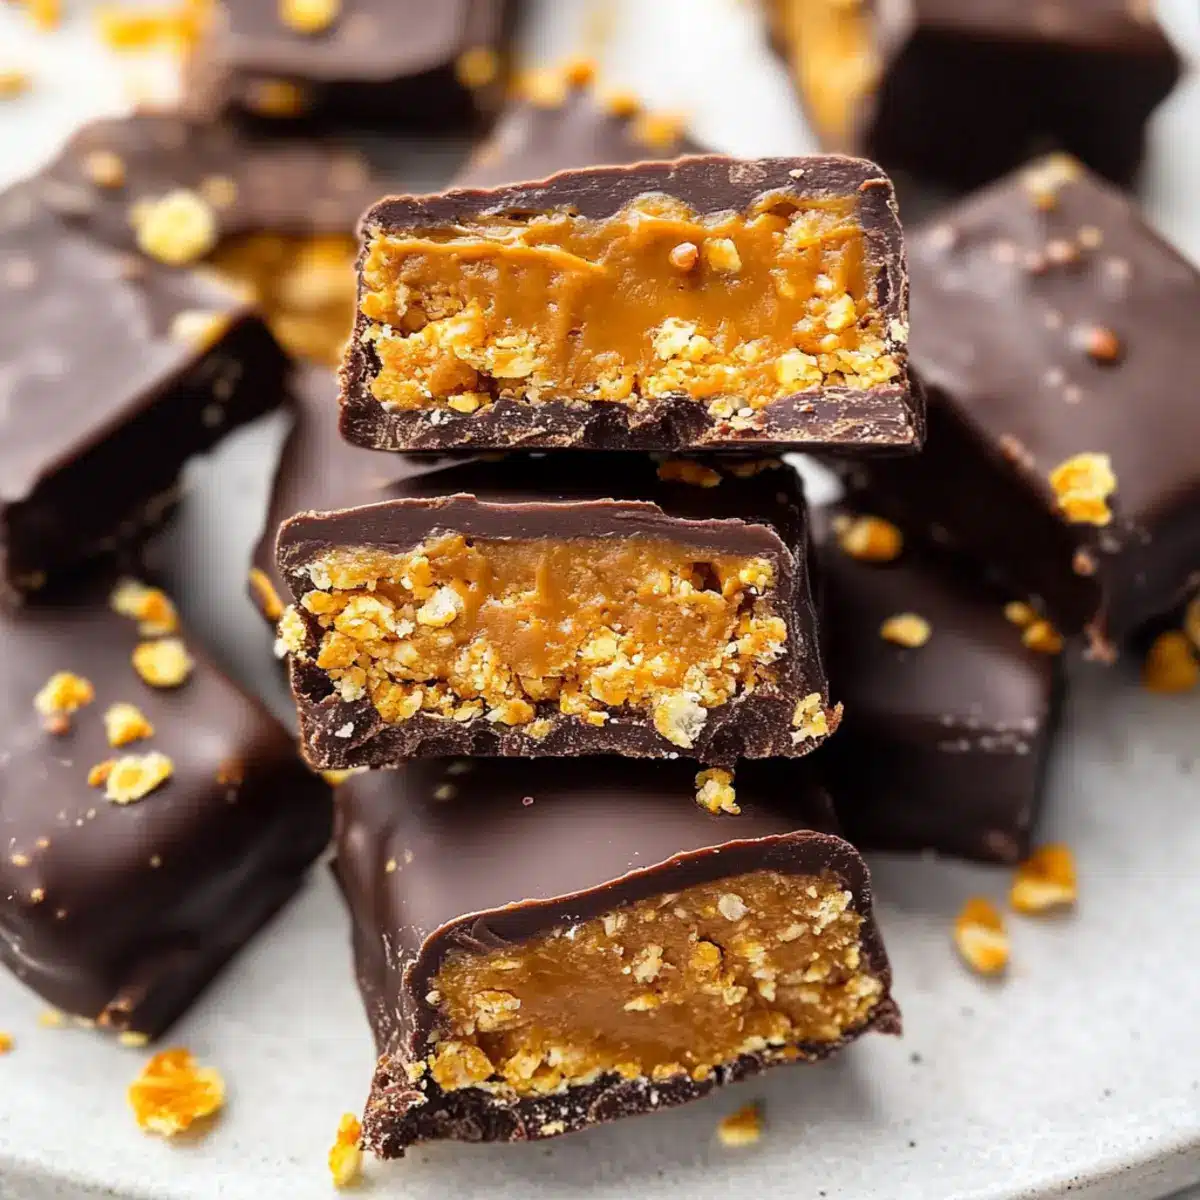
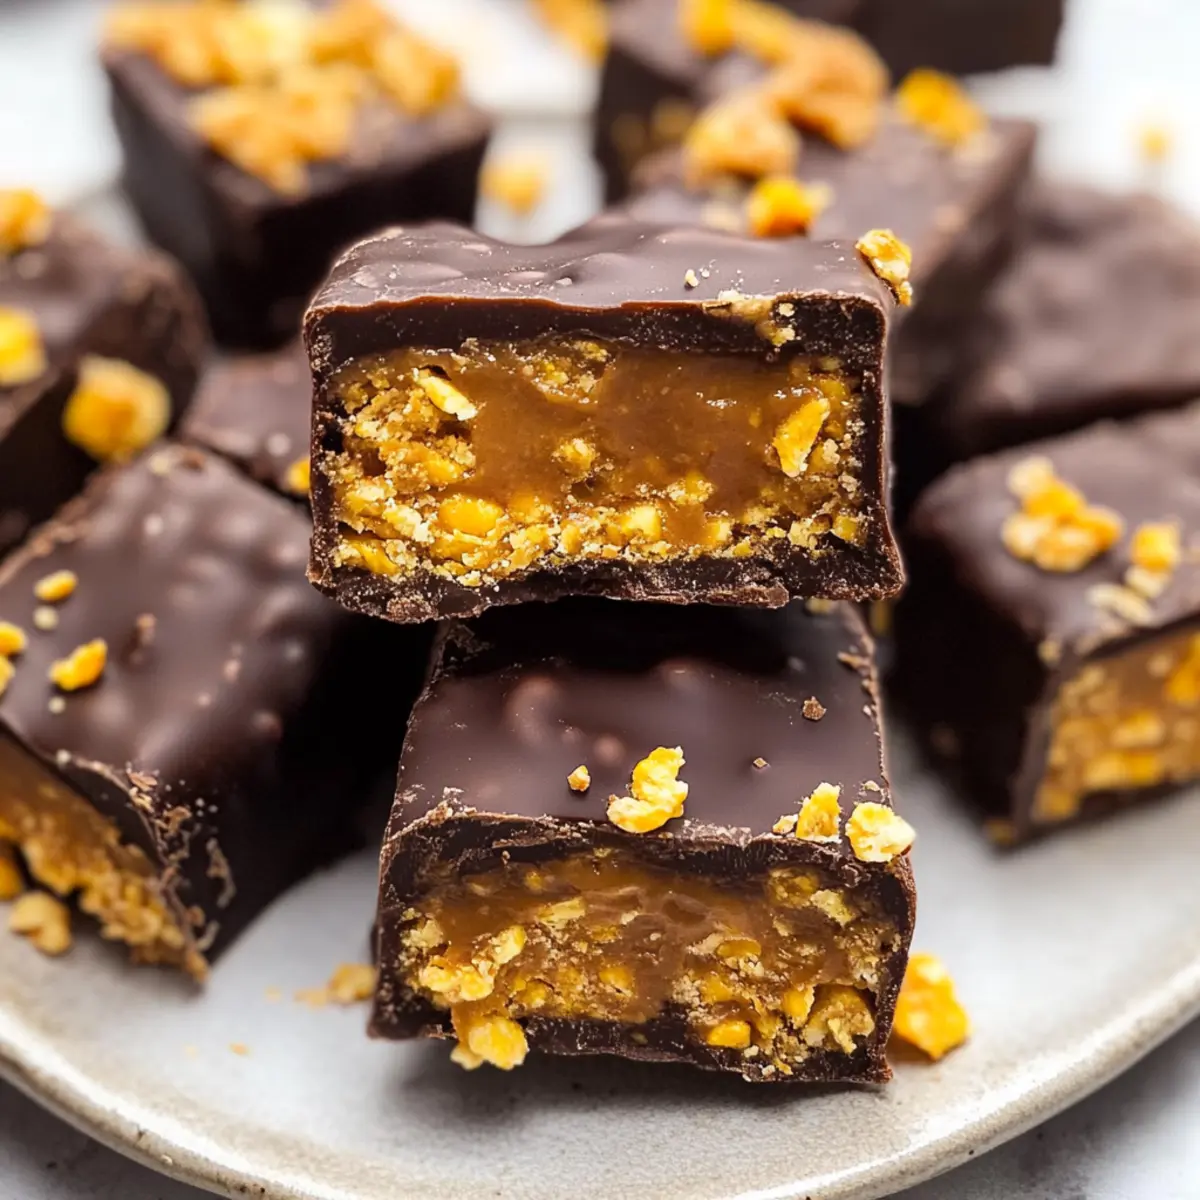
As I stood in my kitchen, an all-too-familiar craving for something sweet washed over me. But instead of reaching for a standard candy bar, I decided to whip up a healthier alternative that didn’t compromise on taste: Healthy Homemade Butterfingers. With just five simple ingredients, these delightful bars are gluten-free, dairy-free, and naturally sweetened, making them a guilt-free indulgence that I can feel good about enjoying. Perfect for quick snacks or a satisfying dessert, they also store beautifully in the freezer, ready for when that sweet tooth strikes. Isn’t it amazing to have a treat that brings all the satisfaction of a classic candy bar without any of the guilt? Curious to see how easy it is to make these delightful bars yourself? Let’s dive right into the recipe!

Why Are These Butterfingers Better?
Nutritious Twist: These Homemade Butterfingers redefine indulgence by using wholesome ingredients that are both gluten-free and dairy-free.
Easy Preparation: With just five simple components, crafting these treats requires minimal effort, making them perfect even for beginner chefs.
Naturally Sweetened: Say goodbye to refined sugars! Using maple syrup or honey ensures a delightful sweetness without the guilt.
Flavorful Crunch: The satisfying crunch from the corn flakes adds texture that you won’t find in traditional candy bars.
Versatile Pairing: Enjoy them as a snack, dessert, or a sweet side with your favorite Healthy Breakfast Granola or a glass of almond milk.
Meal Prep Friendly: Ideal for stocking your freezer, these bars are a convenient option for on-the-go treats, ready whenever your sweet cravings kick in!
Healthy Homemade Butterfingers Ingredients
Get ready to discover how simple it is to make these delightful bars!
For the Bars
- Peanut Butter – A creamy base that adds a rich flavor; you can swap it for almond butter for a nut-free option.
- Maple Syrup or Honey – This natural sweetener binds the ingredients together; for a vegan alternative, consider using agave syrup.
- Corn Flakes – These provide a delightful crunch; crush them to your preferred size for optimum texture in your bars.
For the Chocolate Coating
- Chocolate Chips – A need for sweetness that envelops the bars; opt for dark chocolate chips for a richer taste or dairy-free alternatives for vegans.
- Coconut Oil – This helps melt the chocolate smoothly for a glossy finish; leave it out if you’re seeking a lower-fat option.
Now that you have the essentials for these Healthy Homemade Butterfingers, it’s time to let your kitchen adventures commence!
Step‑by‑Step Instructions for Healthy Homemade Butterfingers
Step 1: Prepare Corn Flakes
Begin by crushing your corn flakes for the Healthy Homemade Butterfingers. Place them into a zip-top bag, seal it tightly, and use a rolling pin or your hands to crush them into small pieces. Aim for a combination of crumbs and larger bits, as this will give your bars a delightful texture. Set aside when finished.
Step 2: Mix Ingredients
In a large bowl, combine 1 cup of creamy peanut butter and 1/4 cup of maple syrup (or honey). Mix these ingredients together thoroughly using a spatula until they’re smooth and well-blended. Next, add the crushed corn flakes and stir gently until the mixture is combined, allowing the flakes to soak up the sweetness.
Step 3: Form Bars
Line a loaf pan with parchment paper to prevent sticking and transfer the combined mixture into the pan. Using your hands or a spatula, press the mixture evenly into the bottom of the pan to create a solid layer. Make sure it’s tightly packed for the best consistency. Freeze the mixture for at least 1 hour until firm.
Step 4: Cut Bars
Once the mixture is set, carefully remove it from the loaf pan by lifting the parchment paper. Place it on a cutting board and use a sharp knife to cut it into 12 even bars. Make sure to wipe the knife clean between cuts for neat edges, setting aside the bars as you work.
Step 5: Melt Chocolate
In a small microwave-safe bowl, combine 1 cup of chocolate chips and 1 tablespoon of coconut oil. Microwave in 30-second intervals, stirring in between, until the mixture is smooth and glossy, usually taking about 1-2 minutes total. Be sure to keep an eye on it to avoid burning the chocolate.
Step 6: Coat Bars
Take each bar and dip it into the melted chocolate, ensuring that it is fully coated. Use a fork to lift the bar out, allowing excess chocolate to drip back into the bowl. Place the coated bars onto a parchment-lined plate, ensuring they have space between them to avoid sticking.
Step 7: Final Freeze
Once all the bars are coated, transfer them to the freezer for about 10 minutes to let the chocolate set completely. This quick freeze will give them that perfect chocolate shell. Once set, enjoy your Healthy Homemade Butterfingers right away or store them in an airtight container in the freezer for up to three months.
What to Serve with Healthy Homemade Butterfingers
Looking to create a delightful spread that perfectly complements your guilt-free treats?
-
Nutty Fruit Salad: A refreshing mix of seasonal fruits and nutty flavors balances the rich sweetness of the bars.
-
Almond Milk Smoothie: Creamy and nutritious, this smoothie pairs excellently with the crunchy texture, enhancing the experience.
-
Coconut Chia Pudding: Silky and luscious, this pudding offers a healthy contrast to the Butterfingers, making for a well-rounded dessert.
-
Roasted Sweet Potatoes: The natural sweetness of roasted sweet potatoes makes a comforting side that contrasts the bars’ crunchiness.
-
Dark Chocolate Coffee: Sip on a rich, bold coffee with hints of dark chocolate for a sweet pick-me-up that aligns with your treat.
-
Homemade Trail Mix: Combine nuts, seeds, and dried fruit for a textural crunch that mirrors the Butterfingers while adding an extra energy boost.
-
Coconut Whipped Cream: This light and airy topping provides an indulgent dip that allows you to savor every bite of your homemade confections.
-
Cinnamon-Spiced Apples: Warm apples sprinkled with cinnamon bring a touch of fall to the table, perfectly complementing the rich flavors of the bars.
-
Fresh Mint Tea: This light herbal tea cleanses the palate, making each bite of the Butterfingers feel refreshing.
Make Ahead Options
These Healthy Homemade Butterfingers are a fantastic option for meal prep enthusiasts! You can prepare the mixture (steps 1-3) up to 24 hours in advance; simply form the bars and freeze them wrapped in parchment paper. For the best texture, it’s essential to press the mixture firmly into the pan before freezing to maintain cohesion. Alternatively, after cutting them into bars, you can freeze them for up to 3 months. When you’re ready to enjoy, simply coat them with melted chocolate (steps 5-6) straight from the freezer for that fresh, delightful taste. This way, you’ll have a sweet treat ready whenever your cravings hit, saving time on busy days!
Expert Tips for Healthy Homemade Butterfingers
-
Firm Pressing: Ensure you press the mixture firmly into the pan. This step helps the bars hold together better and prevents crumbling later.
-
Chocolate Melting: Stirring frequently while melting the chocolate is crucial. This prevents burning and gives you a smooth finish for your Healthy Homemade Butterfingers.
-
Corn Flake Size: Crush corn flakes to a mix of large and small pieces. This variation enhances the texture, making your bars crunchier without falling apart.
-
Flavored Options: Elevate the taste by adding a pinch of sea salt or a splash of vanilla extract before freezing the bars for an extra flavor boost.
-
Storage Tips: Store your bars in an airtight container in the freezer. They maintain their freshness and are quick to grab whenever that sweet craving strikes.
Healthy Homemade Butterfingers Variations
Feel free to get creative with your Healthy Homemade Butterfingers — your taste buds will thank you!
-
Nut Butter Swap: Use almond butter for a nut-free option. The flavor is just as rich and creamy!
-
Sweetener Choice: Substitute agave syrup for maple syrup or honey for a vegan-friendly twist. Sweetness without compromise!
-
Crispy Texture: Add chopped nuts or seeds for extra crunch. Think walnuts, almonds, or even sunflower seeds for a delightful mix!
-
Dried Fruit Addition: Toss in some dried cranberries or raisins to amp up the flavor and add a chewiness to your bars.
-
Dairy-Free Chocolate: Opt for dairy-free chocolate chips to stay in the vegan lane. Your taste buds won’t miss the traditional chocolate!
-
Flavor Infusion: Add a pinch of sea salt or a splash of vanilla extract to the mixture for an extra layer of flavor. It really makes a difference!
-
Bittersweet Boost: Try dark chocolate for the coating instead of regular chocolate chips. The richness pairs beautifully with the sweetness of the bars.
-
Healthy Granola Bars: Use the same mixture to make healthy granola bars by adding oats and reducing the chocolate coating. Perfect for breakfast or snacks on the go!
Experimenting with these variations can create countless delicious combinations. If you’re looking for a different treat, why not explore some Healthy Carrot Cake or even some Healthy Breakfast Granola? Your kitchen adventures await!
How to Store and Freeze Healthy Homemade Butterfingers
Fridge: Store your Healthy Homemade Butterfingers in an airtight container in the fridge for up to 1 week for a quick treat anytime.
Freezer: To keep your bars fresh, place them in an airtight container or wrap them individually in plastic wrap. They can be frozen for up to 3 months!
Reheating: When you’re ready to enjoy a frozen bar, let it sit at room temperature for about 10 minutes for the best texture before biting in.
Make-Ahead: These bars are perfect for meal prep; you can whip them up in advance and keep them in the freezer, ready for whenever those sweet cravings hit!
Healthy Homemade Butterfingers Recipe FAQs
How do I choose the right peanut butter for this recipe?
Absolutely! For the best flavor, use a natural peanut butter with no added sugars or oils, preferably that says “stir well” on the label. This ensures a creamy consistency that blends perfectly with the other ingredients. If you’re avoiding peanuts, almond butter or sunflower seed butter are great alternatives!
How long do Healthy Homemade Butterfingers last in the fridge?
These delightful bars can be stored in an airtight container in the fridge for about 1 week. Make sure to keep them well-wrapped to maintain their freshness and crispness.
Can I freeze Healthy Homemade Butterfingers?
Very! These bars freeze beautifully. To ensure they stay fresh, wrap each bar individually in plastic wrap and place them in an airtight container or a freezer bag. This way, they can be stored for up to 3 months.
What’s the best way to melt chocolate for the coating?
Melting chocolate can be tricky, but don’t worry! Place your chocolate chips and coconut oil in a microwave-safe bowl. Microwave in 30-second intervals, stirring in between until the chocolate is completely smooth. Aim for about 1-2 minutes total. Just keep an eye on it to prevent burning!
Are there any allergen considerations for this recipe?
Absolutely! If you’re making these Healthy Homemade Butterfingers for someone with allergies, be sure to check the labels on all ingredients. For nut allergies, swap the peanut butter with seeds like sunflower seed butter. For gluten sensitivity, ensure the corn flakes are certified gluten-free.
Can I change the sweeteners in this recipe?
Yes, if you’re looking for alternatives, maple syrup is a great choice, but you can also use agave syrup for a vegan option. Just remember that different sweeteners may affect the flavor slightly, so choose one that fits your taste preference!
Healthy Homemade Butterfingers You Can Feel Good About
Ingredients
Equipment
Method
- Crush corn flakes in a zip-top bag using a rolling pin or hands and set aside.
- Combine peanut butter and maple syrup (or honey) in a bowl and mix until smooth. Add crushed corn flakes and stir gently.
- Line a loaf pan with parchment paper, transfer the mixture, and press it evenly into the pan. Freeze for at least 1 hour.
- Remove the set mixture from the pan and cut into 12 bars.
- Melt chocolate chips and coconut oil in a microwave-safe bowl, stirring until smooth.
- Dip each bar in the melted chocolate and place on a parchment-lined plate.
- Freeze the chocolate-coated bars for about 10 minutes until set.
Leave a Reply