
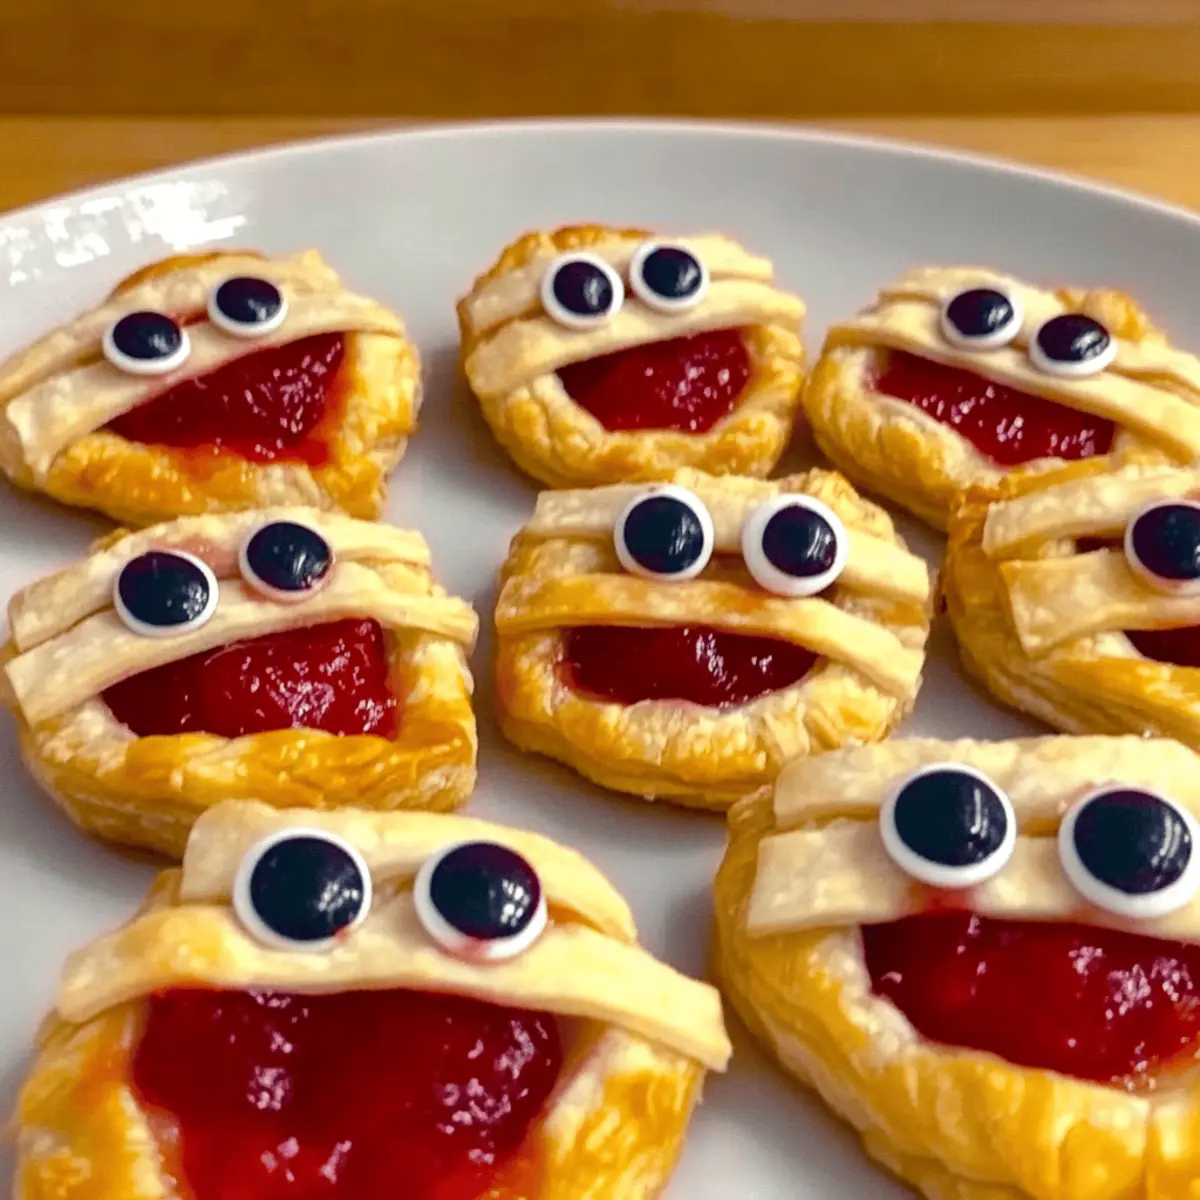
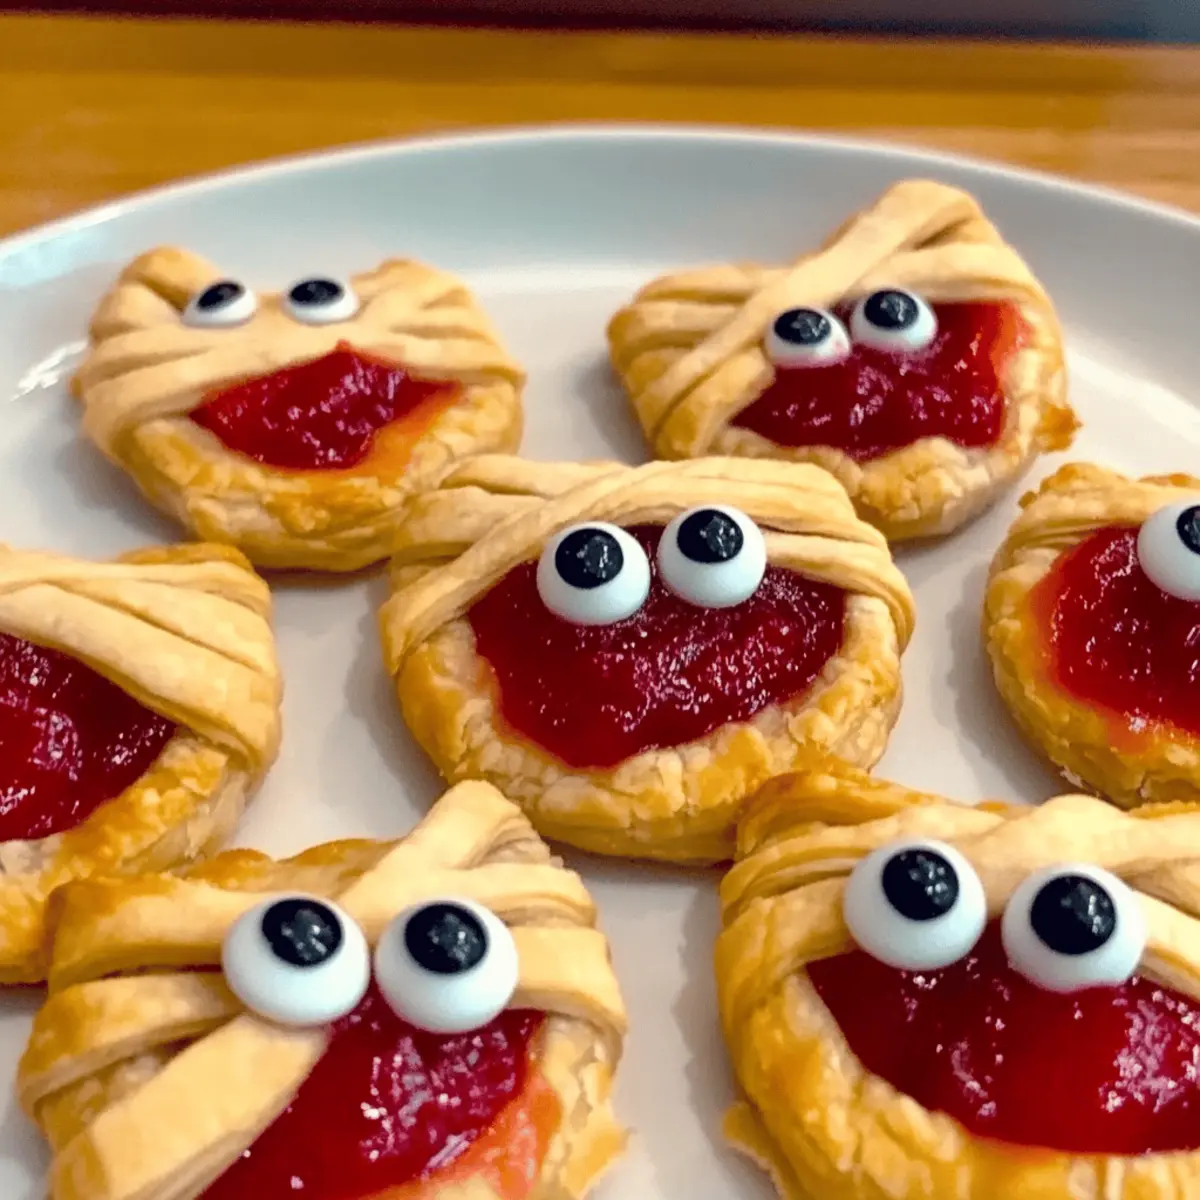
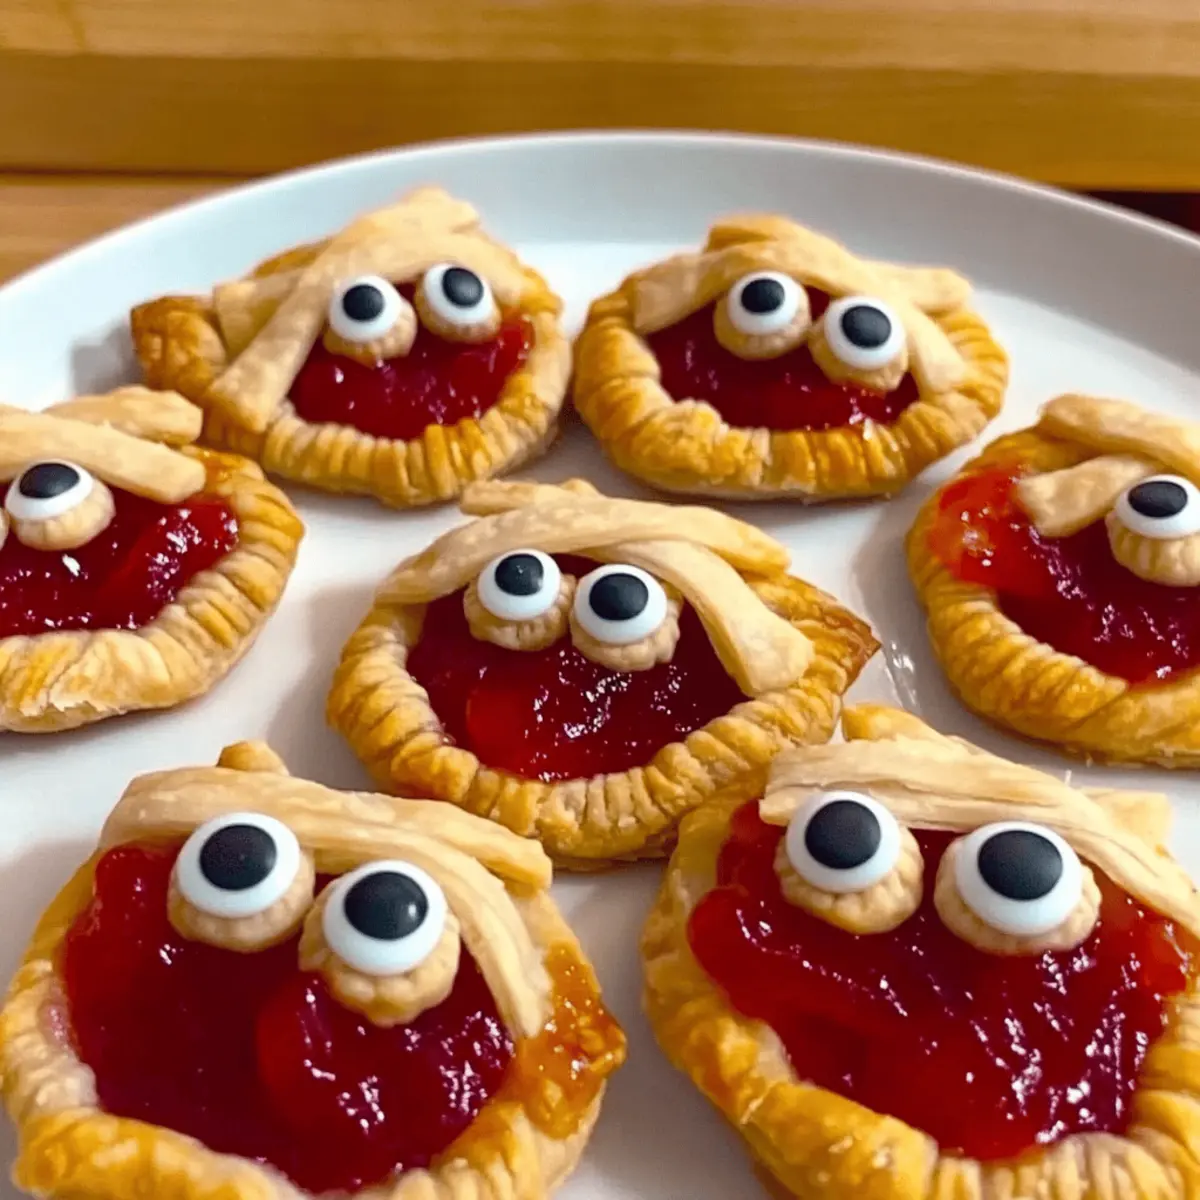
As I peeled back the thin layers of dough, the tantalizing aroma of baking pastries filled my kitchen, instantly transporting me to memories of festive celebrations. These Easy Halloween Mummy Hand Pies are not just delightful treats; they’re a playful way to engage the whole family in the kitchen. Brimming with sweet strawberry jam and wrapped in flaky pastry, they’re bound to bring smiles to both kids and adults alike. What I love about this recipe is its quick prep time and simple ingredients, making it an ideal choice for those busy October evenings. Whether you’re hosting a Halloween party or just satisfying a craving for something sweet, these spooky hand pies are a clever crowd-pleaser that will elevate your holiday festivities. Curious to see how easy it is to create this spooky delight? Let’s get baking!
Why are Halloween Mummy Hand Pies special?
Family Fun: The playful design of these hand pies makes them a perfect activity for kids and adults alike, bringing everyone together in the spirit of Halloween.
Quick and Easy: With simple ingredients and a short prep time, you’ll have these spooky treats ready in no time, letting you spend more moments enjoying the festivities.
Deliciously Versatile: You can switch up the fillings with your favorite jams, just like in my S’mores Hand Pies, giving you endless flavor options!
Spooktacular Presentation: The candy eyes add a whimsical touch that delights both young and old, making them a hit at parties.
Perfect for Sharing: Serve them warm alongside ice cream or whipped cream for an irresistible treat that will have everyone coming back for seconds!
Halloween Mummy Hand Pies Ingredients
For the Dough
- All-Purpose Flour – Provides the structure for the hand pies; swap for gluten-free flour for a gluten-free option.
- Melted Unsalted Butter – Adds richness and moisture; substitute with coconut oil for a dairy-free alternative.
- Milk – Contributes the necessary moisture; non-dairy milk like almond works perfectly for lactose intolerance.
- Granulated Sugar – Sweetens the dough, but brown sugar can add a delightful depth of flavor.
For the Filling
- Strawberry Jam – The sweet surprise inside the hand pies; try raspberry or orange jam for a different twist.
For the Finish
- Eggwash – Provides a shiny, golden finish; use a dairy-free alternative or leave it out for a vegan version.
- Candy Eyes – Perfect for creating the “mummy” look; while optional, they definitely enhance the festive aesthetic!
Step-by-Step Instructions for Halloween Mummy Hand Pies
Step 1: Make the Dough
In a large mixing bowl, combine all-purpose flour, melted unsalted butter, milk, and granulated sugar until a soft dough forms. Knead the dough gently for a couple of minutes until smooth. Once ready, wrap the dough in plastic wrap and refrigerate for about 10 minutes to firm it up, helping to achieve that perfect flaky texture in your Halloween Mummy Hand Pies.
Step 2: Prepare the Oven and Baking Sheet
While the dough chills, preheat your oven to 350°F (180°C). Line a baking sheet with parchment paper to prevent sticking and make cleanup easier. Having everything prepped sets you up for success, ensuring your spooky treats will bake to a lovely golden brown while you prepare the rest of the recipe.
Step 3: Roll Out the Dough
Retrieve the chilled dough from the refrigerator and place it on a lightly floured surface. Roll it out to a thickness of about ¼ inch. Use a cookie cutter to cut out circles of dough, ensuring you save any scraps for later use. The rolled-out dough should be smooth and pliable, perfect for forming your Halloween Mummy Hand Pies.
Step 4: Assemble the Hand Pies
Transfer the dough circles to the prepared baking sheet. Place about ¼ teaspoon of strawberry jam in the center of each circle, creating a delightful sweet surprise. Be careful not to overfill, as that can cause your hand pies to burst open while baking. This step adds that magical fruity flavor to your spooky Halloween Mummy Hand Pies!
Step 5: Create the Mummy Wrapping
Take the leftover dough scraps and cut them into thin strips. Arrange these strips over the filled circles to mimic “bandages,” allowing some of the jam to peek through for an eerie effect. The more crooked and uneven the strips, the more realistic and spooky your mummy pies will look, enticing everyone at your Halloween gathering.
Step 6: Bake to Perfection
Brush the tops of the assembled hand pies with eggwash to achieve a shiny, golden finish while baking. Carefully place the baking sheet in the preheated oven and bake for about 10–12 minutes, or until the hand pies are golden brown. Keep an eye on them to avoid over-browning—you’re looking for that beautiful flaky crust on your Halloween Mummy Hand Pies!
Step 7: Add Candy Eyes and Serve
Once baked, remove the hand pies from the oven and allow them to cool slightly. While they are still warm, add candy eyes on top of each mummy pie for a fun and festive touch. Serve your Halloween Mummy Hand Pies warm to your delighted guests, and watch the smiles grow as they enjoy these spooktacular treats!
Halloween Mummy Hand Pies Variations & Substitutions
Customize your Halloween Mummy Hand Pies with these fun and delightful variations that will excite your taste buds and keep things fresh!
- Gluten-Free: Use a gluten-free flour blend in place of all-purpose flour for a gluten-free treat that everyone can enjoy.
- Dairy-Free: Substitute melted unsalted butter with coconut oil and use non-dairy milk to create a tasty, dairy-free version.
- Crunchy Oat Topping: Add crushed oats or granola on top before baking for a crunchy texture that contrasts beautifully with the sweetness inside.
- Chocolate Surprise: Swap out strawberry jam for chocolate hazelnut spread for a fun and decadent twist. Kids will love this twist!
- Savory Mummies: Fill your hand pies with cooked sausage and cheese instead of jam for a savory version that’s perfect for Halloween parties.
- Spiced Filling: Add a pinch of cinnamon or pumpkin spice to your jam for a warm, autumnal flavor that complements the season wonderfully.
- Mini Mummies: Cut the dough into smaller circles for bite-sized hand pies, perfect for little fingers and snack platters at Halloween gatherings.
- Festive Shapes: Get creative with cookie cutter shapes like bats or skulls, similar to what’s shared in my S’mores Hand Pies, to add a delightful spin to your spooky treats!
Let your imagination run wild and enjoy the process of creating your own unique Mummy Hand Pies this Halloween season!
How to Store and Freeze Halloween Mummy Hand Pies
Fridge: Store baked Halloween Mummy Hand Pies in an airtight container for up to 3 days. This will keep them fresh while their flaky texture remains intact.
Freezer: For longer storage, freeze unbaked hand pies before adding the candy eyes. Wrap each pie tightly in plastic wrap and store in a freezer-safe bag for up to 2 months.
Reheating: To reheat baked pies, place them in a preheated oven at 350°F (180°C) for about 10 minutes. This will restore their golden, flaky crust while warming the sweet filling.
Make-Ahead Tip: Prepare the dough in advance and store it in the fridge for up to one week, making it easy to whip up these fun treats when the Halloween spirit strikes!
Make Ahead Options
Preparing these Halloween Mummy Hand Pies in advance is a fantastic way to save time during the busy Halloween season! You can make the dough up to 3 days ahead—just wrap it tightly in plastic wrap and refrigerate to keep it fresh. You can also assemble the hand pies (without baking) and store them in the refrigerator for up to 24 hours; this method ensures that they maintain their flaky texture. When you’re ready to serve, simply brush them with eggwash and pop them in the oven for about 10-12 minutes. You’ll have delicious, fresh Halloween Mummy Hand Pies that are just as delightful as if they had been made on the spot!
Expert Tips for Halloween Mummy Hand Pies
• Chill the Dough: Ensure the dough is well-chilled before rolling. This step helps maintain structure and prevents the pies from becoming overly soft during baking.
• Fill Just Right: Don’t overfill with jam; about ¼ teaspoon per circle is perfect. Overfilling can lead to bursting pies, making a delightful mess!
• Watch the Bake Time: Keep an eye on your pies while they bake. They can go from golden to overdone quickly, affecting the texture of your Halloween Mummy Hand Pies.
• Creative Cutouts: Use various cookie cutter shapes for fun variations. Consider bats or pumpkins to elevate your spooky dessert lineup!
• Storage Solutions: If making ahead, store assembled but unbaked hand pies in the freezer. Bake them fresh when needed for the best flavor and texture.
What to Serve with Halloween Mummy Hand Pies?
Serve these delightful treats alongside accompaniments that enhance their festive charm and flavor.
-
Vanilla Ice Cream: This creamy, cool dessert melts delightfully next to the warm, gooey pies, creating an irresistible contrast. A scoop of velvety vanilla perfectly balances the sweetness of the jam, enhancing the overall experience.
-
Whipped Cream: Light and airy, whipped cream offers a dollop of indulgence that complements the flaky texture of the hand pies. It’s a classic, and the kids love it, making each bite even more fun.
-
Chocolate Sauce: Drizzling warm chocolate sauce over the hand pies adds a rich, decadent twist. It’s a treat that ups the spook factor while introducing a delightful, chocolatey flavor that pairs beautifully with the strawberry filling.
-
Fruit Salad: A refreshing blend of seasonal fruits adds a bright, tart contrast, balancing the sweetness of the pies. Try incorporating apples and oranges for a colorful autumnal touch, creating a delightful visual platter.
-
Pumpkin Spice Latte: Warm up your Halloween gathering with this iconic fall drink. Its spices mirror the cozy vibes of the season, making it a great companion alongside your mummy treats.
-
Candy Corn: This sweet seasonal treat adds a pop of color and playful fun to your serving table. Candy corn is both nostalgic and festive, reminding everyone of Halloween, and is sure to spark smiles.
-
Hot Apple Cider: Serve this warm beverage for a classic fall comfort that evokes the sweet essence of apples and spices. It not only warms you up but also enhances the entire Halloween experience.
-
Chocolate-Covered Pretzels: This sweet and salty snack offers a crunchy complement to the soft hand pies, balancing both textures and flavors. It’s a fun, bite-sized addition that’s visually appealing and scrumptious.
Halloween Mummy Hand Pies Recipe FAQs
What type of jam works best for Halloween Mummy Hand Pies?
Absolutely! While strawberry jam is the classic choice, you can use other fruit jams like raspberry or orange for a delightful twist. Each variety gives a different flavor profile, making every batch unique and exciting!
How should I store Halloween Mummy Hand Pies?
Store your baked Halloween Mummy Hand Pies in an airtight container in the fridge for up to 3 days. This keeps them fresh and delicious while maintaining their flaky texture. And if you’re not ready to devour them immediately, pop them in the freezer!
Can I freeze unbaked Halloween Mummy Hand Pies?
Very! To freeze unbaked hand pies, wrap each one tightly in plastic wrap and place them in a freezer-safe bag. They can be stored for up to 2 months. When you’re ready to bake, no need to thaw; just bake them straight from the freezer, adding a couple of extra minutes to the baking time!
What should I do if my dough is too sticky?
If you find your dough is sticking to the surface while rolling out, sprinkle a little more flour on your work area and your rolling pin. This will help, but be careful not to add too much flour, as it can make the dough tough. The key is to have a soft but manageable dough!
How can I make these Halloween Mummy Hand Pies dairy-free?
You can easily make these hand pies dairy-free by substituting melted unsalted butter with coconut oil and using a non-dairy milk, like almond or soy. Just follow the same steps, and you’ll have a spooky treat that accommodates dietary restrictions while still being delicious!
Can I prepare the dough in advance?
Absolutely! If you want to make the process quicker on Halloween night, you can prepare the dough and store it in the refrigerator for up to one week. Once you’re ready, simply roll it out, assemble your hand pies, and bake for a fresh, festive treat!

Halloween Mummy Hand Pies: Spooky & Easy Family Treats
Ingredients
Equipment
Method
- In a large mixing bowl, combine all-purpose flour, melted unsalted butter, milk, and granulated sugar until a soft dough forms. Knead the dough gently for a couple of minutes until smooth. Wrap the dough in plastic wrap and refrigerate for about 10 minutes.
- Preheat your oven to 350°F (180°C). Line a baking sheet with parchment paper.
- Roll out the chilled dough to a thickness of about ¼ inch. Cut out circles using a cookie cutter.
- Transfer the dough circles to the prepared baking sheet. Place about ¼ teaspoon of strawberry jam in the center of each circle.
- Cut leftover dough into thin strips and arrange over the filled circles to mimic 'bandages'.
- Brush the tops of the assembled hand pies with eggwash. Bake in the preheated oven for about 10–12 minutes, or until golden brown.
- Once baked, allow to cool slightly, then add candy eyes on top of each mummy pie and serve warm.
Leave a Reply