
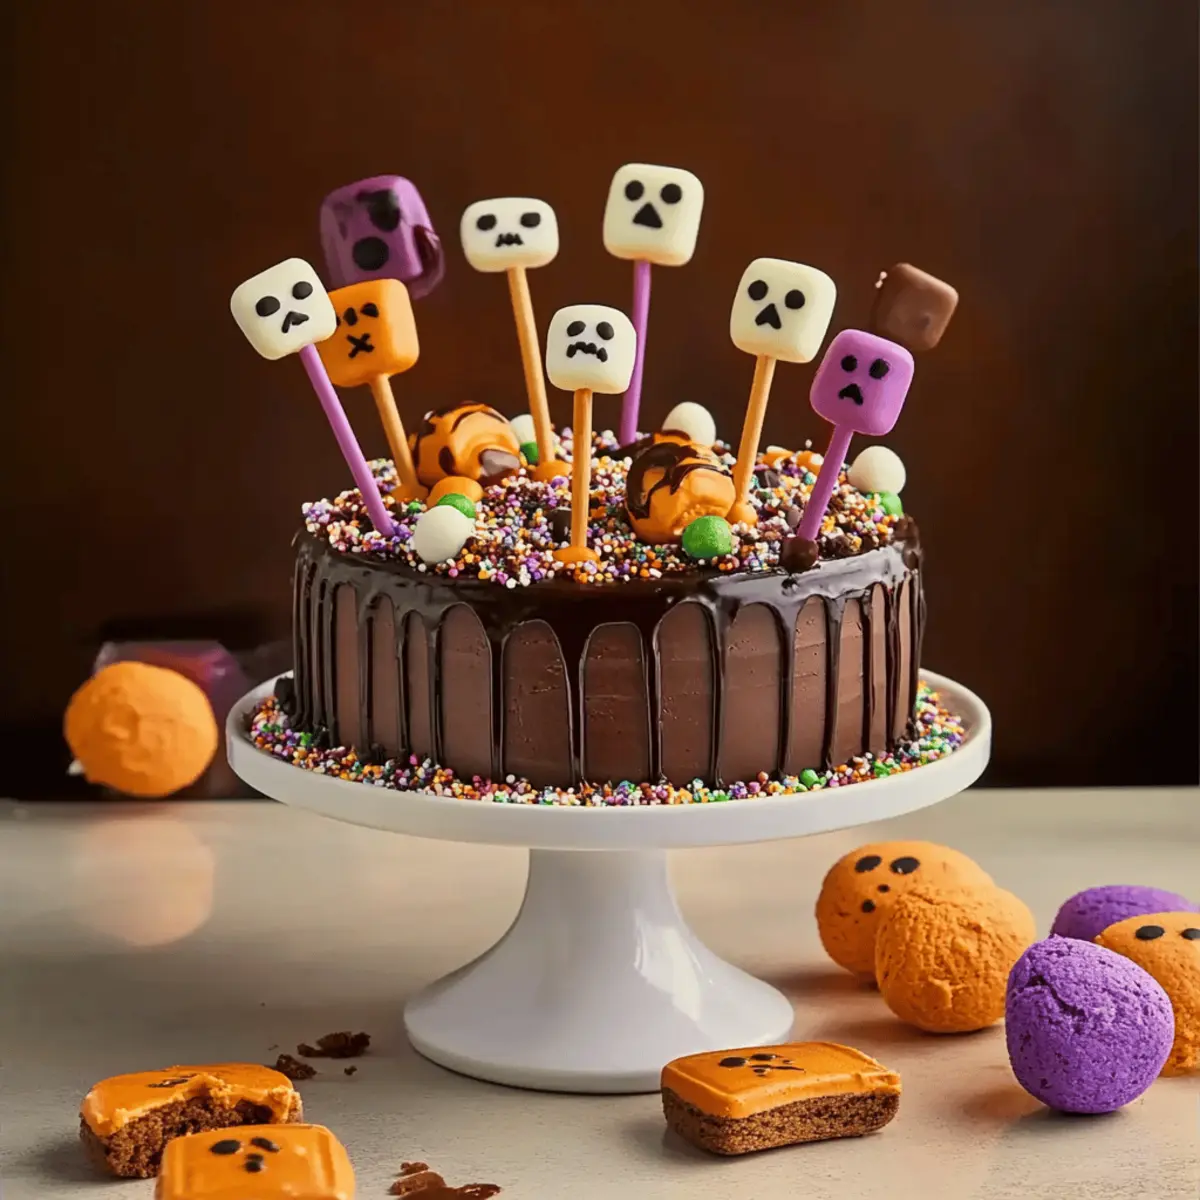
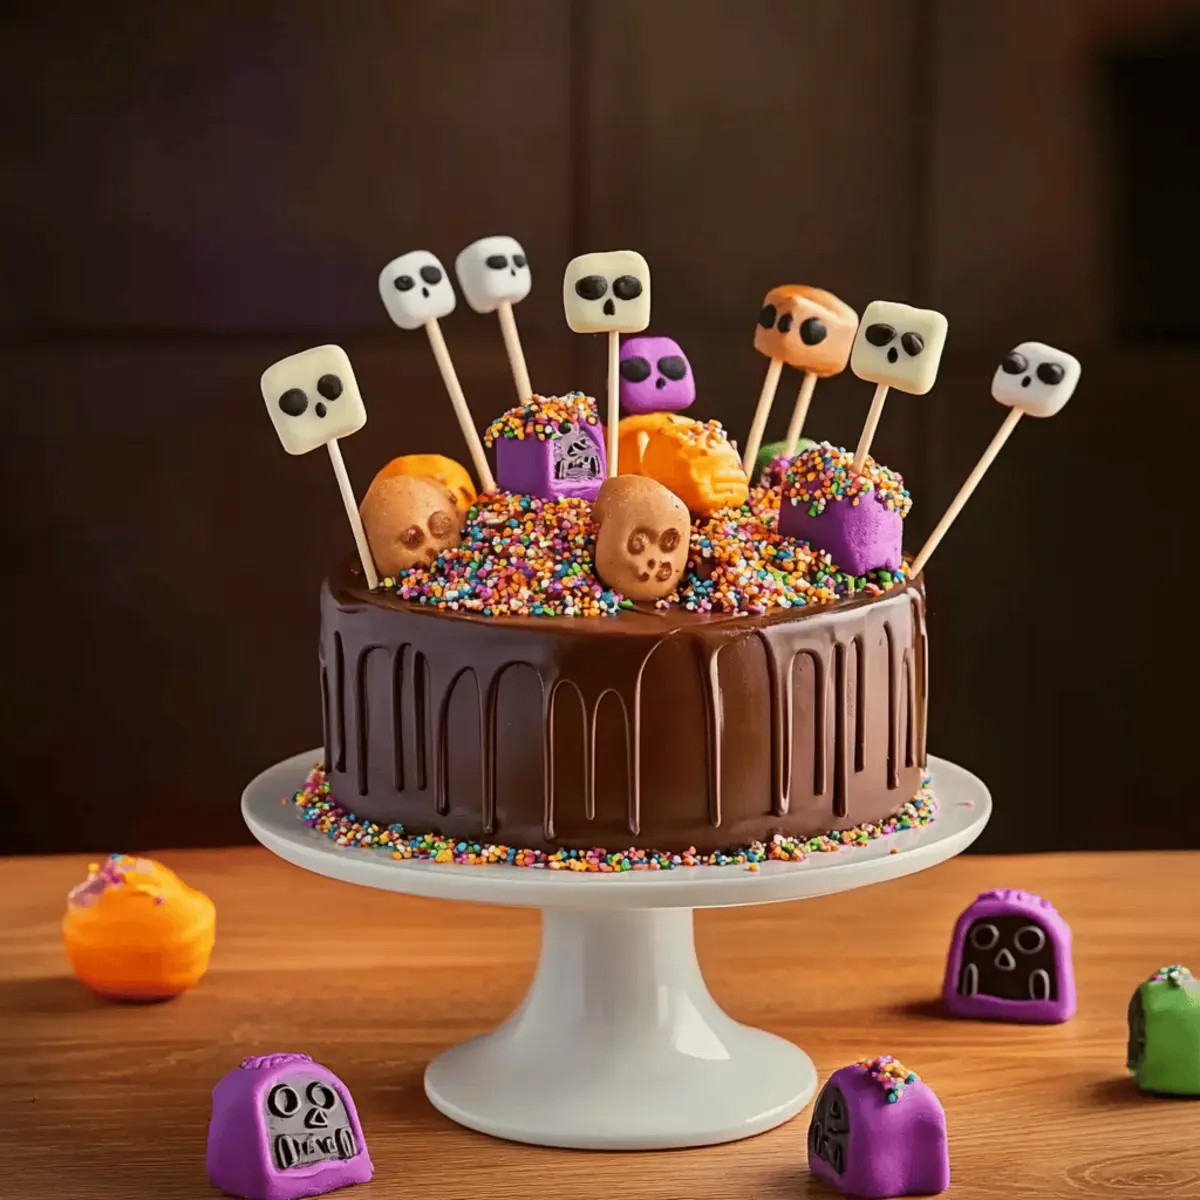
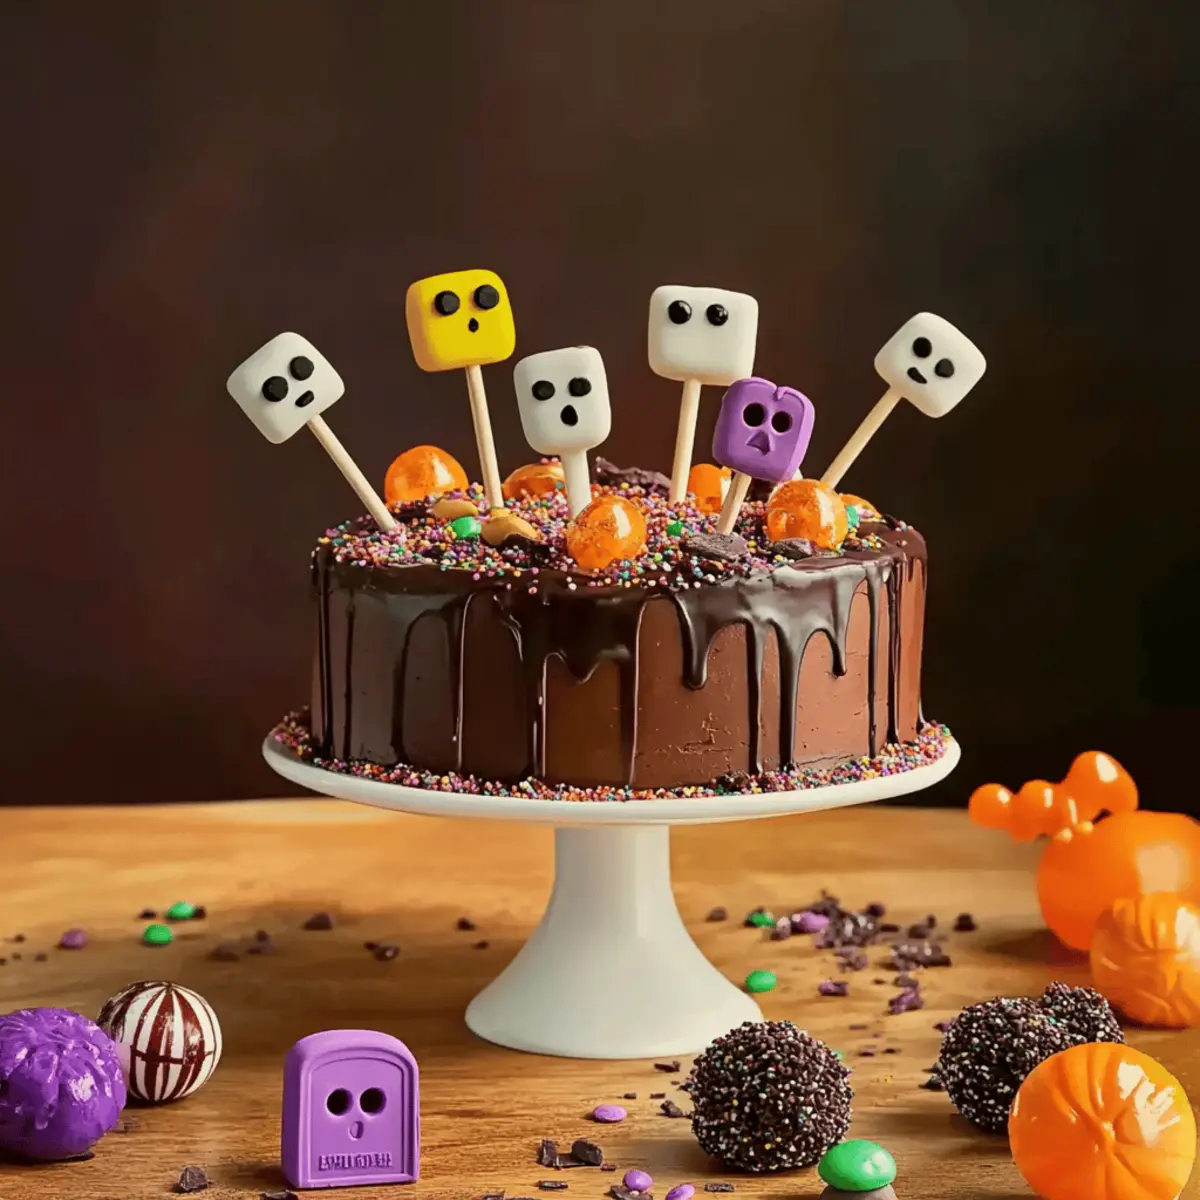
As the leaves begin to fall and the air turns crisp, Halloween creeps closer, bringing with it the magic of nostalgia and sweet creativity. If you’re ready to lift your Halloween festivities to the next level, look no further than these delightful Halloween Marshmallow Pops. Not only are they a hit with kids and adults alike, but they’re also incredibly easy to whip up as no-bake treats! Picture a plate filled with these whimsical pops, each one a mini masterpiece, perfect for capturing the spirit of the season. With their colorful coatings and playful designs, these treats will undoubtedly bring joy to any gathering. So, who’s excited to get their hands sticky and create some spooktacular memories this Halloween?

Why are Marshmallow Pops Perfect for Halloween?
Whimsical and Fun: Halloween Marshmallow Pops are not only adorable but are also a delight to make with your family. The colorful coatings make each pop visually appealing and exciting for kids to enjoy.
No-Bake Ease: These treats don’t require any baking! Just dip, decorate, and enjoy—perfect for busy hosts looking to impress without the hassle.
Customizable: You can get creative with various toppings, from sprinkles to drizzle, making this a versatile recipe. Try chocolate-dipped strawberries as another festive treat!
Crowd-Pleaser: Everyone loves a sweet treat, making these pops ideal for parties, playdates, or as a festive addition to any Halloween gathering.
Memorable: Beyond taste, the experience of making these pops together creates lasting memories—turn your kitchen into a haunted workshop and let the fun begin!
Halloween Marshmallow Pops Ingredients
Get ready to make some spooktacular treats!
For the Marshmallow Pops
- Large Marshmallows – Choose fluffy marshmallows as the base for these sweet creations.
- Candy Melts – Use brightly colored candy melts that will coat the marshmallows beautifully and add a festive flair.
- Lollipop Sticks – Insert these into the marshmallows to create easy-to-hold pops; you can find them in various sizes.
For the Decorations
- Sprinkles – Select Halloween-themed sprinkles, such as bats or pumpkins, for a playful touch.
- Chopped Nuts – Add nuts for a crunchy contrast; they pair well with chocolate coatings.
- Drizzle Chocolate – Melt some extra chocolate to drizzle over pops for a chic finish; this is especially delightful with white chocolate.
- Ghostly Eyes – Use candy eyes to create fun characters on your pops, making them irresistibly cute!
Feel free to get creative with the toppings and let your imagination run wild with these Halloween Marshmallow Pops!
Step‑by‑Step Instructions for Halloween Marshmallow Pops
Step 1: Prepare the Work Area
Start by gathering all your equipment, including a microwave-safe bowl, parchment paper, and lollipop sticks. Ensure your space is clean and organized to make the process smooth and enjoyable. Begin by lining a baking sheet with parchment paper where you will place your finished pops. This prevents sticking and makes cleanup easier later.
Step 2: Melt the Candy Melts
In a microwave-safe bowl, add your colorful candy melts. Microwave in 30-second intervals, stirring in between until fully melted—this typically takes about 1-2 minutes. The melted candy should have a smooth and glossy consistency, ready to coat your marshmallows. Avoid overheating, as this can lead to clumping or burning.
Step 3: Dip the Marshmallows
Insert a lollipop stick into each large marshmallow, ensuring it goes in halfway for stability. Holding the marshmallow by the stick, dip it into the melted candy melts, allowing it to be fully coated. Let any excess candy drip off before placing the pop on the prepared parchment paper. This part is particularly fun, as kids can get involved here!
Step 4: Decorate with Fun Toppings
While the candy coating is still wet, sprinkle your Halloween-themed sprinkles generously over the pops, or add chopped nuts for extra crunch. Get creative with your toppings! For a chic flair, drizzle extra melted chocolate over the coated marshmallows after they’ve set slightly, creating a beautiful design.
Step 5: Add Ghostly Eyes
To turn your Halloween Marshmallow Pops into playful characters, gently press candy eyes onto the coated surface before the candy melts harden completely. This allows the eyes to stick well and will create an adorable and spooky appearance. Be imaginative with the placement to give each pop its unique character!
Step 6: Allow to Set
Once decorated, set the pops aside for about 30 minutes at room temperature, or until the candy coating is firm. You can also place them in the refrigerator for about 10-15 minutes to speed up the setting process. Ensure they are completely hardened before moving on to display or serve.
Step 7: Serve and Enjoy!
Once all the Halloween Marshmallow Pops are set and ready, arrange them on a festive platter or in a container for an eye-catching display. They’re perfect for parties, a spooky movie night, or as a fun treat for trick-or-treaters. Watch as smiles spread across faces when your guests see these delightful treats!
Expert Tips for Halloween Marshmallow Pops
-
Melt Gradually: Make sure to microwave the candy melts in short intervals, stirring frequently. This prevents clumping and ensures a smooth coating for your Halloween Marshmallow Pops.
-
Shape Matters: For best results, use large, fluffy marshmallows that hold their shape well when dipped and decorated. Avoid smaller marshmallows as they can be tricky to work with.
-
Timing is Key: Decorate the marshmallows while the candy coating is still wet to ensure that toppings stick properly. Wait too long, and they may not adhere well.
-
Stick Stability: Insert the lollipop sticks halfway into the marshmallows for better stability. This prevents the pops from toppling over when decorating or serving.
-
Chill to Set: If you’re in a hurry, pop the decorated marshmallows in the refrigerator for 10-15 minutes to speed up the hardening process of the candy coating.
-
Safety First: When using any decorations, especially for kids, ensure everything is food-safe to keep your Halloween celebrations worry-free.
What to Serve with Halloween Marshmallow Pops?
Creating a playful and enchanting spread for your Halloween gathering is easy with these delightful desserts.
-
Spooky Cupcakes: Decorate cupcakes with ghostly frosting or fondant decorations to add whimsy and fun to your dessert table. Their soft and airy texture pairs perfectly with the chewy marshmallows.
-
Pumpkin Cheesecake Bites: These bite-sized treats bring a creamy, rich flavor that contrasts beautifully with the sweetness of marshmallow pops. Serve them chilled for a refreshing treat!
-
Gummy Worms: An essential Halloween candy, their chewy texture and fun design make them a fantastic addition. Scatter them around the dessert platter for extra spookiness.
-
Chocolate-Dipped Pretzels: With a perfect crunch and salty sweet mix, these pretzels introduce a delightful contrast to the soft, fluffy marshmallows, creating a satisfying textural experience.
-
Caramel Apples: A classic fall treat that brings nostalgia and gooey sweetness to the table. The crisp apple and smooth caramel balance out the marshmallow’s texture beautifully.
-
Halloween-Themed Fruit Skewers: Use a mix of seasonal fruits like oranges and grapes to create vibrant, fresh pops of color, balancing the sweetness of your marshmallow pops. These can be both healthy and festive!
-
Witch’s Brew Punch: Serve a fun, spooky punch as a drink option, adding a festive touch to the dessert spread. Its fruity flavors will complement the sweetness of your treats wonderfully.
-
Ghostly Meringues: Light and airy, these meringues can serve as a perfect, delicate counterpart to the dense, sweet marshmallow pops, creating a charming dessert duo.
Make Ahead Options
These Halloween Marshmallow Pops are ideal for busy home cooks looking to save time while keeping the festive spirit alive! You can prepare the marshmallows (dipped in candy melts) up to 24 hours in advance. Simply coat the marshmallows and allow them to set before storing them in an airtight container, ensuring they remain fresh and delicious. To maintain quality, avoid placing them in the refrigerator, as the moisture can affect the coating. When you’re ready to serve, just add your fun toppings and ghostly eyes for that extra festive flair. With this make-ahead strategy, you can enjoy the season without the last-minute rush!
How to Store and Freeze Halloween Marshmallow Pops
Room Temperature: Store prepared marshmallow pops in an airtight container at room temperature for up to 3 days to maintain their freshness and texture.
Fridge: If you prefer to keep your Halloween Marshmallow Pops longer, refrigerate them in a single layer within an airtight container for up to a week. This helps to keep the coating intact and prevents melting.
Freezer: To freeze, wrap each marshmallow pop individually in plastic wrap, then place them in a freezer-safe bag or container. They can be frozen for up to 2 months. Thaw at room temperature before serving.
Reheating: Avoid reheating marshmallow pops, as the coating may become sticky. Instead, serve them chilled or at room temperature for the best experience!
Halloween Marshmallow Pops Variations & Substitutions
Feel free to play and personalize your Halloween Marshmallow Pops for a spooky twist that will dazzle your guests!
-
Fun Toppings: Swap sprinkles with crushed candies like M&M’s or colorful popping candies for an exciting crunch and a burst of flavor.
-
Nut-Free: Use sunflower seed butter instead of peanut butter for a nut-free alternative in recipes involving dipping or drizzling chocolate.
-
Different Fruits: Replace the marshmallows with fresh fruit pieces (like strawberries or banana slices) for a lighter treat that’s just as fun.
-
Colder Coatings: Try using yogurt or a yogurt-based coating instead of candy melts for a creamy, tangy alternative that’s just as delicious.
-
Chocolate Lovers: Use dark chocolate melts instead of candy melts for a richer flavor. Dark chocolate brings an elegant twist that adults will appreciate!
-
Ghostly Variants: Create ghost pops by shaping the marshmallows into ghost figures instead of leaving them round, and use edible markers for features.
-
Texture Play: Incorporate crushed graham crackers or cookie crumbs as a coating for added texture and a fun flavor boost.
-
Spicy Twist: For those who love heat, add a dash of cayenne pepper to the melted chocolate to create a subtly spicy chocolate coating!
Your Halloween Marshmallow Pops can be as unique as your imagination. You might even find that those cookie tombstones from the last dessert recipe would make a perfect addition atop your pops for a creative display! Enjoy experimenting and making unforgettable, festive memories this Halloween!
Halloween Marshmallow Pops Recipe FAQs
What type of marshmallows should I use for the best results?
Absolutely go for large, fluffy marshmallows! They hold their shape well and provide a delightful texture when coated. Avoid smaller marshmallows, as they can be trickier to handle and decorate.
How should I store my Halloween Marshmallow Pops?
You can keep your pops fresh by storing them in an airtight container at room temperature for up to 3 days. If you want them to last longer, refrigerate them for up to a week in a single layer within an airtight container.
Can I freeze Halloween Marshmallow Pops?
Yes! To freeze, wrap each marshmallow pop individually in plastic wrap and place them in a freezer-safe bag or container. They can be frozen for up to 2 months. To enjoy, simply thaw them at room temperature—no need to reheat!
What should I do if my candy melts clump when melting?
To prevent clumping, make sure to microwave the candy melts in 30-second intervals, stirring in between. If you notice them starting to thicken, try adding a tiny bit of vegetable oil to help smooth them out.
How can I make my Halloween Marshmallow Pops suitable for kids with allergies?
Consider using allergy-friendly candy melts and ensure all toppings are free from common allergens such as nuts, dairy, or gluten. You can also opt for fruits like raisins or coconut for a tasty, safe alternative.
Are there any other creative toppings I can use?
Very! You can get imaginative with toppings—think crushed cookies, edible glitter, or even pretzels for a salty crunch. Try mixing and matching different colorful sprinkles to match your Halloween theme!
Halloween Marshmallow Pops That Will Wow Your Guests
Ingredients
Equipment
Method
- Prepare the work area by gathering all equipment and lining a baking sheet with parchment paper.
- Melt the candy melts in a microwave-safe bowl in 30-second intervals until smooth.
- Dip the marshmallows into the melted candy melts, ensuring they are fully coated.
- Decorate with Halloween-themed sprinkles or chopped nuts while coating is still wet.
- Add candy eyes to the pops before the coating hardens.
- Allow the pops to set for 30 minutes at room temperature or in the refrigerator for quicker results.
- Serve and enjoy your delightful Halloween Marshmallow Pops!
Leave a Reply