
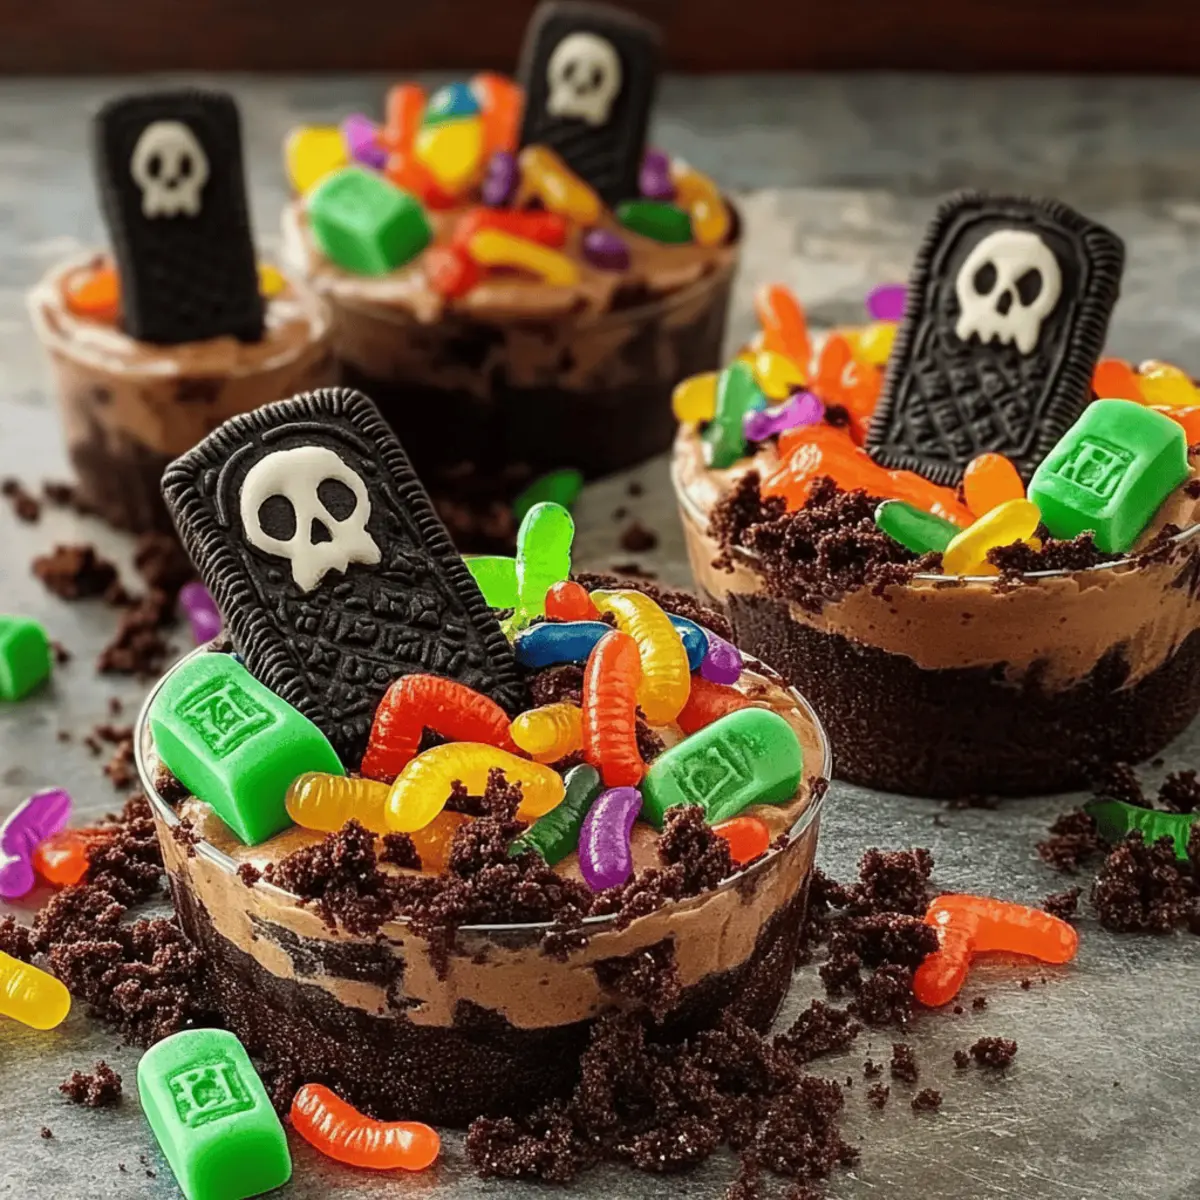
Just the other day, I stumbled upon a group of kids delighting in the Halloween spirit, their faces painted with spooky designs and mouths full of candy. It reminded me that Halloween isn’t just about costumes—it’s also the perfect time to whip up some creative treats, like the irresistible Graveyard Brownies. This fun recipe brings both flair and flavor to your Halloween gatherings, all while being quick to prepare, which means more time for festivities! Imagine the smiles as you present these chocolatey delights, complete with edible decorations that transform your dessert into a playful graveyard scene. Perfect for parties or casual family nights, these brownies promise to be a hit with all ages. Ready to conjure up some deliciously spooky fun? Let’s dive into these frightfully delicious treats!

Why are Graveyard Brownies a Must-Try?
Simplicity makes these brownies an absolute breeze to prepare, perfect for bakers of all skill levels. Deliciously chocolatey and utterly decadent, they provide a rich flavor that every chocolate lover craves. Creative presentation transforms ordinary brownies into a spooky masterpiece, enchanting guests young and old. And with a no-bake option for some decorations, you’ll save time without compromising on fun! Looking for more festive ideas? Check out these playful Gluten Free Brownies for a delicious twist.
Graveyard Brownie Ingredients
• Get ready for a spooky treat!
For the Brownies
- Brownie mix – A convenient base that ensures rich, chocolatey goodness; choose your favorite brand for the best taste.
- Eggs – Essential for binding ingredients; consider using flax eggs for a vegan option.
- Vegetable oil – Adds moisture, making brownies fudgy; substitute with melted coconut oil for a hint of tropical flavor.
- Water – Helps achieve the right consistency; use brewed coffee for an extra depth of flavor.
For the Decorations
- Chocolate frosting – Spreads effortlessly on top; a homemade version can add a personal touch, especially if you like it sweet!
- Crushed Oreos – Creates the ‘dirt’ effect for your graveyard; you can also use chocolate graham cracker crumbs for variety.
- Candy tombstones – Adds a whimsical touch; look for chocolate-covered marshmallows or other fun options for a spooky twist.
- Gummy worms – Perfect for creeping out guests; not a fan? Try candy spiders for a different creepy crawl effect.
- Green icing or fondant – Use this for grass effect; it can be homemade or store-bought to suit your time constraints.
With these Graveyard Brownies, you’re all set to bring laughter and creativity to your Halloween table!
Step‑by‑Step Instructions for Graveyard Brownies
Step 1: Prepare the Brownie Mix
Start by preheating your oven to 350°F (175°C) and greasing a square baking pan. In a large mixing bowl, combine the brownie mix, eggs, vegetable oil, and water. Stir vigorously until the mix is well-combined and smooth, showing no lumps. Pour the brownie batter into the prepared pan, spreading it evenly, then bake for 25–30 minutes or until a toothpick inserted comes out with moist crumbs.
Step 2: Cool and Frost the Brownies
Once baked, remove the brownies from the oven and let them cool in the pan for about 15–20 minutes. When they are cool to the touch, spread a generous layer of chocolate frosting on top, creating a smooth, enticing surface. This chocolate frosting will serve as the perfect base for your graveyard decorations, providing a deliciously sweet touch to your Graveyard Brownies.
Step 3: Create the Graveyard Effect
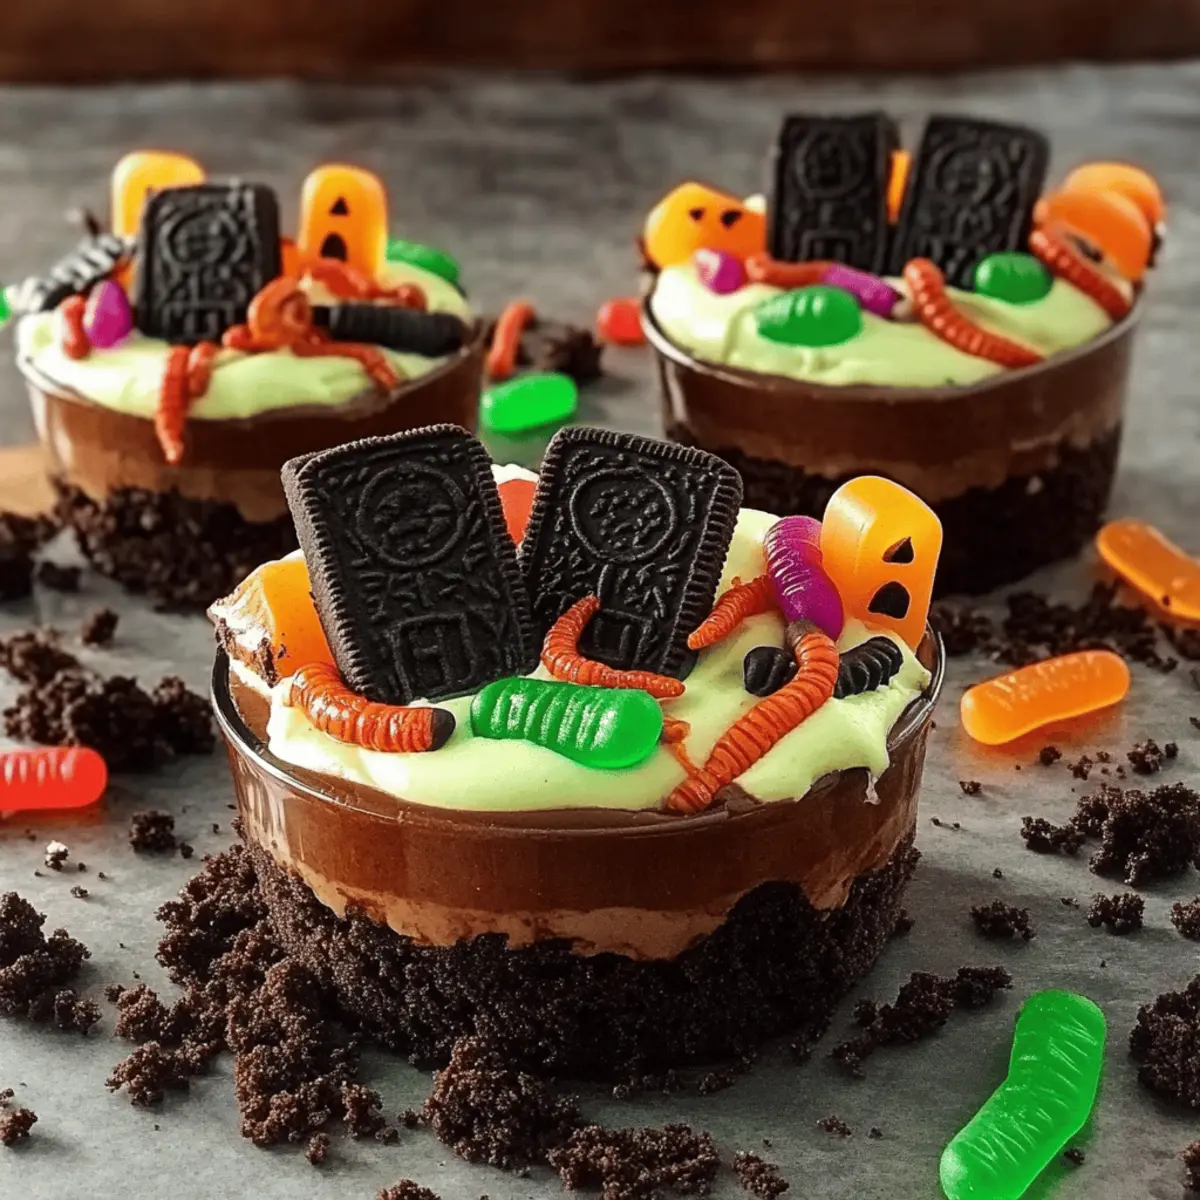
Now it’s time to transform those frosted brownies into a spooky graveyard scene! Sprinkle a layer of crushed Oreos on top of the frosting, mimicking dirt. Make sure the crumbs are evenly distributed for a realistic touch. This step adds texture and enhances the haunting visual appeal of your Graveyard Brownies, setting the stage for the fun decorations ahead.
Step 4: Add Candy Tombstones
Next, carefully position candy tombstones on top of the Oreo ‘dirt’ to create a whimsical grave marker scene. Whether you use chocolate-covered marshmallows or other spooky-shaped candies, arrange them at different angles for visual interest. These decorative pieces should partially sink into the icing, adding to the illusion of an edible graveyard that will dazzle your guests.
Step 5: Finish with Gummy Worms and Grass
For the final touches on your Graveyard Brownies, place gummy worms discreetly around and on top of the brownies, adding a playful creepy factor. Then, using green icing or fondant, pipe or shape little patches of grass around the tombstones for added detail. This will enhance the overall appearance, making your brownies a hauntingly delightful centerpiece for your Halloween festivities.
Step 6: Serve and Enjoy
Slice the brownies into squares and serve them on a fun Halloween-themed platter. For an extra touch, you can sprinkle additional crushed Oreos or add themed decorations around the serving dish. Your festive Graveyard Brownies are now ready to share! Be prepared for oohs and aahs as guests admire and indulge in the creative spooky treats you’ve crafted.
Expert Tips for Graveyard Brownies
-
Choose Quality Mix: Select a brownie mix with a rich chocolate flavor for the best taste. A premium mix elevates your dessert’s overall quality.
-
Cooling Time: Allow the brownies to cool completely before frosting; this prevents the frosting from melting and losing its texture.
-
Decorate Creatively: When placing candy tombstones, varying their angles creates a dynamic lookout, making the graveyard scene more visually engaging.
-
Crushed Oreos: To achieve a realistic dirt effect, crush the Oreos finely but not into dust; this adds the right texture to your Graveyard Brownies.
-
Gummy Worms Placement: Position gummy worms so they appear to be crawling in or out of the ‘graveyard’—it adds fun and builds excitement for your guests!
What to Serve with Graveyard Brownies?
Creating a spooky dessert table filled with delightful treats sets the perfect atmosphere for your Halloween celebration.
- Pumpkin Spice Latte: The warm spices in a pumpkin spice latte balance the chocolatey richness of the brownies, making every bite more delightful.
- Witch’s Brew Punch: A refreshing punch adorned with floating gummy eyeballs adds a fun, eerie flair to your dessert array. Guests of all ages will enjoy this entertaining drink!
- Candy Corn Popcorn: The sweet and salty combination of candy corn popcorn provides a fun texture contrast, making each treat a little more exciting.
- Ghostly Fruit Platter: Use ghostly shapes for fruit like bananas and blueberries to offer a healthier option that still keeps the Halloween vibe alive. Substitute with cookie cutouts for added fun!
- Chocolate Milkshake: Indulging in a rich, thick chocolate milkshake amplifies the chocolate flavor of the brownies. Top with whipped cream for an extra treat!
- Spooky Cheesecake Bites: These mini cheesecakes, adorned with Halloween-themed toppings, bring a creamy counterpart to the chewy brownies and enhance the dessert menu’s variety.
- Creepy Cupcakes: Decorate cupcakes with Halloween designs, providing another sweet option that adds to the dessert table’s visual appeal.
- Apple Cider: Warm apple cider adds a cozy atmosphere, while its sweetness pairs beautifully with the chocolatey depth of your Graveyard Brownies.
How to Store and Freeze Graveyard Brownies
Room Temperature: Store leftover Graveyard Brownies in an airtight container for up to 3 days. This keeps them fresh while maintaining their fudgy texture.
Fridge: For longer storage, place the brownies in the refrigerator, covered, where they can last up to a week. Allow them to come to room temperature before serving for the best flavor.
Freezer: If you want to keep them longer, freeze the brownies in an airtight container for up to 2 months. Thaw in the refrigerator overnight before enjoying.
Reheating: If desired, microwave individual squares on low power for about 10-15 seconds to warm them up, enhancing their gooeyness!
Make Ahead Options
These Graveyard Brownies are perfect for meal prep enthusiasts! You can prepare the brownie base a day in advance by baking and cooling them, then tightly wrapping them in plastic wrap and refrigerating to maintain their fudgy texture. The decorations, such as the chocolate frosting and crushed Oreos, can also be made up to 3 days ahead; simply store them in airtight containers. When you’re ready to serve, spread the frosting, sprinkle on the Oreo dirt, and add the candy tombstones and gummy worms for a fun finish. This prep strategy not only saves you time on the day of your event but ensures your Graveyard Brownies are just as delicious and visually delightful!
Graveyard Brownies: Fun Variations & Substitutions
Feel free to get creative and customize your Graveyard Brownies with these exciting twists that will add even more spooktacular flair!
-
Gluten-Free: Substitute your brownie mix with a gluten-free version or make your brownies from scratch using almond flour for a nutty flavor.
-
Vegan-Friendly: Use flax eggs and a plant-based brownie mix, along with coconut oil instead of regular oil to make this treat accessible for everyone.
-
Decadent Chocolate Upgrade: Add chocolate chips to the brownie batter for an extra chocolatey burst! This gives your brownies an even more indulgent heart.
-
Nutty Surprise: Toss in some chopped nuts, like walnuts or pecans, into the brownie mix for delightful crunch and added texture. The contrast of creamy and crunchy makes them unforgettable.
-
Candy Variations: Instead of gummy worms, try using festive candy eyeballs or spooky marshmallow ghosts to customize the graveyard scene to your liking.
-
Dirt Alternatives: If you’re looking for something different, consider using crushed chocolate-covered pretzels—this adds a salty-sweet twist to your dessert.
-
Spiced Up Frosting: Infuse your chocolate frosting with a hint of cinnamon or even a dash of cayenne pepper for a warm, unexpected kick that hints at the devilish side of Halloween.
For more fun dessert ideas, don’t forget to explore this delicious Gluten Free Brownies recipe to keep your fun festive and inclusive! Combining creativity with culinary delights is the key to making your Halloween celebrations memorable. Enjoy the hauntingly delicious fun!
Graveyard Brownies Recipe FAQs
How do I choose the best brownie mix for Graveyard Brownies?
Absolutely! When selecting a brownie mix, look for one that is rich in chocolate flavor. Premium brands often contain higher-quality cocoa and chocolate chips, which will enhance the overall taste of your Graveyard Brownies, making them irresistibly fudgy and delicious. Personal favorites often lead to crowd-pleasers, so trust your taste!
How should I store leftover Graveyard Brownies?
Very simply! Store any leftover Graveyard Brownies in an airtight container at room temperature for up to 3 days to maintain their decadent fudginess. If you want to extend their shelf life, refrigerate them, making sure they’re covered to avoid drying out. They can last up to a week this way!
Can I freeze Graveyard Brownies?
Absolutely! To freeze your Graveyard Brownies, first, allow them to cool completely. Slice them into squares and then place them in an airtight container or freezer bag, layering parchment paper between the squares to prevent sticking. They will keep well in the freezer for up to 2 months. When you’re ready to enjoy them, simply thaw in the refrigerator overnight.
What if my brownies are too dry?
If your Graveyard Brownies turn out dry, there are a few adjustments you can make. First, ensure you’re not overbaking them; stick to the recommended time and check with a toothpick—moist crumbs should cling to it when done. Additionally, consider adding a touch of brewed coffee to the batter, as it enhances the chocolate flavor and moisture content. You can also serve them with a scoop of ice cream to balance any dryness!
Can I make Graveyard Brownies with gluten-free ingredients?
The more the merrier! You can absolutely make these delightful brownies gluten-free by opting for a gluten-free brownie mix. There are many options available that hold up well, allowing you to enjoy the spooky treat without the gluten! Just ensure all decorations, like Oreos or any candies, are also gluten-free to keep every guest included in the fun.
Do these brownies contain any allergens?
Always a smart question! Graveyard Brownies typically contain common allergens, such as eggs and dairy, if you’re using regular brownie mixes and frosting. To cater to dietary needs, consider using egg substitutes like flax eggs for a vegan version and non-dairy chocolate frosting. Always check labels to ensure the decorations you choose are free from allergens like nuts or gluten for safe enjoyment!

Graveyard Brownies: Spooktacular Treats for Halloween Fun
Ingredients
Equipment
Method
- Preheat your oven to 350°F (175°C) and grease a square baking pan.
- In a large mixing bowl, combine the brownie mix, eggs, vegetable oil, and water. Stir until smooth and lump-free.
- Pour the brownie batter into the prepared pan and spread evenly. Bake for 25–30 minutes or until a toothpick inserted comes out with moist crumbs.
- Let the brownies cool in the pan for about 15–20 minutes until cool to the touch.
- Spread a layer of chocolate frosting on top of the cooled brownies.
- Sprinkle crushed Oreos on top of the frosting, resembling dirt.
- Place candy tombstones on top of the Oreo ‘dirt’, arranging them at different angles.
- Add gummy worms around and on top of the brownies, and pipe green icing or shape fondant for grass.
- Slice the brownies into squares and serve on a Halloween-themed platter.
Leave a Reply