
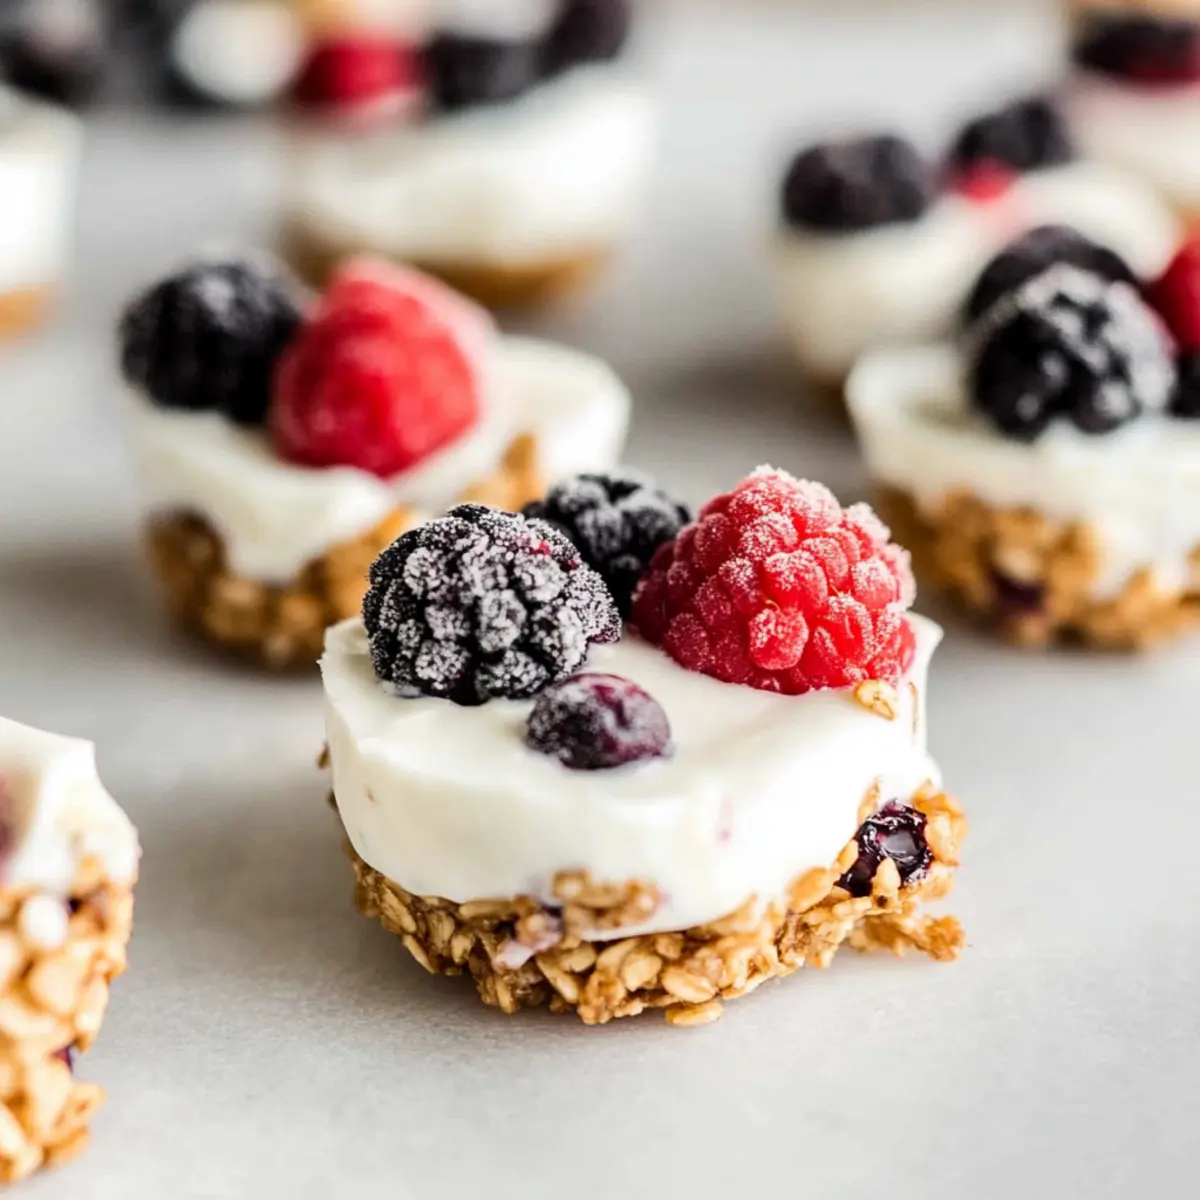
As I opened the freezer one sweltering afternoon, I spotted something that instantly whisked me away from the heat: my batch of Frozen Yogurt Granola Cups. These delightful little snacks are not only a refreshing treat but also incredibly easy to whip up, taking less than 20 minutes to prepare. They combine the creamy goodness of Greek yogurt with the crunch of granola, making them a perfect protein-packed option for both kids and adults. What I love most is their versatility—you can easily customize them to fit dietary preferences, whether you’re going dairy-free or switching up the sweeteners. So, whether you need a quick breakfast, a mid-afternoon snack, or a healthy dessert, this recipe has you covered. Isn’t it time we made snacking as enjoyable as it is nutritious? Let’s dive in!
Why are Frozen Yogurt Granola Cups amazing?
Simplicity at Its Finest: This recipe is incredibly easy, requiring only basic mixing and freezing skills, making it accessible for everyone.
Customize to Your Taste: With options for dairy-free alternatives and varied sweeteners, you can tailor these cups to fit any dietary needs.
Nutritious and Filling: Packed with protein and healthy fats, they satisfy your hunger without the guilt of traditional snacks—perfect for a wholesome treat anytime!
Grab-and-Go Convenience: Ideal for busy mornings or a quick snack, these cups are perfect for on-the-go lifestyles. Try pairing them with your morning coffee or a refreshing smoothie for a well-rounded breakfast!
Impressive Crowd Pleaser: With their vibrant appearance and rich flavors, they are sure to impress guests at your next gathering. For more great ideas on healthy snacking, check out our Breakfast Granola Cups!
Frozen Yogurt Granola Cups Ingredients
Get ready to indulge in these delicious Frozen Yogurt Granola Cups with this handy ingredient list!
For the Granola Base
• Oats – provide the structure and crunch; substitute with gluten-free oats for a gluten-free option.
• Almond Butter – adds creaminess and helps bind the granola; replace with peanut butter or sunflower seed butter for nut allergies.
• Honey – sweetens the crust; swap for maple syrup to keep it vegan and dairy-free.
• Vanilla Extract – enhances flavor; optional but recommended for a more complex taste.
For the Filling
• Greek Yogurt – forms the creamy layer; substitute with coconut yogurt for a vegan-friendly option.
For the Topping
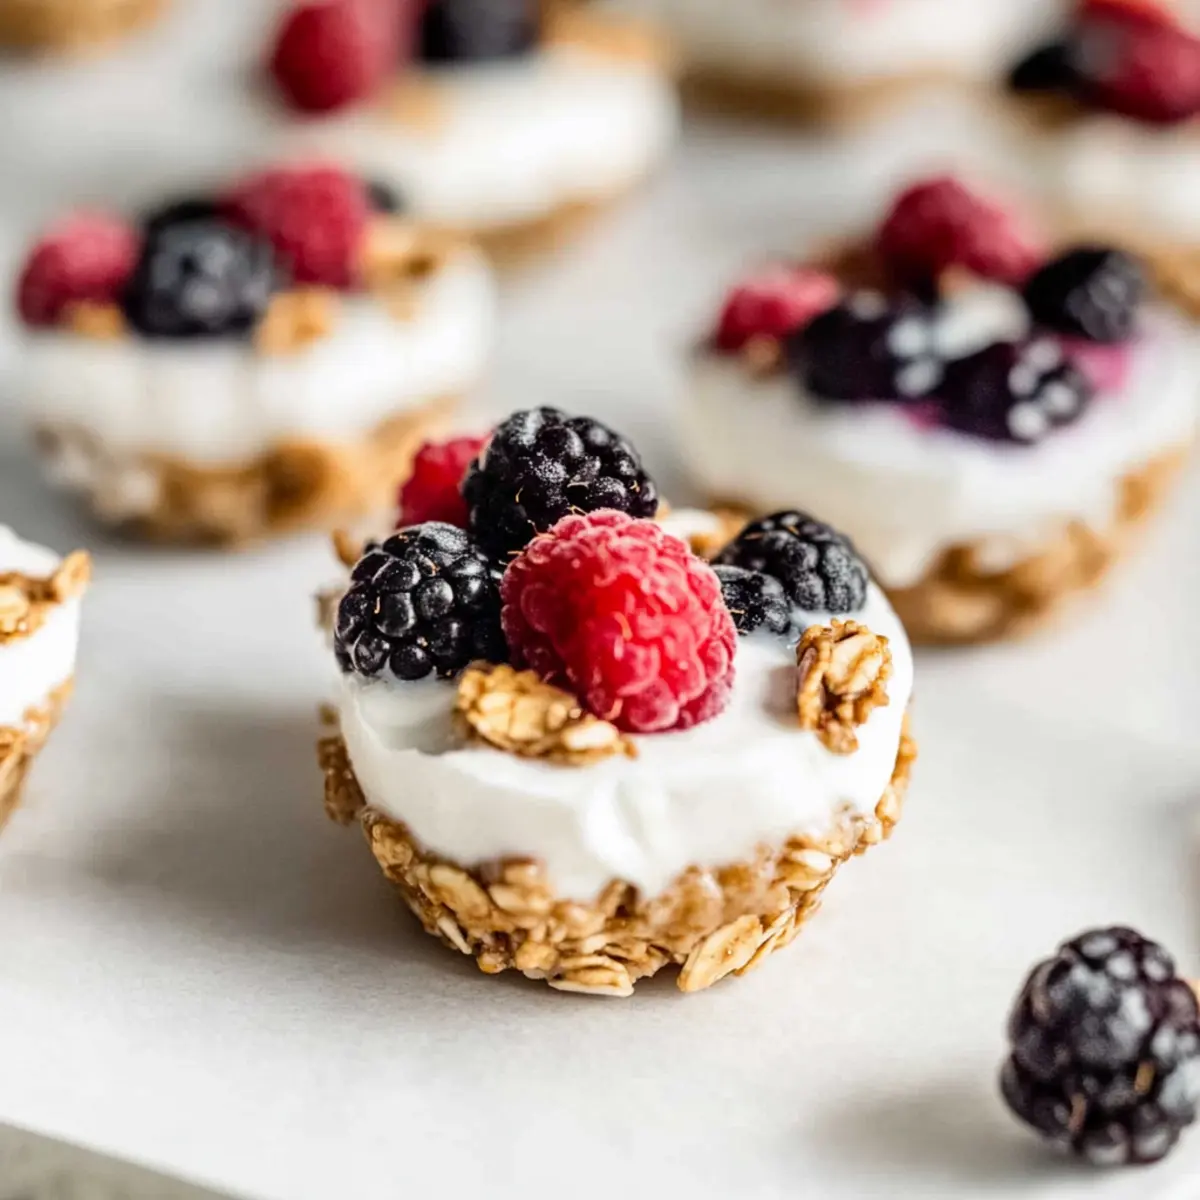
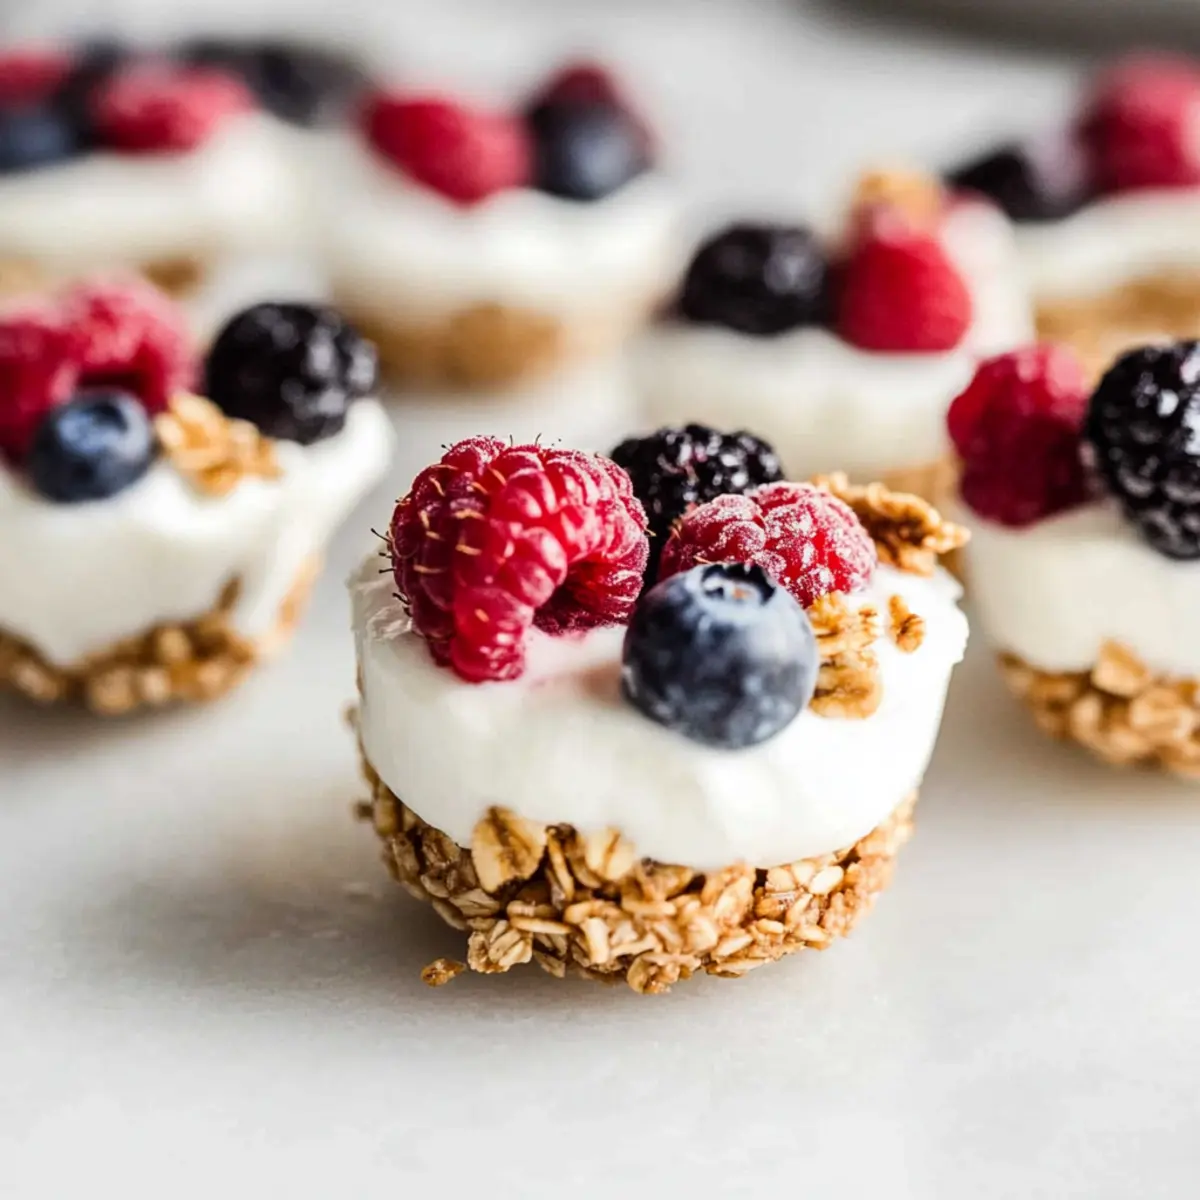
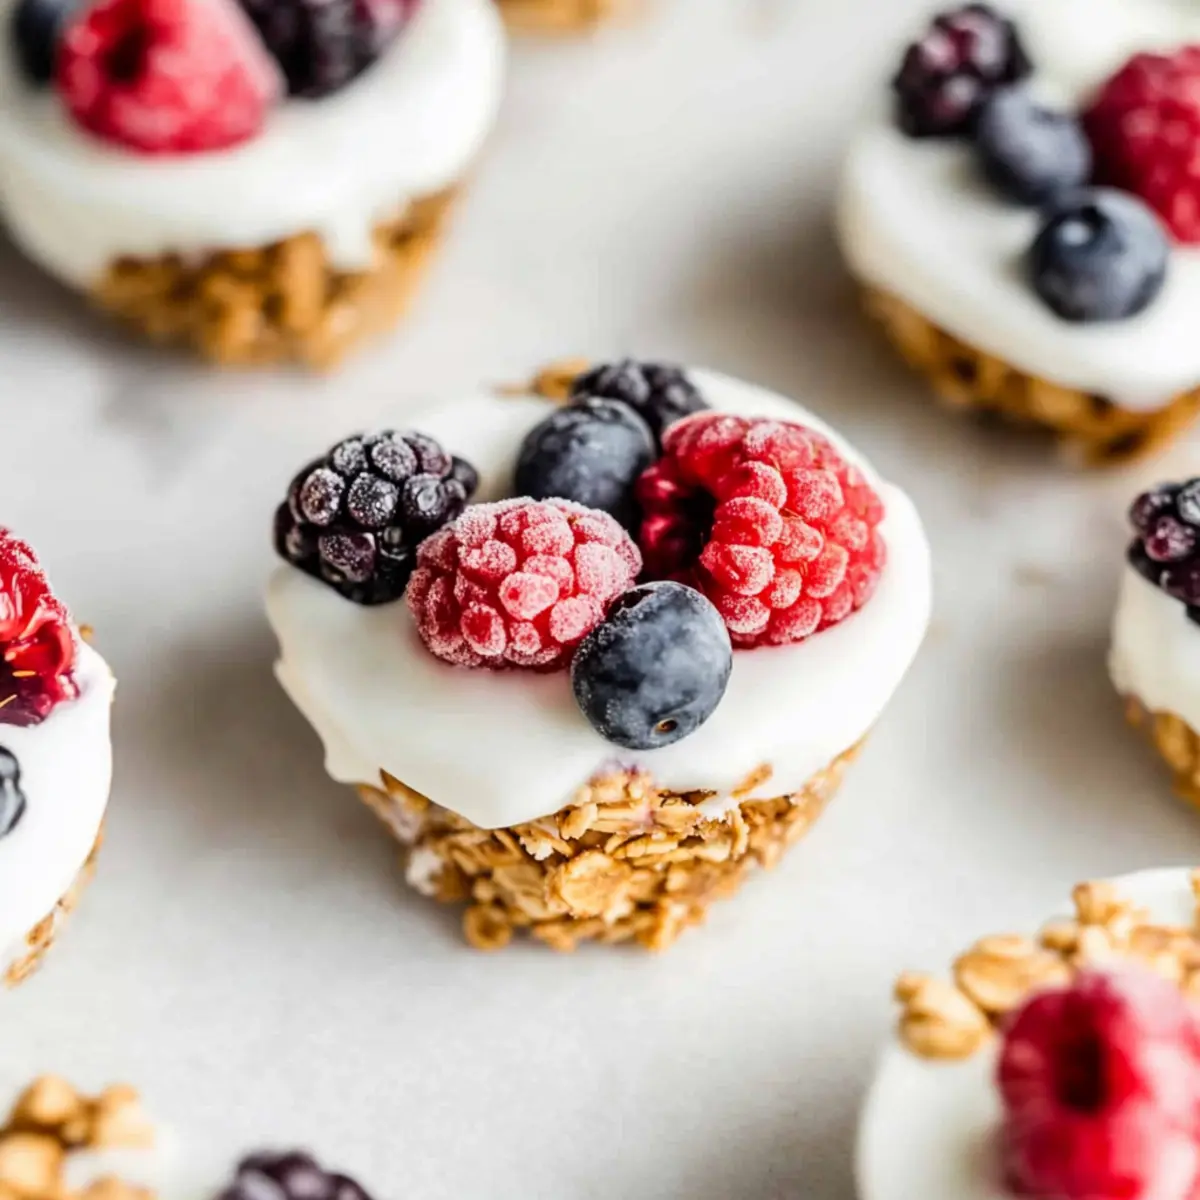
• Fresh Berries – add natural sweetness and a pop of color; feel free to use any seasonal berries you like!
With these ingredients, you’re all set to create your very own Frozen Yogurt Granola Cups! Enjoy the process and let your creativity shine!
Step‑by‑Step Instructions for Frozen Yogurt Granola Cups
Step 1: Prepare the Granola Mixture
In a large mixing bowl, combine rolled oats, almond butter, honey, and vanilla extract. Stir everything together until fully mixed and the oats are well-coated, which should take about 2-3 minutes. The consistency should be sticky enough to hold together when pressed. Set aside to let the mixture rest while you prepare the muffin pan.
Step 2: Press into Muffin Pan
Line a muffin pan with cupcake liners for easy removal. Using your hands or a spoon, evenly distribute the granola mixture into the bottom of each liner, pressing firmly to create a sturdy base. You want the layer to be compact and about 1/4 inch thick, which will take about 5 minutes. This step is crucial for the integrity of your Frozen Yogurt Granola Cups.
Step 3: Add Yogurt
Spoon Greek yogurt into each cup, filling them just above the granola layer. Use a small spatula to smooth the tops, creating an even, creamy layer. This process should take approximately 5 minutes. Ensure each cup has a generous amount of yogurt to make your Frozen Yogurt Granola Cups rich and delicious.
Step 4: Top with Berries
Wash and slice your fresh berries, then place them artfully on top of each yogurt layer. Feel free to get creative with arrangement for extra visual appeal. If desired, sprinkle any remaining granola crumbles over the berries for added crunch. This step should only take about 3 minutes and adds vibrant color to your Frozen Yogurt Granola Cups.
Step 5: Freeze
Carefully place the muffin pan in the freezer and allow the cups to freeze for at least 3 hours. This is essential for ensuring your Frozen Yogurt Granola Cups are solid enough to handle without falling apart. After 3 hours, check for firmness; they should feel solid to the touch.
Step 6: Serve
Once frozen, remove the muffin pan from the freezer and let the cups sit at room temperature for 5-10 minutes before serving. This will make it easier to peel away the liners. Ready to enjoy, your delicious Frozen Yogurt Granola Cups are perfect for a nutritious snack or dessert treat!
How to Store and Freeze Frozen Yogurt Granola Cups
Fridge: Store in an airtight container for up to 5 days to maintain freshness; perfect for grab-and-go snacks during the week.
Freezer: Freeze individual cups in a sealed freezer bag or container for up to 2 months. Just be sure to separate layers with parchment paper to avoid sticking.
Thawing: For best results, remove from the freezer the night before and let them thaw in the fridge or leave them at room temperature for 10-15 minutes before serving.
Serving Tip: Enjoy them straight from the freezer for a refreshing treat on hot days, as Frozen Yogurt Granola Cups are delightful even when slightly frozen!
Make Ahead Options
Frozen Yogurt Granola Cups are perfect for meal prep enthusiasts looking to save time during busy weeks! You can prepare the granola base up to 24 hours in advance; simply mix the oats, almond butter, honey, and vanilla extract and store it in an airtight container in the refrigerator. The yogurt layer can be added right before serving for optimal creaminess, or you can assemble the entire cup and freeze them for up to 2 months. Just remember to let them thaw at room temperature for 5-10 minutes before enjoying, ensuring they retain that delightful texture. With these make-ahead tips, you’ll have nutritious snacks ready whenever you need them!
What to Serve with Frozen Yogurt Granola Cups
These delightful snacks create a perfect backdrop for a nourishing meal filled with vibrant flavors and textures.
- Fresh Fruit Salad: A medley of juicy seasonal fruits adds brightness and complements the creamy yogurt with natural sweetness.
- Smoothie Bowl: Served alongside, a smoothie bowl packed with green goodness enhances your snack with an energizing kick, ideal for breakfast or a light lunch.
- Nutty Granola Clusters: The crunch and nutty flavor of granola clusters echo the texture of the cups, making for a satisfying contrast that’ll please every palate.
- Coconut Chia Pudding: Creamy and rich, this pudding brings an exotic twist that pairs wonderfully with the flavor profiles of the yogurt cups.
- Herbal Iced Tea: Refreshing and light, a cup of herbal iced tea offers a soothing, fragrant sip that balances the creamy and sweet notes in each bite.
- Greek Yogurt Parfait: Layered with more fresh berries and your favorite granola, this parfait can make your snacking experience feel decadent while keeping it healthy.
- Dark Chocolate Drizzled Berries: The slight bitterness of dark chocolate on strawberries or blueberries provides a luxurious touch, perfect for when you’re craving a little indulgence.
- Matcha Latte: The earthy flavors of matcha create a harmonious balance with the sweetness of the cups, ideal for an afternoon pick-me-up.
Expert Tips for Frozen Yogurt Granola Cups
• Mix It Well: Ensure that the granola mixture is thoroughly combined before pressing it into the muffin pan; this helps create a solid base that holds together.
• Freeze Right: Be patient with freezing time; cups should be frozen for at least 3 hours. Under-freezing can lead to mushy, hard-to-handle cups.
• Choose Thicker Yogurt: For the best texture and creaminess, opt for thicker Greek yogurt; regular yogurt might turn out icier, which could alter the delicious experience.
• Salt for Flavor: Add a pinch of salt to the granola mixture to enhance sweetness and overall flavor balance—this small touch makes a meaningful difference in your Frozen Yogurt Granola Cups!
• Play with Toppings: Get creative with toppings! Customize your cups by adding sliced fruit, nuts, or even a sprinkle of chocolate chips for an indulgent twist that will impress everyone.
Frozen Yogurt Granola Cups Variations
Feel free to explore your creativity and make these delicious cups uniquely yours!
- Dairy-Free: Substitute Greek yogurt with coconut yogurt for a creamy, dairy-free alternative.
- Nut-Free: Swap almond butter for sunflower seed butter, perfect for nut allergies without compromising flavor.
- Sweetener Swap: Use maple syrup instead of honey for a vegan twist that’s still perfectly sweet.
- Extra Crunch: Mix in chopped nuts or seeds to the granola layer for an exciting boost of texture.
- Fruit Choices: Customize with seasonal fruits; blueberries, strawberries, or even banana slices can brighten your cups vividly.
- Chocolate Treat: Add dark chocolate chips to the granola mixture for a decadent twist and extra indulgence.
- Coconut Bliss: Sprinkle shredded coconut on top for a tropical flair that enhances both flavor and texture.
- Spicy Kick: Add a pinch of cinnamon or a dash of cayenne pepper for a surprising and delightful heat level.
These variations are just a starting point! For more inspiration in creating delicious snacks, don’t forget to check out our Breakfast Granola Cups for another wonderful treat!
Frozen Yogurt Granola Cups Recipe FAQs
How should I select ripe ingredients for my Frozen Yogurt Granola Cups?
Absolutely! When choosing fresh berries, look for vibrant colors and firm textures—avoid any with dark spots or mushy areas. If using Greek yogurt, opt for a brand that offers a creamy consistency; this will enhance the cups’ overall flavor. Finally, choose a nut butter that is smooth with no added sugars for the best results in your granola base.
What is the best way to store Frozen Yogurt Granola Cups, and how long do they last?
You can store your Frozen Yogurt Granola Cups in an airtight container in the refrigerator for up to 5 days, allowing for easy grab-and-go snacks. If you’re planning to keep them for longer, they can be frozen in a sealed freezer bag for up to 2 months. Just remember to separate layers with parchment paper to prevent them from sticking together!
Can I freeze the cups, and how do I do it properly?
Very! To freeze your Frozen Yogurt Granola Cups, place the muffin pan directly into the freezer for at least 3 hours until they are completely firm. Once frozen solid, gently remove the cups from the liners and place them in a single layer in a freezer-safe bag. This method keeps them from sticking together. Make sure to label and date your bag for future snacking!
I have allergies; can I modify this recipe for dietary restrictions?
Absolutely! This recipe is quite flexible. You can easily make it dairy-free by substituting Greek yogurt with coconut yogurt or any other dairy-free yogurt of your choice. For nut allergies, replace almond butter with sunflower seed butter or tahini. Honey can be swapped with maple syrup, making these cups both vegan and delicious!
What should I do if my granola base falls apart?
If your Frozen Yogurt Granola Cups aren’t holding together after freezing, it may be due to insufficient mixing or lack of binding ingredients. Ensure that when preparing the granola mixture, everything is well-combined and chunky—I recommend mixing until the oats are fully coated. If the mixture still feels too dry, adding a touch more nut butter can help bind everything together!
Anything else I should consider for serving?
Yes! To serve, let the cups thaw at room temperature for 5-10 minutes for easier removal from the cupcake liners. For an extra refreshing treat on hot days, enjoy them straight from the freezer. They are delightful and maintain a lighter, icy texture that makes them perfect for summer snacking!
Delicious Frozen Yogurt Granola Cups for Healthy Snacking
Ingredients
Equipment
Method
- In a large mixing bowl, combine rolled oats, almond butter, honey, and vanilla extract. Stir everything together until fully mixed and the oats are well-coated.
- Line a muffin pan with cupcake liners. Evenly distribute the granola mixture into the bottom of each liner, pressing firmly to create a sturdy base.
- Spoon Greek yogurt into each cup, filling them just above the granola layer. Use a spatula to smooth the tops.
- Wash and slice your fresh berries, then place them on top of each yogurt layer. Get creative with the arrangement.
- Carefully place the muffin pan in the freezer and allow the cups to freeze for at least 3 hours.
- Once frozen, remove the muffin pan from the freezer and let the cups sit at room temperature for 5-10 minutes before serving.
Leave a Reply