
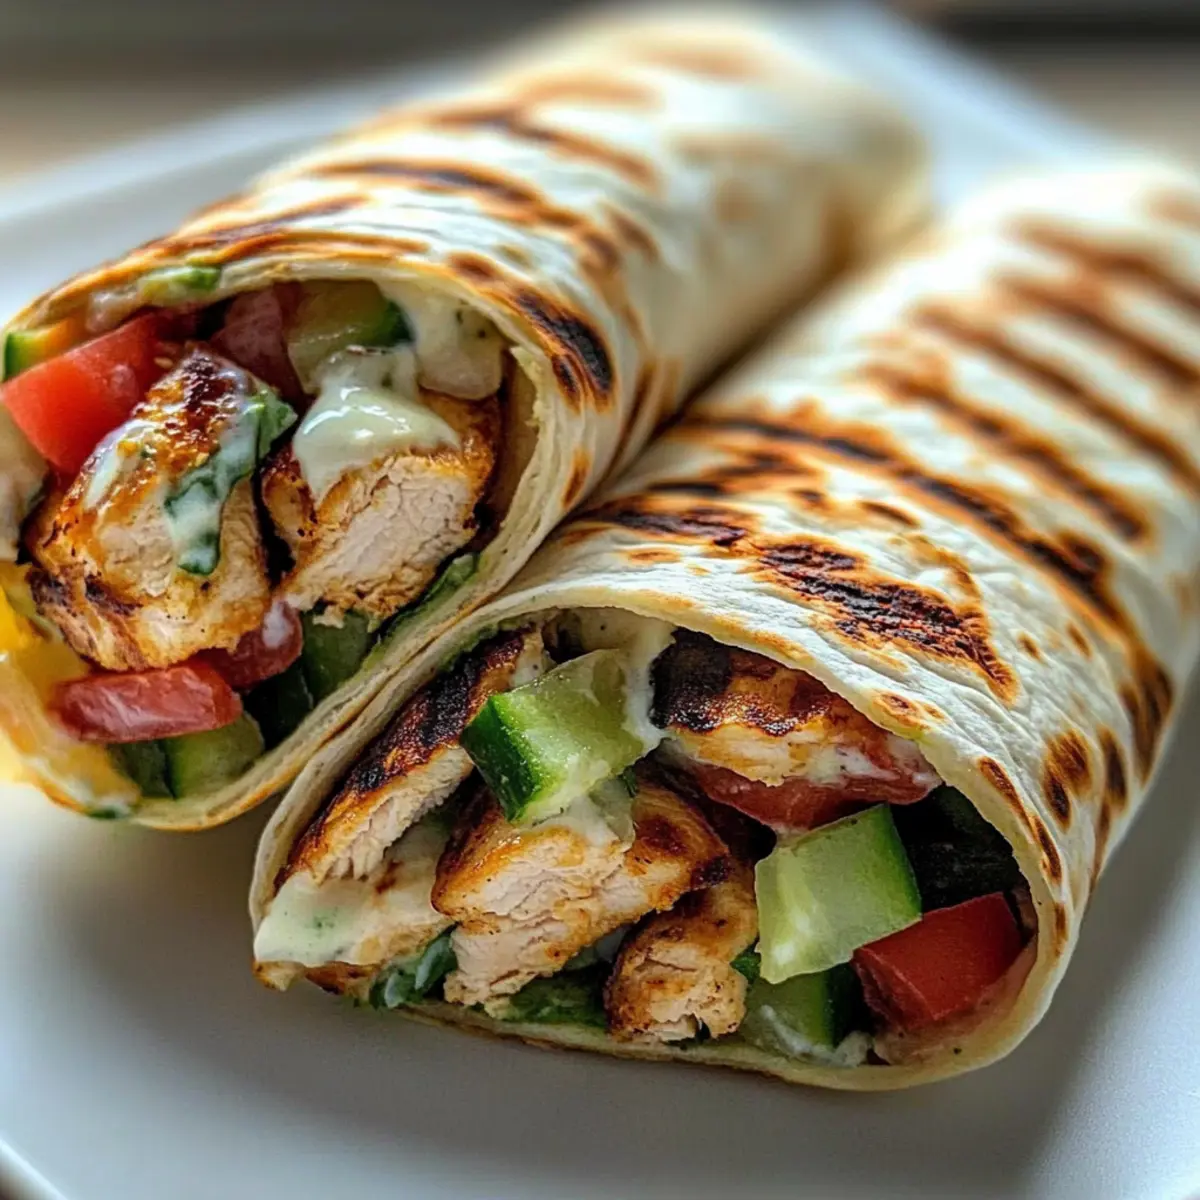
The sizzling sound of grilled chicken hitting a hot skillet is music to my ears. There’s something undeniably satisfying about being able to whip up a meal that is not only quick but wholly satisfying. Enter the Creamy Grilled Chicken Wrap—your ready-to-go solution for busy days that still demand flavor and nutrition. This easy chicken wrap is filled with high-protein goodness and vibrant fresh vegetables, making it a wonderful option for anyone tired of fast food. In just 20 minutes, you can enjoy a crispy, warm wrap that satisfies even the heartiest of appetites. Plus, the flexibility to customize it with whatever ingredients you have on hand adds a fun twist to your cooking repertoire. What’s your favorite filling to add? Let’s explore this delicious recipe together!
Why is This Chicken Wrap So Special?
Quick and Easy: In just 20 minutes, your delicious wrap is ready, making it the ultimate weeknight dinner solution.
High-Protein Delight: Packed with grilled chicken and fresh veggies, this wrap fuels your day while keeping your protein goals in check.
Versatile Ingredients: Customize it based on what you have! Leftover grilled chicken? Perfect. Fresh cucumbers or bell peppers? Toss them in!
Crispy Texture: Enjoy a comforting crunch with every bite, especially when toasted to perfection. This is a tasty way to elevate your lunch options.
Don’t forget to check out other crowd-pleasers like our Chimichurri Grilled Chicken or Honey Pepper Chicken for more meal inspiration!
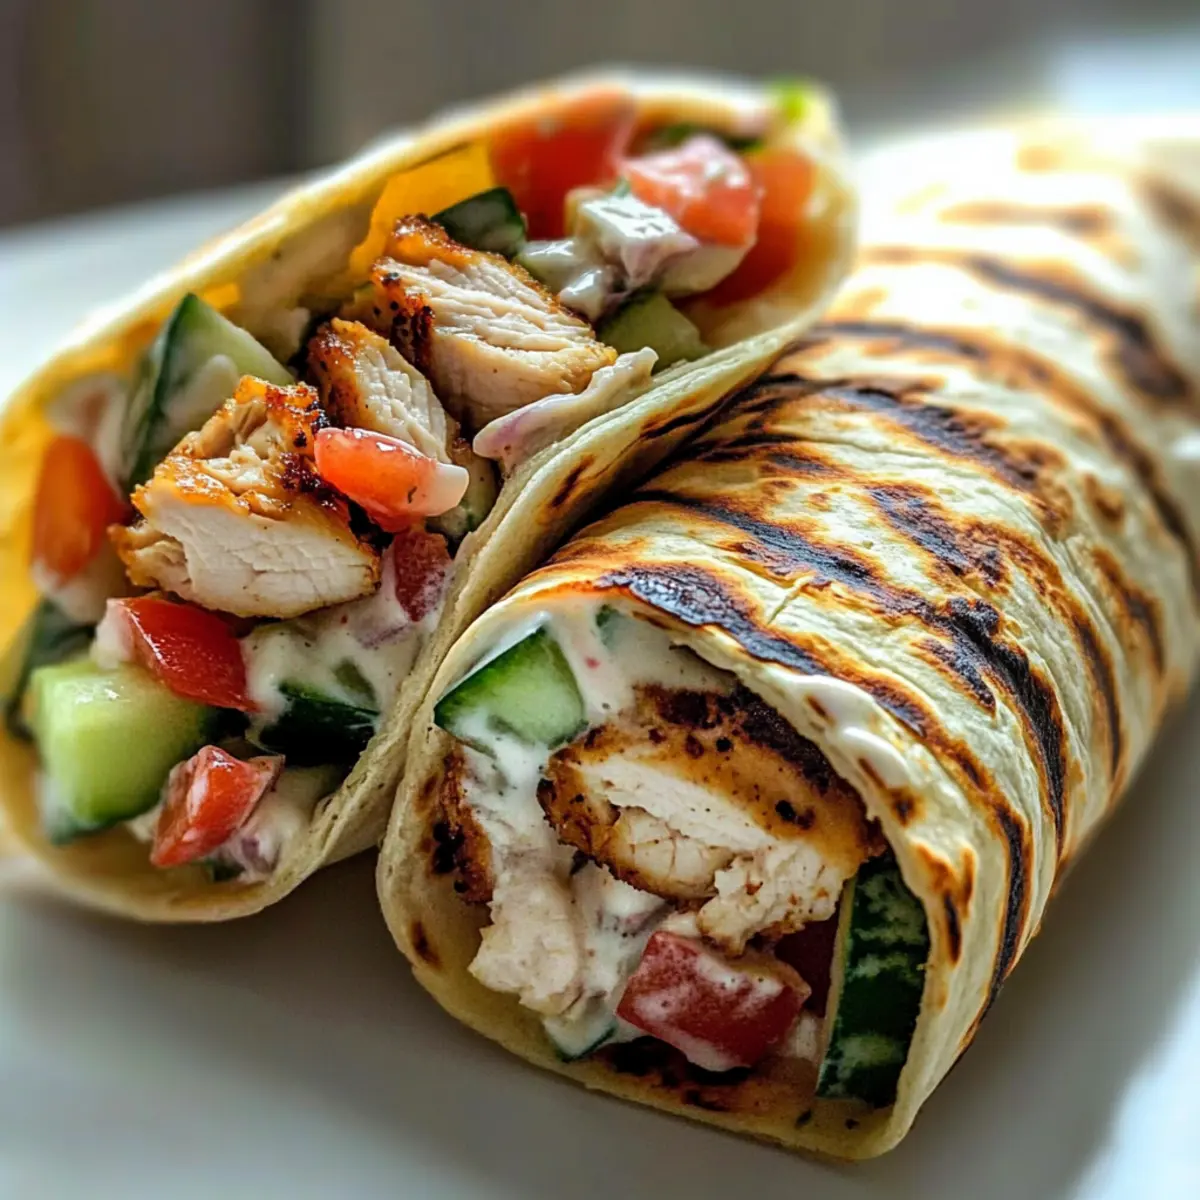
Creamy Grilled Chicken Wrap Ingredients
• Here’s everything you need for this satisfying meal.
For the Wrap
- Grilled Chicken – Use leftover grilled chicken for a quick, convenient protein source.
- Olive Oil – This will help achieve a crispy texture when sautéing.
- Tortillas – Warm them for a few seconds to ensure they roll easily without tearing.
For the Fillings
- Cilantro – Adds a burst of fresh flavor; don’t skip this vibrant herb!
- Fresh Vegetables (e.g., bell peppers, cucumbers) – Toss in whatever veggies you have for added crunch.
- Lettuce – Adds crispness and balances the creaminess of the sauce.
For the Sauce
- Creamy Sauce – This flavor glue holds everything together; spread it thinly to prevent sogginess.
Remember, this delicious Creamy Grilled Chicken Wrap is as customizable as it is tasty!
Step‑by‑Step Instructions for Creamy Grilled Chicken Wrap
Step 1: Heat the Skillet
Begin by heating a tablespoon of olive oil in a large skillet over medium heat. Allow the oil to warm for about 1-2 minutes until it shimmers gently, indicating that it’s ready for cooking. This will create a delightful, crispy texture for the grilled chicken as it sears.
Step 2: Sauté the Chicken
Add your chopped grilled chicken to the skillet, seasoning it with salt and pepper. Cook for 3-4 minutes, stirring occasionally until the chicken is lightly crispy and heated through. You should see a golden-brown color develop on the chicken pieces, enhancing both flavor and texture for your Creamy Grilled Chicken Wrap.
Step 3: Warm the Tortillas
While the chicken cooks, warm your tortillas to make them pliable. You can do this by microwaving them for about 10 seconds or toasting them in a pan for 1-2 minutes. Keeping an eye on them prevents tearing, ensuring they roll nicely around your flavorful fillings.
Step 4: Spread the Sauce
Once the tortillas are warmed, take one and spread a thin layer of creamy sauce across the entire surface. This acts as a flavor glue and prevents sogginess, allowing each bite of your Creamy Grilled Chicken Wrap to be packed with flavor without the mushiness!
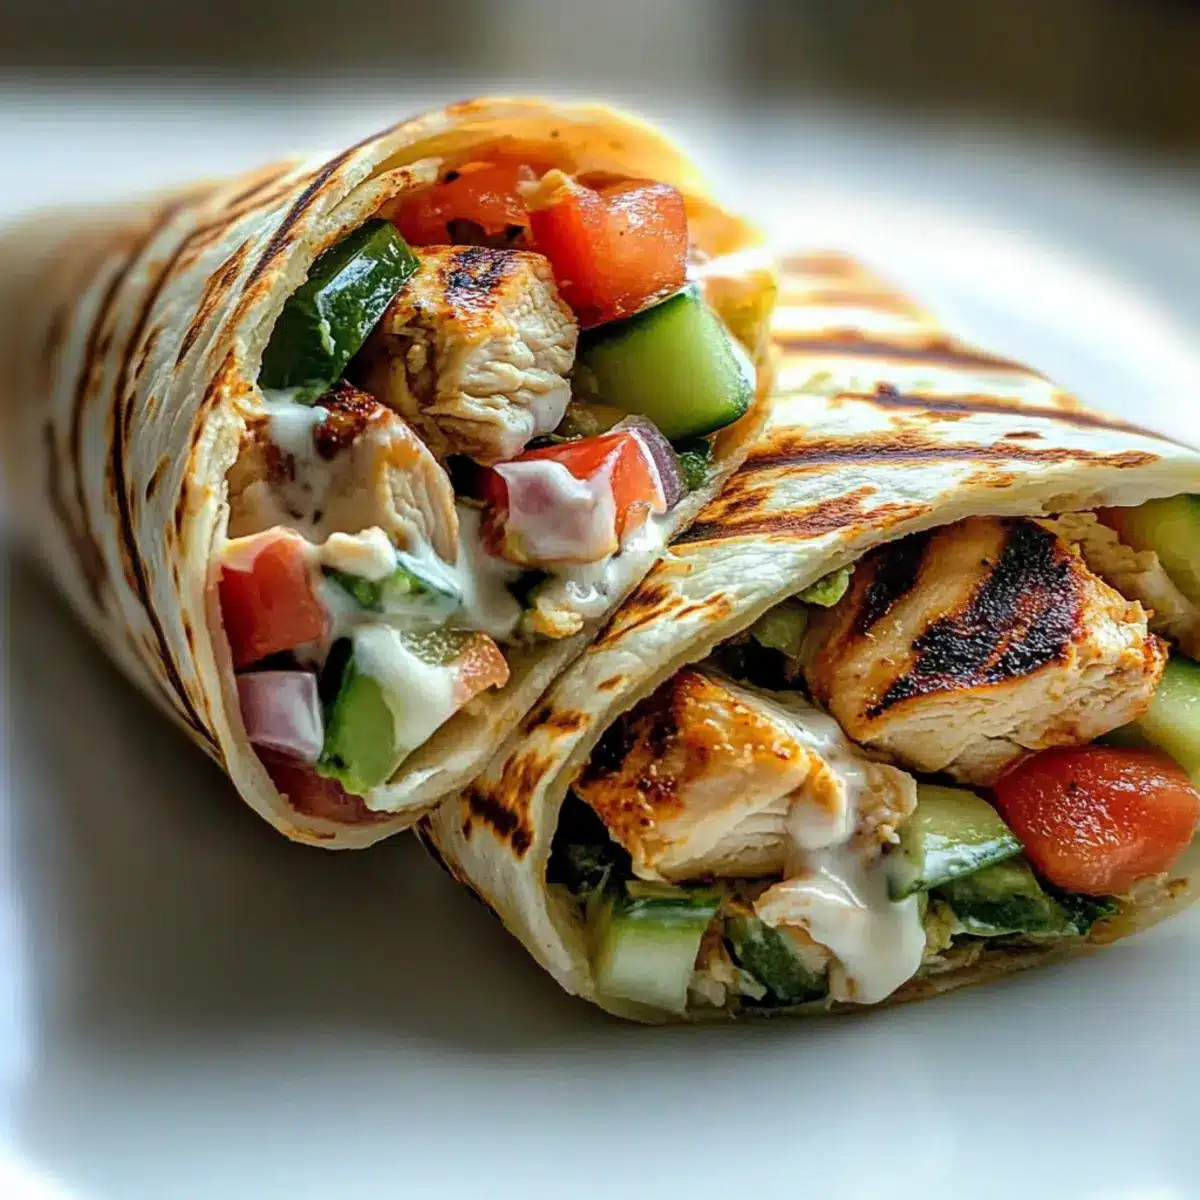
Step 5: Layer the Fillings
Start layering your wrap by adding the sautéed chicken first. Then, follow with your choice of fresh vegetables and a handful of lettuce. Get creative with your veggie mix for a burst of textures and colors! This layering helps maintain the structure of the wrap while enhancing its taste.
Step 6: Roll the Wrap
Carefully roll the tortilla tightly around the fillings, tucking in the sides as you go. This ensures that none of the delicious ingredients spill out during the cooking process. Aim for a snug roll that doesn’t tear the tortilla, preserving all the vibrant flavors of your Creamy Grilled Chicken Wrap.
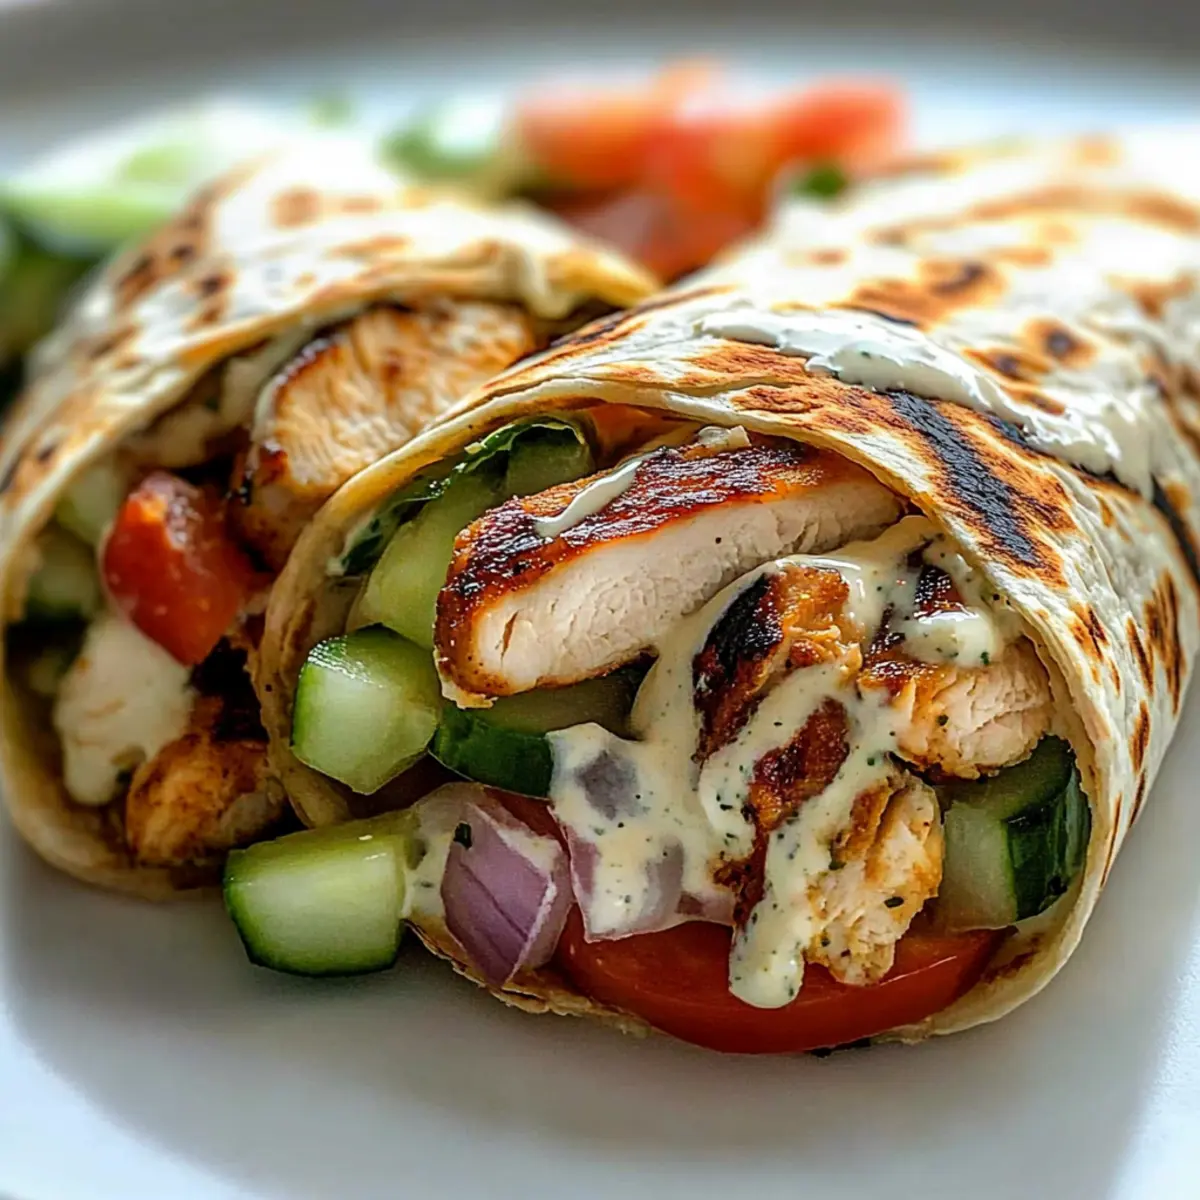
Step 7: Toast the Wrap
Now, place the assembled wrap seam-side down in the skillet over medium heat. Toast it for 1-2 minutes until golden brown, then flip it gently and toast the other side. This creates a delightful crunch and seals the wrap, making it irresistibly crispy on the outside while keeping the fillings warm and gooey within.
Make Ahead Options
These Creamy Grilled Chicken Wraps are a fantastic choice for meal prep! You can grill and season the chicken up to 3 days in advance, then simply refrigerate it in an airtight container to maintain freshness. Fresh veggies can also be chopped and stored separately for up to 24 hours to keep them crisp. When you’re ready to enjoy your wraps, just warm the tortillas, layer the prepared ingredients, and toast them as directed for that deliciously crunchy exterior. This preparation not only saves you time but ensures your wraps are just as flavorful and satisfying when served!
How to Store and Freeze Creamy Grilled Chicken Wrap
Fridge: Store the wrap wrapped tightly in foil or parchment paper for up to 2 days. Keep it airtight to maintain freshness.
Freezer: For longer storage, freeze the assembled wrap in a freezer-safe bag for up to 2 months. Wrap tightly to prevent freezer burn.
Reheating: To enjoy your Creamy Grilled Chicken Wrap, reheat it in a 350°F oven or air fryer for about 10-15 minutes. This helps retain that crispy texture!
Assembling Fresh: If you prefer freshly assembled wraps, store each component separately—chicken, veggies, and sauce—and combine them when ready to eat.
What to Serve with Creamy Grilled Chicken Wrap
Experience a delightful culinary adventure as you craft a meal that’s not only quick but also bursting with flavors and textures.
-
Crispy Sweet Potato Fries: The sweetness complements the savory wrap, and their crunchiness adds an enjoyable contrast to the meal.
-
Zesty Cucumber Salad: Refreshing and light, this salad balances the richness of the creamy wrap with a crisp texture and a tangy kick.
-
Roasted Vegetable Medley: A colorful mix of roasted veggies enhances nutritional value, providing a heartwarming, caramelized flavor that pairs beautifully with the wrap.
-
Herbed Quinoa: This nutty, fluffy side elevates your meal, adding protein while maintaining a subtle backdrop that allows the wrap to shine.
-
Guacamole and Tortilla Chips: A creamy, zesty guacamole pairs wonderfully, offering a rich dip that complements the flavors of the wrap while the chips add texture.
-
Sparkling Lemonade: A fizzy drink with a citrus zing refreshes your palate, making it the perfect accompaniment to a warm, savory chicken wrap.
-
Fruit Skewers: Light and vibrant, these add a refreshing sweetness and a burst of color to your plate, making your meal feel festive.
-
Chilled Green Tea: Offering a soothing finish, this beverage works well with the wrap’s savory characteristics while adding a hint of earthiness.
-
Mini Berry Parfaits: A light dessert option with layers of yogurt and berries provides a sweet but healthy way to end your meal, enhancing the overall experience.
Creamy Grilled Chicken Wrap Variations
Feel free to personalize your wrap creation with these fun ideas and make it truly your own.
-
Rotisserie Chicken: Swap in rotisserie chicken for a quick and easy protein boost. It’s perfect for busy nights!
-
Spicy Kick: Add jalapeños or a dash of hot sauce for a fiery twist that will awaken your taste buds. Spice lovers will adore this upgrade!
-
Vegetarian: Replace chicken with grilled portobello mushrooms or chickpeas for a delicious vegetarian alternative. This keeps all the flavor while offering a new texture!
-
Gluten-Free: Use lettuce wraps or gluten-free tortillas to enjoy this recipe without the gluten. It’s fresh, crunchy, and light!
-
Herb Infusion: Incorporate fresh herbs like basil or mint for a fragrant burst of flavor that uplifts your wrap. These will take your taste experience to a whole new level!
-
Creamy Options: Experiment with different creamy sauces like ranch, tzatziki, or avocado crema. Each variation will give your wrap a unique flavor profile!
-
Crunchy Additions: Toss in nuts, seeds, or crispy fried onions for an exciting crunch that complements the creaminess of the sauce. Your texture-loving friends will thank you!
Consider trying these variations with Honey Pepper Chicken or an Herb Roasted Chicken from our collection for a different, delightful meal experience!
Expert Tips for Creamy Grilled Chicken Wrap
-
Keep It Dry: Ensure all vegetables are thoroughly dried before adding them to the wrap. Wet ingredients can lead to a soggy Creamy Grilled Chicken Wrap.
-
Avoid Tearing: Warm tortillas just enough to make them pliable but not too hot to handle. This prevents unwanted tearing during assembly.
-
Quick Toasting: Toast wraps immediately after rolling for the best crispy texture. This enhances overall flavor and makes each bite satisfying.
-
Meal Prep Success: When prepping in advance, store chicken, veggies, and sauce in separate containers. This keeps the ingredients fresh and prevents sogginess before serving.
-
Flavor Variations: Get creative! Don’t hesitate to swap in your favorite sauces or seasonings to make your Creamy Grilled Chicken Wrap uniquely yours.
Creamy Grilled Chicken Wrap Recipe FAQs
How do I choose the right grilled chicken for my wrap?
Absolutely! For the best flavor and texture, opt for grilled chicken that is moist and cooked through. If you’re using leftover grilled chicken, make sure it’s fresh, with no dark spots or unusual odors. If needed, you can quickly grill or sauté fresh chicken pieces to your liking before adding them to your wrap.
How should I store leftovers of my Creamy Grilled Chicken Wrap?
Very simply! Wrap your leftover Creamy Grilled Chicken Wrap tightly in foil or parchment paper to prevent air from seeping in. You can store it in the refrigerator for up to 2 days. Enjoy it cold or reheat it in the oven for a quick, satisfying meal.
Can I freeze the Creamy Grilled Chicken Wrap for later?
Yes, you can! For freezing, wrap the assembled wrap tightly in plastic wrap and then place it in a freezer-safe bag to keep out air. It will last up to 2 months in the freezer. When you’re ready to enjoy it, simply reheat in a 350°F oven for about 10-15 minutes to restore that crispy texture.
What can I do if I find my wrap is soggy after assembly?
Don’t worry—this is a common issue! To prevent sogginess, ensure all fresh vegetables are thoroughly dried before adding them to your wrap. You might also want to spread only a thin layer of sauce to keep excess moisture at bay. If your wrap is soggy already, consider toasting it in a pan to help restore some crunch.
Are there any allergies to consider with this recipe?
Yes, keep in mind that this recipe contains chicken and may include allergens such as gluten (from tortillas) and lactose (depending on your creamy sauce choice). If you’re cooking for someone with dietary restrictions, you can use gluten-free tortillas and choose a lactose-free sauce to keep it safe and enjoyable for everyone.
What other vegetables can I use in my Chicken Wrap?
The more the merrier! You can get creative and add any fresh vegetables you have on hand. Consider using spinach, shredded carrots, or even avocados for extra creaminess. Mixing up the vegetables not only adds flavor but also makes the wrap visually appealing and nutritious!
Creamy Grilled Chicken Wrap: Your Quick High-Protein Fix
Ingredients
Equipment
Method
- Heat the Skillet: Begin by heating a tablespoon of olive oil in a large skillet over medium heat. Allow the oil to warm for about 1-2 minutes until it shimmers gently.
- Sauté the Chicken: Add your chopped grilled chicken to the skillet, seasoning it with salt and pepper. Cook for 3-4 minutes, stirring occasionally until lightly crispy.
- Warm the Tortillas: While the chicken cooks, warm your tortillas for about 10 seconds in a microwave or for 1-2 minutes in a pan.
- Spread the Sauce: Once warmed, spread a thin layer of creamy sauce across the tortillas to prevent sogginess.
- Layer the Fillings: Add the sautéed chicken first, followed by fresh vegetables and lettuce.
- Roll the Wrap: Carefully roll the tortilla tightly around the fillings, tucking in the sides to avoid spilling.
- Toast the Wrap: Place the assembled wrap seam-side down in the skillet over medium heat and toast for 1-2 minutes until golden brown.
Leave a Reply