
The aroma of baking fills the kitchen as I whip up a batch of Cottage Cheese Wraps, and I can’t help but feel a rush of excitement. Unlike traditional wraps, these gluten-free delights are not only soft and pliable but are also packed with over 21 grams of protein per serving—perfect for anyone looking to shake off the fast food habit. With simple, wholesome ingredients, they make meal prepping a breeze and satisfy those snack cravings without the usual carb overload. Whether you fill them with creamy avocado, grilled chicken, or a crisp vegetable medley, you’ll find endless options to suit your tastes. Are you ready to elevate your snack game and try these delightful wraps?

Why Try These Cottage Cheese Wraps?
Flexible and Fun: The Cottage Cheese Wraps are incredibly versatile, allowing you to fill them with virtually anything—from smoky bacon and cream cheese to fresh veggies.
Nutritious Goodness: With over 21 grams of protein per serving, you’ll enjoy a healthy snack or meal that keeps you fuller longer.
Quick Meal Prep: Ready in just 35 minutes, they are excellent for busy lifestyles—prepare a batch and have healthy snacks at your fingertips.
Gluten-Free Delight: These wraps fit well into any gluten-free diet, making them an ideal choice for those who want to avoid grains without sacrificing taste.
Rich Flavor: The combination of Parmesan and garlic enhances the taste, delivering satisfying bites you’ll crave again and again.
Cottage Cheese Wrap Ingredients
Here’s what you need to make your delightful Cottage Cheese Wraps!
For the Wrap Mixture
- Full-fat Cottage Cheese – Provides moisture and protein; lower-fat options may yield a drier texture.
- Large Eggs – Bind the mixture together, adding richness; using egg substitutes will alter the consistency.
- Grated Parmesan Cheese – Adds savory flavor and helps create a light crust; you can substitute with finely grated mozzarella if you prefer.
- Garlic Powder – Infuses a subtle garlicky flavor to enhance overall taste; fresh garlic can be used for a bolder flavor, but adjust to your liking.
- Italian Seasoning – Offers a savory herb blend that complements the wraps; feel free to swap with individual herbs like oregano or basil.
Optional Fillings
- Cream Cheese – Adds a rich and creamy texture, perfect for savory fillings.
- Crispy Bacon – A delicious indulgence that brings a smoky flavor to your wraps.
- Grilled Chicken – Healthy protein that pairs wonderfully with the wraps; simply season your chicken to preference.
- Sautéed Vegetables – A colorful and nutritious way to fill your wraps, adding crunch and flavor.
With these simple ingredients, your Cottage Cheese Wraps will come together in no time, making healthy meal prep a reality!
Step‑by‑Step Instructions for Cottage Cheese Wraps
Step 1: Preheat the Oven
Begin by preheating your oven to 350°F (175°C). While the oven warms up, line a baking sheet with parchment paper, ensuring to lightly grease it with cooking spray or oil. This will help the Cottage Cheese Wraps release smoothly once baked.
Step 2: Blend the Mixture
In a blender, combine 1 cup of full-fat cottage cheese, 2 large eggs, ½ cup of grated Parmesan cheese, ½ teaspoon of garlic powder, and 1 teaspoon of Italian seasoning. Blend on high for 45 seconds to 1 minute, until the mixture is smooth and creamy without any lumps. Check the consistency; it should be pourable and well-combined.
Step 3: Pour and Spread
Pour the blended mixture onto the prepared baking sheet. Using a spatula, spread it into a uniform rectangle, approximately ¼ inch thick. Make sure there are no thicker areas, as this will ensure even baking. The wrap mixture should look glossy and smooth as you spread it out.
Step 4: Bake Until Set
Place the baking sheet in the preheated oven and bake for 30-35 minutes. Keep an eye on the wraps as they cook; they should be set and lightly golden on top without browning excessively. If they appear soft in the middle, give them extra baking time to firm up.
Step 5: Cool and Remove
Once baked, carefully remove the baking sheet from the oven and let the wraps cool completely on the countertop. This cooling period is essential for the wraps to firm up. Once cool, gently peel them off the parchment paper to maintain their integrity without breaking.
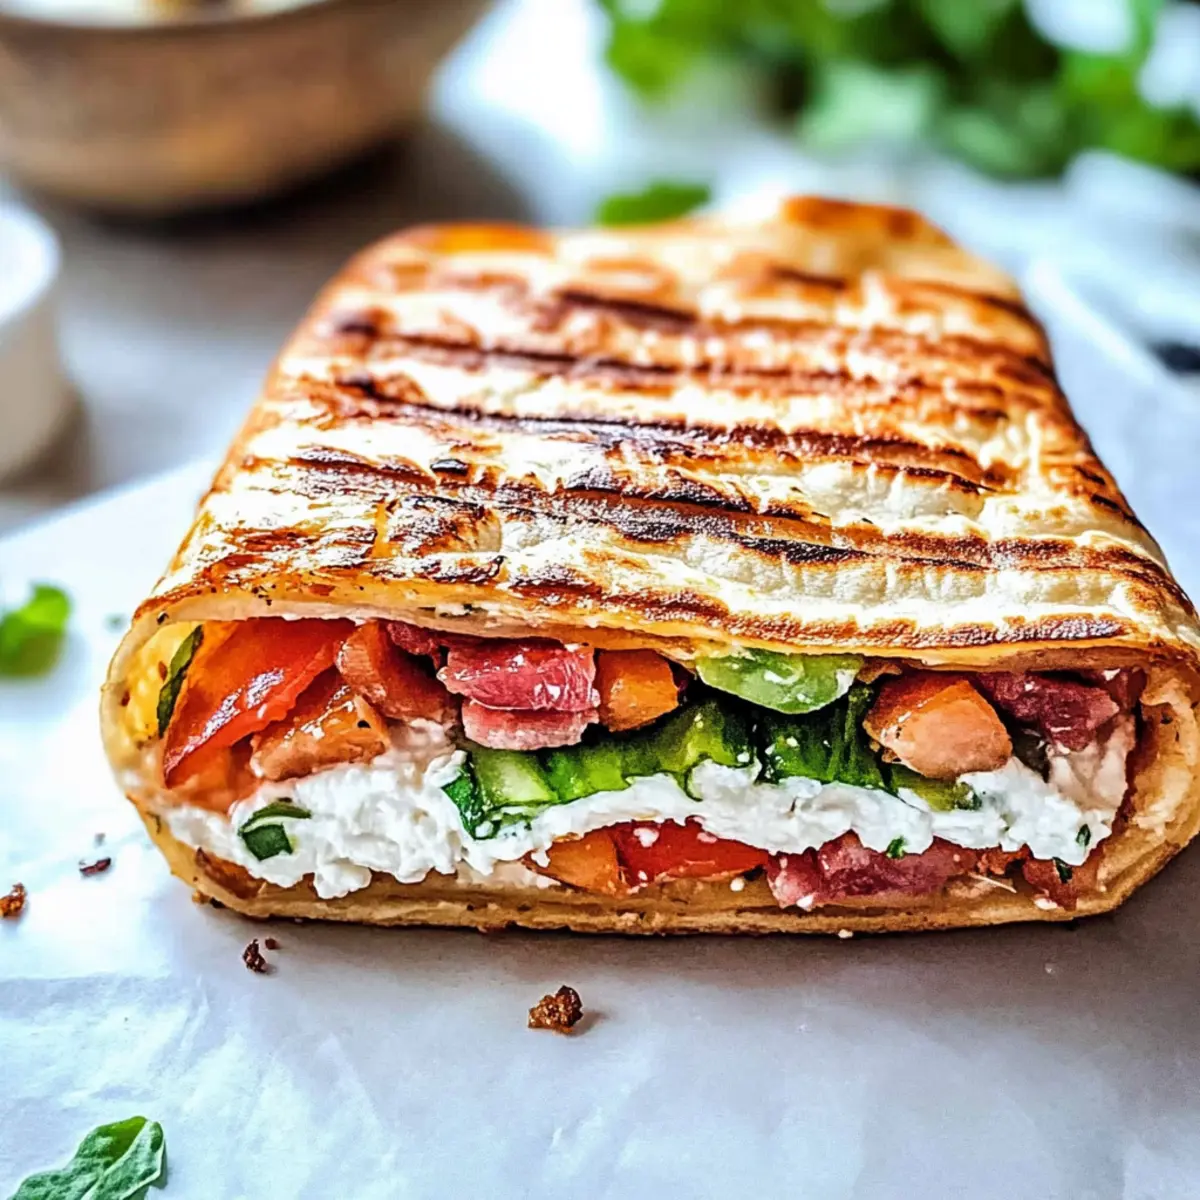
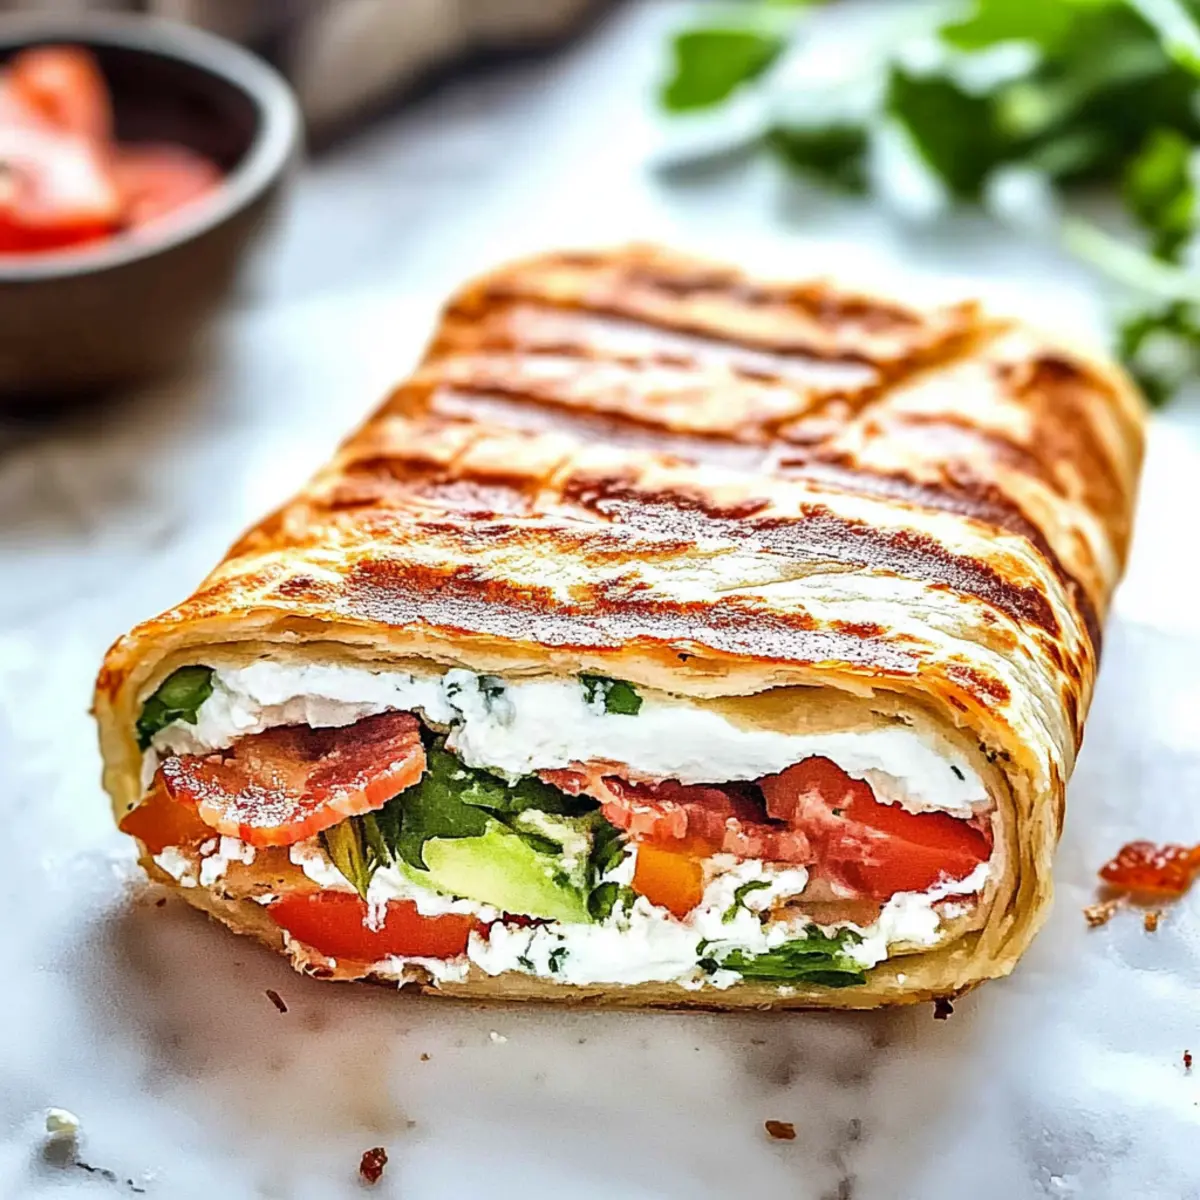
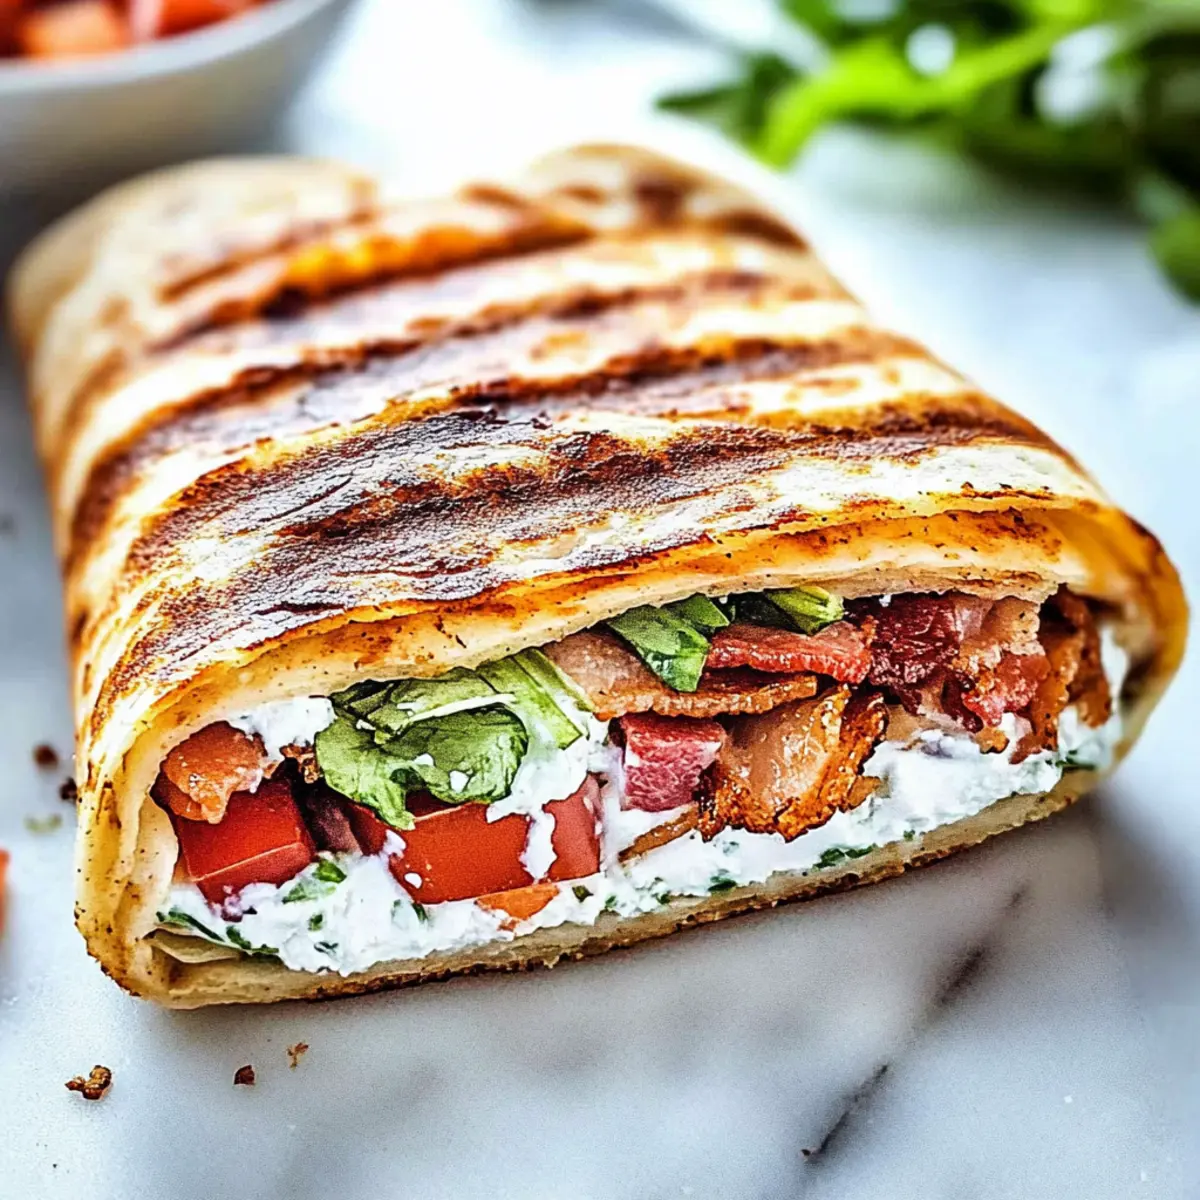
Step 6: Cut and Fill
After cooling, use a sharp knife to cut the Cottage Cheese Wraps into the desired sections. Now comes the fun part! Fill each section with your favorite ingredients, such as cream cheese and crispy bacon, grilled chicken, or a vibrant mix of sautéed vegetables, crafting a delicious meal or snack tailored to your cravings.
Make Ahead Options
These Cottage Cheese Wraps are perfect for meal prep enthusiasts looking to save time during busy weekdays! You can prepare the wrap mixture up to 24 hours in advance by blending all the ingredients and storing it in an airtight container in the refrigerator—this keeps the flavors fresh and vibrant. Alternatively, once baked and cooled completely, store the wraps in an airtight container for up to 5 days in the fridge. When you’re ready to serve, simply fill them with your desired ingredients and enjoy! For best quality, consider refrigerating the fillings separately and assemble right before eating to maintain the wraps’ delightful texture.
What to Serve with Cottage Cheese Wraps
Savoring your Cottage Cheese Wraps opens up a world of delightful pairings to create a deliciously balanced meal.
-
Creamy Avocado: Adds a rich, buttery texture that complements the savory flavors of the wraps. Avocado’s mild taste offers a perfect contrast to the cottage cheese.
-
Smoked Salmon: The briny flavor brings a luxurious twist to your wraps, turning a simple meal into a gourmet experience. Top with a sprinkle of dill for an extra touch of elegance.
-
Fresh Spinach Salad: A light and refreshing side dish, filled with vitamins and minerals. Toss in berries and nuts for a crunchy, nutrient-packed contrast.
-
Roasted Vegetables: Caramelized veggies bring sweetness and depth that enhance the wraps’ savory essence. Choose seasonal vegetables for an irresistible harmony of flavors.
-
Zesty Cilantro Lime Dressing: Drizzle this dressing over your filled wraps or salad for a bright and tangy twist. It’s an instant flavor booster that brightens up every bite.
-
Chickpea Hummus: Serve alongside your wraps for a protein-rich dip. The creamy texture and earthy flavor can complement savory fillings perfectly and make every bite more enjoyable.
-
Iced Herbal Tea: This refreshing drink pairs well with the wraps, offering a light, cooling element. Choose mint or hibiscus for a flavor that dances on your palate after each bite.
-
Chocolate Avocado Mousse: For dessert, this creamy treat is a guilt-free indulgence. The lusciousness of the mousse rounds off your meal with a satisfying finish.
Cottage Cheese Wraps Variations
Feel free to let your creativity shine as you customize these wraps to suit your taste preferences and dietary needs!
- Dairy-Free: Substitute full-fat cottage cheese with a dairy-free option like almond or cashew cream for a creamy alternative.
- Herb-Infused: Add fresh herbs such as basil, cilantro, or parsley to the batter for a fragrant twist that elevates the flavor profile.
- Spicy Kick: Mix in a pinch of cayenne pepper or red pepper flakes to add some heat to your wraps, making them an exciting choice for spice lovers.
- Cheddar Upgrade: Replace Parmesan with sharp cheddar cheese for a delightful richness that plays well with savory fillings like pulled pork or roasted veggies.
- Veggie Boost: Fold in finely chopped spinach, mushrooms, or bell peppers into the batter for added nutrients and a pop of color.
- Sweet Treat: Create a sweet variation by adding a touch of vanilla extract and a dash of cinnamon; fill with cream cheese and strawberries for a dessert twist!
- Low-Carb Delight: For a truly low-carb option, consider using a blend of cauliflower rice and cottage cheese, creating a different texture and flavor.
- Flavorful Spreads: Pair your wraps with dips like hummus or tzatziki to expand your spread options. They make every bite more enjoyable!
Don’t forget to explore possible fillings too! If you’re in the mood for something savory, try using smoked salmon paired with cream cheese, or enjoy a fresh salad combination for a light and nutritious meal. The options are limitless, just like the delicious flavors of these wraps—perfect for getting you away from the fast food routine!
How to Store and Freeze Cottage Cheese Wraps
Fridge: Store the Cottage Cheese Wraps in an airtight container, and they will remain fresh for up to 5 days. Be sure to layer parchment paper between wraps to prevent sticking.
Freezer: For longer storage, freeze the wraps for up to 2 months. Place parchment paper between each wrap before transferring them to a freezer-safe bag or container.
Reheating: To reheat, simply thaw overnight in the fridge. Then, warm them in a skillet over medium heat for 2-3 minutes on each side or microwave briefly until heated through.
Meal Prep Tip: These wraps are perfect for meal prep! Prepare a batch and keep them on hand for quick, healthy meal options throughout the week.
Expert Tips for Cottage Cheese Wraps
-
Parchment Precaution: Ensure your parchment paper is well-greased to prevent sticking. A thin layer of oil can work wonders for easy removal.
-
Cooling is Key: Allow wraps to cool completely before peeling them off the paper. This helps them firm up and avoid tearing.
-
Thickness Matters: For a thicker wrap, you can spread the mixture slightly thicker, but be aware that you may need to adjust the baking time accordingly.
-
Blend to Perfection: Make sure to blend the mixture until smooth and creamy. Lumps can lead to an uneven texture in your Cottage Cheese Wraps.
-
Flavor Variations: Feel free to mix up your spices and herbs! Adding fresh basil or a pinch of chili flakes can elevate the flavor profile dramatically.
Cottage Cheese Wraps Recipe FAQs
What kind of cottage cheese should I use for the wraps?
Opt for full-fat cottage cheese to ensure your wraps have the right moisture and texture. If you choose a lower-fat option, be aware that it may yield a drier consistency, which could affect the final product. I often stick with the full-fat version for the best results!
How long can I store Cottage Cheese Wraps in the refrigerator?
These wraps can be kept in an airtight container in the fridge for up to 5 days. To maintain freshness, layer parchment paper between the wraps to prevent them from sticking to each other.
Can I freeze Cottage Cheese Wraps?
Absolutely! You can freeze these wraps for up to 2 months. Just be sure to place parchment paper between each wrap, then transfer them to a freezer-safe bag or container. When you’re ready to enjoy, thaw overnight in the fridge and reheat gently in a skillet for the best texture.
What should I do if my Cottage Cheese Wraps tear when removing them from the parchment paper?
If you find that the wraps are tearing, it could be due to not cooling them completely before removal. Make sure to allow them to cool on the countertop for the full cooling period. If they still seem delicate, gently slide a spatula between the wrap and the parchment and try lifting slowly to help preserve their shape.
Are there any dietary considerations I should keep in mind with these wraps?
Yes! These Cottage Cheese Wraps are naturally gluten-free, making them suitable for those with gluten sensitivities or celiac disease. However, if you have dairy allergies, you may want to explore dairy-free cheese options. Always consult ingredient labels for any allergies when selecting substitutes!
Healthy Cottage Cheese Wraps for Delicious Meal Prep
Ingredients
Equipment
Method
- Preheat your oven to 350°F (175°C) and line a baking sheet with parchment paper, greasing lightly.
- In a blender, combine cottage cheese, eggs, Parmesan cheese, garlic powder, and Italian seasoning. Blend until smooth.
- Pour the mixture onto the prepared baking sheet and spread it into a uniform rectangle, ¼ inch thick.
- Bake for 30-35 minutes until set and lightly golden, checking for doneness.
- Let the wraps cool completely before peeling them off the parchment paper.
- Cut the wraps into desired sections and fill with your favorite ingredients.
Leave a Reply