
As the aroma of seasoned meat wafts through my kitchen, I can’t help but smile, knowing I’m about to share my go-to recipe for Classic Meatloaf. This comforting dish has evolved over the years, and today’s version is not just hearty but also healthier and packed with hidden vegetables. It’s a perfect choice for anyone craving the nostalgia of family dinners without the guilt. Not only does it come together in just a matter of minutes, but it also transforms into delicious leftovers that can be enjoyed in various ways. Whether you’re making it for your loved ones or just treating yourself, this meatloaf is bound to impress. Curious how to recreate this classic with a modern twist? Let’s dive into the recipe!
What Makes This Classic Meatloaf Special?
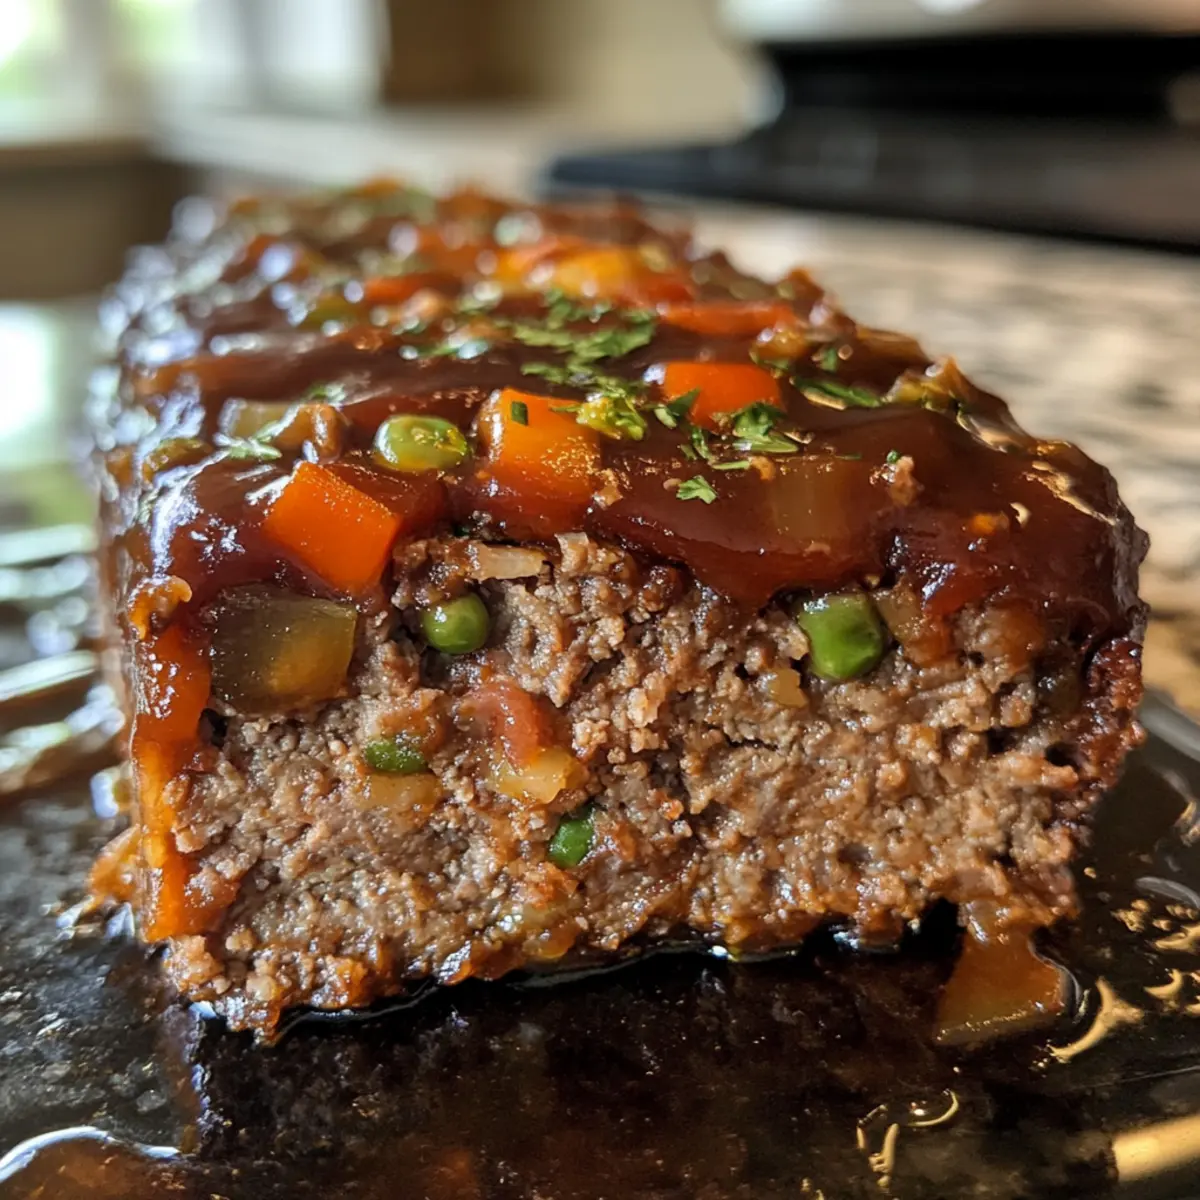
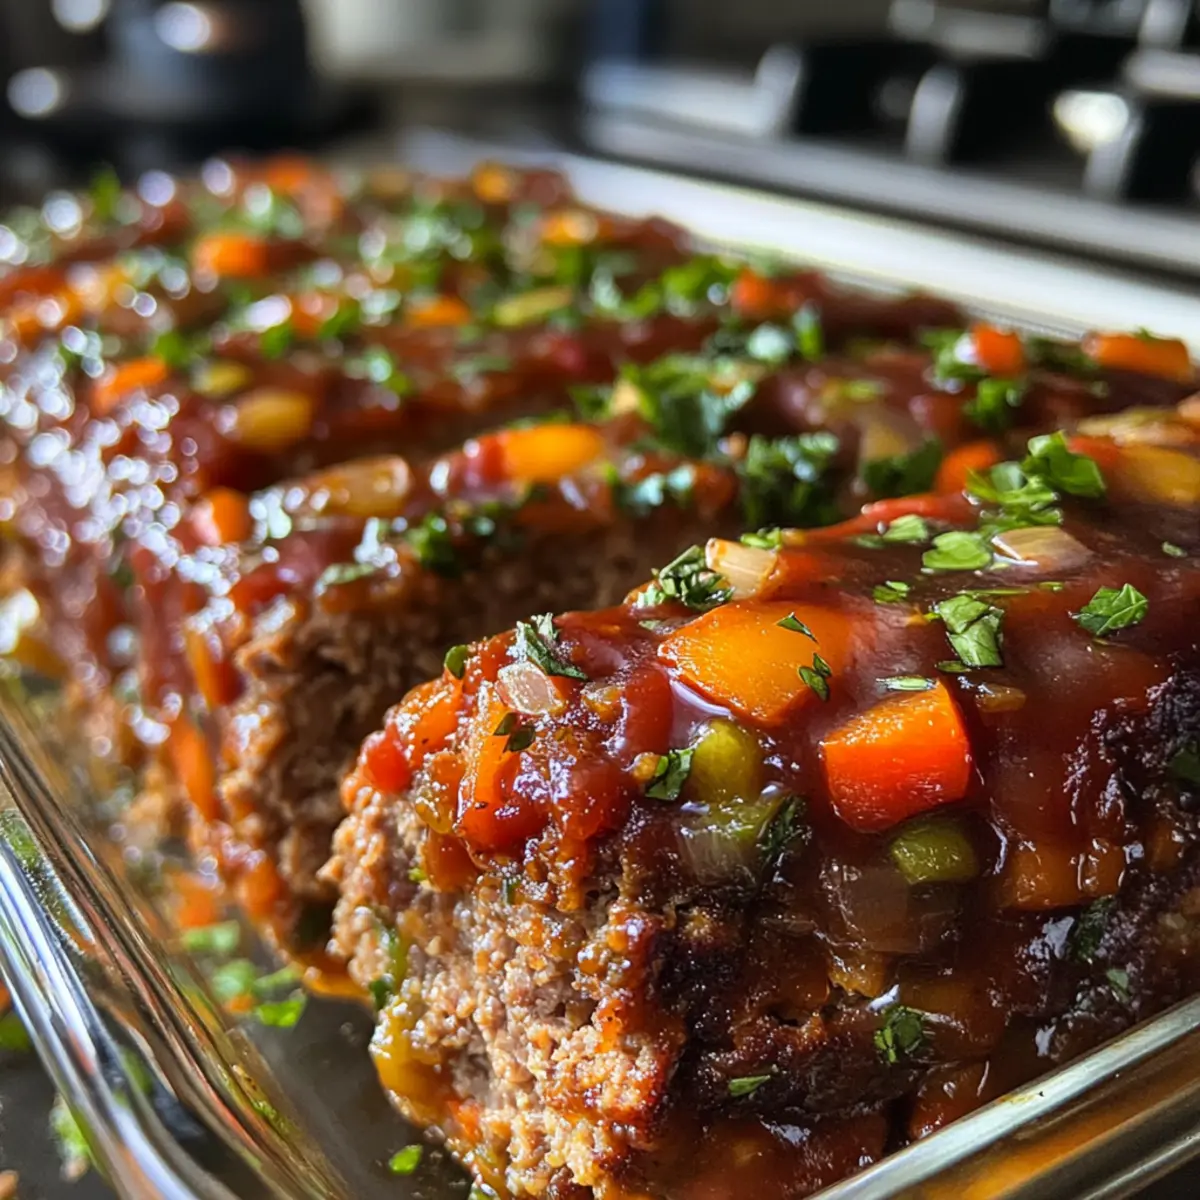
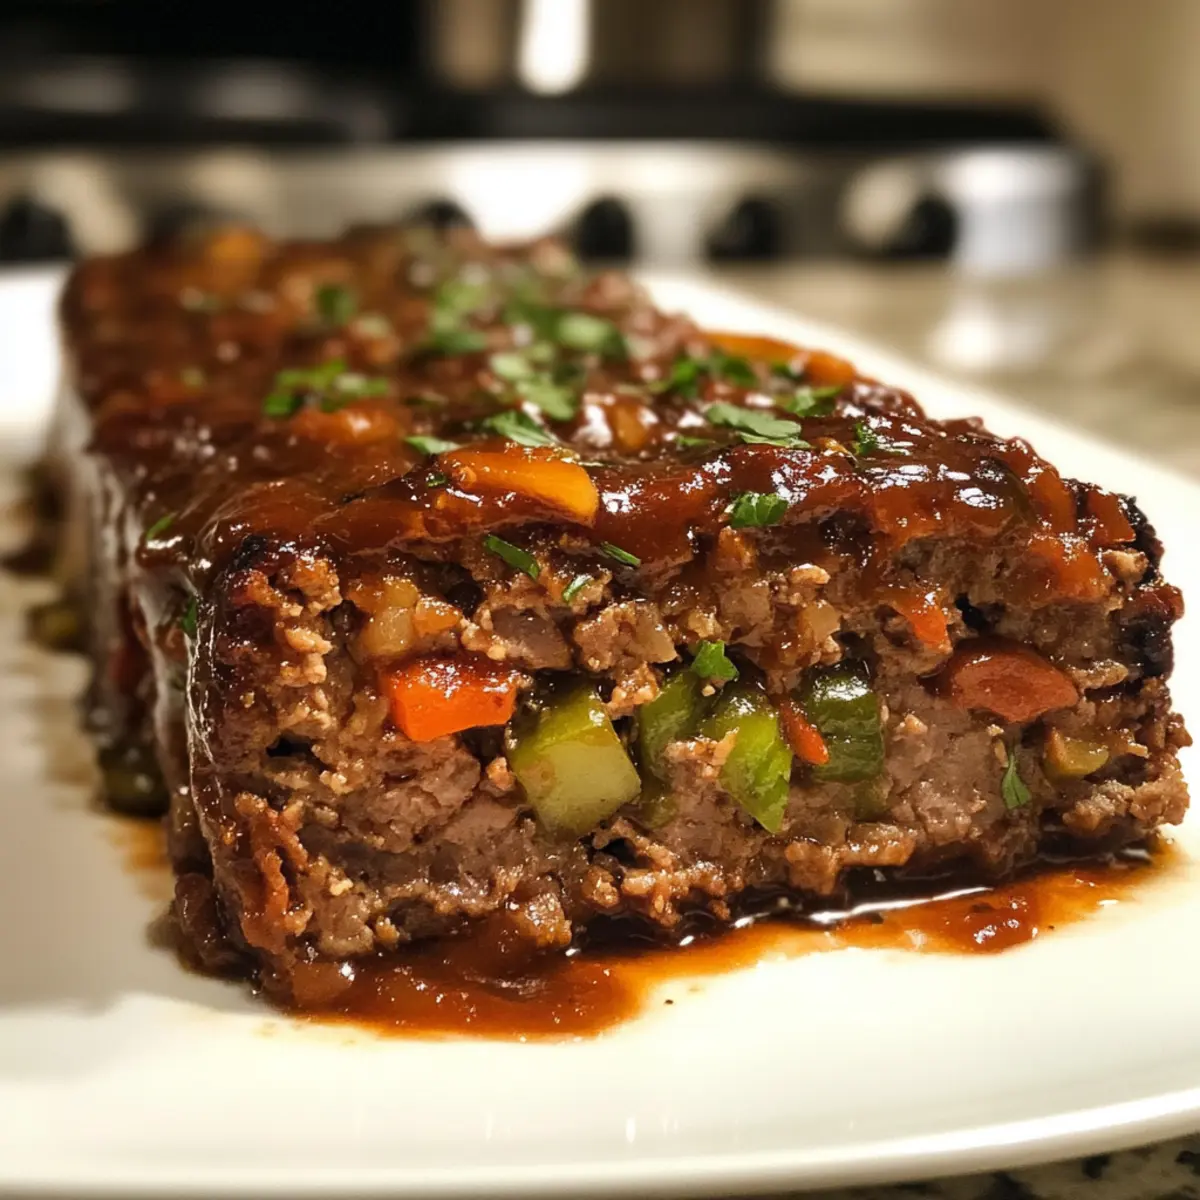
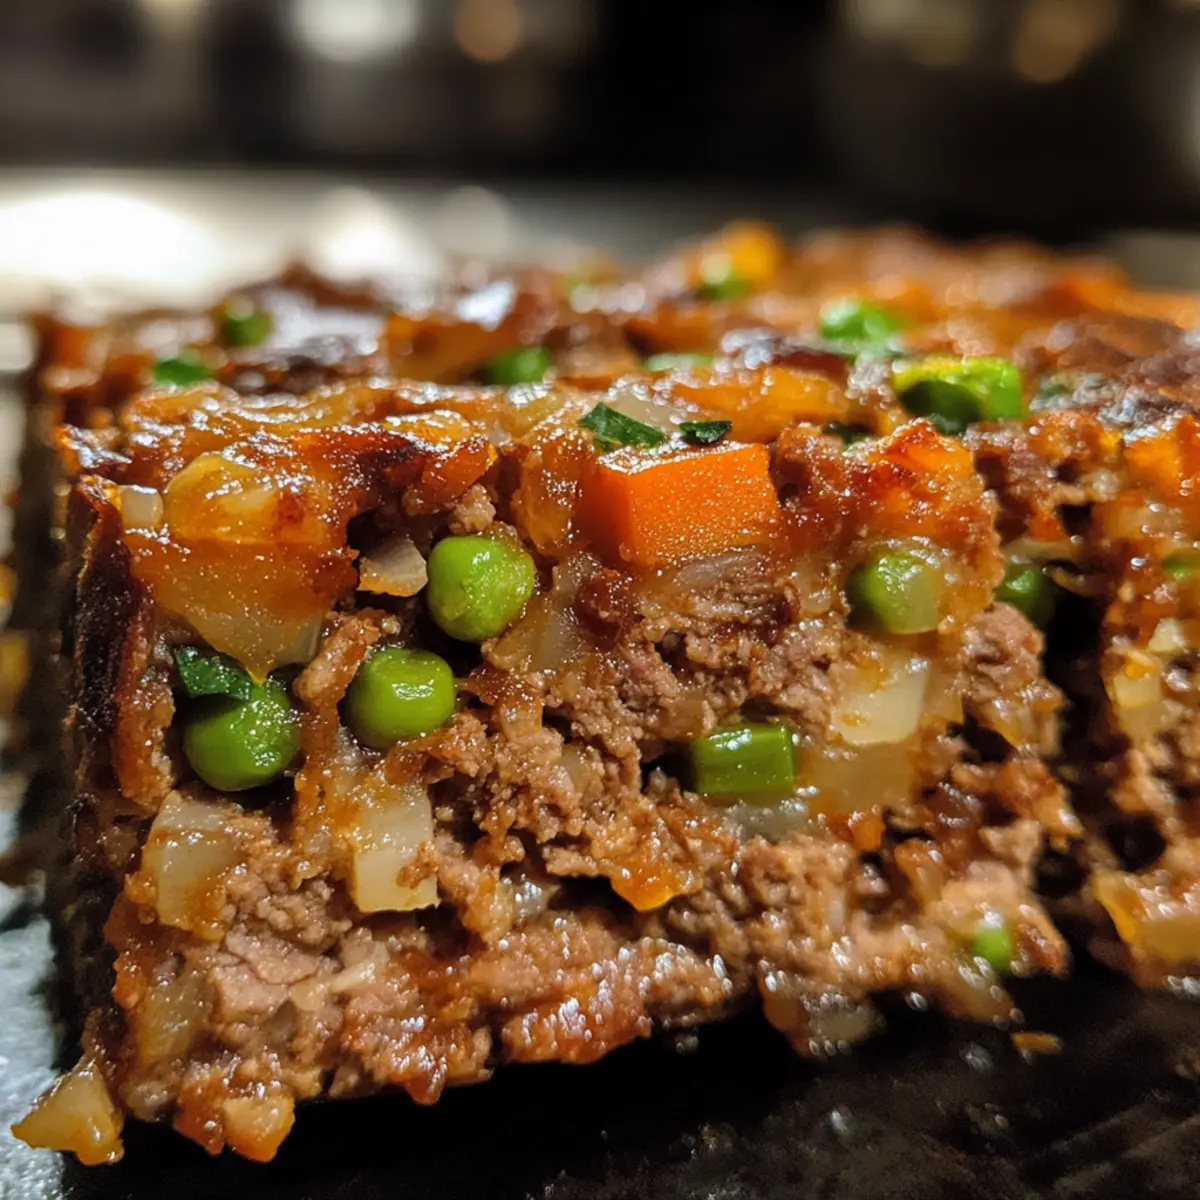
Moist, Flavorful Texture: Each slice promises a juicy interior and a slightly crisp exterior that is simply irresistible.
Hidden Veggies: This recipe skillfully incorporates vegetables, making it a nutritious option without compromising on flavor.
Easy to Customize: Whether you want a healthy twist or a keto version, it can be easily adapted to suit your dietary needs. Check out my Stuffed Italian Meatloaf for another delicious variation!
Quick Prep Time: With just a few simple steps and under 10 minutes of prep, it’s the perfect weeknight meal.
Crowd-Pleaser: Guaranteed to be a hit with family and friends, serving this dish is sure to spark joy and satisfaction around the dinner table!
Delicious Leftovers: Transform last night’s meatloaf into tasty sandwiches with fresh toppings, ensuring no bite goes to waste. You might also enjoy my Bacon Mushroom Meatloaf for a flavor-packed twist!
Classic Meatloaf Ingredients
• Gather these key ingredients to whip up a delicious classic meatloaf that’s sure to impress!
For the Meatloaf
- Ground Beef (2 lbs, 80-85% lean) – Main protein source; offers flavor and structure; substitute with ground turkey for a lean option.
- Onion (1 medium, finely chopped) – Adds sweetness and depth; no direct substitute but shallots can provide a milder flavor.
- Eggs (2 large) – Binds the mixture and adds moisture; no egg substitute is recommended for best results.
- Milk (3/4 cup) – Provides moisture and richness; consider using low-fat milk or non-dairy alternatives if desired.
- Breadcrumbs (3/4 cup, preferably Panko) – Adds texture and prevents dryness; replace with crushed pork rinds or almond flour for a low-carb choice.
- Garlic (3 cloves, minced) – Enhances flavor; provides savory depth; use 1 tsp of garlic powder as an alternative if needed.
- Ketchup (1/4 cup for meatloaf; 1/2 cup for glaze) – Adds sweetness and moisture; swap for low-sugar ketchup for a healthier option.
- Fresh Parsley (2 tbsp, finely chopped) – Offers freshness and color; can be replaced with other herbs like basil or thyme.
- Worcestershire Sauce (1 tsp) – Adds umami and depth of flavor; substitute with soy sauce for a different twist.
- Salt (1 1/2 tsp) and Black Pepper (1/2 tsp) – Essential seasonings to enhance profile; feel free to adjust to your taste.
- Italian Seasoning (1/2 tsp) – Incorporates a blend of herbal flavors; use oregano and basil if you don’t have it on hand.
- Brown Sugar (2 tbsp in glaze) – Provides sweetness and caramelization; a sugar substitute can work for lower sugar preferences.
- White Vinegar (1 tsp in glaze) – Balances the sweetness; lemon juice serves as a refreshing substitute.
- Garlic Powder (1/2 tsp) and Onion Powder (1/4 tsp in glaze) – Elevates the flavor profile; fresh alternatives can be used to enhance taste.
This Classic Meatloaf recipe is not only a comfort food favorite but also a fantastic way to blend nutrition with nostalgia!
Step‑by‑Step Instructions for Classic Meatloaf
Step 1: Preheat and Prepare the Pan
Begin by preheating your oven to 350°F (175°C). While the oven heats up, prepare a loaf pan or line a baking sheet with foil for easy cleanup. This ensures that your Classic Meatloaf has a stable foundation and will cook evenly, resulting in a deliciously moist texture.
Step 2: Mix the Meatloaf Ingredients
In a large mixing bowl, combine the ground beef, finely chopped onion, eggs, milk, and breadcrumbs. Add in minced garlic, 1/4 cup of ketchup, fresh parsley, Worcestershire sauce, salt, black pepper, and Italian seasoning. Mix gently, using your hands or a spatula, until just combined, being careful not to overmix to maintain the juicy integrity of the meatloaf.
Step 3: Shape the Meatloaf
Once the mixture is well combined, transfer it onto a clean surface and shape it into a loaf, about 8 inches long and 4 inches wide. Place the formed loaf carefully into the prepared pan or on the lined baking sheet, ensuring it maintains its shape and a nice, even thickness for cooking.
Step 4: Prepare the Glaze
In a small bowl, mix together the remaining ketchup, brown sugar, white vinegar, garlic powder, and onion powder. This glaze adds a deliciously sweet and tangy flavor to your Classic Meatloaf, enhancing its overall taste and giving it a beautiful, glossy finish when baked.
Step 5: Apply the First Layer of Glaze
Brush half of the prepared glaze generously over the top of the meatloaf, allowing it to seep into the crevices and flavor the meat. Make sure to cover the surface well, as this will caramelize beautifully during baking, creating a mouthwatering crust that your family will love.
Step 6: Bake the Meatloaf
Transfer the meatloaf to the preheated oven and bake for 45 minutes. After this initial baking period, check the internal temperature using a meat thermometer; it should be 160°F (71°C) for safe consumption. If not quite done, continue baking, adding the remaining glaze on top for the last 15-30 minutes.
Step 7: Let It Rest
Once your Classic Meatloaf reaches the desired temperature and looks beautifully browned, remove it from the oven. Allow it to rest for 10-15 minutes before slicing. This resting period helps the juices redistribute, ensuring each slice is moist and flavorful, perfect for enjoying with your favorite sides.
Classic Meatloaf Variations & Substitutions
Feel free to tweak this classic recipe to make it uniquely yours and cater to your family’s preferences!
- Healthy Meatloaf: Replace ground beef with lean turkey or chicken for a lighter, healthier protein option that still delivers on flavor.
- Keto-Friendly: Swap breadcrumbs for almond flour or crushed pork rinds, and use heavy cream instead of milk for a low-carb delight that satisfies cravings.
- Vegetable Boost: Add finely minced mushrooms or grated zucchini to increase moisture and nutrition without altering the taste significantly. They blend in beautifully!
- Spicy Kick: Mix in diced jalapeños or a splash of hot sauce to turn up the heat, creating a meatloaf with a warm, zesty finish that will excite your taste buds.
- Herb Variation: Experiment with fresh herbs like rosemary or thyme instead of parsley for a delightful aroma and flavor twist, making each bite aromatic and refreshing.
- Barbecue Flavor: Substitute ketchup in the glaze with your favorite barbecue sauce for a smoky, sweet profile that’s perfect for summer gatherings or a family BBQ. Check out my Bbq Cheddar Meatloaf for more inspiration!
- Cheesy Comfort: Incorporate shredded cheddar cheese into the meat mixture for a melty, indulgent treat that will surely please cheese lovers.
- Nut-Free: Replace almond flour in keto variations with crushed pork rinds or gluten-free breadcrumbs for delicious alternatives that fit dietary needs.
Feel empowered to mix and match these suggestions, creating a comforting dish that is not only delicious but also a reflection of your unique culinary style!
Expert Tips for Classic Meatloaf
Use a Meat Thermometer: Ensure your meatloaf reaches an internal temperature of 160°F (71°C) to guarantee safety and prevent dryness.
Gently Mix Ingredients: Overmixing can lead to a tough texture. Combine the meat and other ingredients just until incorporated for a tender result.
Add Extra Veggies: To boost nutrition, consider adding finely grated zucchini or carrots; just remember to squeeze out excess moisture to avoid texture issues.
Shape Uniformly: Keep your meatloaf uniform in thickness for even cooking; this helps prevent burnt edges while keeping the center juicy.
Rest Before Slicing: Allowing the meatloaf to rest for 10-15 minutes after baking allows the juices to settle, providing beautifully moist slices every time.
What to Serve with Classic Meatloaf?
When planning the perfect meal, consider pairing delightful sides that enhance the comforting essence of your classic meatloaf.
- Creamy Mashed Potatoes: These velvety potatoes with rich butter balance the savory flavors of meatloaf, making each bite a delight.
- Garlic Green Beans: Fresh, tender green beans sautéed in garlic add a bright crunch, complementing the hearty meatloaf beautifully.
- Roasted Brussels Sprouts: Their crispy exterior and tender inside bring a lovely roasted flavor that pairs wonderfully with the meat’s richness.
- Coleslaw: A tangy, crunchy slaw offers a refreshing contrast to the warm meatloaf, ensuring a well-rounded meal experience.
- Buttered Corn on the Cob: Sweet, buttery corn adds a seasonal touch that enhances the nostalgic comfort of this dish.
- Homemade Tomato Salad: The acidity of fresh tomatoes and zesty dressing brightens the palate and works perfectly alongside the meatloaf.
- Warm Dinner Rolls: Soft, buttery rolls are perfect for mopping up any juices left on the plate, enhancing the meal’s heartiness.
- Red Wine: A fruity cabernet or merlot will contrast pleasantly with the savory depth of the meatloaf, creating a relaxing dining atmosphere.
- Apple Pie: For dessert, a slice of warm apple pie topped with vanilla ice cream offers a sweet ending that echoes the comfort of the main dish.
Make Ahead Options
These Classic Meatloafs are perfect for anyone looking to save time during busy weeknights! You can assemble the meatloaf mixture and shape it into a loaf up to 24 hours in advance, then wrap it tightly in plastic wrap and refrigerate. Not only does this allow the flavors to meld, but it also ensures the meatloaf is just as delicious when baked. If you prefer, you can also freeze the shaped meatloaf for up to 3 months; just thaw it overnight in the fridge before baking. When you’re ready to cook, simply add your glaze and bake as instructed, for a wonderful family meal without the fuss!
How to Store and Freeze Classic Meatloaf
Fridge: Keep leftovers in an airtight container in the fridge for up to 4 days. This ensures your Classic Meatloaf stays fresh and delicious for those next-day lunches!
Freezer: For longer storage, wrap slices tightly in plastic wrap and place in a freezer-safe container, where it can last for up to 3 months. Just remember to label with the date!
Reheating: When ready to enjoy, thaw in the fridge overnight and reheat in a preheated oven at 350°F (175°C) for 20-25 minutes, or until heated through, to maintain moisture.
Leftover Ideas: Use sliced meatloaf to create hearty sandwiches or serve it with a side salad for a quick meal option that doesn’t compromise on flavor!
Classic Meatloaf Recipe FAQs
What type of ground beef should I use for meatloaf?
For a delicious Classic Meatloaf, I recommend using ground beef that is 80-85% lean. This fat content provides the perfect balance of flavor and moisture. If you’re looking for a lighter option, ground turkey can also work well, but it may yield a slightly drier result.
How should I store leftover meatloaf?
Leftovers should be stored in an airtight container in the refrigerator, where they will stay fresh for up to 4 days. This method preserves the moisture while keeping flavors intact! You can also reheat slices in the oven to maintain the classic meatloaf’s delightful texture.
Can I freeze Classic Meatloaf, and if so, how?
Absolutely! To freeze your Classic Meatloaf, wrap individual slices tightly in plastic wrap, ensuring no air is trapped inside. Place the wrapped slices in a freezer-safe container. This way, you can enjoy them for up to 3 months. Just remember to label the container with the date to keep track!
What should I do if my meatloaf comes out dry?
If your meatloaf turns out dry, it may be due to overmixing or cooking it for too long. Be sure to mix gently, just until combined, and use a meat thermometer to check for doneness. Whenever possible, allow the meatloaf to rest after baking; it gives time for the juices to redistribute, enhancing moisture.
Are there any ingredient substitutions I should know about?
Definitely! If you prefer a healthier option, you can swap traditional breadcrumbs with almond flour or crushed pork rinds for a keto meatloaf. Additionally, using low-fat milk or a non-dairy alternative like almond milk works well. Just remember to adjust seasonings to taste, especially if using substitutes that may alter the flavor profile.
Can pets eat meatloaf?
It’s best to avoid sharing your Classic Meatloaf with pets, as it contains onions and garlic, which are toxic to them. If you want to treat your furry friends, consider preparing a pet-friendly version without these ingredients, focusing on lean meats and safe veggies. Always consult your veterinarian if unsure!
Classic Meatloaf: Moist, Flavorful Comfort Food Redefined
Ingredients
Equipment
Method
- Preheat your oven to 350°F (175°C) and prepare a loaf pan or line a baking sheet with foil.
- In a large mixing bowl, combine the ground beef, finely chopped onion, eggs, milk, and breadcrumbs along with minced garlic, 1/4 cup of ketchup, fresh parsley, Worcestershire sauce, salt, black pepper, and Italian seasoning. Mix until just combined.
- Transfer the mixture onto a clean surface and shape it into a loaf, about 8 inches long and 4 inches wide. Place it in the prepared pan or on the lined baking sheet.
- In a small bowl, mix together the remaining ketchup, brown sugar, white vinegar, garlic powder, and onion powder to prepare the glaze.
- Brush half of the glaze over the top of the meatloaf, ensuring it covers the surface well.
- Bake the meatloaf in the preheated oven for 45 minutes, then check the internal temperature; it should be 160°F (71°C). If needed, continue baking for an additional 15-30 minutes with the remaining glaze on top.
- Once done, let the meatloaf rest for 10-15 minutes before slicing to redistribute the juices.
Leave a Reply