
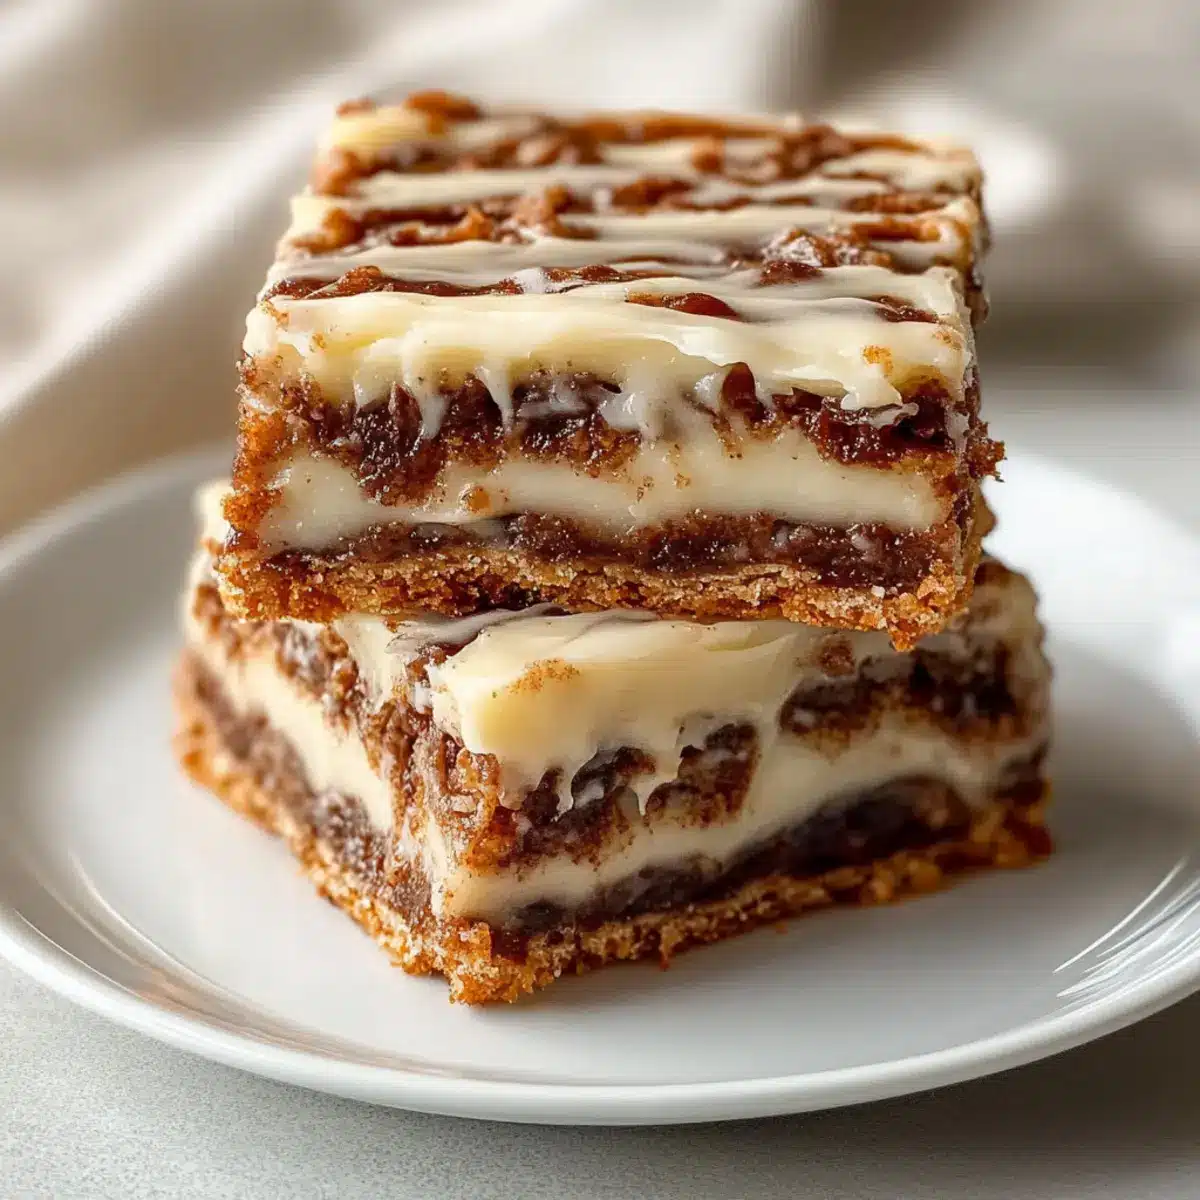
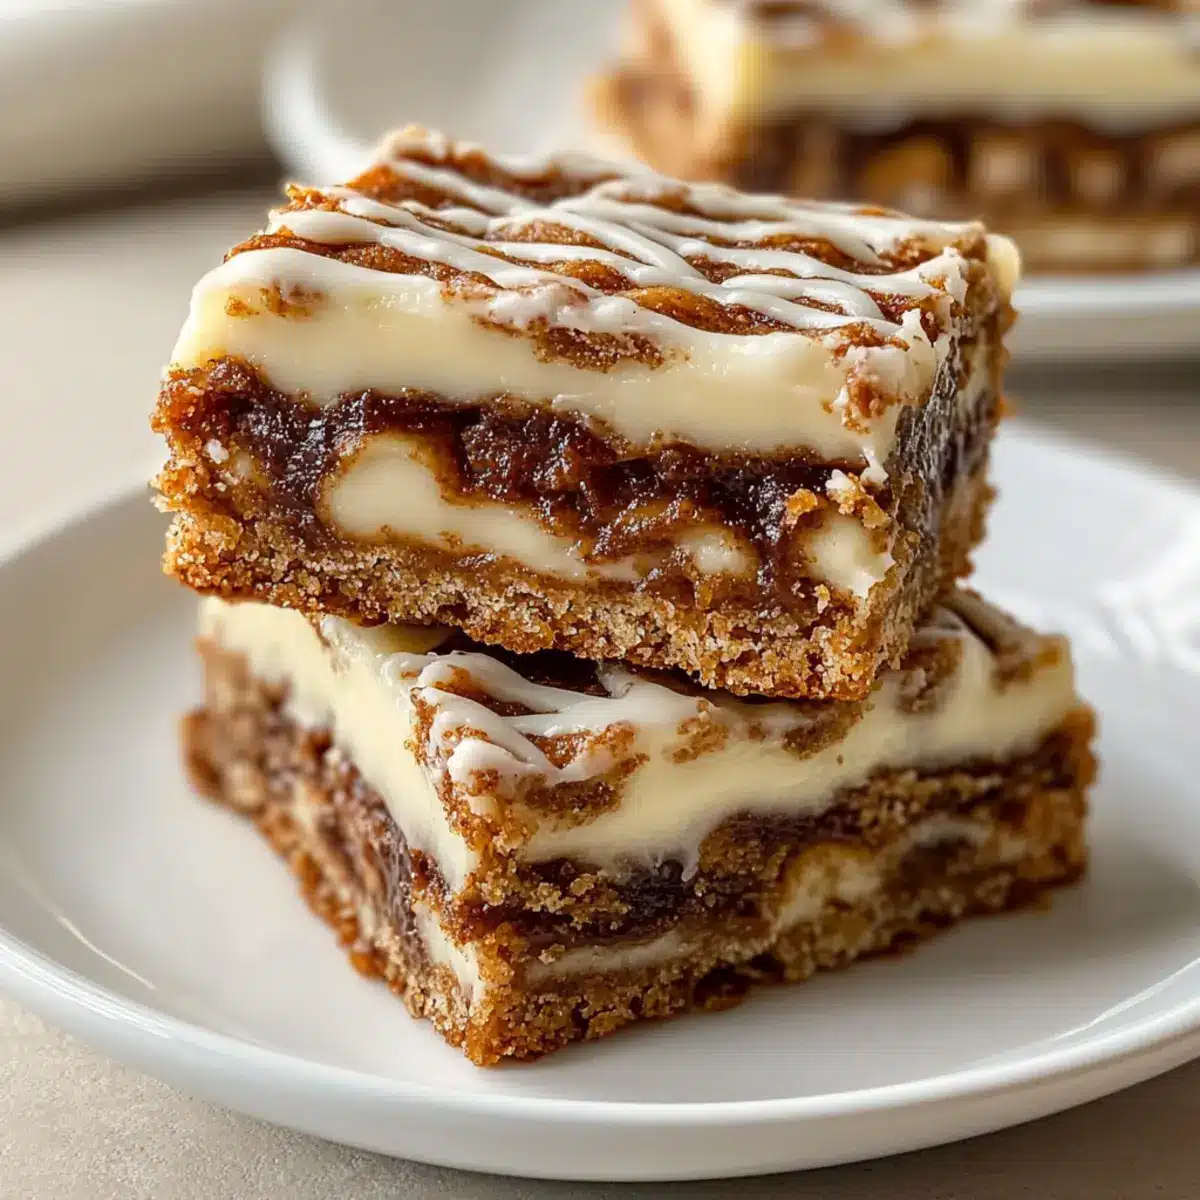
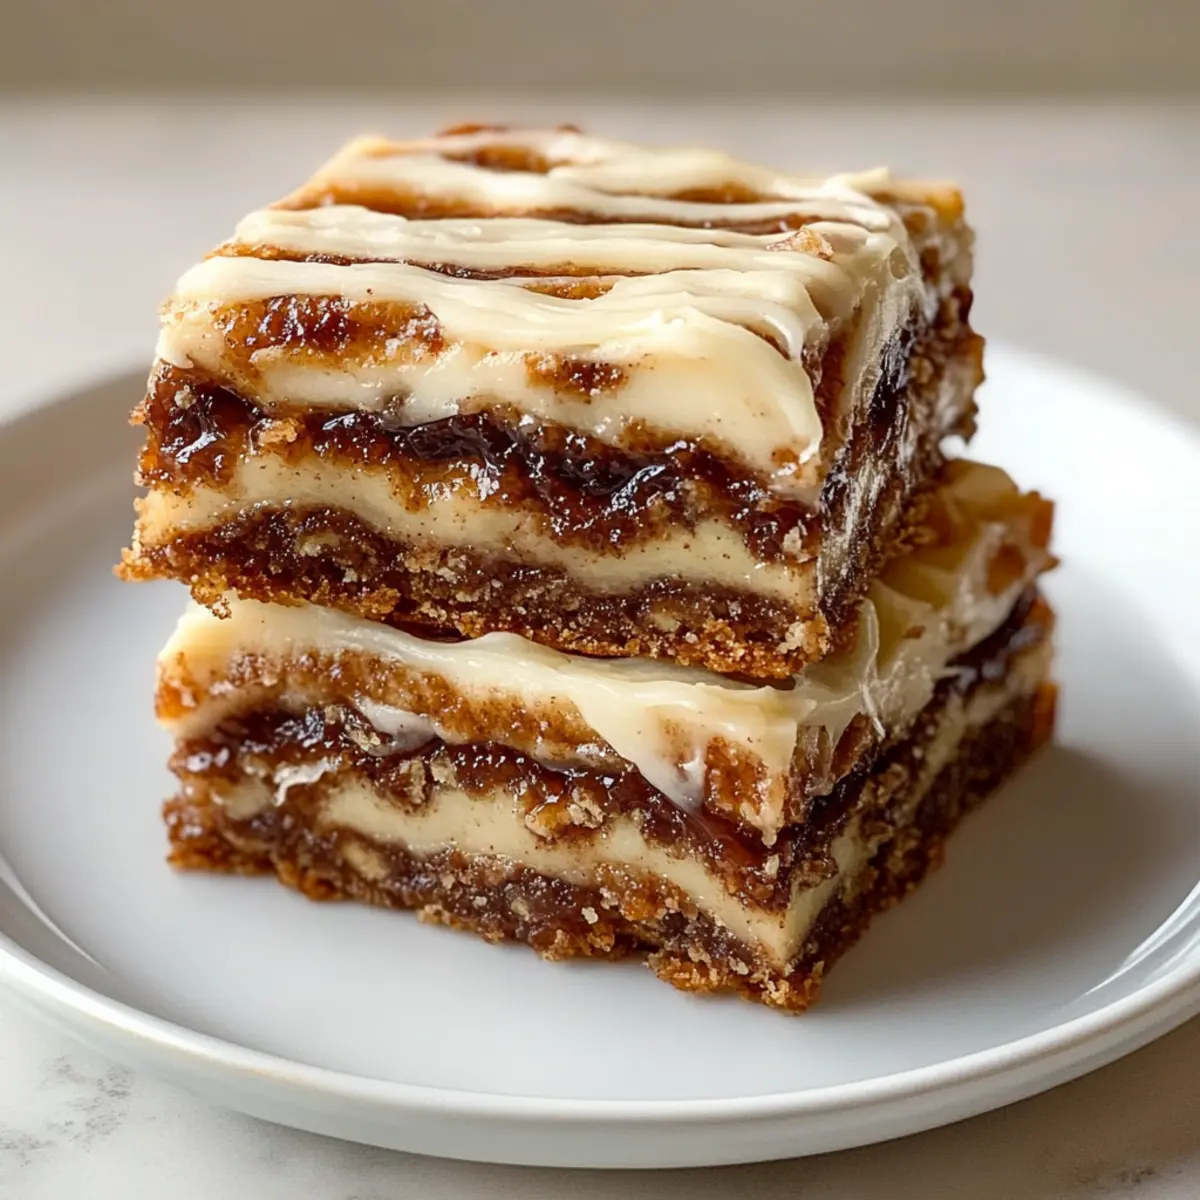
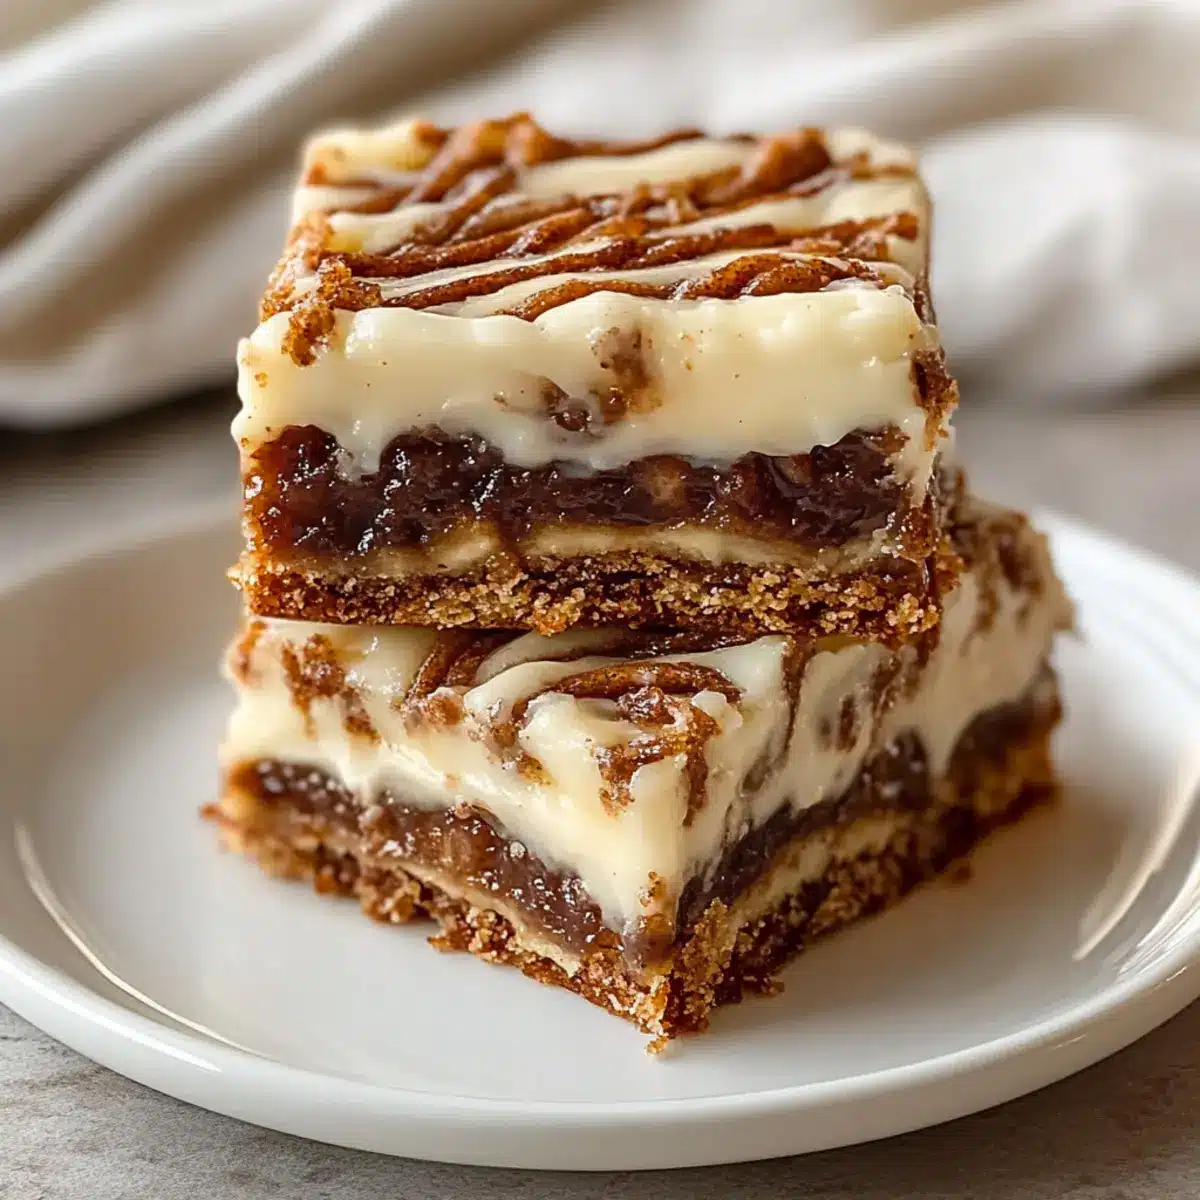
The aroma of freshly-baked cinnamon rolls wafting through the air can instantly transport me to cozy mornings spent with loved ones. However, during busy days, who has time for rolling and rising dough? That’s where these Delightful Cinnamon Roll Bliss Bars come in — a simple and delicious shortcut to the beloved classic. Made with just a handful of ingredients, this easy cinnamon roll bars recipe delivers that irresistible sweet and spicy flavor we all crave in a fraction of the time. They’re perfect for a quick dessert or as a delightful snack whenever you need a little pick-me-up. Plus, these cinnamon roll bliss bars are both portable and pleasing, making them an ideal treat for brunch gatherings or cozy evenings at home. Curious about how to whip up this comforting delight? Let’s dive in!
Why Are Cinnamon Roll Bliss Bars Irresistible?
Convenience: These bars come together quickly, making them perfect for busy individuals who crave homemade treats without the fuss.
Delightful Flavor: The marriage of brown sugar, cinnamon, and creamy frosting makes each bite feel like a warm hug.
Versatile Options: Experiment with toppings, like nuts or fruit, to create your own spin.
Crowd-Pleaser: Ideal for brunch or gatherings, these bars will surely impress your family and friends.
Easy Storage: Simply seal them in an airtight container, and enjoy them all week or freeze them for later!
Whip these up alongside our delicious Garlic Bread Rolls or serve them for dessert after our hearty Sausage Egg Roll.
Cinnamon Roll Bliss Bars Ingredients
For the Base
- All-purpose flour – Provides structure; feel free to use whole wheat for added nutrition.
- Granulated sugar – Adds sweetness; can be swapped with coconut sugar for a different taste.
- Baking powder & baking soda – These leavening agents ensure the bars rise beautifully.
- Salt – Enhances the overall flavor profile of the bars.
- Unsalted butter (cold) – This is crucial for a flaky texture; make sure it’s cold and cubed.
- Buttermilk – It adds moisture and a subtle tang; you can substitute it with milk plus vinegar.
- Vanilla extract – Infuses the bars with a lovely aromatic flavor.
For the Cinnamon Filling
- Brown sugar (packed) – Adds sweetness and a caramelized flavor; the secret to that delicious filling!
- Ground cinnamon – This essential spice creates that classic cinnamon taste; opt for high-quality for the best flavor.
- Unsalted butter (melted) – Binds the cinnamon filling together for a perfect layer.
For the Frosting
- Cream cheese – Adds rich creaminess to the frosting; ensure it’s softened for easy mixing.
- Unsalted butter (softened) – Essential for creating a creamy and smooth frosting.
- Powdered sugar – Sweetens and thickens the frosting to your desired consistency.
- Milk – Use this to adjust the thickness of the frosting as needed.
Dive into this easy cinnamon roll bars recipe and enjoy creating a comforting dessert that’s perfect for any occasion!
Step‑by‑Step Instructions for Cinnamon Roll Bliss Bars
Step 1: Preheat and Prepare
Begin by preheating your oven to 375°F (190°C). While your oven warms up, grab a 9×13 inch baking pan and line it with parchment paper for easy removal later. This small step ensures your Cinnamon Roll Bliss Bars will bake evenly and slide out of the pan effortlessly when they’re done.
Step 2: Mix Dry Ingredients
In a large mixing bowl, whisk together the all-purpose flour, granulated sugar, baking powder, baking soda, and salt until well combined. This will serve as the foundation for your bars. Make sure to break up any clumps for a smooth mixture. Take a moment to enjoy the sweet scent of your ingredients as you prepare for the next steps.
Step 3: Cut in Butter
Next, cut in the cold, cubed unsalted butter into the dry mixture using a pastry cutter or your fingers until the texture resembles coarse crumbs. This process is crucial as it helps create the delightful flaky texture at the base of your Cinnamon Roll Bliss Bars. Don’t rush; take your time to ensure the butter is well incorporated.
Step 4: Combine Wet Ingredients
In a separate bowl, combine the buttermilk and vanilla extract. Pour this mixture into the dry ingredients and gently mix until everything is just combined. Avoid overmixing, as you want the mixture to remain soft and plump for the bars. The batter should feel thick but slightly sticky; this ensures that each bar has that signature gooey goodness.
Step 5: Press the Dough
Now it’s time to press that delicious dough evenly into the bottom of your prepared baking pan. Use your fingers or a spatula to spread it out smoothly, ensuring there are no thin patches. This even layer forms the perfect base to hold the cinnamon filling beautifully, preparing your Cinnamon Roll Bliss Bars for the next delightful step.
Step 6: Create the Cinnamon Filling
In a small mixing bowl, combine the packed brown sugar and ground cinnamon. Drizzle the melted butter over the pressed dough in the pan, ensuring it’s evenly distributed. Sprinkle the cinnamon-sugar mixture generously on top, creating a sweet swirl that will permeate throughout the bars as they bake. The tantalizing aroma will start to fill your kitchen!
Step 7: Bake to Perfection
Slide your prepared pan into the preheated oven and bake for 20-25 minutes, until the edges are golden brown and a toothpick inserted in the center comes out clean. Keep an eye on them toward the end of the baking time, as you want your Cinnamon Roll Bliss Bars to be set but not overbaked. The golden edges will be your visual cue for doneness.
Step 8: Cool Completely
After baking, remove the pan from the oven and allow it to cool in the pan for about 10 minutes. Then, carefully transfer the bars onto a wire rack to cool completely. This step is essential before frosting, as applying frosting to warm bars can lead to a melty mess! The cooling process ensures each bite is perfectly set and flavorful.
Step 9: Make the Creamy Frosting
While your bars cool, prepare the frosting by beating the softened cream cheese and unsalted butter in a mixing bowl. Gradually add in the powdered sugar, milk, and a splash of vanilla extract, mixing until creamy and smooth. This luscious frosting will elevate your Cinnamon Roll Bliss Bars, giving them a rich topping that complements the warm spices perfectly.
Step 10: Frost and Serve
Once the bars are completely cool, spread the creamy frosting generously over the top. Use a spatula to make it nice and smooth, getting that luxurious layer just right. After frosting, cut the bars into pieces, and they’re ready to be served! Share them with family and friends, and get ready for compliments on these delightful cinnamon roll bliss bars!
How to Store and Freeze Cinnamon Roll Bliss Bars
Fridge: Store your Cinnamon Roll Bliss Bars in an airtight container for up to 1 week. Make sure they’re fully cooled to prevent condensation and maintain freshness.
Freezer: For longer storage, freeze the unfrosted bars by wrapping them tightly in plastic wrap and then aluminum foil. They can last for up to 3 months.
Reheating: To enjoy, thaw the bars in the fridge overnight. For a warm treat, microwave individual pieces for 10-15 seconds, just until slightly warm.
Frosting Tip: Frost the bars just before serving if they’ve been frozen. This keeps the creamy layer fresh and delightful!
What to Serve with Delightful Cinnamon Roll Bliss Bars
Indulging in the soft, sweet flavor of these bars opens a world of delightful accompaniments that elevate your experience.
-
Fresh Fruit Medley: Bright, juicy fruits like strawberries and oranges offer a refreshing contrast, balancing the rich sweetness of the cinnamon bars.
-
Vanilla Ice Cream: A scoop of creamy vanilla ice cream pairs beautifully, creating a warm and cold sensation that’s utterly delicious.
-
Coffee or Espresso: A rich brew enhances the cinnamon flavor while providing a cozy, comforting vibe perfect for brunch.
-
Warm Milk Latte: The smoothness of a latte complements the spices in the bars, ensuring a delightful morning or afternoon treat.
-
Frosted Cupcakes: Serve with light and airy vanilla or cream cheese frosted cupcakes for a dessert spread that feels festive and fun.
-
Nutty Biscotti: Crunchy biscotti with almonds or hazelnuts provides a satisfying texture, making each bite a delightful crunch alongside the blissful bars.
These delightful pairings can transform your gathering into a memorable experience with the comforting essence of cinnamon roll bliss bars at the center!
Expert Tips for Cinnamon Roll Bliss Bars
-
Butter Temperature Matters: Ensure your butter is cold when cutting it into the base. This helps achieve that ideal flaky texture that makes these Cinnamon Roll Bliss Bars so delightful.
-
Don’t Overmix: When combining wet and dry ingredients, mix just until combined. Overmixing can make the bars tough, losing that soft, tender bite we all love.
-
Cool Before Frosting: Allow the baked bars to cool completely before applying frosting. This prevents the creamy topping from melting into a soggy mess, preserving that heavenly texture.
-
Adjust Serving Sizes: If you’re expecting a crowd, consider using a larger baking pan while adjusting the baking time. This way, everyone gets their share of these scrumptious bars!
-
Storage Secrets: Store cooled bars in an airtight container for up to a week. For longer freshness, freeze them unfrosted and frost just before serving to maintain their deliciousness.
Make Ahead Options
These Delightful Cinnamon Roll Bliss Bars are a fantastic option for meal prep, saving you time on busy mornings or during hectic weeks! You can prepare the base up to 24 hours in advance by mixing the dough, pressing it into the pan, and storing it covered in the fridge. The cinnamon filling can also be made ahead—just mix the brown sugar and cinnamon, and keep it sealed until you’re ready to bake. After baking, allow the bars to cool and frost them up to 3 days ahead of serving; store in an airtight container in the fridge to keep them moist and fresh. When you’re ready to enjoy, simply slice and serve for delicious, homemade results without the hassle!
Cinnamon Roll Bliss Bars Variations
Feel free to personalize these delightful cinnamon roll bliss bars to suit your tastes and dietary needs!
- Whole Wheat Option: Swap all-purpose flour for whole wheat flour for a heartier, more nutritious bar.
- Nutty Delight: Add chopped walnuts or pecans for a crunchy texture that complements the sweetness of the bars.
- Dairy-Free: Substitute butter and cream cheese with coconut oil and dairy-free cream cheese for a plant-based variation.
- Gluten-Free: Use a gluten-free flour blend to accommodate gluten sensitivities while still enjoying these delicious bars.
- Spiced Up: Boost the flavor by adding a pinch of nutmeg or cardamom to the cinnamon filling for a warm, aromatic twist.
- Fruity Addition: Consider adding raisins or dried cranberries to the filling for a yummy fruity surprise!
- Cinnamon Swirl: For an extra touch, create a cinnamon swirl by alternating bites of plain and cinnamon-filled mixtures, adding visual appeal.
- Simple Drizzle: Instead of frosting, drizzle a simple glaze made from powdered sugar and milk over the top for a lighter finish.
These variations are a guarantee for new flavors in every bite! And remember, they pair beautifully with our Cinnamon Roll French for a show-stopping brunch or an indulgent dessert. Enjoy your baking adventure!
Cinnamon Roll Bliss Bars Recipe FAQs
What kind of flour should I use for Cinnamon Roll Bliss Bars?
Absolutely! I recommend using all-purpose flour for the best structure. If you’re looking for a healthier twist, whole wheat flour works well too, adding a nutty flavor and extra nutrients to your bars.
How do I store my Cinnamon Roll Bliss Bars?
To store your bars, place them in an airtight container in the fridge for up to a week. Make sure they are completely cooled to avoid any condensation that could make them soggy. Enjoy them as a delightful cold treat throughout the week!
Can I freeze Cinnamon Roll Bliss Bars?
Yes, you can! For freezing, wrap the unfrosted bars tightly in plastic wrap and then in aluminum foil for extra protection. They can last up to 3 months in the freezer. When you’re ready to indulge, simply thaw them overnight in the fridge and frost them before serving for optimal freshness.
How do I prevent my bars from being too dry?
To ensure your bars remain moist and tender, avoid overbaking. Keep an eye on them during the last few minutes in the oven; they should be golden brown and a toothpick inserted in the center should come out clean, but not dry. Also, remember to allow them to cool completely before frosting, as a warm frosting mix can affect texture.
What if I have a nut allergy?
If you’re concerned about nut allergies, rest assured that this recipe is nut-free as written. However, if desired, you can customize it by omitting any optional toppings that may include nuts. Always check labels if you’re using pre-packaged ingredients to confirm they are allergen-free.
Can I use a different type of sugar for the Cinnamon Roll Bliss Bars?
Very! You can definitely swap granulated sugar for coconut sugar if you’re looking for a more natural option. Coconut sugar has a lower glycemic index and provides a lovely caramel flavor, enhancing the richness of your bliss bars.
Cinnamon Roll Bliss Bars: Easy Comfort in Every Bite
Ingredients
Equipment
Method
- Preheat your oven to 375°F (190°C) and line a 9x13 inch baking pan with parchment paper.
- In a large mixing bowl, whisk together the flour, granulated sugar, baking powder, baking soda, and salt until well combined.
- Cut in the cold, cubed unsalted butter into the dry mixture until the texture resembles coarse crumbs.
- In a separate bowl, combine the buttermilk and vanilla extract. Pour this into the dry ingredients and mix gently.
- Press the dough evenly into the bottom of your prepared baking pan.
- In a small bowl, combine the brown sugar and ground cinnamon. Drizzle the melted butter over the pressed dough and sprinkle the cinnamon-sugar mixture on top.
- Bake for 20-25 minutes, until golden brown and a toothpick comes out clean.
- Cool the bars in the pan for 10 minutes, then transfer to a wire rack to cool completely.
- Prepare the frosting by beating the softened cream cheese and butter, then gradually add in powdered sugar and milk until creamy.
- Spread the creamy frosting over the cooled bars, cut into pieces, and serve.
Leave a Reply