
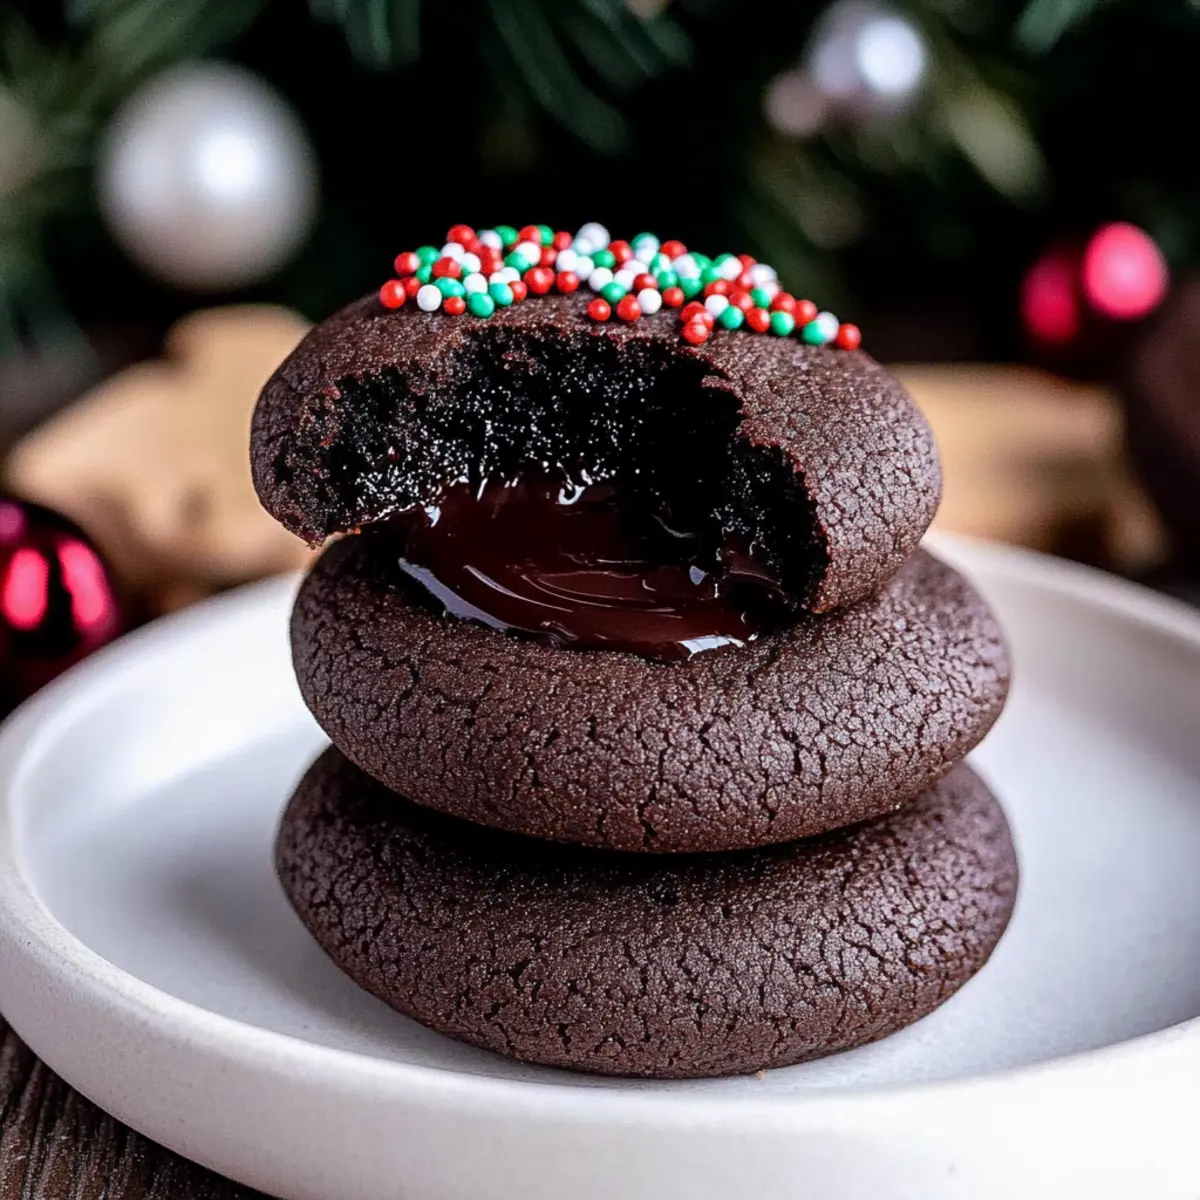
Walking into a kitchen filled with the rich aroma of chocolate is an experience that instantly elevates my mood. There’s something undeniably comforting about the classic Chocolate Thumbprint Cookies, with their chewy texture and a surprise of velvety ganache nestled in the center. These delightful cookies are perfect for celebrating the holidays or simply treating yourself after a long day. Best of all, they require just a handful of ingredients and come together quickly, making them an easy crowd-pleaser at any gathering. So, are you ready to bring a little joy to your baking routine with these irresistible treats that promise to warm hearts and indulge sweet cravings?

Why are these cookies a must-try?
Irresistible Flavor: The combination of rich Dutch-process cocoa and velvety ganache creates a decadent treat that chocolate lovers will adore.
Quick & Easy: With only a handful of ingredients, these cookies come together in a flash, making them perfect for last-minute cravings or festive gatherings.
Chewy Delight: Enjoy the perfect chewy texture that strikes the right balance between indulgent and satisfying, reminiscent of a brownie.
Versatile Options: Feel free to swap the ganache for your favorite fruit preserves or experiment with flavored extracts to tailor the cookies to your taste.
Pair these with a warm cup of coffee or hot cocoa for an unforgettable experience! Don’t forget to check out my recipe for Chocolate Oat Cookies for another delightful treat!
Chocolate Thumbprint Cookie Ingredients
For the Cookie Dough
- All-purpose flour – Provides structure; spoon and level for accuracy.
- Cocoa powder (Dutch process) – Imparts a deep chocolate flavor; regular unsweetened may be substituted, but flavor and color will differ.
- Salt – Enhances flavor; essential for balancing sweetness.
- Baking powder – Leavening agent for a light texture; ensure freshness for best results.
- Unsalted butter – Adds richness and moisture; must be softened for easy creaming.
- Light brown sugar – Contributes sweetness and moisture; can substitute with dark brown sugar for a deeper flavor.
- Granulated white sugar – Adds sweetness; adjust quantity for desired sweetness.
- Egg yolks – Provide richness and help bind; at room temperature for better incorporation.
- Vanilla bean paste or extract – Adds depth of flavor; substitute with pure vanilla extract if necessary.
For the Ganache Filling
- Semi-sweet chocolate chips – Used for ganache filling; dark or milk chocolate can be substituted based on preference.
- Heavy whipping cream – Creates a rich ganache; do not substitute with low-fat options for best results.
For Decoration (Optional)
- Nonpareils – For decoration; can be omitted or replaced with crushed candy canes for a festive touch.
Dive into the world of Chocolate Thumbprint Cookies, and let your baking adventure begin!
Step‑by‑Step Instructions for Chocolate Thumbprint Cookies
Step 1: Prepare Baking Sheets
Start by lining two baking sheets with parchment paper, ensuring that they are ready for your delicious chocolate thumbprint cookies. This step keeps the cookies from sticking and makes cleanup a breeze. Preheat your oven to 350°F to get it warmed up while you prepare the dough.
Step 2: Mix Dry Ingredients
In a medium bowl, whisk together the all-purpose flour, Dutch-process cocoa powder, salt, and baking powder until evenly combined. This mixture will give your cookies their structure and rich chocolate flavor. Set aside the dry ingredients, as they will be gradually added to the wet mixture later on.
Step 3: Cream Butter and Sugars
In a large mixing bowl, cream together the softened unsalted butter, light brown sugar, and granulated white sugar for about 2 minutes using an electric mixer. You’ll know it’s ready when the mixture becomes light and fluffy, which creates a wonderful base for your chocolate thumbprint cookies.
Step 4: Incorporate Egg Yolks and Vanilla
Add the egg yolks and vanilla bean paste or extract into the creamed butter and sugars. Mix until the batter is pale and fluffy, making sure all ingredients are well incorporated. This step adds richness and flavor that will elevate your cookies to a whole new level of deliciousness.
Step 5: Combine Ingredients
Gradually add the dry ingredient mixture to the wet ingredients, stirring just until combined. Be careful not to overmix, as this can result in denser cookies. You want to maintain that perfect chewy texture in your chocolate thumbprint cookies!
Step 6: Form the Dough
Using a cookie scoop or your hands, divide the dough into 34 equal portions and roll them into balls. Place these dough balls on the prepared baking sheets, giving them some space. Use a 1/4 teaspoon to make indents in the center of each ball, creating the perfect wells for your ganache later on.
Step 7: Chill Dough
Refrigerate the indented dough balls for at least 1 hour. Chilling the dough is crucial as it helps maintain the shape of the cookies while baking and enhances their chewiness, making your chocolate thumbprint cookies a delightful treat.
Step 8: Bake Cookies
Once chilled, place the baking sheets in your preheated oven and bake the cookies for 9 to 11 minutes. Keep an eye on them, and gently re-indent the centers after baking to ensure a perfect well for the ganache filling once they cool.
Step 9: Cool and Prepare Ganache
Allow the cookies to cool on the baking sheets for about 5 minutes, then transfer them to a wire rack to cool completely. Meanwhile, prepare the ganache by heating heavy whipping cream until just simmering, pour it over the semi-sweet chocolate chips in a bowl, and mix until you achieve a smooth and shiny consistency.
Step 10: Fill Cookies
Once the cookies have fully cooled, fill each well with the delicious ganache you just made. Optionally, sprinkle with nonpareils or crushed candy canes for a festive touch. Allow the ganache to set in the fridge for a few minutes before serving your heavenly chocolate thumbprint cookies!
What to Serve with Chewy Chocolate Thumbprint Cookies
There’s nothing quite like indulging in a sweet treat, especially when paired with the perfect accompaniments to elevate your dessert experience.
-
Fresh Berries: The tartness of raspberries or strawberries balances the rich chocolate and adds a burst of freshness to each bite.
-
Hot Cocoa: Warm, creamy hot cocoa is a nostalgic choice, enhancing the chocolate flavors and making for a cozy dessert moment.
-
Vanilla Ice Cream: The cool, creamy contrast of vanilla ice cream pairs beautifully with the chewy texture, creating a delightful combination of flavors and temperatures.
-
Espresso: A bold shot of espresso cuts through the sweetness, enhancing the deep chocolate notes and adding complexity to your palate.
-
Whipped Cream: Light and airy homemade whipped cream makes a delightful topping, adding a soft touch that complements the dense cookies perfectly.
-
Chocolate Milkshake: For an indulgent treat, serve these cookies with a thick chocolate milkshake; it’s a chocolate lover’s dream come true!
-
Nutty Biscotti: Dipping crunchy nutty biscotti into the ganache is a fun twist on traditional cookies and creates a delicious textural contrast.
Combine these delightful items, and watch as your chocolate thumbprint cookies become the star of any gathering!
Make Ahead Options
These Chewy Chocolate Thumbprint Cookies are a fantastic choice for meal prep enthusiasts! You can prepare the cookie dough up to 24 hours in advance by mixing all the ingredients, then rolling the dough into balls and chilling them in the refrigerator. To maintain their delightful texture, keep the indented dough covered with plastic wrap to prevent drying out. When you’re ready to bake, simply preheat your oven, bake the cookies for 9-11 minutes, and fill the centers with ganache after cooling. This way, you’ll have freshly baked cookies with minimal effort, perfect for busy weeknights or last-minute gatherings!
Expert Tips for Chocolate Thumbprint Cookies
-
Measure with Care: Always spoon and level your flour to avoid dense cookies. Measuring incorrectly can lead to dry or heavy results.
-
Chill for Success: Don’t skip the chilling step! It helps the dough hold its shape and contributes to that delightful chewy texture.
-
Watch the Bake Time: Bake just until the edges begin to firm. Overbaking can lead to cookies that are too hard, losing their chewy appeal.
-
Perfect Ganache: Stir the ganache until smooth; don’t rush this step. A well-made filling is key to elevating your chocolate thumbprint cookies.
-
Creative Variations: Try different flavored extracts or swap the ganache with fruit preserves to add a personal touch to your cookies.
How to Store and Freeze Chocolate Thumbprint Cookies
Room Temperature: Keep cookies in an airtight container at room temperature for up to 3 days for the best taste and texture.
Fridge: If you prefer a chewier texture, store them in the fridge for up to 5 days; just allow them to come to room temperature before serving.
Freezer: For longer storage, freeze the cookies in a single layer on a baking sheet before transferring them to an airtight container for up to 2 weeks.
Reheating: To enjoy the cookies warm, gently reheat them in the microwave for about 10-15 seconds before serving, making the ganache filling wonderfully gooey again!
Chocolate Thumbprint Cookies Variations
Feel free to sprinkle your own creativity into these delicious cookies for a delightful twist!
-
Fruity Filling: Substitute ganache with fruit preserves, like raspberry or strawberry, for a refreshing touch. This variation will surprise your taste buds!
-
Flavored Extracts: Experiment with different extracts in the dough, such as peppermint or almond, to give a unique flavor twist that complements the chocolate. Your kitchen will smell amazing!
-
Chocolate Variety: Swap semi-sweet chocolate chips with dark, milk, or even white chocolate for ganache to cater to your taste preferences. Each type brings its own character to these cookies.
-
Nutty Crunch: Add finely chopped nuts like hazelnuts or walnuts into the dough for a delightful crunch that pairs beautifully with the soft cookie texture. This is a wonderful way to elevate the cookie experience.
-
Minty Refresh: Mix in crushed peppermint candies into the dough for a festive twist, perfect for holiday gatherings. The aroma will fill your home with a warm, festive spirit!
-
Spicy Sensation: For a kick, incorporate a pinch of cayenne pepper or cinnamon in the dough. This subtle heat adds an unexpected depth that chocolate lovers will adore.
-
Dairy-Free Delight: Use coconut cream or almond milk in place of heavy cream for the ganache, fulfilling the needs of dairy-free diets without compromising flavor. You can still achieve that rich, silky texture!
-
Cookie Sandwiches: Create mini cookie sandwiches by filling them with buttercream or whipped cream instead of ganache. This adds a fun and playful element to the classic cookie.
For more delightful ideas, don’t forget to check out my recipe for High Protein Chocolate or get inspired with this Rocky Road Chocolate treat for your next baking adventure!
Chocolate Thumbprint Cookies Recipe FAQs
What type of cocoa powder should I use for the best flavor?
For these Chocolate Thumbprint Cookies, I highly recommend using Dutch-process cocoa powder. It has a richer and deeper flavor compared to regular unsweetened cocoa, which is crucial for achieving that intense chocolate taste. If you cannot find Dutch-process cocoa, you can use regular unsweetened cocoa, but note that the flavor and color may differ slightly.
How should I store the cookies to keep them fresh?
To keep your cookies fresh, store them in an airtight container at room temperature for up to 3 days. If you want to prolong their freshness, you can refrigerate them for up to 5 days, but remember to let them come to room temperature before serving. Always check for any visual cues, like texture changes, to ensure they are still enjoyable.
Can I freeze these cookies for later?
Absolutely! To freeze your Chocolate Thumbprint Cookies, start by placing them in a single layer on a baking sheet and freeze until solid. Then transfer to an airtight container where they will stay fresh for up to 2 weeks. When you’re ready to enjoy them, simply thaw at room temperature or reheat gently in the microwave for a few seconds to make the ganache gooey again.
What should I do if my cookie dough seems too dry or crumbly?
If your cookie dough appears too dry or crumbly, don’t worry! Start by trying to incorporate a little extra softened butter or a splash of milk into the mixture. You can also try mixing it a little longer to ensure all ingredients blend well. Remember, it should be moist enough to hold together when formed into balls without falling apart.
Are there any allergy considerations with this recipe?
Yes, the Chocolate Thumbprint Cookies contain common allergens such as gluten (in flour) and dairy (in butter and cream). If you’re baking for someone with allergies, consider using gluten-free all-purpose flour and a dairy substitute like coconut cream for the ganache. Always double-check ingredient labels to ensure safety!
Rich and Chewy Chocolate Thumbprint Cookies to Delight You
Ingredients
Equipment
Method
- Prepare Baking Sheets: Line two baking sheets with parchment paper and preheat your oven to 350°F.
- Mix Dry Ingredients: In a bowl, whisk together the flour, cocoa powder, salt, and baking powder.
- Cream Butter and Sugars: In a large bowl, cream together the softened butter, light brown sugar, and granulated sugar until light and fluffy.
- Incorporate Egg Yolks and Vanilla: Add the egg yolks and vanilla to the creamed mixture and mix until fluffy.
- Combine Ingredients: Gradually add the dry mixture to the wet ingredients, stirring until just combined.
- Form the Dough: Divide the dough into 34 portions, roll into balls, and press to create wells.
- Chill Dough: Refrigerate the indented dough balls for at least 1 hour.
- Bake Cookies: Bake for 9 to 11 minutes and re-indent centers if needed.
- Cool and Prepare Ganache: Allow cookies to cool and prepare the ganache by mixing hot cream with chocolate chips.
- Fill Cookies: Fill each well with ganache, optionally decorate, and let set.
Leave a Reply