
Late-night cravings can feel like a mini crisis, especially when a sweet tooth kicks in and you’re left rummaging through a pantry that seems devoid of dessert. Enter the Chocolate Lava Mug Cake: a wonderfully quick dessert that transforms a few humble ingredients into a warm, molten masterpiece within minutes. This single-serving delight is perfect for those of us who want to indulge without the fuss of baking a whole cake. What’s more, it’s incredibly versatile with delicious variations like a Peanut Butter Lava Mug Cake or a Gluten-Free option! So, if you’re ready to elevate your midnight snack game and have a guaranteed dose of chocolate goodness, keep scrolling to discover how to whip up this mug cake in a flash. Are you ready to indulge?
Why is this mug cake a must-try?
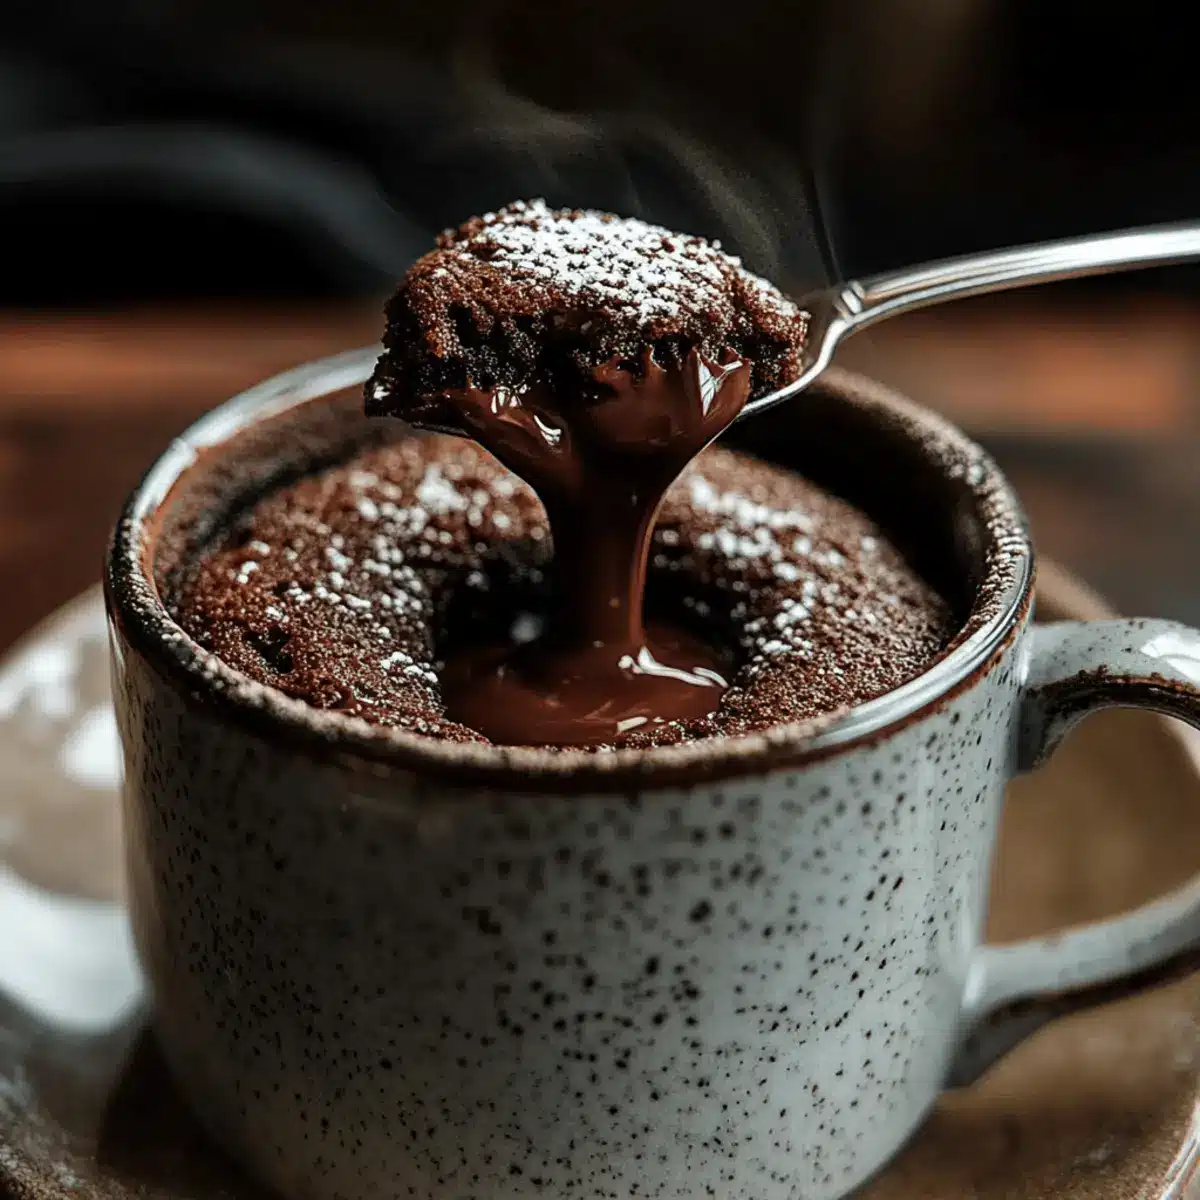
Indulgent Treat: This Chocolate Lava Mug Cake is your ticket to instant satisfaction, delivering a warm, gooey center that bursts with rich chocolate flavor in just minutes.
Incredibly Quick: No need for an oven! This easy microwave recipe means you can enjoy dessert without waiting, making it perfect for those late-night cravings.
Versatile Options: Whether you crave a classic or want to switch things up with a Peanut Butter Lava Mug Cake or a gluten-free version, the possibilities are endless!
Single-Serving Perfection: Enjoy the comforting embrace of a freshly made dessert without the leftovers. It’s guilt-free indulgence in a mug!
Perfect for Everyone: Everyone, from busy professionals to home chefs, will appreciate how simple and delicious this recipe is. Add a scoop of ice cream, and you’ll have a dessert that feels gourmet!
Chocolate Lava Mug Cake Ingredients
For the Cake Base
- All-purpose flour – Provides structure for the cake; substitute with gluten-free all-purpose flour blend for a gluten-free option.
- Unsweetened cocoa powder – Adds rich chocolate flavor; no substitute needed for that lava-like taste.
- Granulated sugar – Sweetens your cake; can be reduced for less sweetness or swapped for a sugar alternative.
- Baking powder – Acts as a leavening agent; make sure it’s fresh for optimal results.
- Salt – Enhances the overall flavor; essential to the taste with no substitute recommended.
For the Wet Ingredients
- Milk – Adds moisture and richness to the batter; substitute with almond, oat, or soy milk for a dairy-free option.
- Vegetable oil – Provides fat for moisture; can be replaced with melted butter or coconut oil for a different flavor.
- Vanilla extract – Adds depth to the flavor; consider using pure vanilla for a richer taste.
For the Lava Center
- Semi-sweet or dark chocolate – Creates that delectable molten center; chocolate chips can also be used as an alternative.
Enjoy this quick and easy Chocolate Lava Mug Cake and let every bite transport you to dessert heaven!
Step‑by‑Step Instructions for Chocolate Lava Mug Cake
Step 1: Mix Dry Ingredients
In a microwave-safe mug that holds at least 12 ounces, combine 4 tablespoons of all-purpose flour, 2 tablespoons of unsweetened cocoa powder, 3 tablespoons of granulated sugar, 1/8 teaspoon of baking powder, and a pinch of salt. Stir the dry ingredients together until they are evenly blended. This will form the base for your delicious Chocolate Lava Mug Cake.
Step 2: Add Wet Ingredients
Pour in 3 tablespoons of milk, 2 tablespoons of vegetable oil, and 1/4 teaspoon of vanilla extract into the dry mixture. Using a small whisk or fork, mix these ingredients until the batter becomes smooth and free of lumps. Make sure everything is well combined to create a lovely chocolatey flavor throughout your cake.
Step 3: Create the Lava Center
Take a piece of semi-sweet or dark chocolate (about 1 tablespoon), or a few chocolate chips, and gently press it into the center of the batter. Make sure the chocolate is covered by the batter, which will melt beautifully to create the signature gooey middle of your Chocolate Lava Mug Cake.
Step 4: Microwave the Cake
Place the mug in the microwave and cook on high for 60 to 90 seconds. Start with 60 seconds and check; the edges should look set while the center remains soft and slightly wobbly. If it needs more time, continue microwaving in 10-second intervals to avoid overcooking and ensure that molten center.
Step 5: Cool and Serve
Once your mug cake is cooked, carefully remove it from the microwave (it will be hot!). Let it cool for about 1-2 minutes to enhance the molten effect. This short cooling time allows the rich chocolate center to settle while you prepare to indulge in your decadent Chocolate Lava Mug Cake.
Chocolate Lava Mug Cake Variations
Feel free to explore delicious twists on this mug cake, allowing your taste buds to embark on a flavorful journey!
-
Peanut Butter Delight: Swap the chocolate center for a delicious spoonful of peanut butter for a nutty richness. The combination of chocolate and peanut butter offers an indulgent twist that will satisfy any craving.
-
Mocha Magic: Add ½ teaspoon of instant coffee granules to the dry ingredients for a delightful mocha flavor. This variation brings a lovely depth to the chocolate, making it perfect for coffee lovers.
-
Dairy-Free Option: Use almond, oat, or soy milk instead of regular milk for a creamy yet dairy-free treat. You can still enjoy the warmth and flavor of the chocolate lava cake, guilt-free!
-
Extra Richness: Pop in a tablespoon of chocolate hazelnut spread in the center for a luxurious taste experience. The creaminess adds an extra layer of indulgence that will make your dessert feel even more gourmet.
-
Gluten-Free Goodness: Substitute all-purpose flour with a gluten-free flour blend to make this recipe suitable for gluten-sensitive friends. Everyone deserves a taste of this chocolatey heaven!
-
Cinnamon Twist: Add a sprinkle of ground cinnamon to the dry ingredients for a warm and cozy flavor profile. This small addition offers warmth that pairs beautifully with chocolate for a delightful surprise in every bite.
-
Fruity Fusion: Toss in some fresh raspberries or sliced strawberries into the batter for a fruity burst. The tartness of the fruit balances the rich chocolate wonderfully, making it a fresh and vibrant dessert.
-
Chili Heat: For a spicy kick, mix in a pinch of chili powder or cayenne pepper to the dry ingredients. The heat from the spices enhances the chocolate flavor and creates an exciting dessert experience.
With these variations, you can find your perfect chocolaty match! If you’re intrigued by more ideas, check out recipes like Rocky Road Chocolate or Healthy Carrot Cake for more delightful inspirations.
How to Store and Freeze Chocolate Lava Mug Cake
Fridge: Store any leftovers in an airtight container in the fridge for up to 1 day to maintain freshness and full flavor.
Freezer: For longer storage, freeze the cooled mug cake wrapped tightly in plastic wrap for up to 1 month. Thaw overnight in the fridge before reheating.
Reheating: When ready to enjoy, reheat in the microwave for 15-20 seconds at a time until warmed through to restore its delicious, gooey chocolate center.
Leftover Tips: Remember that the longer it’s stored, the less gooey the center may become, but it will still be a delightful treat!
Make Ahead Options
These Chocolate Lava Mug Cakes are perfect for busy weeknights or unexpected guests! You can prepare the dry ingredients—4 tablespoons of flour, 2 tablespoons of cocoa powder, 3 tablespoons of sugar, 1/8 teaspoon of baking powder, and a pinch of salt—up to 3 days in advance. Simply mix them and store in an airtight container at room temperature. When you’re ready to enjoy this delightful dessert, just add the wet ingredients (3 tablespoons of milk, 2 tablespoons of oil, and 1/4 teaspoon of vanilla) right before microwaving. This method ensures a fresh, delicious cake every time with minimal effort, allowing you to relish your warm, gooey Chocolate Lava Mug Cake without the hassle!
Expert Tips for the Best Chocolate Lava Mug Cake
-
Mug Size Matters: Use a microwave-safe mug that holds at least 12 ounces to prevent overflow during cooking.
-
Watch the Time: Avoid overcooking your cake by checking it in 10-second intervals after the first minute; you want that gooey center to remain molten.
-
Let it Cool: Allow the cake to cool for 1-2 minutes before digging in; this enhances the melting effect and makes it easier to enjoy.
-
Prep Ahead: Consider mixing the dry ingredients ahead of time and storing them in a jar to make achieving this quick Chocolate Lava Mug Cake even easier on busy days.
-
Experiment with Flavors: Don’t hesitate to try different variations, like the Peanut Butter Lava Mug Cake, to elevate your dessert experience!
What to Serve with Chocolate Lava Mug Cake
Sink your spoon into an experience that combines sweetness and warmth, turning each bite into a moment of blissful indulgence.
- Vanilla Ice Cream: A classic pairing that adds a creamy contrast to the rich molten chocolate. The cold ice cream beautifully balances the warm cake.
- Whipped Cream: Light and fluffy, it enhances the cake’s texture while adding a touch of sweetness. A sprinkle of chocolate shavings on top elevates this delightful combination.
- Berries Medley: Fresh strawberries or raspberries add a burst of tart flavor and a pop of color. They contrast the rich chocolate, making each bite a celebration of flavors.
- Espresso or Coffee: A warm cup of coffee complements the chocolate and deepens the dessert experience. Consider a mocha for an extra kick of flavor!
- Chocolate Sauce Drizzle: Enhance your dessert with a generous drizzle of chocolate sauce. This keeps the chocolate theme alive and adds a delightful sweetness.
- Chopped Nuts: Sprinkle over your mug cake for added crunch and a nutty flavor. Almonds or hazelnuts harmonize beautifully with the chocolate.
- Caramel Sauce: A drizzle of smooth caramel adds another layer of sweetness and richness. The blend of chocolate and caramel creates a truly luxurious treat.
- Mint Leaves: A fresh mint garnish can brighten the dish with a hint of cooling freshness. It’s a sophisticated touch that enhances the overall indulgence.
Chocolate Lava Mug Cake Recipe FAQs
What type of flour is best for this recipe?
All-purpose flour is perfect for creating structure in the Chocolate Lava Mug Cake. If you prefer a gluten-free option, substitute it with a gluten-free all-purpose flour blend. Just make sure to check the ingredients for any allergens, especially if serving someone with sensitivities.
How should I store leftovers of the mug cake?
If you have any leftovers, you can cover your mug cake with plastic wrap or transfer it to an airtight container and refrigerate it for up to 1 day. Just remember, the longer it sits, the less gooey the center may become, but it’ll still be delicious!
Can I freeze the Chocolate Lava Mug Cake?
Absolutely! To freeze, let the mug cake cool completely and then wrap it tightly in plastic wrap. Place it in a freezer-safe bag or container, and it will keep for up to 1 month. When you’re ready to enjoy it, thaw overnight in the fridge, then reheat in the microwave for 15-20 seconds to revive that gooey goodness.
What should I do if the cake spills over while microwaving?
If you use a smaller mug or have filled it too much, don’t worry! It’s common for mug cakes to overflow a bit. Be sure to use a 12-ounce mug and only fill it about halfway to ensure enough space for the cake to rise. If it does spill, simply clean your microwave while it cools – it’ll be worth the mess!
Is this mug cake suitable for people with allergies?
This Chocolate Lava Mug Cake can be easily modified for various dietary needs! For a dairy-free version, simply substitute milk with almond, oat, or soy milk, and use vegetable oil instead of butter. When addressing nut allergies, you might want to skip the peanut butter variation or make sure to choose nut-free chocolate options.
Decadent Chocolate Lava Mug Cake: Quick & Easy Indulgence
Ingredients
Equipment
Method
- In a microwave-safe mug that holds at least 12 ounces, combine all-purpose flour, cocoa powder, sugar, baking powder, and salt. Stir until evenly blended.
- Pour milk, vegetable oil, and vanilla extract into the dry mixture. Mix until the batter is smooth.
- Press chocolate into the center of the batter, ensuring it is covered.
- Microwave on high for 60 to 90 seconds. Start with 60 seconds and check. Adjust time in 10-second intervals.
- Carefully remove from the microwave and let cool for about 1-2 minutes before serving.
Leave a Reply