
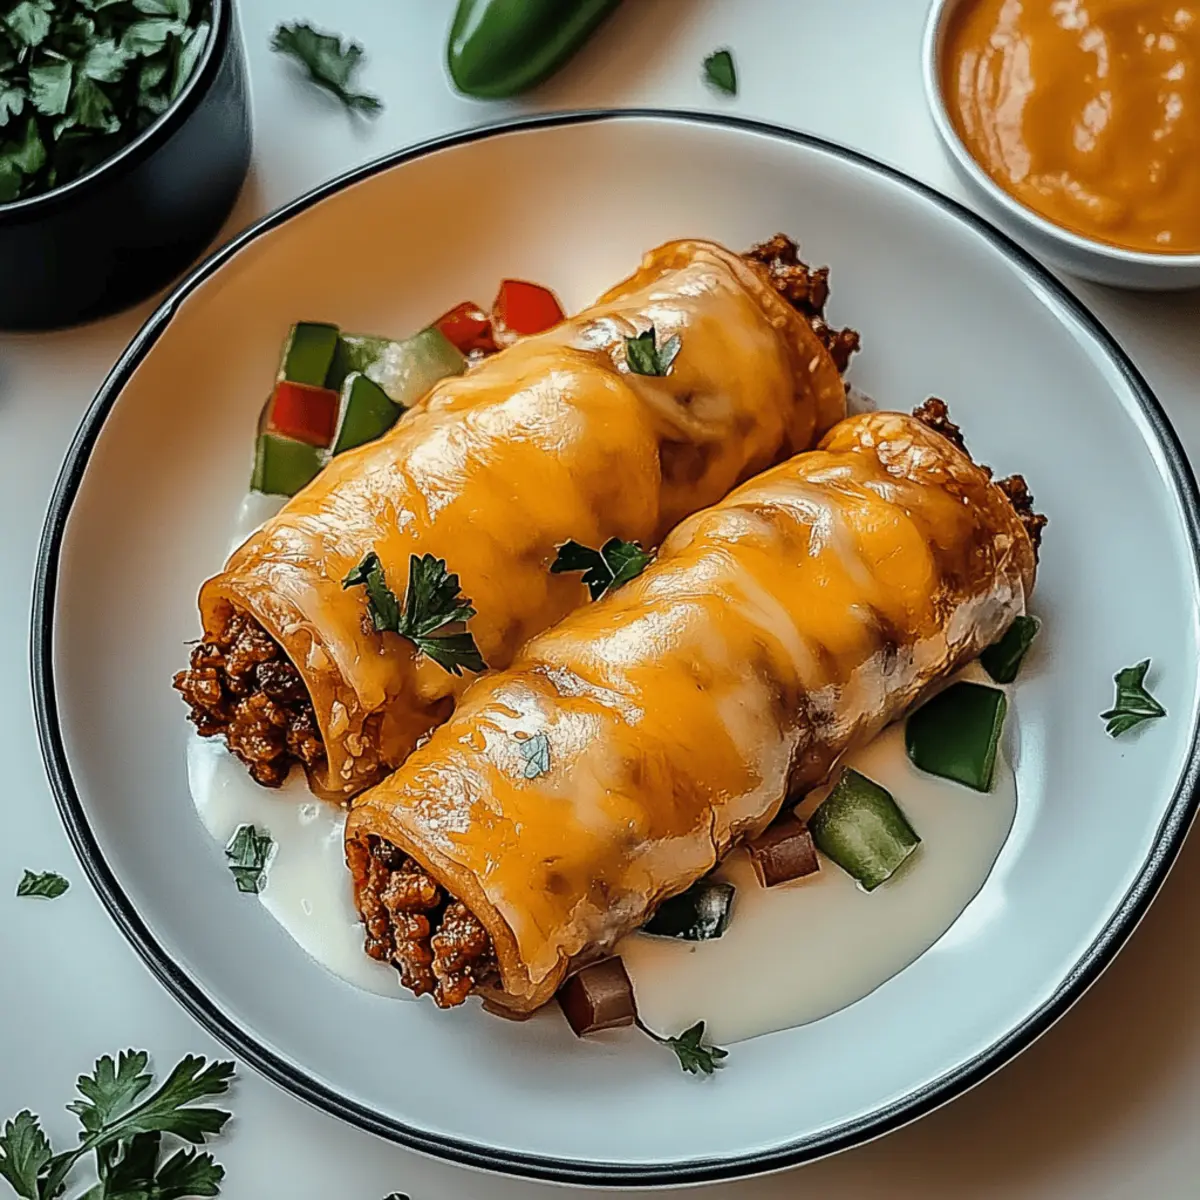
As the aroma of sizzling meat mingles with crispy, flaky pastry, I can’t help but feel a wave of excitement wash over me. These Cheesy Taco Sticks are the ultimate answer to those weeknight cravings when you need something quick yet satisfying. With each bite, you’ll discover a delicious medley of seasoned beef and melty cheeses, perfectly enveloped in crescent roll dough. What I love most about this recipe is how beginner-friendly it is and the fact that you can easily customize it to your taste—whether you prefer a veggie twist or want to add a spicy kick. In just 35 minutes, you’ll have a crowd-pleasing snack that’s ideal for gatherings or simply a cozy night in. Ready to dive in and whip up these delightful handheld treats? Let’s get started!
Why Are Cheesy Taco Sticks So Irresistible?
Quick and Easy: These Cheesy Taco Sticks come together in just 35 minutes, making them perfect for busy weeknights or impromptu gatherings.
Flavor Explosion: The savory seasoned beef combined with melty cheeses cradled in flaky crescent roll dough creates a bite that bursts with flavor.
Endless Customization: Whether you’re a meat lover or a veggie aficionado, this recipe can easily adapt to your preferences—add black beans for a vegetarian twist or sprinkle on jalapeños for an extra kick!
Crowd-Pleasing Appeal: Ideal for parties or cozy family dinners; everyone loves a tasty, handheld treat that’s easy to share.
Make-Ahead Convenience: You can prepare these in advance, freeze, and bake them straight from the freezer, making snack time a breeze. Pair them with salsa or guacamole for an added flavor boost, and if you enjoy cheesy goodness, check out our Cheesy Chicken Crescent Roll for another crowd-pleasing recipe!
Cheesy Taco Sticks Ingredients
For the Filling
- Ground Beef – Provides a savory, meaty filling; substitute with ground turkey or chicken for a leaner option.
- Taco Seasoning – Adds flavor and spice to the beef; consider using homemade seasoning for a healthier alternative.
- Water – Hydrates the beef mixture; no substitutes needed as it’s essential for consistency.
- Red Onion – Gives crunch and enhances flavor; shallots are a milder substitute.
- Green Bell Pepper – Adds freshness and color; can swap for red or yellow bell peppers for added sweetness.
- Fresh Cilantro – Enhances flavor with herbaceous notes; omit for a less herbal taste or substitute with parsley.
For the Dough
- Refrigerated Crescent Roll Dough – Creates the flaky texture for the sticks; puff pastry or homemade pizza dough can be used as substitutes.
For the Cheese
- Shredded Cheddar Cheese – Adds sharpness and creaminess; pepper jack can be used for a spicy kick.
- Shredded Mozzarella Cheese – Contributes gooeyness; any melting cheese like gouda or Fontina works beautifully.
For the Finish
- Egg (for wash) – Ensures a golden finish on the sticks; omit for a vegan version, keeping in mind the texture may vary.
Embrace the joy of cooking with these Cheesy Taco Sticks and delight in their fun, flavor-packed experience!
Step‑by‑Step Instructions for Cheesy Taco Sticks
Step 1: Preheat and Prepare
Begin by preheating your oven to 375°F (190°C) and lining a baking sheet with parchment paper. This ensures easy cleanup and prevents sticking. As the oven heats up, gather your ingredients to streamline the process, including the crescent roll dough, ground beef, and your favorite taco accoutrements.
Step 2: Brown the Beef
In a large skillet, over medium heat, add the ground beef, breaking it apart as it cooks. Stir occasionally for about 5–6 minutes until the meat is fully browned with no pink remaining. Once cooked, drain any excess grease to keep your Cheesy Taco Sticks from being greasy.
Step 3: Add Seasoning
Sprinkle the taco seasoning over the browned beef and add a splash of water. Stir to combine and let it simmer for 2–3 minutes, allowing the flavors to meld and thicken. The mixture should be moist but not watery; this will serve as the delicious filling for your Cheesy Taco Sticks.
Step 4: Unroll the Dough
Carefully unroll the refrigerated crescent roll dough on a clean, flat surface, and press the seams together to form a continuous rectangle. This will give you a solid base to hold your savory filling. Make sure to flatten out any creases to ensure an even texture.
Step 5: Spread the Filling
Evenly distribute the seasoned beef mixture across the dough, leaving a small border around the edges. This allows for easy rolling without the filling spilling out. Spread the mixture into an even layer, and watch as it transforms the crescent roll dough into a mouthwatering sensation.
Step 6: Add Toppings
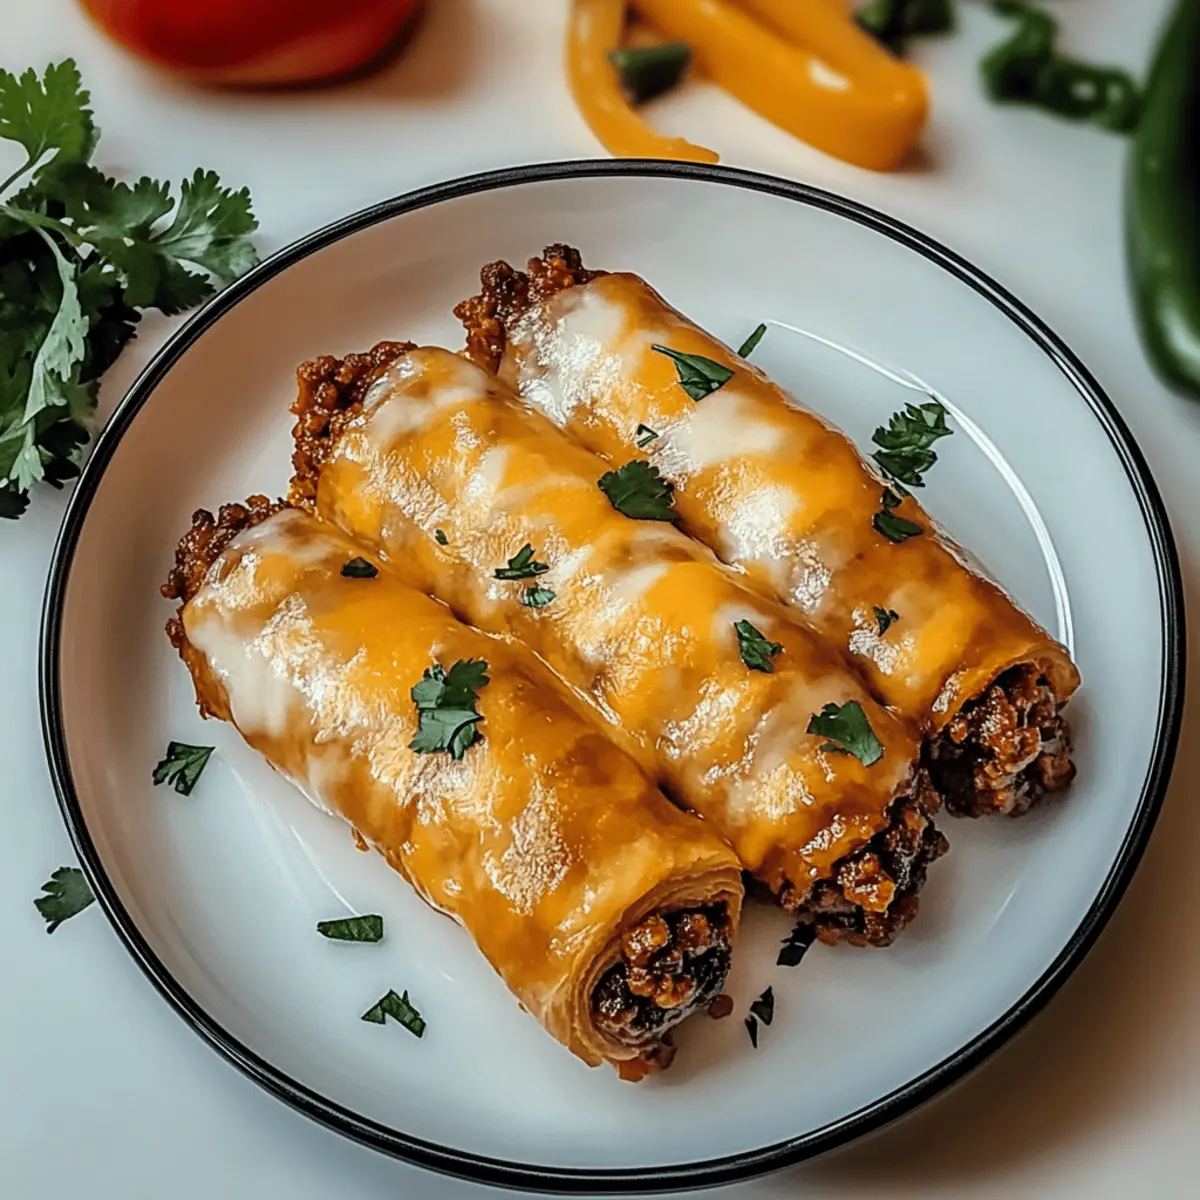
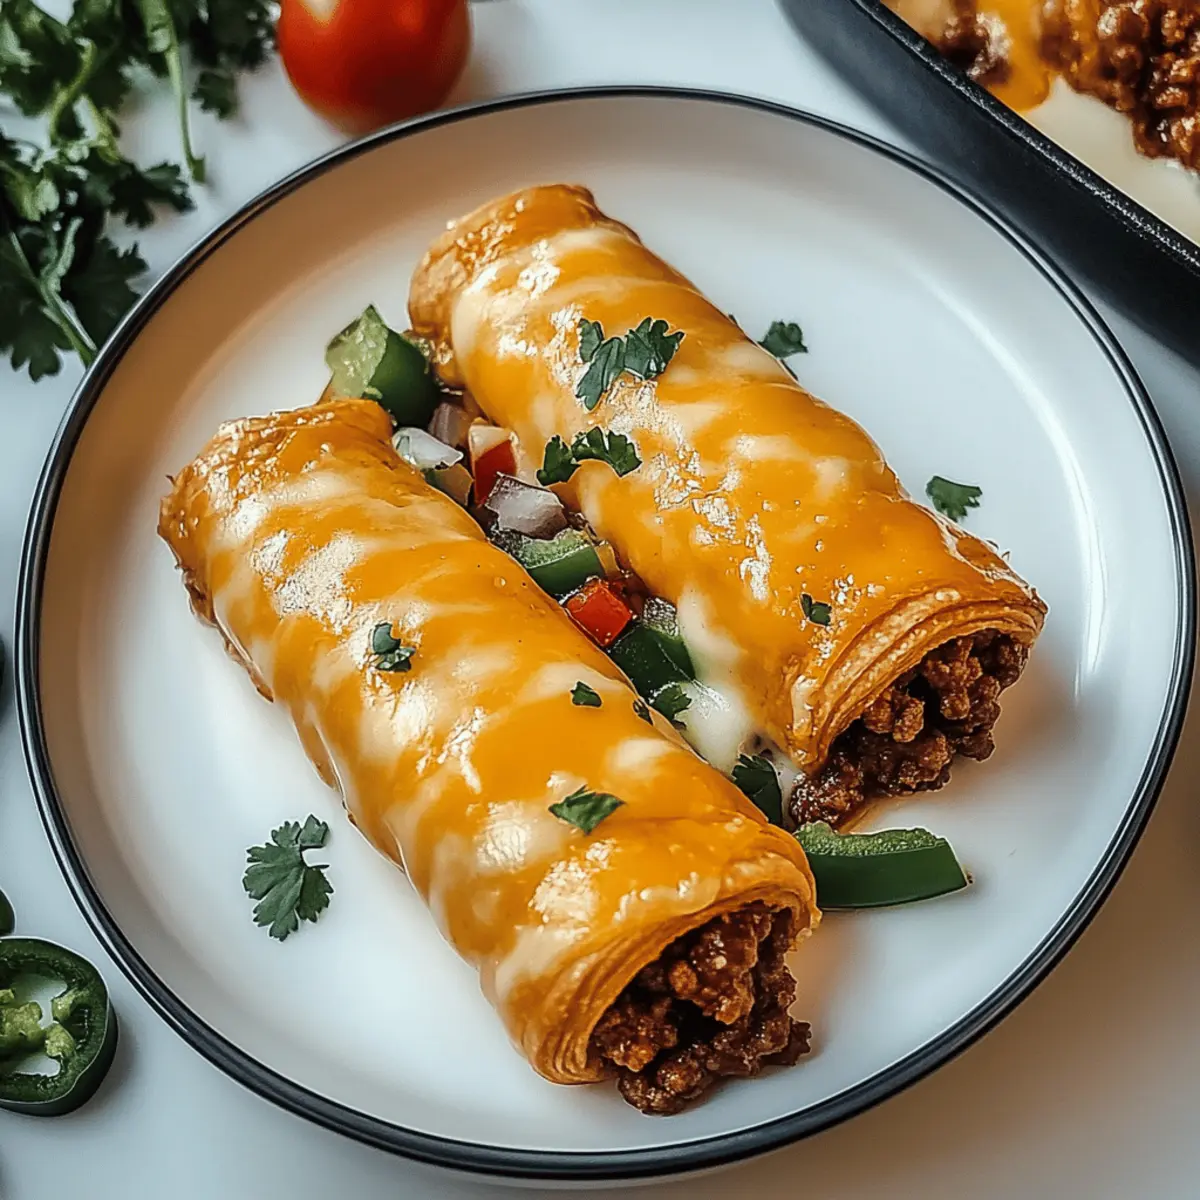
Next, generously sprinkle the shredded cheddar and mozzarella cheeses over the beef filling. Follow with the red onion, green bell pepper, and fresh cilantro. Feel free to customize with any other toppings you love! This combination will create a rich, cheesy filling and enhance the flavor of your Cheesy Taco Sticks.
Step 7: Roll and Seal
Starting from the wide end, carefully roll the dough towards the narrow end while keeping the filling securely inside. Once rolled, pinch the edges to seal them tightly, ensuring no filling escapes during baking. You should have a beautifully formed log ready to bake.
Step 8: Brush with Egg Wash
In a small bowl, beat the egg and use a pastry brush to coat the tops of the rolled dough. This step gives your Cheesy Taco Sticks a beautiful golden color and shiny finish. Make sure to cover the tops evenly for a uniform look when baked.
Step 9: Bake to Perfection
Place the prepared Cheesy Taco Sticks on the lined baking sheet, and bake in the preheated oven for 12–15 minutes. Keep an eye on them; they should turn golden brown, and the cheese will start bubbling. This moment really builds the anticipation for that first bite!
Step 10: Cool and Serve
Once baked, remove the Cheesy Taco Sticks from the oven and allow them to cool for a few minutes. This cooling period makes them easier to slice and handle. Serve them warm, ideally with a side of salsa for dipping, to complement the savory flavors inside.
Expert Tips for Cheesy Taco Sticks
Avoid Overcooking: Keep an eye on the beef while cooking; it should be browned but still moist to prevent dry filling.
Seal the Edges: Make sure to pinch the seams of the crescent roll dough tightly to avoid any filling leaking out during baking.
Customize Your Cheese: Experiment with different cheese combinations – a mix of cheddar, mozzarella, and gouda adds depth to your Cheesy Taco Sticks.
Prep Ahead: For busy nights, assemble the sticks in advance and freeze. Bake directly from the freezer, adding a few extra minutes to the cooking time.
Flavorful Add-Ins: Don’t hesitate to include extra veggies like zucchini or mushrooms, adding not just flavor but also nutrition to your Cheesy Taco Sticks.
Serving Suggestions: Pair your Cheesy Taco Sticks with ranch dressing, guacamole, or salsa for a delightful dipping experience that elevates this already tasty treat!
Cheesy Taco Sticks Variations & Substitutions
Feel free to make these Cheesy Taco Sticks your own with these delightful twists and substitutions!
-
Vegetarian Delight: Swap ground beef for black beans, kidney beans, or a plant-based meat for a hearty, meatless option. This alternative still delivers on flavor and texture, making it a delectable choice for veggie lovers.
-
Spicy Kick: Add jalapeños or sprinkle chipotle powder into your beef mixture for an extra kick. Elevate the heat to your liking and enjoy that satisfying zing with every bite!
-
Exotic Veggies: Replace the green bell pepper with other favorites such as zucchini, mushrooms, or corn. These swaps not only bring varied flavors but also texture, making your Cheesy Taco Sticks even more scrumptious.
-
Dairy-Free Version: Use dairy-free cheese alternatives to keep it lactose-free while enjoying all the cheesy goodness. This way, everyone can dig in without a worry!
-
Lower-Calorie Option: Opt for low-fat ground turkey or chicken instead of beef, and use less cheese for a lighter snack that still satisfies. You’ll love enjoying a healthier version without sacrificing flavor.
-
Homemade Taco Seasoning: For a healthier twist, make your own taco seasoning with spices from your pantry. Combining cumin, chili powder, and paprika can elevate the dish while controlling the salt content.
-
Unconventional Cheese: Go beyond cheddar and mozzarella by trying gouda or Fontina for unique flavor. These cheeses melt beautifully and add a creamy richness that your family will rave about.
-
Adding Fruits: For a fun twist, consider adding diced pineapples or mangoes to the filling for a sweet and savory combination. This creative addition will surprise your taste buds and leave you wanting more!
As you embark on this flavorful journey, make sure to explore these variations and enjoy your personalized Cheesy Taco Sticks with your favorite dipping sauces, just like with our Cheesy Garlic Bread or Dorito Taco Pie. Your family will adore discovering how adaptable this recipe can be!
How to Store and Freeze Cheesy Taco Sticks
Fridge: Store leftover Cheesy Taco Sticks in an airtight container for up to 3 days. Reheat in the oven at 350°F (175°C) for about 10-15 minutes to restore their crispy texture.
Freezer: For longer storage, freeze unbaked Cheesy Taco Sticks on a baking sheet until solid, then transfer them to a freezer-safe bag for up to 2 months. Bake directly from frozen, adding 5-10 minutes to the baking time.
Reheating: To reheat baked Cheesy Taco Sticks, place them on a baking sheet in a preheated oven at 350°F (175°C) for about 10-15 minutes, ensuring they are heated through and the cheese becomes gooey again.
Make-Ahead: Assemble your Cheesy Taco Sticks ahead of time, freeze, and enjoy the convenience of popping them into the oven whenever cravings strike.
Make Ahead Options
These Cheesy Taco Sticks are perfect for meal prep lovers! You can assemble the sticks up to 24 hours in advance, simply refrigerating them (covered tightly in plastic wrap) until you’re ready to bake. Additionally, you can freeze assembled sticks for up to 3 months; just place them on a baking sheet to freeze individually before transferring to a zip-top bag. When you’re ready to enjoy them, bake straight from the freezer, adding a few extra minutes to the cooking time. This method ensures they remain just as delicious, with a perfectly flaky crust, adding a delightful touch to your busy weeknights!
What to Serve with Cheesy Taco Sticks
Elevate your meal experience with perfect pairings that complement these delightful cheesy delights and add a burst of flavor.
-
Fresh Salsa: A zesty, chunky salsa enhances each bite, offering a bright contrast to the savory flavors of the sticks.
-
Guacamole: Creamy avocado dip adds richness, creating a balanced flavor profile that feels indulgent and fresh.
-
Crispy Nachos: Crunchy tortilla chips topped with melted cheese and jalapeños make for a fun way to amp up your snack game.
-
Mexican Street Corn Salad: This colorful salad brings sweetness and crunch, mixing grilled corn, lime, and cilantro to brighten the meal.
-
Creamy Queso Dip: A warm, gooey cheese dip invites you to take another bite of those cheesy taco sticks, creating a wonderful cheesy experience.
-
Ice-Cold Beer: Pair with a light lager or a crisp Mexican beer for a refreshing contrast that complements the spices wonderfully.
-
Sweet Churros: End your meal on a sweet note with these delightful, cinnamon-sugar coated treats, perfect for dipping in chocolate sauce.
Enjoy the delightful blend of textures and flavors with these well-suited sides that will keep everyone reaching for more!

Cheesy Taco Sticks Recipe FAQs
How do I choose ripe ingredients for the filling?
Absolutely! For the best flavor, select fresh vegetables like bell peppers and cilantro. Look for bell peppers that are firm with smooth skin and vibrant color. Avoid peppers with dark spots or wrinkles, which indicate age. Fresh cilantro should be bright green with no wilting.
How should I store leftovers?
Very! To keep your Cheesy Taco Sticks fresh, store them in an airtight container in the fridge for up to 3 days. When reheating, pop them back in the oven at 350°F (175°C) for about 10-15 minutes to regain their crispiness without sacrificing that gooey cheese filling.
Can I freeze these Cheesy Taco Sticks?
Absolutely! If you want to prepare in advance, assemble the Cheesy Taco Sticks unbaked and place them on a baking sheet until solid. Once firm, transfer them to a freezer-safe plastic bag for up to 2 months. When you’re ready to bake, simply pop them straight from the freezer into the preheated oven and add 5-10 minutes to the cooking time for a fresh, hot treat!
What if my taco filling is too wet?
Here’s a comprehensive solution! If your filling is on the wetter side, it could potentially leak out during baking. Start by draining excess grease after cooking the beef. Then, if there’s still moisture, simmer the mixture longer on low heat until it thickens. You can also add a tablespoon of cornstarch mixed with a little water to absorb excess liquid, ensuring a perfect filling that holds together beautifully!
Are there any dietary considerations for this recipe?
Very! If you’re concerned about allergies, keep in mind that the dough contains gluten. For gluten-free options, look for gluten-free crescent roll dough available at specialty grocery stores or online. Additionally, you can substitute ground beef with plant-based protein or black beans to cater to vegetarian diets. Always check labels on your taco seasoning for potential allergens.
Can I make these Cheesy Taco Sticks vegan?
Absolutely! To turn your Cheesy Taco Sticks vegan, simply replace the ground beef with a plant-based meat alternative or black beans, omit the egg wash, and use a vegan cheese that melts well. You’ll still enjoy a delicious flavor that satisfies your cravings without using any animal products!
Cheesy Taco Sticks That Deliver Flavor and Fun in Every Bite
Ingredients
Equipment
Method
- Preheat your oven to 375°F (190°C) and line a baking sheet with parchment paper.
- In a large skillet, over medium heat, add the ground beef, cooking until browned, about 5–6 minutes.
- Sprinkle the taco seasoning over the beef, add water, and simmer for 2–3 minutes.
- Unroll the crescent roll dough and press seams together to form a rectangle.
- Spread the seasoned beef mixture evenly across the dough.
- Sprinkle cheddar and mozzarella cheeses over the beef, followed by red onion, green bell pepper, and cilantro.
- Roll the dough tightly from the wide end, sealing the edges to secure the filling.
- Beat the egg and brush it over the tops of the rolled dough.
- Bake for 12–15 minutes or until golden brown and cheese is bubbling.
- Allow to cool for a few minutes before slicing and serving with salsa.
Leave a Reply