
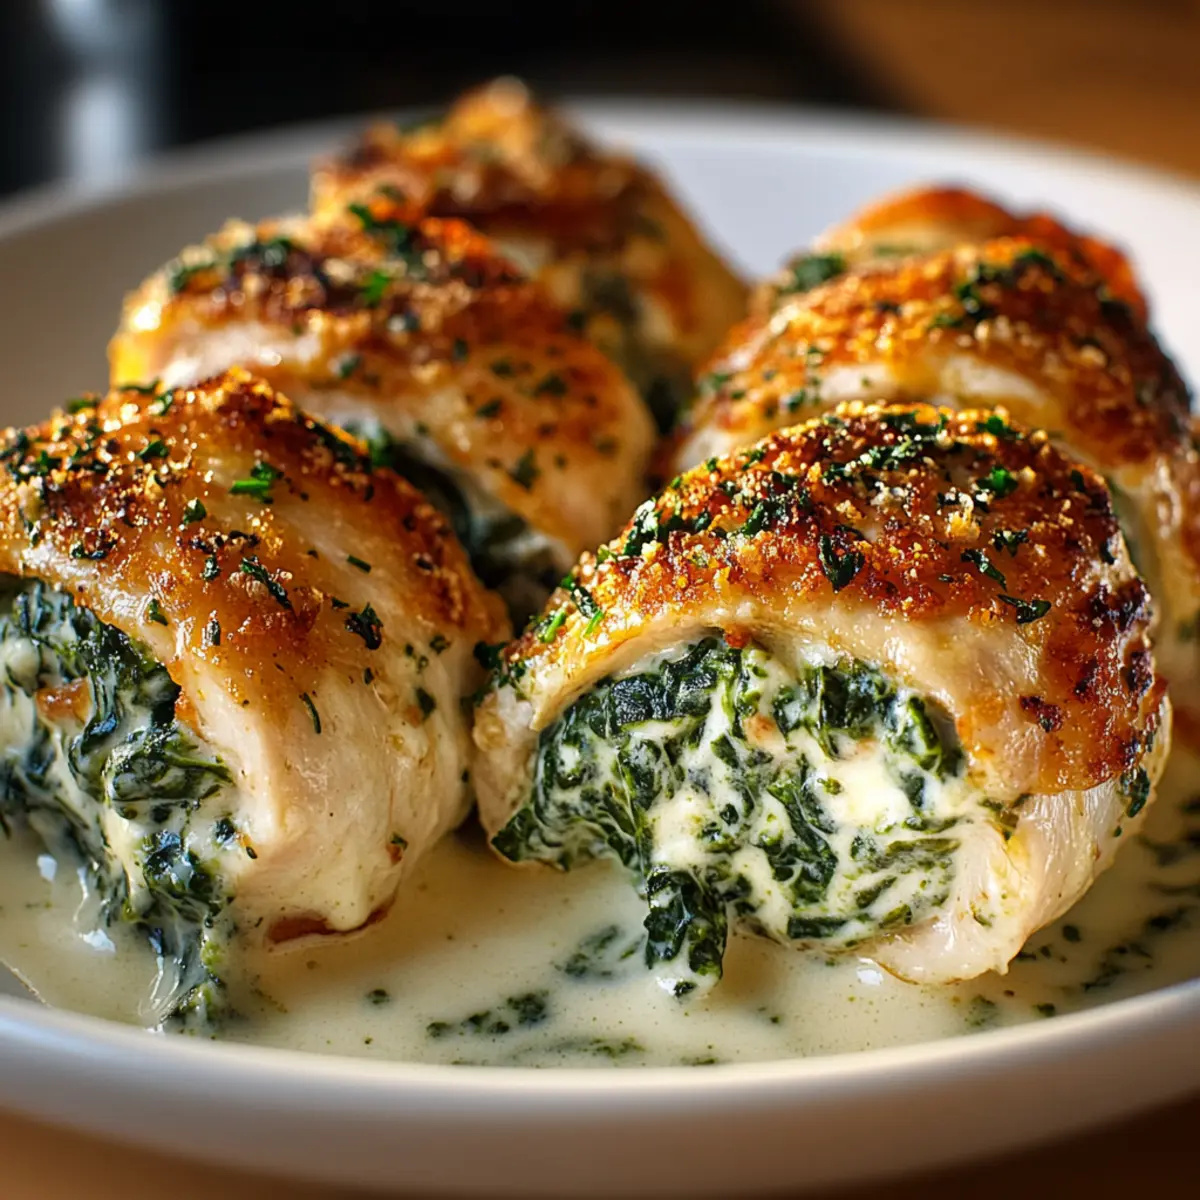
As I rummaged through my fridge, the vibrant green of fresh spinach caught my eye, sparking a surge of inspiration. What better way to turn a simple weeknight dinner into a family favorite than with these Cheesy Spinach Stuffed Chicken Roll-Ups? This dish combines juicy chicken breasts rolled tightly around a creamy, cheesy spinach filling that’s pure comfort on a plate. The beauty lies in its quick and easy preparation, making it a go-to recipe when life gets busy, while still impressing everyone at the dinner table. Whether you’re looking for a low-carb dinner or simply something satisfying, these roll-ups are both delicious and adaptable, ensuring that even picky eaters will be asking for seconds. Are you ready to transform your dinner routine? Let’s dive in and get cooking!

Why are these roll-ups a must-try?
Family-Friendly Delight: These Cheesy Spinach Stuffed Chicken Roll-Ups are sure to please even the pickiest eaters at your table.
Quick & Easy Preparation: With simple steps, you can whip up an impressive meal in no time—perfect for busy weeknights!
Versatile Ingredients: Easily swap out spinach for sautéed mushrooms or artichokes, or try dairy-free options for dietary needs.
Comforting Flavor: The combination of gooey cheese and savory spinach makes for a dish that feels like a warm hug.
Meal Prep-Friendly: Prepare these roll-ups ahead of time for a delightful dinner that’s ready when you are. Pair it with a fresh salad or roasted potatoes for a complete meal!
Cheesy Spinach Stuffed Chicken Roll-Ups Ingredients
For the Chicken
• Chicken Breasts – Boneless, skinless is preferred for easy rolling; consider using boneless chicken thighs for a richer flavor.
For the Filling
• Spinach – Adds vibrant color and earthiness; fresh is best, but ensure frozen spinach is thawed and drained before using.
• Garlic – Provides savory depth; use 1-2 cloves, minced, for optimal flavor.
• Cream Cheese – Creates a creamy texture for the filling; you can substitute with Neufchâtel for a lower-fat option.
• Mozzarella Cheese – Offers that stretchy melt; try Provolone or Monterey Jack as alternatives.
• Parmesan Cheese – Adds depth and saltiness; opt for freshly grated for the best flavor.
For Seasoning & Searing
• Italian Herbs (Oregano, Basil, Thyme) – Enhances aroma and flavor; dried herbs work well too, or use fresh if available.
• Olive Oil – Used for sautéing and searing; vegetable oil can be a good substitute if needed.
• Salt and Black Pepper – Basic seasonings to elevate the dish.
For Assembly
• Toothpicks/Kitchen Twine – Essential for securing the roll-ups during cooking; make sure they’re handy to keep everything nice and tight.
Get ready to dive into these delightful Cheesy Spinach Stuffed Chicken Roll-Ups! The preparation is simple, and the taste is utterly comforting.
Step‑by‑Step Instructions for Cheesy Spinach Stuffed Chicken Roll-Ups
Step 1: Flatten Chicken
Begin by preheating your oven to 375°F (190°C). To prepare the chicken breasts, place each piece between sheets of plastic wrap or parchment paper. Using a meat mallet, gently pound the chicken to a uniform thickness of about 1/4 inch. This ensures they cook evenly and roll up smoothly when filled with the cheesy spinach mixture.
Step 2: Prepare Filling
In a skillet, heat a tablespoon of olive oil over medium heat. Add minced garlic and sauté for about 1 minute until fragrant. Then, add fresh spinach to the pan, cooking until it’s just wilted, which should take another 2-3 minutes. Remove from heat and allow the mixture to cool slightly before combining it with cream cheese, mozzarella, Parmesan, herbs, salt, and pepper until smooth and creamy.
Step 3: Assemble Roll-Ups
Once the filling is ready, spread an even layer of the cheesy spinach mixture over each flattened chicken breast, leaving a small border around the edges. Starting from the narrow end, tightly roll up each chicken breast and secure the ends with toothpicks or kitchen twine. Make sure they are tight but not too tight, to avoid squeezing out the filling during cooking.
Step 4: Sear Roll-Ups
In the same skillet, heat a bit more olive oil over medium-high heat. Carefully place the chicken roll-ups seam-side down in the skillet. Sear them for about 2-3 minutes until they develop a beautiful golden-brown crust. This step not only adds flavor but also helps secure the filling as you move to the next stage.
Step 5: Bake
Transfer the seared roll-ups to the preheated oven. Bake for 20–25 minutes, or until the internal temperature of the chicken reaches 165°F (74°C). You’ll know they’re ready when the chicken is fully cooked and the filling is bubbling slightly. Allow them to rest for 5 minutes before slicing them open to reveal the cheesy spinach goodness inside.

Expert Tips for Cheesy Spinach Stuffed Chicken Roll-Ups
-
Even Thickness: Make sure to pound your chicken breasts to a consistent 1/4-inch thickness to ensure even cooking and easy rolling.
-
Filling Space: When spreading the cheesy spinach filling, leave a small border around the edges to prevent spillage while rolling up the chicken.
-
Secure Roll-Ups: Use toothpicks or kitchen twine to tightly secure the roll-ups. This will keep the filling from leaking out during cooking.
-
Searing Magic: For a crispy exterior, don’t skip the searing step! It enhances flavor and creates a nice golden crust on your roll-ups.
-
Resting Time: Allow the roll-ups to rest for 5 minutes after baking. This step helps the juices redistribute, ensuring every bite is tender and juicy.
Cheesy Spinach Stuffed Chicken Roll-Ups Variations
Get ready to put your own twist on these roll-ups with delightful alternatives that will tantalize your taste buds!
-
Mushroom Medley: Swap spinach for sautéed mushrooms for an earthy, umami-filled twist. The rich flavors will elevate your meal.
-
Artichoke Delight: Incorporate chopped artichokes into the filling for a gourmet touch. Their tangy taste complements the cheese perfectly!
-
Dairy-Free: For a dairy-free option, use plant-based cream cheese and non-dairy cheese alternatives. These roll-ups are still creamy and flavorful without the dairy.
-
Herby Infusion: Add finely chopped fresh herbs like dill or parsley to the filling for an herbal punch. Freshness will brighten every bite and enhance the dish.
-
Spicy Kick: Want more heat? Add crushed red pepper flakes or diced jalapeños to the filling. These fiery additions can turn up the flavor intensity delightfully!
-
Veggie Boost: Toss in finely chopped bell peppers or zucchini to the filling mixture for extra nutrition and a pop of color. The textures will add a nice contrast!
-
Cheese Swap: Instead of mozzarella, try using feta or goat cheese for a more robust flavor. Their creaminess adds a delicious tanginess that’s simply irresistible.
-
Pesto Perfection: Mix in a spoonful of pesto to the cheesy filling for a fragrant, herby flavor explosion. This little addition will take your roll-ups to new heights!
For more delicious inspiration, check out our amazing recipes like Cheesy Chicken Crescent and Garlic Chicken Gnocchi to keep the flavors flowing!
Make Ahead Options
These Cheesy Spinach Stuffed Chicken Roll-Ups are perfect for meal prep enthusiasts! You can assemble the roll-ups up to 24 hours in advance and refrigerate them uncooked. Just prepare the filling and roll them tightly, securing them with toothpicks or twine to prevent any leaks during cooking. If you’re feeling extra organized, you can even prepare the filling up to 3 days ahead and store it in an airtight container to maintain freshness. When you’re ready to serve, simply sear the roll-ups, bake them in a preheated oven at 375°F (190°C) for 20–25 minutes, and enjoy restaurant-quality results with minimal effort in your own kitchen!
Storage Tips for Cheesy Spinach Stuffed Chicken Roll-Ups
Fridge: Store cooked roll-ups in an airtight container for up to 3 days. Reheat them in the oven or microwave until warmed through.
Freezer: Uncooked roll-ups can be frozen for up to 2 months. Wrap tightly in plastic wrap and then store in a freezer bag. Thaw in the fridge before cooking.
Reheating: For best results, reheat cooked roll-ups in the oven at 350°F (175°C) for about 15-20 minutes until heated throughout. This ensures the cheesy filling remains delicious.
Prep Ahead: Feel free to assemble the Cheesy Spinach Stuffed Chicken Roll-Ups ahead of time and refrigerate uncooked for up to 24 hours before baking.
What to Serve with Cheesy Spinach Stuffed Chicken Roll-Ups
A delightful array of sides can elevate your meal into a full culinary experience.
-
Garlic Mashed Potatoes: Creamy and buttery, these mashed potatoes balance the savory roll-ups and bring comfort to every bite. Their fluffy texture makes for a perfect companion.
-
Roasted Vegetables: Colorful and caramelized, a mix of seasonal vegetables adds brightness to your plate, enhancing both flavor and nutrition. Toss in olive oil and your favorite herbs for an irresistible side.
-
Caesar Salad: Crisp romaine topped with crunchy croutons and a tangy dressing complements the richness of the roll-ups beautifully. It’s refreshing while also satisfying.
-
Quinoa Pilaf: Nutty and hearty, quinoa provides a healthy touch with a delightful chew. Toss in some herbs and lemon zest for a bright flavor that marries well with the chicken.
-
Garlic Bread: Perfect for sopping up any remaining cheesy goodness on your plate, this warm, crusty side adds a comforting contrast while also being a family favorite.
-
Steamed Asparagus: Tender and slightly crisp, asparagus drizzled with lemon juice adds a vibrant green element to your meal, enhancing its visual appeal and flavor complexity.
-
Crisp White Wine: A chilled glass of Sauvignon Blanc enhances the dish’s flavors with its citrus notes, making each bite of these Cheesy Spinach Stuffed Chicken Roll-Ups even more enjoyable.
-
Chocolate Mousse: End your meal on a sweet note with a rich, creamy dessert. This light yet indulgent treat is a delightful finish after the savory chicken.
Cheesy Spinach Stuffed Chicken Roll-Ups Recipe FAQs
What type of spinach is best for the filling?
Absolutely, fresh spinach is best for an optimal flavor and texture! However, if you’re using frozen spinach, ensure that it’s thoroughly thawed and drained to remove any excess moisture. This will keep your filling from becoming too watery.
How long can I store the cooked Cheesy Spinach Stuffed Chicken Roll-Ups?
You can keep leftover roll-ups in an airtight container in the fridge for up to 3 days. Just reheat them gently in the oven or microwave until they’re warmed through. I often recommend the oven for reheating as it helps maintain that crispy exterior.
Can I freeze the roll-ups before cooking?
Yes, you can! Wrap the uncooked Cheesy Spinach Stuffed Chicken Roll-Ups tightly in plastic wrap and store them in a freezer bag. They will keep well for up to 2 months. When you’re ready to enjoy, thaw them in the refrigerator overnight before baking as usual.
What should I do if the filling spills out during cooking?
Very! If you experience any spillage, it’s often due to not rolling them tightly enough or overfilling. Next time, be sure to leave a small border around the edges when spreading the filling, and roll them up snugly—this will help avoid any mishaps!
Are these roll-ups suitable for gluten-free diets?
Yes, indeed! The Cheesy Spinach Stuffed Chicken Roll-Ups are naturally gluten-free since they use chicken and dairy products without any gluten-containing ingredients. Just double-check your individual ingredient labels to ensure they meet your dietary needs.

Cheesy Spinach Stuffed Chicken Roll-Ups for Cozy Family Dinners
Ingredients
Equipment
Method
- Preheat your oven to 375°F (190°C). Pound the chicken to a uniform thickness of about 1/4 inch.
- In a skillet, heat olive oil over medium heat. Sauté minced garlic for about 1 minute, then add spinach and cook until wilted.
- Allow filling to cool slightly, then combine with cream cheese, mozzarella, Parmesan, herbs, salt, and pepper until smooth.
- Spread the cheesy spinach mixture over each flattened chicken breast, roll them tightly, and secure with toothpicks.
- Sear the roll-ups seam-side down in medium-high heat until golden-brown, about 2-3 minutes.
- Transfer to the oven and bake for 20-25 minutes until internal temperature reaches 165°F (74°C). Allow rest for 5 minutes before slicing.
Leave a Reply