
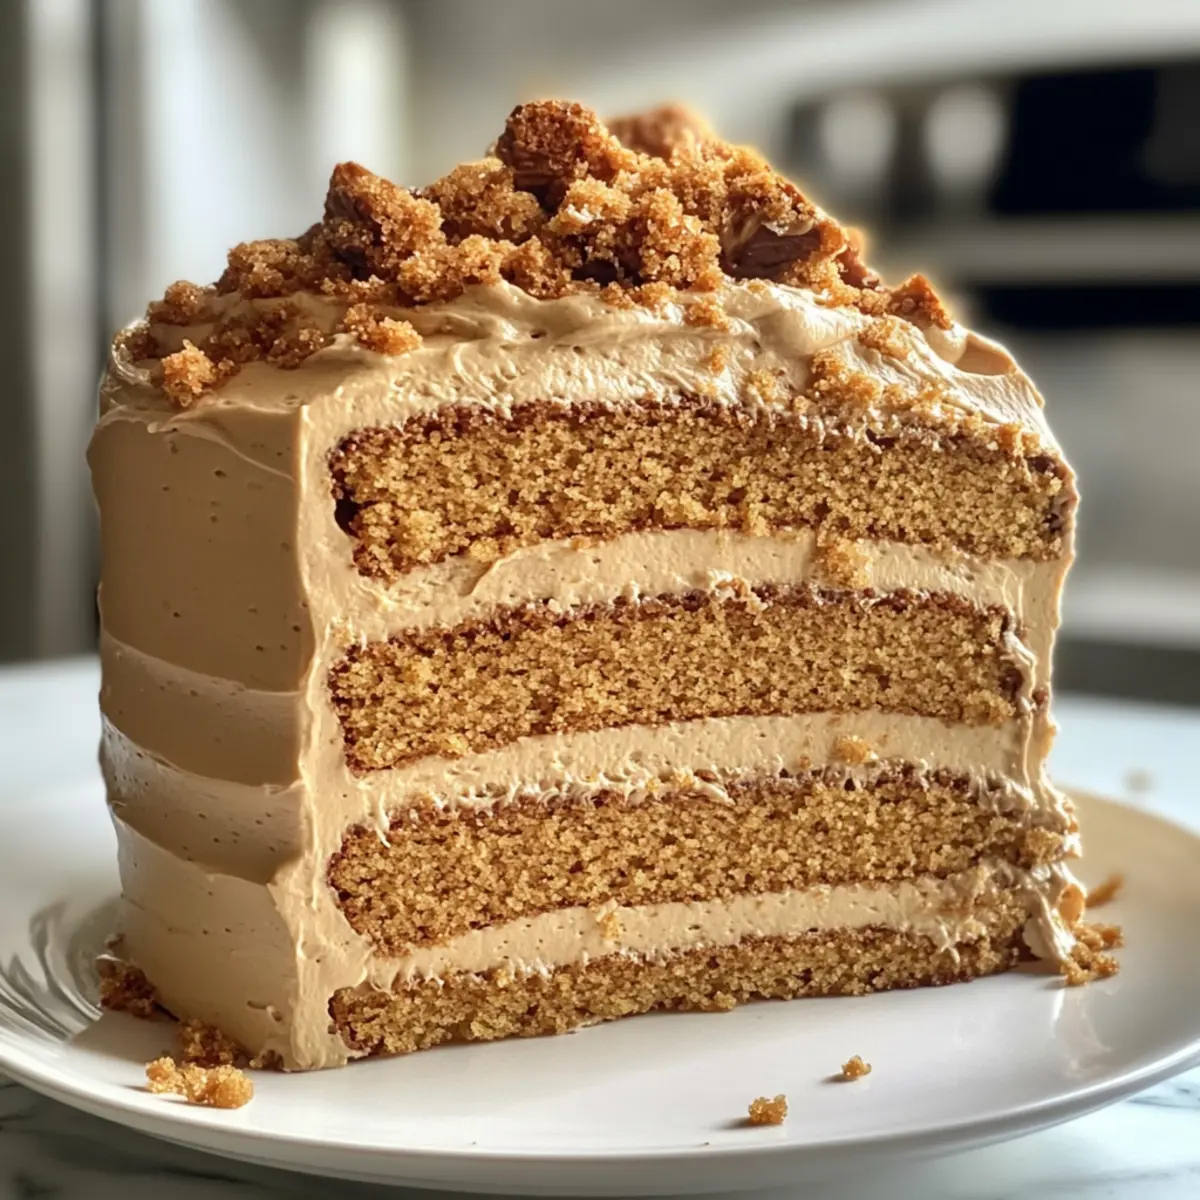
As I stood in my kitchen, the enticing aroma of warm spices wafted through the air, instantly transporting me to cozy holiday gatherings. This is the magic of my Decadent Biscoff Cookie Butter Layer Cake. Inspired by the beloved Biscoff cookie, this recipe brings together the comforting flavors of dark brown sugar and cinnamon with a moist, tender crumb that’s sure to impress. The best part? Each slice is enveloped in a luscious combination of vanilla and cookie butter frostings, topped with a delectable cookie butter drizzle that promises to delight your taste buds. Perfect for celebrating special occasions or simply treating yourself, this indulgent cake is not only a crowd-pleaser but also easy to whip up, even on a busy day. Curious to discover the secrets behind this irresistible Biscoff Cake? Let’s dive in!
What Makes This Biscoff Cake Special?
Decadent Flavors: Each bite bursts with a splendid blend of dark brown sugar and cinnamon, echoing the magic of the original Biscoff cookie.
Easy-to-Follow: With simple steps and minimal prep time, you’ll feel like a baking pro in your own kitchen.
Visually Stunning: Layered with creamy frosting and adorned with crunchy Biscoff cookies, it’s a showstopper at any gathering.
Versatile Variations: Want to mix things up? Explore gluten-free options or jazz it up with a hint of pumpkin spice for a seasonal twist.
Perfect for Sharing: Whether it’s a birthday party or just a cozy evening at home, this cake is sure to impress friends and family, making it a delightful centerpiece.
Biscoff Cake Ingredients
• Here’s everything you need to recreate this indulgent delight!
For the Cake
- All-Purpose Flour – Provides the cake’s structure and texture; try cake flour for a lighter finish.
- Granulated Sugar – Balances sweetness and moisture; coconut sugar offers a deeper flavor alternative.
- Brown Sugar (dark/light) – Adds moisture and a rich flavor; regular granulated sugar can be used but will change the cake’s taste.
- Baking Powder – The leavening agent for a good rise; no substitutions recommended.
- Ground Cinnamon – Infuses warmth and spice; other spice blends like pumpkin spice can offer variety.
- Fine Salt – Enhances sweetness and rounds out the flavor; it’s essential for balance.
- Unsalted Butter – Provides moisture and richness; opt for vegan butter for dairy-free cakes.
- Egg Whites – Contributes to a lighter texture; whole eggs will change the density.
- Buttermilk – Delivers moisture and tang; mix milk with vinegar for a homemade substitute.
- Vegetable or Canola Oil – Keeps the cake moist and tender; feel free to use any neutral oil.
- Vanilla Extract – Enhances flavor; you can use vanilla bean paste for a more intense profile.
For the Frosting
- Powdered Sugar – Creates a smooth, sweet frosting; no substitutions recommended here.
- Heavy Whipping Cream – Adds richness to the frosting; coconut cream works for a dairy-free alternative.
- Cookie Butter – The star ingredient in the frosting that gives it that signature flavor; best not to substitute.
For Decoration
- Biscoff Cookies – Use them to embellish and infuse extra flavor; you can swap with any similar spiced cookie if desired.
Embrace your inner baker and create this sweet, comforting Biscoff Cake!
Step‑by‑Step Instructions for Biscoff Cake
Step 1: Preheat and Prepare Pans
Begin by preheating your oven to 350°F (175°C). While it warms, prepare three 8-inch round cake pans by lining the bottoms with parchment paper and greasing the sides with butter or cooking spray. This ensures your decadent Biscoff Cake layers will release easily after baking, resulting in beautifully intact cakes.
Step 2: Mix Dry Ingredients
In a large mixing bowl or a stand mixer, combine the all-purpose flour, granulated sugar, dark brown sugar, baking powder, ground cinnamon, and fine salt. Use a whisk to thoroughly blend these dry ingredients, ensuring they are evenly distributed. This foundational step balances flavors and aids in the uniform rise of your cake layers.
Step 3: Incorporate Wet Ingredients
Next, add the softened unsalted butter to the dry mixture. Beat on low speed until the mixture becomes crumbly, blending in the egg whites gradually. Once combined, pour in buttermilk, vegetable oil, and vanilla extract. Continue mixing until the batter is smooth and free of lumps, showcasing the rich, creamy texture that defines the cake.
Step 4: Divide and Bake
Carefully divide the cake batter evenly among the prepared pans. Smooth the tops with a spatula for even baking. Place the pans in the preheated oven and bake for 33-35 minutes, or until a toothpick inserted in the center comes out clean. The cakes should be lightly golden on top and will gently spring back when touched.
Step 5: Cool the Cake Layers
Once baked, remove the cake layers from the oven and allow them to cool in the pans for about 10 minutes. Then, carefully transfer them to wire racks to cool completely. This step is crucial to ensuring that the layers remain moist and do not crumble when you’re ready to frost your irresistible Biscoff Cake.
Step 6: Make the Frosting
While the cake layers cool, prepare the frosting. In a mixing bowl, beat the unsalted butter until creamy and smooth. Gradually add the powdered sugar, mixing until well incorporated, then add heavy whipping cream to achieve your desired consistency. This luscious frosting will be the perfect complement to your Biscoff Cake.
Step 7: Combine Cookie Butter and Frosting
Take a portion of the prepared frosting and mix in the cookie butter until fully combined. This will create a delightful layer of flavor that reflects the iconic Biscoff cookie taste, enhancing the overall profile of your decadent Biscoff Cake.
Step 8: Assemble the Cake
Start assembling your Biscoff Cake by placing one layer on a cake board or stand. Spread a layer of vanilla frosting over the top, then add the second layer of cake. Repeat the process with another layer of frosting, followed by the final cake layer on top. Lastly, drizzle cookie butter over the top for a beautiful finish.
Step 9: Final Touches
Use any remaining frosting to smooth the exterior of the cake, making it visually appealing. If desired, decorate with crushed Biscoff cookies around the sides or on top for added texture and a touch of elegance. Chill the finished cake briefly to allow the frosting to set before serving, ensuring a perfect slice every time.
Expert Tips for Biscoff Cake
- Room Temperature Ingredients: Ensure all ingredients, especially butter and eggs, are at room temperature to achieve a smooth batter and optimal cake rise.
- Weigh Your Flour: Accurate measurements are key, especially for flour. Using a kitchen scale helps prevent a dense cake; too much flour can lead to dryness.
- Cool Before Frosting: Let your cake layers cool completely to avoid melting your frosting; applying frosting to warm layers can lead to a messy finish.
- Even Baking: Rotate your pans halfway through baking. This helps achieve an even cook, especially if your oven has hot spots.
- Decorate with Care: Use crushed Biscoff cookies for decoration at the end. They’re not only delicious but add a lovely texture and visual appeal to your Biscoff Cake.
- Practice Patience: Allow the frosted cake to chill for a bit after decorating. This helps the frosting set, making it easier to slice and serve beautifully.
Biscoff Cake Variations & Substitutions
Feel free to adjust this luscious Biscoff Cake to fit your taste preferences and dietary needs!
-
Gluten-Free: Substitute all-purpose flour with a quality gluten-free flour blend for a delicious gluten-free option. Your cake will maintain its delightful texture.
-
Dairy-Free: Replace unsalted butter with vegan butter and heavy whipping cream with coconut cream to create a dairy-free frosting without compromising flavor.
-
Cream Cheese Frosting: Swap out the buttercream for cream cheese frosting for a tangy twist that perfectly complements the spiced layers of the cake.
-
Spice it Up: Add a touch of nutmeg or allspice in place of ground cinnamon to enhance the warm, comforting flavors of the cake for a unique twist.
-
Different Sugars: Experiment with brown sugar or maple sugar instead of granulated sugar. Both options bring rich flavors that will elevate your cake’s sweetness.
-
Whole Eggs: Use whole eggs instead of just egg whites for a denser and richer cake. This will provide a different texture while still being delightful!
-
Frosting Flavor Variations: Try adding a hint of almond extract to your frosting for a special flavor surprise that pairs beautifully with the cookie butter.
If you’re in the mood for something equally indulgent, why not check out my Healthy Carrot Cake for a lighter option, or relish the tropical notes of my Coconut Dream Cake? Each variation is an opportunity to create a memorable dessert!
Make Ahead Options
These Biscoff Cake layers are perfect for meal prep enthusiasts! You can bake the cake layers up to 24 hours in advance; simply cool them completely, wrap them tightly in plastic wrap, and refrigerate to maintain moisture. The frosting can also be prepared ahead and stored in the fridge for up to 3 days—just ensure it’s in an airtight container to keep it fresh. When you’re ready to serve, allow the frosting to come to room temperature and give it a quick whip for creaminess. Assemble the cake just before presentation to ensure those delightful layers shine, providing effortless elegance with minimal fuss!
Storage Tips for Biscoff Cake
- Room Temperature: Store uneaten cake slices at room temperature for up to 2 days in an airtight container to maintain moisture and flavor.
- Fridge: Frosted Biscoff Cake can last in the fridge for up to a week. Make sure to cover it well to prevent it from absorbing odors.
- Freezer: Cake layers can be frozen for up to 2 months. Wrap them tightly in plastic wrap and then aluminum foil to prevent freezer burn.
- Reheating: If serving slices straight from the freezer, allow them to thaw in the refrigerator overnight, then gently reheat in the microwave for a few seconds if desired.
What to Serve with Decadent Biscoff Cookie Butter Layer Cake
As you indulge in a slice of this heavenly cake, consider rounding out your meal with these delightful pairings that enhance its rich flavors.
-
Creamy Mashed Potatoes: The smooth and buttery texture creates a wonderful contrast to the cake, offering warmth and comfort.
-
Spiced Apple Cider: A warm, spiced drink complements the cinnamon notes in the cake, evoking cozy, nostalgic feelings with every sip. Serve it steaming during chilly evenings for added bliss.
-
Mixed Green Salad: A refreshing salad with a zesty vinaigrette adds a crisp, bright element that offsets the decadence of the cake, making it feel balanced and light.
-
Chocolate Ice Cream: The combination of chocolate and cookie butter is pure indulgence, elevating your dessert experience and contrasting the cake’s texture beautifully.
-
Caramel Drizzle: A drizzle of homemade caramel over each slice can amplify the flavor profile, adding a sweet and sticky element that perfectly complements the Biscoff taste.
-
Whipped Cream with Cinnamon: Light and airy, whipped cream topped with a sprinkle of cinnamon brings a festive touch to your dessert experience.
-
Coffee or Espresso: A warm cup will enhance the cake’s rich flavors, creating a delightful end to your meal. The bitterness of coffee pairs beautifully with the sweetness of the Biscoff cake.
-
Fresh Berries: A side of fresh strawberries or raspberries provides a tart contrast, refreshing your palate and adding a pop of color to the dining experience.
Biscoff Cake Recipe FAQs
What type of Biscoff cookies should I use?
I highly recommend using the classic Biscoff cookies for the best flavor and texture in this cake. However, if you’re in a pinch, any similar spiced cookie can work as a substitute to add that delightful crunch.
How should I store the Biscoff Cake?
To preserve its moisture and flavor, store uneaten cake slices at room temperature for up to 2 days in an airtight container. If you have a frosted Biscoff Cake, it can last in the refrigerator for up to a week if well covered.
Can I freeze Biscoff Cake?
Absolutely! You can freeze the cake layers for up to 2 months. Make sure to wrap each layer tightly in plastic wrap, followed by aluminum foil, to prevent freezer burn. When you’re ready to enjoy, simply thaw them in the refrigerator overnight.
What if my cake layers are too dense?
If your Biscoff Cake turns out too dense, it’s likely due to using too much flour. Make sure to weigh your flour for accuracy next time, or try gently folding your ingredients instead of mixing vigorously, which can overdevelop the gluten.
Can I modify this recipe for dietary restrictions?
Of course! You can easily make substitutions to fit your dietary needs. For a gluten-free version, swap all-purpose flour for a gluten-free flour blend. If you’re looking for dairy-free options, use vegan butter and coconut cream in the frosting.
Indulge in Irresistible Biscoff Cake Bliss at Home
Ingredients
Equipment
Method
- Preheat your oven to 350°F (175°C) and prepare three 8-inch round cake pans.
- Combine flour, sugars, baking powder, cinnamon, and salt in a mixing bowl.
- Add softened butter and mix, then gradually add egg whites, buttermilk, oil, and vanilla, mixing until smooth.
- Divide the batter evenly among the prepared pans. Bake for 33-35 minutes.
- Cool in pans for 10 minutes, then transfer to wire racks to cool completely.
- Beat butter until smooth, then gradually add powdered sugar and cream to prepare the frosting.
- Mix cookie butter into the frosting until combined.
- Assemble the cake by layering with frosting between layers and drizzling on top.
- Use remaining frosting to smooth the exterior, decorate as desired, and chill before serving.
Leave a Reply