
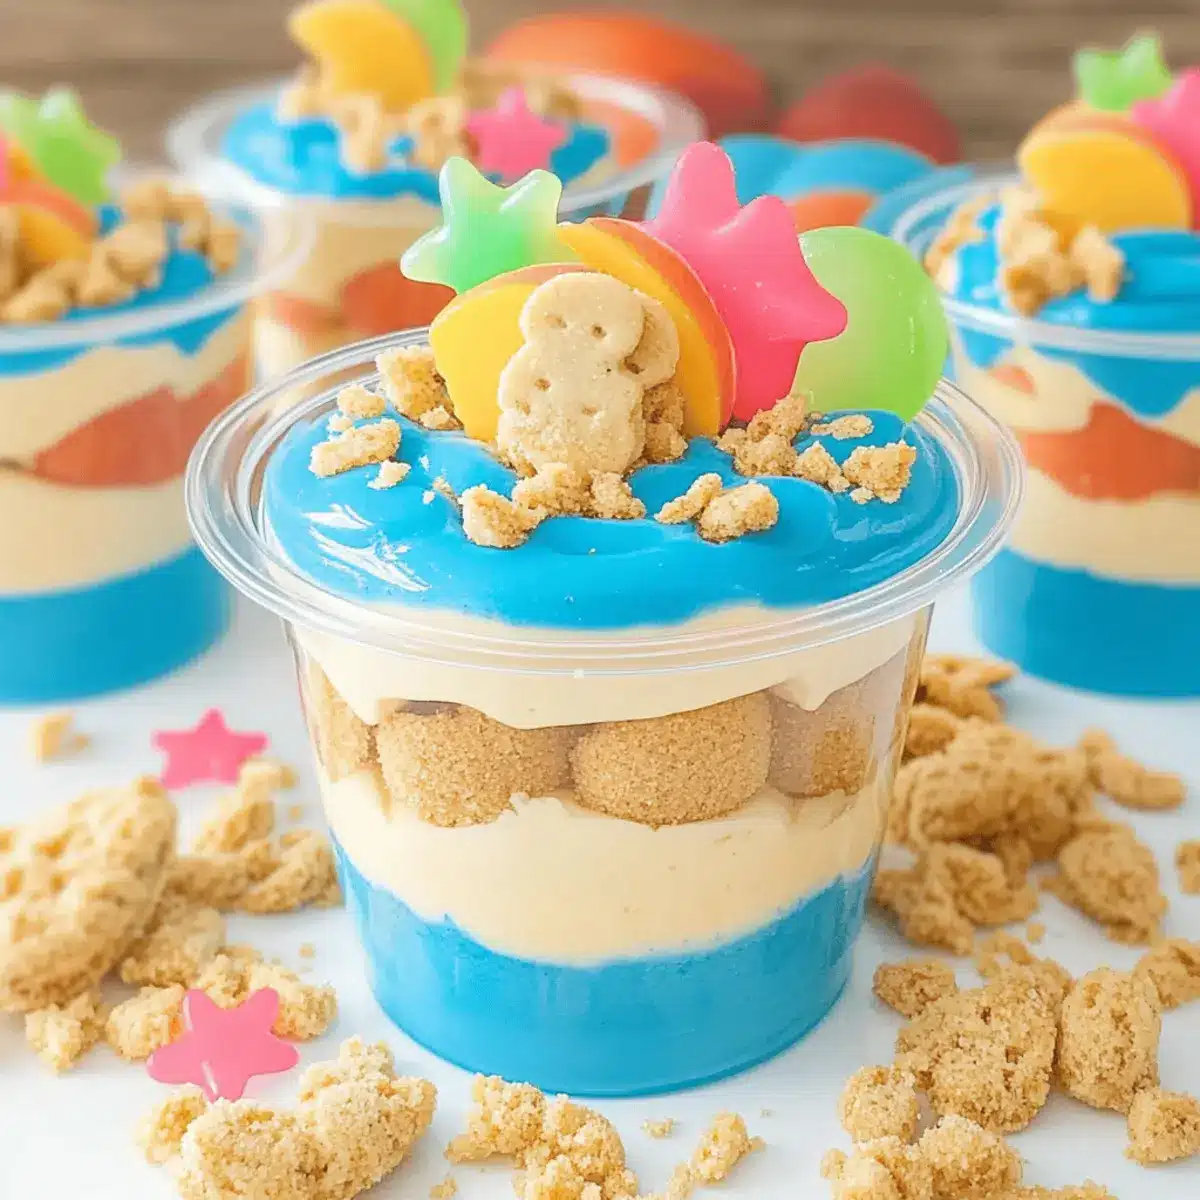
The sound of waves crashing against the shore fills my mind as I whip up these delightful Beach Cheesecake Pudding Cups, a no-bake wonder that’s perfect for summer’s sun-soaked adventures. With creamy cheesecake pudding layered beneath a crunchy teddy graham “sand” and topped with cheerful gummy peach rings, these cups are not only a visual feast but also quick to make in under 30 minutes. Perfect for picnics or backyard barbecues, they’re customizable for every palate—whether you like swapping gummy fruit for fresh berries or experimenting with different pudding flavors, the possibilities are endless. Plus, they’re a kid-friendly treat that brings smiles to faces of all ages. Curious to dive into this sweet summer escape? Let’s get started!
Why are Beach Cheesecake Pudding Cups a Must-Try?
Easy, No-Bake: This recipe requires minimal effort and no oven time—perfect for busy summer days.
Customizable: From candy toppings to pudding flavors, you can personalize these cups to fit any preference!
Fun for Kids: Little hands love to help layer ingredients, making these a hit for family gatherings or parties.
Quick Prep: In just under 30 minutes, you can whip up a delicious dessert that will impress your guests.
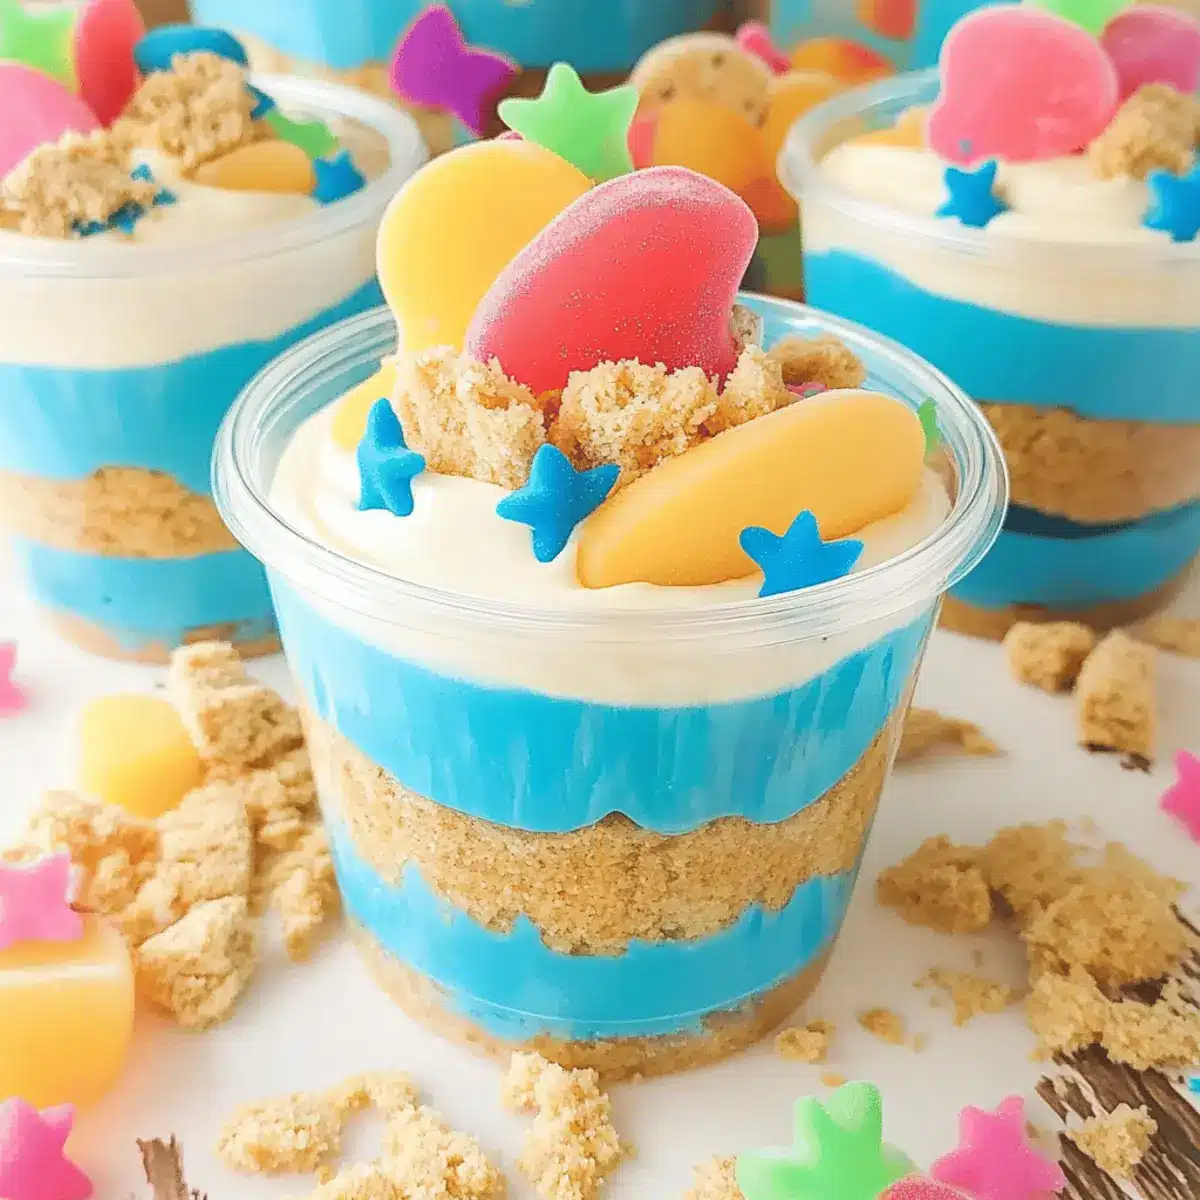
Visually Stunning: The vibrant colors and decorative toppings make these cups an eye-catching centerpiece for any summer table.
Get inspired by other sweet treats like our Strawberry Banana Pudding or for a healthier option, check out our Breakfast Granola Cups!
Beach Cheesecake Pudding Cups Ingredients
For the Base
• Butter Cookies – A delightful base for the dessert; graham crackers can be used for a different flavor.
• Honey Teddy Grahams – Adds a sweet, crunchy layer; any honey-flavored graham crackers can substitute.
For the Creamy Filling
• Cool Whip – Provides a creamy texture; homemade whipped cream is a suitable alternative.
• Whipped Cream Cheese – Creates a rich, creamy base; can replace with cream cheese or mascarpone.
• Cheesecake Pudding Mix – Provides flavor and structure; pre-made pudding cups can also be used.
• Whole Milk – Liquid for the pudding mix; substitute almond milk for a dairy-free version.
• Powdered Sugar – Sweetener for the mixture; consider honey or agave syrup for a less processed option.
• Blue Food Coloring – Offers an ocean-like hue; omit for natural coloring or use spirulina.
For the Toppings
• Peach Gummy Rings – For garnishing and playful presentation; other gummy candies can replace.
• Large Star Sprinkles – Decorative touch for visual appeal; other edible decorations can also be used.
Step‑by‑Step Instructions for Beach Cheesecake Pudding Cups
Step 1: Prepare the Pudding Mixture
In a large mixing bowl, whisk together the cheesecake pudding mix and whole milk for about 2 minutes until it’s fully combined and thickened. The mixture should be smooth without any lumps. Set it aside for a few minutes, allowing it to firm up slightly as you move on to the next steps for these delightful Beach Cheesecake Pudding Cups.
Step 2: Make the Creamy Base
In another bowl, using an electric mixer, beat the whipped cream cheese with powdered sugar until creamy and smooth, which takes about 2-3 minutes. Gently fold in the Cool Whip until the mixture is light and fluffy, ensuring there are no streaks of cream cheese visible. This creamy base will create a delightful contrast with the pudding layers.
Step 3: Combine the Mixtures
Carefully fold the prepared pudding mixture into the creamy base, using a spatula to maintain the airy texture. This should take about 1-2 minutes, and the result should be a beautifully blended, light filling that embodies the essence of the Beach Cheesecake Pudding Cups. Be gentle to keep the mixture fluffy!
Step 4: Add Color
Next, gradually stir in the blue food coloring to the pudding and cream mixture until you achieve your desired ocean-like hue. This step is crucial to enhance the visual appeal of your Beach Cheesecake Pudding Cups. Aim for a light, airy color that evokes images of a sunny beach—usually, about 1-2 drops will do!
Step 5: Crush Cookies
Take your butter cookies and place them in a resealable plastic bag. Using a rolling pin or your hands, crush the cookies into a sandy texture. This should take about 2-3 minutes, and you’ll want the crumbs to be small, resembling sand, for that perfect beachy presentation in your cups.
Step 6: Layering
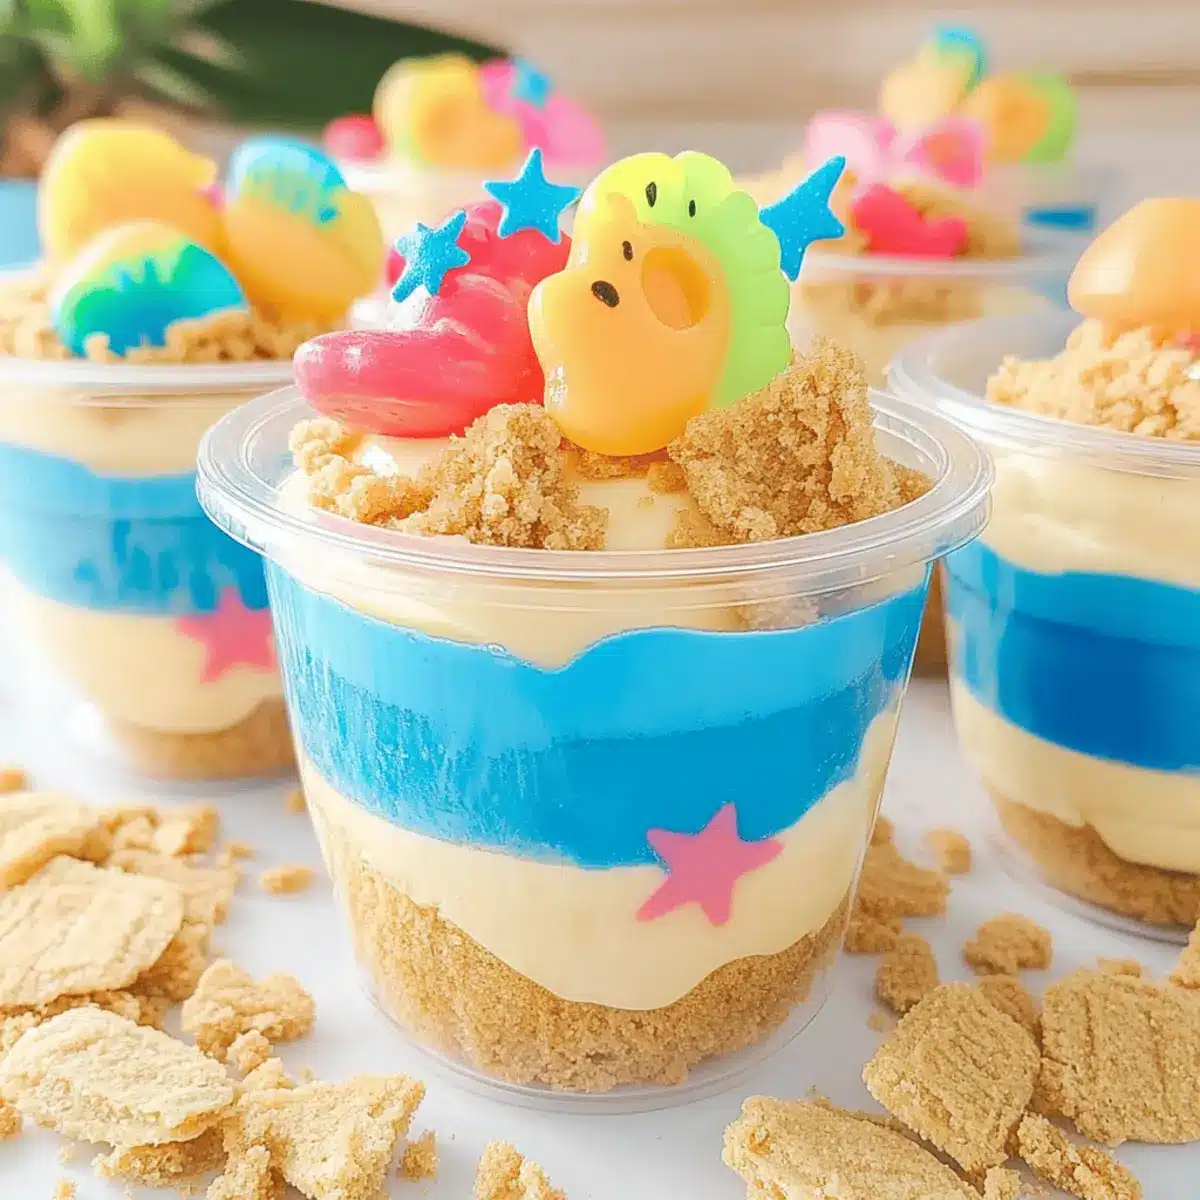
Start assembling your pudding cups by spooning a layer of crushed cookies into the bottom, followed by a generous layer of the cheesecake pudding mixture. Repeat the layers until the cups are full, ensuring the top layer is the pudding mixture. This creates delightful visual layers in your Beach Cheesecake Pudding Cups that are as tasty as they are pretty.
Step 7: Chill
Cover the cups with plastic wrap and refrigerate them for at least 1 hour. Chilling allows the filling to set and firm up, making them easier to serve later. This step is essential to achieve the perfect texture for your Beach Cheesecake Pudding Cups, so don’t skip it!
Step 8: Decorate
Finally, it’s time for the fun part! Shape some of the cookie crumbs on top to mimic a sandy shoreline. Place a teddy graham in the center, surrounded by colorful peach gummy rings. For a finishing touch, sprinkle with large star sprinkles to add a festive feel. Your Beach Cheesecake Pudding Cups are now ready to impress!

Make Ahead Options
These Beach Cheesecake Pudding Cups are an ideal make-ahead dessert, saving you precious time on busy days! You can prepare the pudding mixture and layer it with the crushed cookie “sand” up to 24 hours in advance. Simply store the assembled cups in the refrigerator, covered tightly to maintain their texture and freshness. When you’re ready to serve, add the decorative toppings, like teddy grahams and peach gummy rings, just before presenting them to your guests. This way, the cookies stay crunchy and delicious while the pudding remains creamy—exactly how you’ll want it! Enjoy effortlessly delightful Beach Cheesecake Pudding Cups with minimal last-minute fuss!
Storage Tips for Beach Cheesecake Pudding Cups
- Fridge: Keep your assembled Beach Cheesecake Pudding Cups covered in the refrigerator for up to 3 days. This helps maintain their freshness and creamy texture.
- Make-Ahead: You can assemble these cups up to 24 hours in advance; just layer them right before serving to keep the cookie base crispy and delightful.
- Freezer: While it’s best to avoid freezing these cups due to the cream and pudding textures, if needed, you can freeze the individual components separately for up to 1 month. Thaw in the refrigerator before assembling.
- Reheating: No reheating is necessary! Simply enjoy these cups cold, straight from the fridge for a refreshing summer treat.
What to Serve with Beach Cheesecake Pudding Cups
As you enjoy these vibrant, no-bake delights, consider complementing them with a few delectable sides for a delightful summer spread.
- Fresh Fruit Salad: A mix of seasonal berries and tropical fruits adds a refreshing contrast, bringing a bright, fruity burst alongside the creamy dessert.
- Grilled BBQ Chicken Skewers: Tender and smoky, these skewers provide a savory flavor that beautifully balances the sweetness of the pudding cups.
- Coconut Rice: This subtly sweet, fragrant rice creates a whimsical tropical vibe that harmonizes with the beachy theme of the pudding cups.
- Mint Lemonade: The crispness of fresh mint combined with zesty lemon creates a refreshing drink that perfectly quenches thirst on warm summer days.
- Chocolate Dipped Pretzels: Sweet and salty, these provide a crunchy texture that contrasts well with the creamy cups, making for a fun finger food option.
- Vanilla Ice Cream: A scoop of velvety vanilla ice cream adds an extra creaminess and can be enjoyed alongside the pudding cups for a dessert extravaganza.
Enhancing your spread with these thoughtful pairings rounds out a festive summer meal that your family will adore!
Beach Cheesecake Pudding Cups Variations
Feel free to let your creativity shine by customizing these delicious Beach Cheesecake Pudding Cups!
- Fruit Toppings: Top with fresh berries for a vibrant burst of flavor and a healthy touch. Strawberries, blueberries, or kiwi can create a delightful contrast to the creamy filling.
- Dairy-Free: Swap whole milk with almond or coconut milk to make these cups dairy-free while retaining that delicious taste. This change keeps them accessible for everyone at your gathering.
- Flavor Boost: Experiment with different pudding flavors like chocolate or vanilla for a fun twist. Chocolate pudding adds a rich depth, while vanilla provides a classic touch.
- Cookie Base: Substitute butter cookies with crushed graham crackers, or for a chocolatey version, use Oreo cookies. Each provides a different flavor profile and texture.
- Vegan Option: Use vegan cream cheese and whipped cream alternatives to make this dessert plant-based. Your vegan friends will appreciate the thoughtful tweak!
- Tropical Bliss: Add shredded coconut or pineapple chunks to evoke a tropical beach vibe in your pudding cups. It’s like a mini-vacation in every bite!
- Crunchy Bits: Mix crushed nuts or granola into the layers for a delightful crunch. Chopped almonds or walnuts would add a unique flavor dimension.
- Spicy Kick: For those who enjoy a little heat, sprinkle a pinch of chili powder or cayenne pepper on opt for spiced gummy candies. The contrast will surprise and delight!
Looking for more exciting recipes? Dive into our delightful High Protein Pudding for a nutritious twist or indulge in some scrumptious Bake Keto Cheesecake for a low-carb treat!
Expert Tips for Beach Cheesecake Pudding Cups
- Watch the Texture: Beat your cream cheese at room temperature to ensure a smooth mixture without lumps, making your Beach Cheesecake Pudding Cups extra creamy.
- Experiment with Flavors: Don’t hesitate to change up pudding flavors or toppings. Try chocolate or strawberry pudding for a fun twist that suits various tastes.
- Chill Properly: Allow the cups to chill for at least an hour before serving; this helps the layers set and enhances the overall texture and flavor of the dessert.
- Use Fresh Fruits: For a healthier alternative, replace gummy candies with fresh fruits like strawberries or blueberries—perfect for a vibrant look and taste!
- Store Smart: Keep the finished cups covered in the refrigerator to maintain freshness; they’re best enjoyed within three days for optimal flavor and texture.
Beach Cheesecake Pudding Cups Recipe FAQs
What kind of cookies should I use for the base?
You can use butter cookies for a delightful flavor, but graham crackers also work beautifully if you’re after a different taste. Just make sure to crush them into a sandy texture for that beachy vibe!
How should I store my Beach Cheesecake Pudding Cups?
Keep your assembled Beach Cheesecake Pudding Cups covered in the refrigerator for up to 3 days. This keeps them fresh and helps maintain their creamy texture, ensuring the best experience with each delightful spoonful.
Can I freeze these pudding cups?
While it’s best to enjoy these cups fresh, if you need to freeze components, you can freeze the individual layers separately for up to 1 month. To assemble, just thaw them in the refrigerator overnight before layering. However, the final assembled cups should ideally be served fresh.
What can I do if my pudding mixture is too lumpy?
If your pudding mixture turns out lumpy, try whisking it vigorously for a minute or two, or using an electric mixer for 1-2 minutes until smooth. If lumps persist, you can carefully strain the mixture through a fine-mesh sieve to remove any stubborn bits.
Are there any dietary substitutions I should consider?
Absolutely! For a dairy-free version, replace the whole milk with almond milk and use a non-dairy whipped topping. If there are potential allergies, be sure to swap honey teddy grahams with allergy-friendly cookies, and check your pudding mix for any allergens.
Beach Cheesecake Pudding Cups – A Cool Summer Delight
Ingredients
Equipment
Method
- In a large mixing bowl, whisk together the cheesecake pudding mix and whole milk for about 2 minutes until fully combined and thickened.
- In another bowl, beat the whipped cream cheese with powdered sugar until creamy and smooth, which takes about 2-3 minutes. Fold in the Cool Whip until light and fluffy.
- Carefully fold the prepared pudding mixture into the creamy base, maintaining the airy texture.
- Gradually stir in the blue food coloring until desired ocean-like hue is achieved.
- Crush the butter cookies in a resealable plastic bag, aiming for a sandy texture.
- Layer the cups with crushed cookies and cheesecake pudding mixture until full, ensuring the top layer is pudding.
- Cover the cups with plastic wrap and refrigerate for at least 1 hour to allow the filling to set.
- Shape cookie crumbs on top to mimic a sandy shoreline, decorate with a teddy graham in the center and peach gummy rings.
Leave a Reply