
As I stood in my kitchen, the scent of warm batter wafting through the air, a wave of nostalgia washed over me. Taiyaki, a delightful Japanese fish dessert, holds a special place in my heart. This beloved street food not only captures the essence of playful treats but also offers a world of customizable filling options! Whether you prefer the sweet indulgence of red bean paste or a decadent scoop of Nutella, this homemade version allows you to get creative. Best of all? It’s quick to whip up, making it an ideal companion for both busy weeknights and special gatherings. Get ready to turn your kitchen into a little slice of Japan—curious about how to master these irresistible pastries?
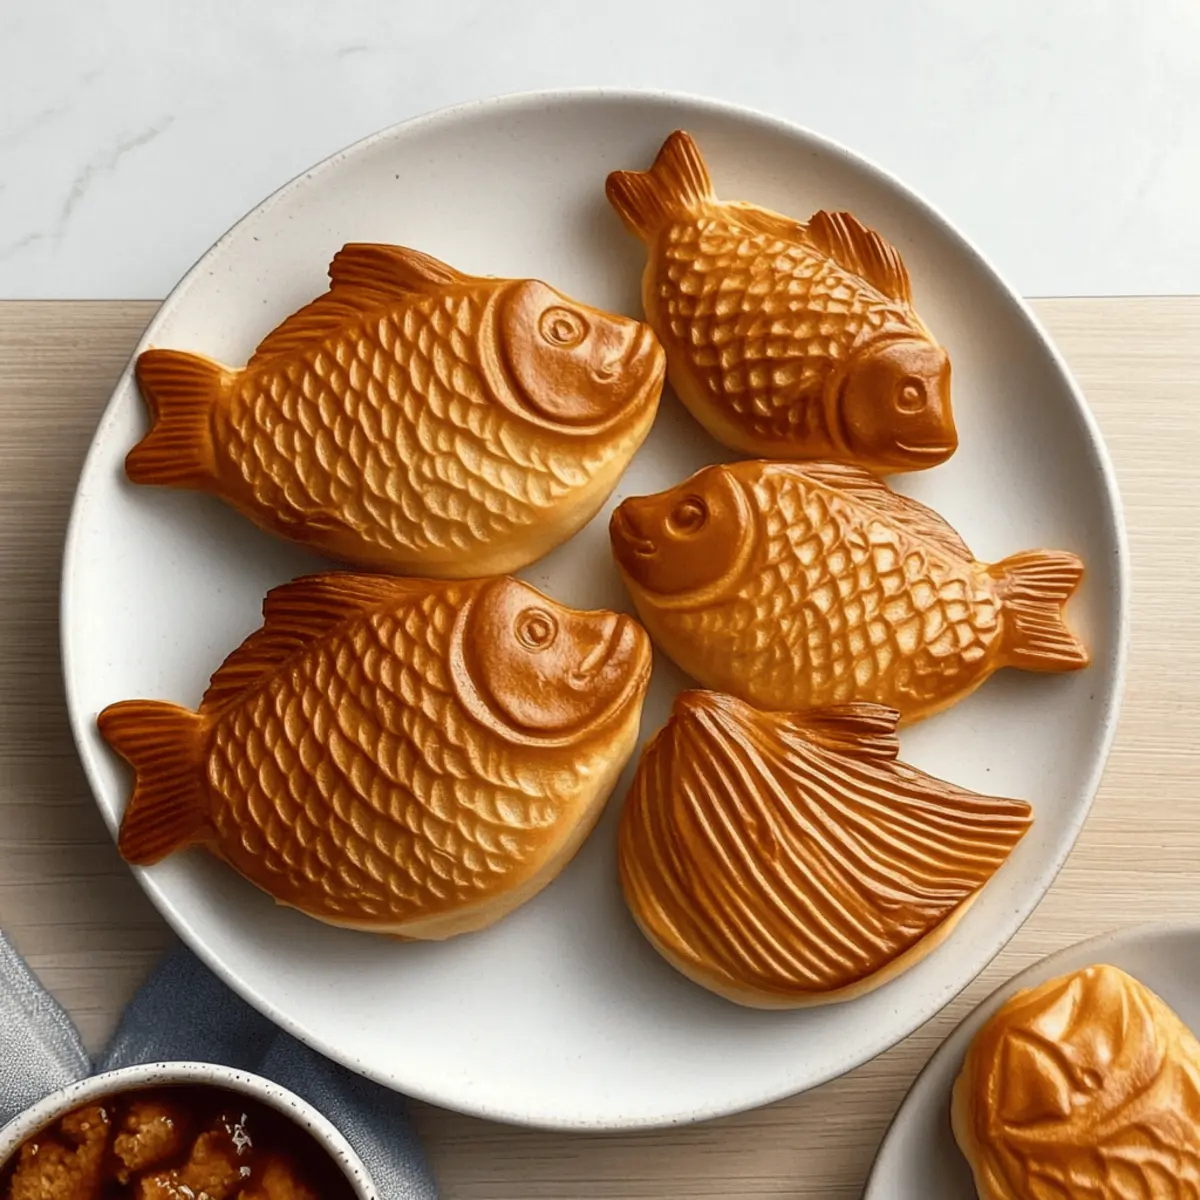
Why is Taiyaki So Irresistibly Delicious?
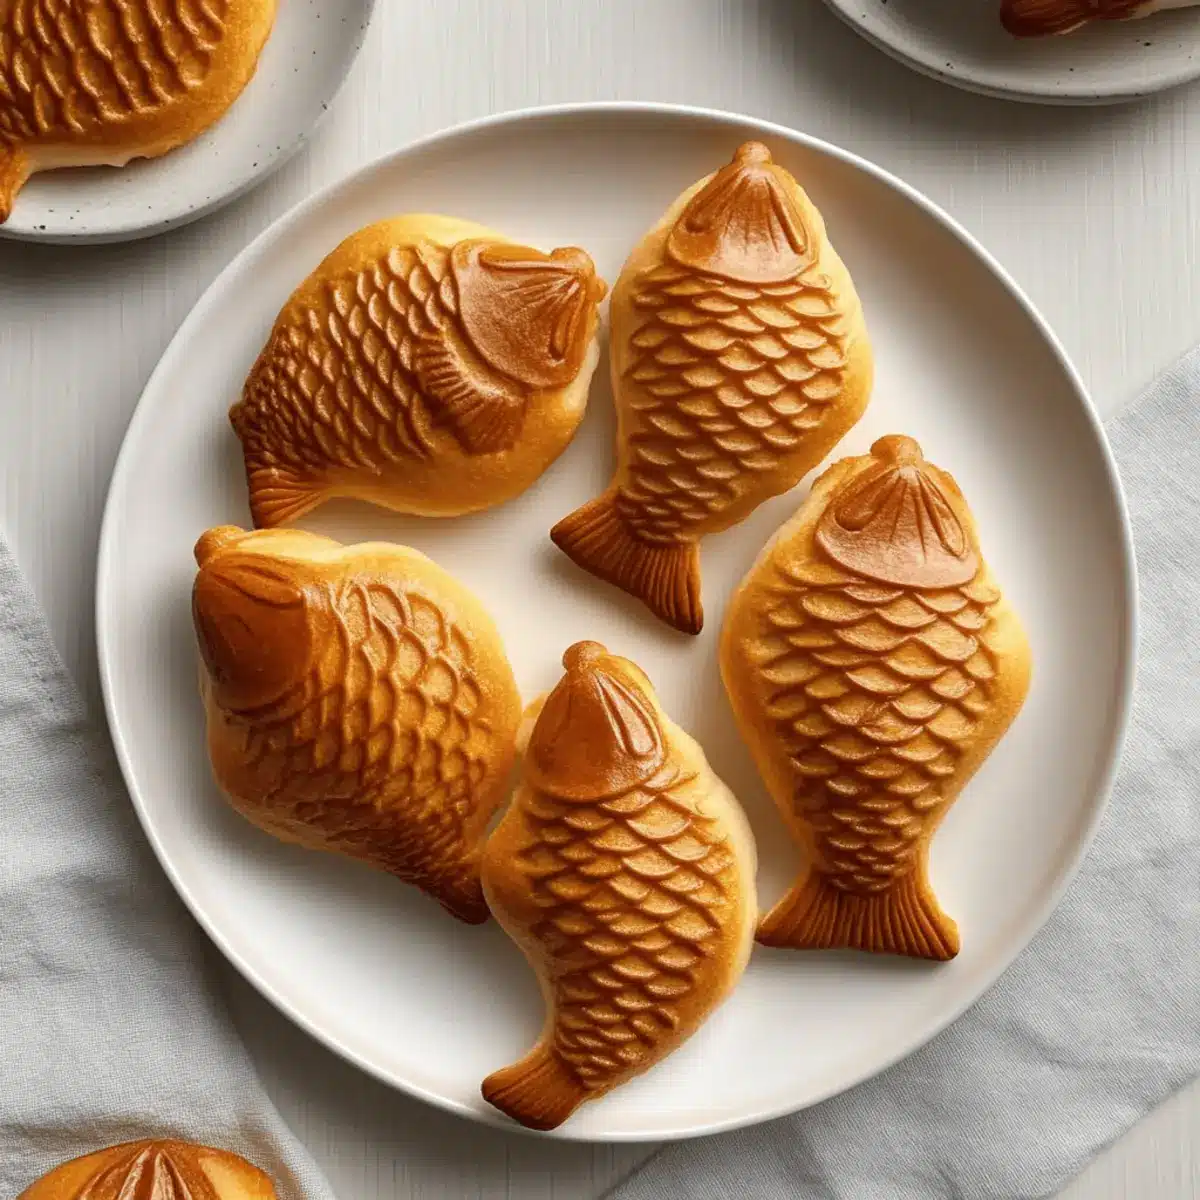
Delightful texture: The crispy exterior waits to give way to a fluffy, moist interior, creating a treat that’s both satisfying and comforting.
Customizable options: From classic red bean paste to creamy Nutella, the possibilities are endless, allowing you to cater to every palate and occasion. You could even explore savory flavors by trying out Battered Fish Chips for a varied twist!
Quick to make: In less than an hour, you can turn simple ingredients into a culinary masterpiece—perfect for spontaneous cravings or entertaining friends.
Cultural connection: Not only are you enjoying a delicious dessert, but you’re also experiencing a piece of Japanese street food history, rich in tradition since 1909.
Crowd-pleaser: Whether served at a family gathering or as street food, Taiyaki always brings smiles and satisfied appetites! Serve it warm alongside whipped cream for an extra touch of indulgence.
Taiyaki Ingredients
• To create these delightful Japanese fish desserts, gather the following essential ingredients:
For the Batter
- Cake Flour – Provides the structure for a fluffy and tender interior; for a gluten-free version, consider using gluten-free flour.
- Granulated Sugar – Adds sweetness to balance the flavors; coconut sugar offers a lower glycemic alternative.
- Baking Powder – Acts as a leavening agent for a light texture; you can substitute with baking soda but adjust as needed.
- Baking Soda – Also leavens the batter, ensuring a lighter cake.
- Salt – Enhances flavor; a low-sodium version can omit it altogether.
- Large Egg – Binds ingredients and adds moisture; replace with unsweetened applesauce or flaxseed meal for a vegan option.
- Whole Milk – Adds richness and moisture; almond milk or other plant-based milks can be great substitutes.
- Vegetable Oil – Keeps the batter moist; melted coconut oil is a lovely alternative.
- Vanilla Extract – Imparts inviting flavor; almond extract can provide a unique twist.
For the Fillings
- Fillings (e.g., Red Bean Paste, Nutella, Custard, Cheese) – These provide the signature flavor of Taiyaki; feel free to mix and match sweet or savory fillings to create your perfect treat.
Gather these ingredients and prepare to dive into making your very own warm and satisfying Taiyaki (Japanese Fish Dessert)!
Step‑by‑Step Instructions for Taiyaki (Japanese Fish Dessert)
Step 1: Prepare Batter
Begin by sifting together 2 cups of cake flour, 1/4 cup of granulated sugar, 2 teaspoons of baking powder, 1/2 teaspoon of baking soda, and a pinch of salt in a large bowl. In a separate bowl, whisk together 1 large egg, 1 cup of whole milk, 2 tablespoons of vegetable oil, and 1 teaspoon of vanilla extract. Gently mix the wet and dry ingredients until just combined, and let the batter rest in the refrigerator for 1 hour to achieve the perfect texture.
Step 2: Preheat Taiyaki Pan
While the batter rests, preheat your Taiyaki pan over medium-low heat for about 5 minutes. Lightly oil the molds with a brush or paper towel, ensuring a non-stick surface to achieve the ideal crispy exterior. Keep a close eye on the temperature; adjusting the heat will prevent the Taiyaki from burning on the outside while remaining undercooked inside.
Step 3: Fill Molds
Once your Taiyaki pan is heated, pour batter into each mold until they are about 60% full, allowing space for the filling. Add approximately 1 tablespoon of your selected filling, such as red bean paste or Nutella, in the center of each mold. Top off with more batter to completely cover the filling, ensuring it doesn’t spill out during cooking.
Step 4: Cook
Carefully close the molds and flop the pan to flip it over; this allows even cooking on both sides. Cook for about 2-3 minutes on each side, watching closely for a golden brown color. You’ll know they’re ready when the edges start turning crisp and they release easily from the mold. Flip again if needed to ensure an even cook.
Step 5: Serve
Once cooked, gently remove the Taiyaki from the pan and transfer them to a cooling rack. Serve warm, basking in their sweet aroma, and consider pairing with whipped cream or fresh fruit for a delightful experience. Feel free to get creative with plating, as these Japanese fish desserts are as fun to look at as they are to eat!

How to Store and Freeze Taiyaki
Fridge: Store leftover Taiyaki in an airtight container for up to 3 days. This keeps them fresh and ready for a quick snack or dessert.
Freezer: For longer storage, wrap Taiyaki individually in plastic wrap and place them in a freezer-safe bag. They can be frozen for up to 3 months without losing flavor.
Reheating: To enjoy them warm again, reheat Taiyaki in a preheated oven at 350°F (175°C) for about 10 minutes. This helps restore their delightful texture.
Serving Suggestions: If you’re serving thawed Taiyaki, consider dusting them with powdered sugar or adding a dollop of whipped cream for extra indulgence!
Make Ahead Options
These Taiyaki (Japanese Fish Dessert) are perfect for busy home cooks who want to save time during the week! You can prepare the batter and refrigerate it for up to 24 hours. Just mix together the dry and wet ingredients, and let the batter rest in the fridge. Additionally, you can pre-fill the molds with your choice of fillings and store them in the refrigerator for up to 3 days—this keeps them fresh and ready to cook! When you’re ready to serve, simply heat your Taiyaki pan, pour the batter over the chilled, pre-filled molds, cook for 2-3 minutes per side, and you’ll have warm, delicious Taiyaki ready to enjoy!
What to Serve with Homemade Taiyaki?
Bring the joy of your warm, fish-shaped desserts to life with delightful pairings that truly elevate your flavorful experience.
-
Whipped Cream:
A dollop adds a light, airy touch that complements the rich flavors of Taiyaki, making each bite a creamy dream. It creates a lovely contrast to the warm, soft interior, enhancing overall indulgence. -
Fresh Berries:
Strawberries, blueberries, or raspberries deliver a burst of freshness and acidity that balances the sweetness of your chosen filling. Their bright colors also make for a stunning presentation! -
Matcha Green Tea:
The earthy flavors of matcha offer a perfect warm beverage option alongside your Taiyaki, cutting through the sweetness and providing a comforting pairing that resonates well with Japanese tradition. -
Chocolate Sauce:
Drizzling some rich chocolate sauce across the Taiyaki adds an extra layer of indulgence, transforming your dessert into a decadent treat. It’s the ultimate allure for chocolate lovers! -
Ice Cream:
A scoop of vanilla or green tea ice cream can melt over the warm Taiyaki, creating a comforting contrast in both temperature and texture. The creaminess of the ice cream beautifully augments the fluffy interior. -
Coconut Flakes:
Toasted coconut flakes sprinkled on top add an aromatic touch and a delightful crunch, creating a tropical flair and enhancing the overall flavor experience of your Taiyaki. -
Fruit Compote:
A warm fruit compote, perhaps with seasonal fruits, can drizzle over your Taiyaki for a delightful contrast. It adds a layer of sweetness with a touch of tanginess that brightens the dessert. -
Yogurt:
Serve with a side of yogurt for a tangy freshness. Greek yogurt can be particularly lovely, offering a creamy texture that enhances each bite of your Taiyaki. -
Chai Tea:
A warm cup of chai tea, with its spices, can serve as a cozy counterpoint to the sweetness, enriching your meal with comforting flavors.
With these pairing suggestions, your homemade Taiyaki is sure to shine at any gathering or as a delicious treat for yourself!
Taiyaki Variations & Substitutions
Feel free to explore your culinary creativity with these delightful twists and swaps for your Taiyaki!
- Gluten-Free: Use a gluten-free flour blend to enjoy this treat without wheat.
- Vegan: Swap the egg with 1/4 cup of unsweetened applesauce or 1 tablespoon of ground flaxseed mixed with 2.5 tablespoons of water for a plant-based version.
- Sweet Potato: Incorporate sweet potato puree in place of traditional fillings for a delicious and nutritious twist, embracing the earthy flavors of fall.
- Chocolate: Add cocoa powder to the batter for a chocolatey treat that pairs wonderfully with fruity fillings like berries or bananas.
- Savory Cheese: Experiment with a cream cheese filling mixed with herbs for a savory spin, creating a delightful contrast to the sweet batter. It’s a perfect way to explore different flavor profiles!
- Spicy Kick: Mix a pinch of chili powder into the batter for a gently spicy base that complements savory fillings beautifully.
- Fruit Medley: Replace traditional fillings with seasonal fruits—think fresh strawberries or peaches cooked down with a touch of honey for a fresh burst of flavor.
- Nutty Delight: Fill with a mix of almond butter and banana slices for a comforting, satisfying experience. It’s like breakfast in dessert form!
Don’t forget, you’re not just making a treat; you’re weaving together memories. If you love varied textures and flavors, how about trying these with a delightful side of Battered Fish Chips? The possibilities are endless! Enjoy your Taiyaki adventure!
Expert Tips for Making Taiyaki
• Don’t Over-Mix: A few lumps in the batter are okay! Over-mixing results in a dense texture, while gentle mixing gives your Taiyaki (Japanese Fish Dessert) a lovely fluffiness.
• Proper Heat: Ensure your Taiyaki pan is at the right temperature. Preheating too long or short can lead to either burnt exteriors or gooey interiors. Keep adjusting to maintain medium-low heat.
• Experiment with Fillings: Don’t be afraid to think outside the box! Try unique combinations, like seasonal fruits or flavored creams, to elevate your Taiyaki experience.
• Timing is Key: Each Taiyaki takes about 2-3 minutes per side; however, cooking times can vary based on your stove. Stay close during cooking to ensure a flawless, golden-brown finish.
• Storage Tips: If you have leftovers, store them in an airtight container in the fridge for up to 3 days. Reheat briefly in an oven to maintain that crispy texture!
Taiyaki (Japanese Fish Dessert) Recipe FAQs
What type of flour should I use for the best Taiyaki?
Using cake flour is ideal as it provides a fluffy and tender interior. However, for those needing a gluten-free option, a high-quality gluten-free flour blend can work well too. Just remember, the texture may vary slightly but will still yield delicious results!
How should I store leftover Taiyaki?
Store your leftover Taiyaki in an airtight container in the refrigerator. They’ll stay fresh for up to 3 days. If you anticipate longer storage, wrap each piece individually in plastic wrap and place them in a freezer-safe bag for up to 3 months.
Can Taiyaki be frozen?
Absolutely! To freeze Taiyaki, first allow them to cool completely. Then, wrap each one in plastic wrap and store them in a freezer bag. Make sure to squeeze out any excess air to prevent freezer burn. When you’re ready to enjoy them, just reheat in a preheated oven at 350°F (175°C) for about 10 minutes until warm and crispy.
What should I do if my Taiyaki are coming out too dense?
It sounds like you might be over-mixing the batter! For the fluffiest results, mix the wet and dry ingredients until just combined. A few clumps are perfectly fine and will contribute to that airy texture you want. Also, ensure that your pan is correctly preheated, as proper cooking temperature is crucial for delicious Taiyaki.
Are there any allergens I should be aware of in this recipe?
Yes, Taiyaki contains several common allergens, including eggs and dairy (from milk). If you’re making these for someone with allergies, consider using alternatives like flaxseed meal instead of eggs and almond milk or a soy-based milk in place of whole milk. Always double-check your fillings too—some, like Nutella, may contain allergens depending on the brand.
How can I adjust the filling for a savory option?
For a savory twist, you can use fillings like cheese or cooked vegetables. Try mixing shredded cheese with herbs for a tasty combination. If you want to go a step further, you can even fill them with a savory meat mix or other cooked fillings to create a completely different experience.

Delicious Taiyaki: Make Your Own Japanese Fish Dessert Today
Ingredients
Equipment
Method
- Prepare Batter: Sift together flour, sugar, baking powder, baking soda, and salt in a bowl. In another bowl, whisk egg, milk, oil, and vanilla. Combine wet and dry ingredients gently, and let batter rest in the refrigerator for 1 hour.
- Preheat Taiyaki Pan: Preheat pan over medium-low heat for 5 minutes. Lightly oil molds to ensure non-stick surface.
- Fill Molds: Pour batter into molds until 60% full. Add 1 tablespoon of selected filling at the center, then top with more batter.
- Cook: Close molds, flip pan to cook evenly. Cook for 2-3 minutes per side until golden brown.
- Serve: Remove Taiyaki and transfer to a cooling rack. Serve warm, optionally with whipped cream or fresh fruit.
Leave a Reply