
When the clouds start to gather and chilly winds sweep through, my mind drifts to a delightful remedy I can whip up in minutes: Easy Homemade Elderberry Gummies. Not only do these chewy snacks provide a delightful pop of fruity flavor, but they also pack a powerful immune-boosting punch. Taking just 15 minutes to prepare, they fit perfectly into my busy schedule and keep the kids happily snacking without a hint of guilt. Plus, the best part? They’re customizable, so you can tweak the sweetness or even make them vegan with just a few ingredient swaps. Curious about how to transform simple ingredients into a fun, healthful treat for your family? Let’s dive into this simple yet satisfying recipe!

Why Make Homemade Elderberry Gummies?
Health Benefits: Packed with immune-boosting properties, these gummies are not just tasty but also good for you and your family.
Kid-Friendly: A fun treat that kids love—no more battles over healthy snacks!
Quick and Easy: You can whip these up in just 15 minutes, making them perfect for busy lifestyles.
Customizable: Enjoy your gummies exactly how you like them! Swap ingredients for a vegan option or play with flavors by adding different fruit juices.
Budget-Friendly: Skip the store-bought versions and make a wholesome, cost-effective snack at home, ideal for health-conscious families. For more easy treats, try these delightful Chicken Caesar Sandwich options!
Homemade Elderberry Gummies Ingredients
• Get ready to create your healthy snack!
For the Gummies
- Elderberry Syrup – This provides the delicious berry flavor and immune support; you can use homemade or store-bought.
- Raw Honey or Maple Syrup – Adds the perfect touch of sweetness; go for stevia or monk fruit for a sugar-free option.
- Water – Helps to blend the ingredients smoothly; distilled water works best for purity.
- Gelatin Powder – Key for that delightful chewy texture; use agar-agar for a vegan alternative.
- Optional: Lemon Juice – A splash adds brightness and tang, enhancing your gummy’s flavor profile.
Step‑by‑Step Instructions for Homemade Elderberry Gummies
Step 1: Combine Ingredients
In a medium saucepan, combine 1 cup of elderberry syrup with 1/4 cup of water. Warm the mixture gently over low heat, stirring regularly until it becomes warm but does not boil—this should take about 3-5 minutes. Keep an eye on it as you want to preserve the nutrients in the elderberry syrup for your delicious Homemade Elderberry Gummies.
Step 2: Sweeten the Mixture
Once the elderberry syrup and water are warm, stir in 1/4 cup of raw honey or maple syrup. Using a whisk, mix until smooth and fully incorporated, which will take about 1-2 minutes. This adds not only sweetness but also a lovely flavor to your gummy mixture, enhancing the fruity notes of the elderberry.
Step 3: Add Gelatin for Texture
Slowly sprinkle in 3 tablespoons of gelatin powder while continuously whisking the mixture. Keep whisking until all the gelatin is fully dissolved, which should take another 2-3 minutes. The mixture will thicken slightly, creating that coveted chewy texture that makes your Homemade Elderberry Gummies so delightful.
Step 4: Transfer to Molds
Carefully pour the gummy mixture into silicone molds, using a dropper or small spoon for precision. Fill the molds until they are about three-quarters full to allow for any slight expansion as they set. Take your time with this step to avoid spills, ensuring that each mold gets an equal amount of your vibrant mixture.
Step 5: Chill Until Firm
Place the filled molds into the refrigerator and let them chill for 2-3 hours or until they are completely firm to the touch. This cooling period allows the gelatin to set, transforming your delicious mixture into the chewy Homemade Elderberry Gummies that you’ll enjoy.
Step 6: Remove and Store
Once set, gently pop the gummies out of the molds, being careful not to tear them. Place the gummies in an airtight container and store them in the fridge, where they will stay fresh for up to two weeks. Share these delightful Homemade Elderberry Gummies with family for a fun and healthy snack option!
What to Serve with Easy Homemade Elderberry Gummies?
Imagine the joy of pairing these delightful, chewy treats with complementary flavors that elevate your snacking experience!
- Fruity Yogurt Parfait: Creamy yogurt layered with fresh fruits makes a refreshing contrast to the gummies, creating a pleasing texture balance. Add granola for crunch!
- Nut Butter Spread: A smear of almond or peanut butter brings a nutty richness that pairs beautifully with the sweet elderberry flavor, making each bite satisfying.
- Veggie Sticks: Crisp carrot and cucumber sticks provide a refreshing crunch, allowing you to feel all the textures without overwhelming your palate. A light dip, like hummus, is perfect here!
- Refreshing Herbal Tea: A cup of chamomile or peppermint tea complements the sweet-and-tangy notes of the gummies. It’s the perfect warm touch for a cozy afternoon snack.
- Fruit Salad: A mix of seasonal berries and melon enhances the fruity essence of elderberries. Toss it with a splash of lime juice for a vibrant zing!
- Granola Bars: Homemade or store-bought, these chewy snacks create a delicious filling duo with the gummies. Their hearty flavors make for an inviting mid-day treat.
- Sparkling Water: Infused with a splash of lemon or berry essence, this bubbly drink refreshes the palate, making it a delightful companion to your gummies.
- Dark Chocolate Bites: The rich bitterness of dark chocolate contrasts fabulously with the sweetness of the elderberry gummies, indulging your taste buds in a new level of satisfaction.
Craft an enjoyable snacking experience by mixing and matching these delightful accompaniments!
How to Store and Freeze Homemade Elderberry Gummies
Fridge: Store your Homemade Elderberry Gummies in an airtight container in the fridge for up to 2 weeks to maintain their chewy texture and freshness.
Freezer: For longer storage, freeze the gummies in a single layer on a baking sheet. Once firm, transfer them to an airtight container where they can last up to 3 months.
Thawing: To enjoy frozen gummies, simply thaw them in the fridge overnight before snacking or let them sit at room temperature for about 30 minutes.
Reheating: No reheating is needed; just pop them out of the fridge or freezer and enjoy these delicious gummies as a healthy snack!
Expert Tips for Homemade Elderberry Gummies
- Preserve Nutrients: Avoid boiling the elderberry syrup to ensure all its beneficial properties remain intact in your gummies.
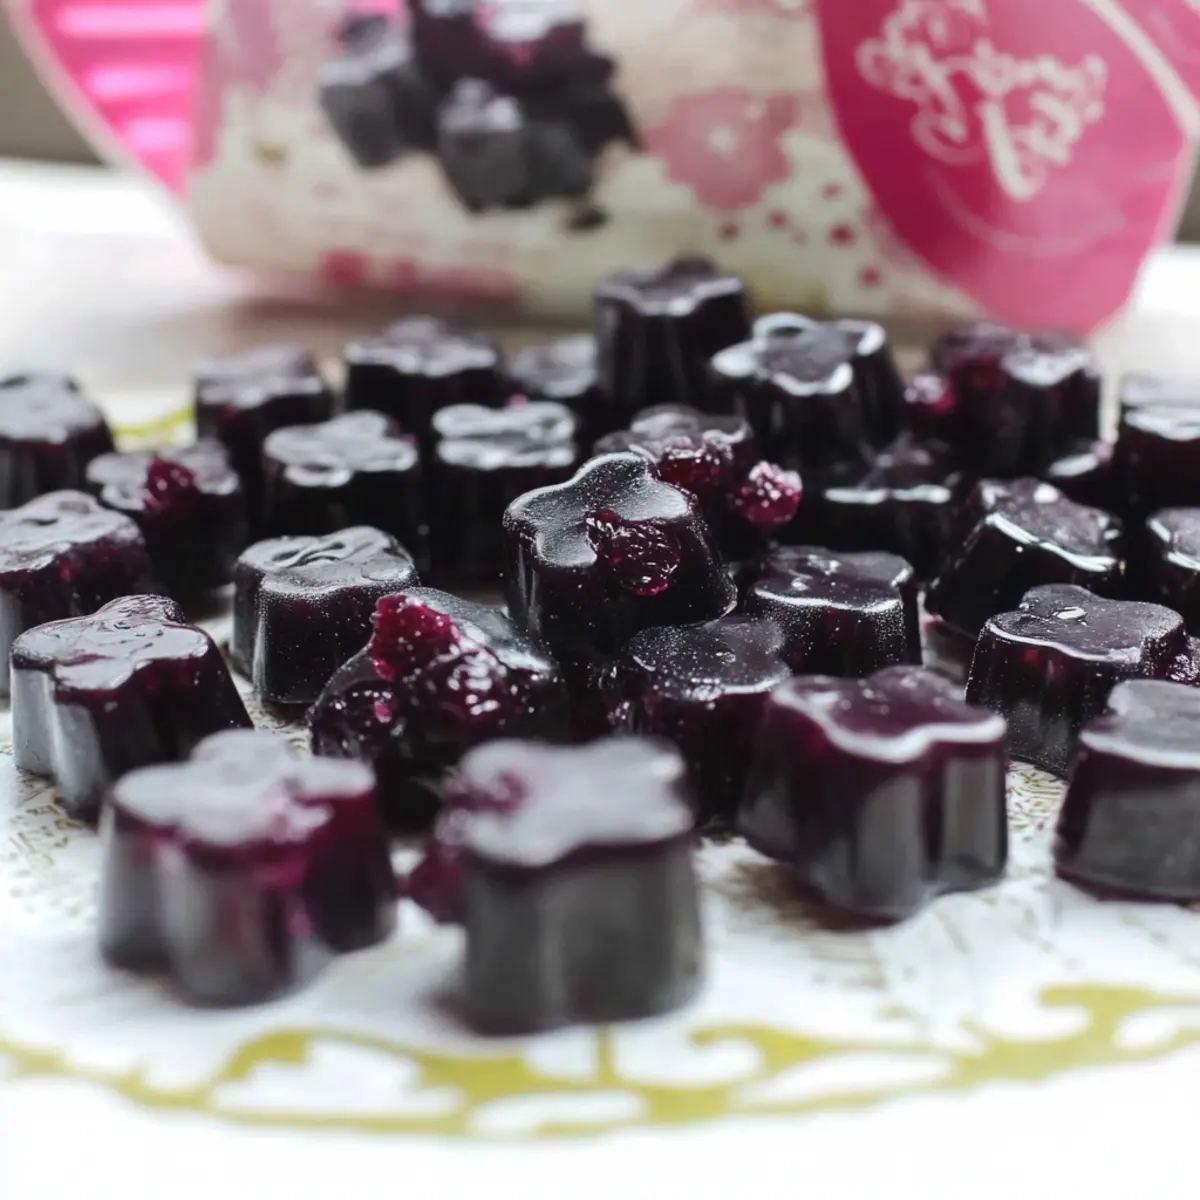
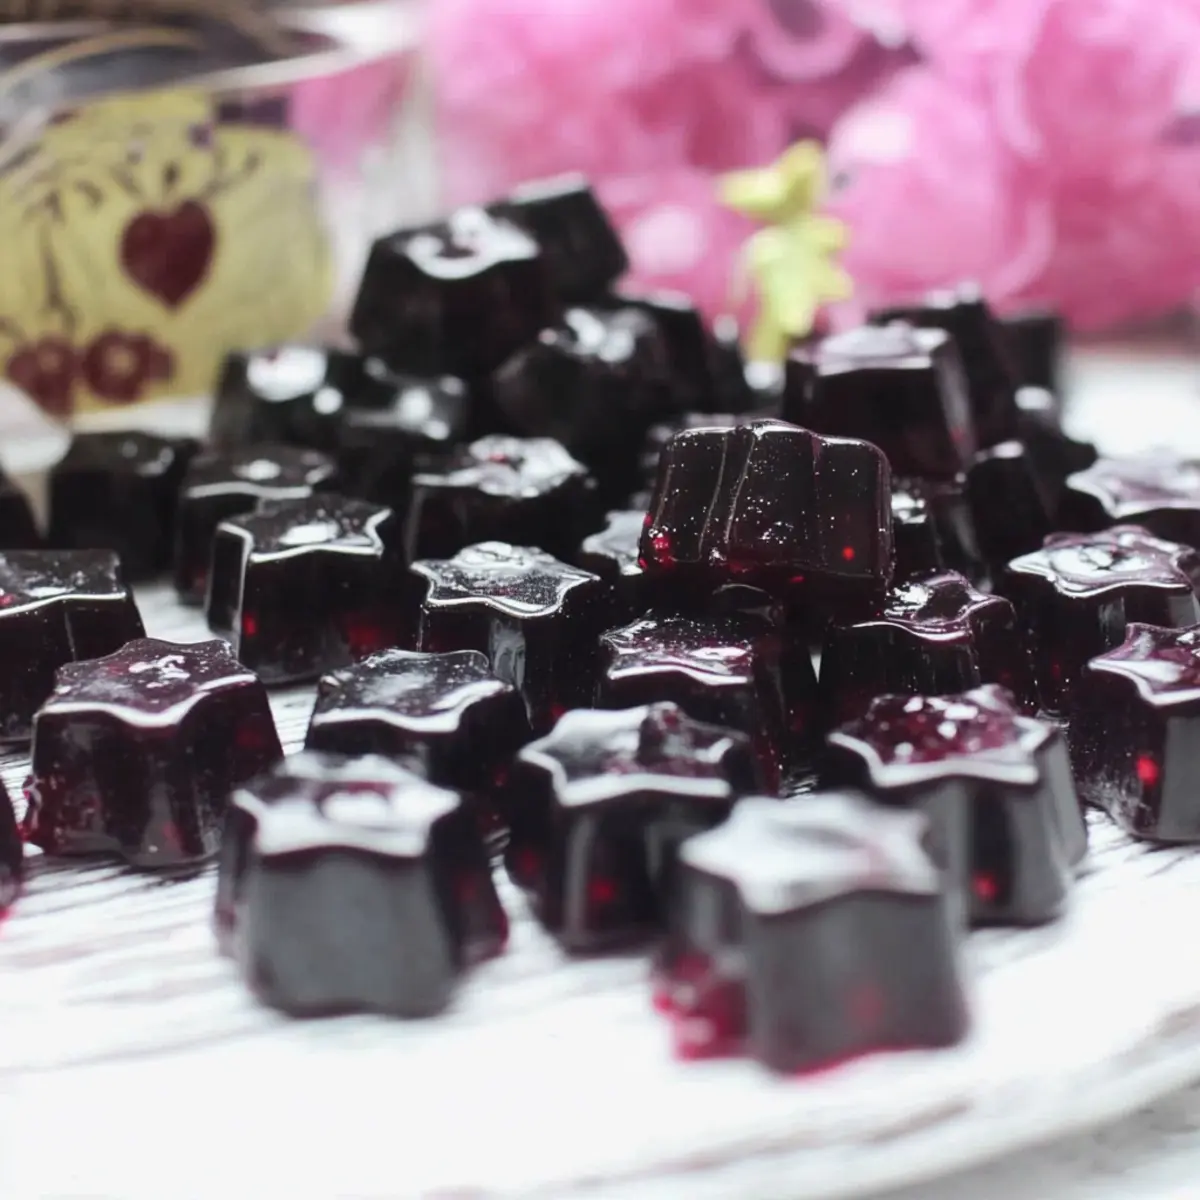
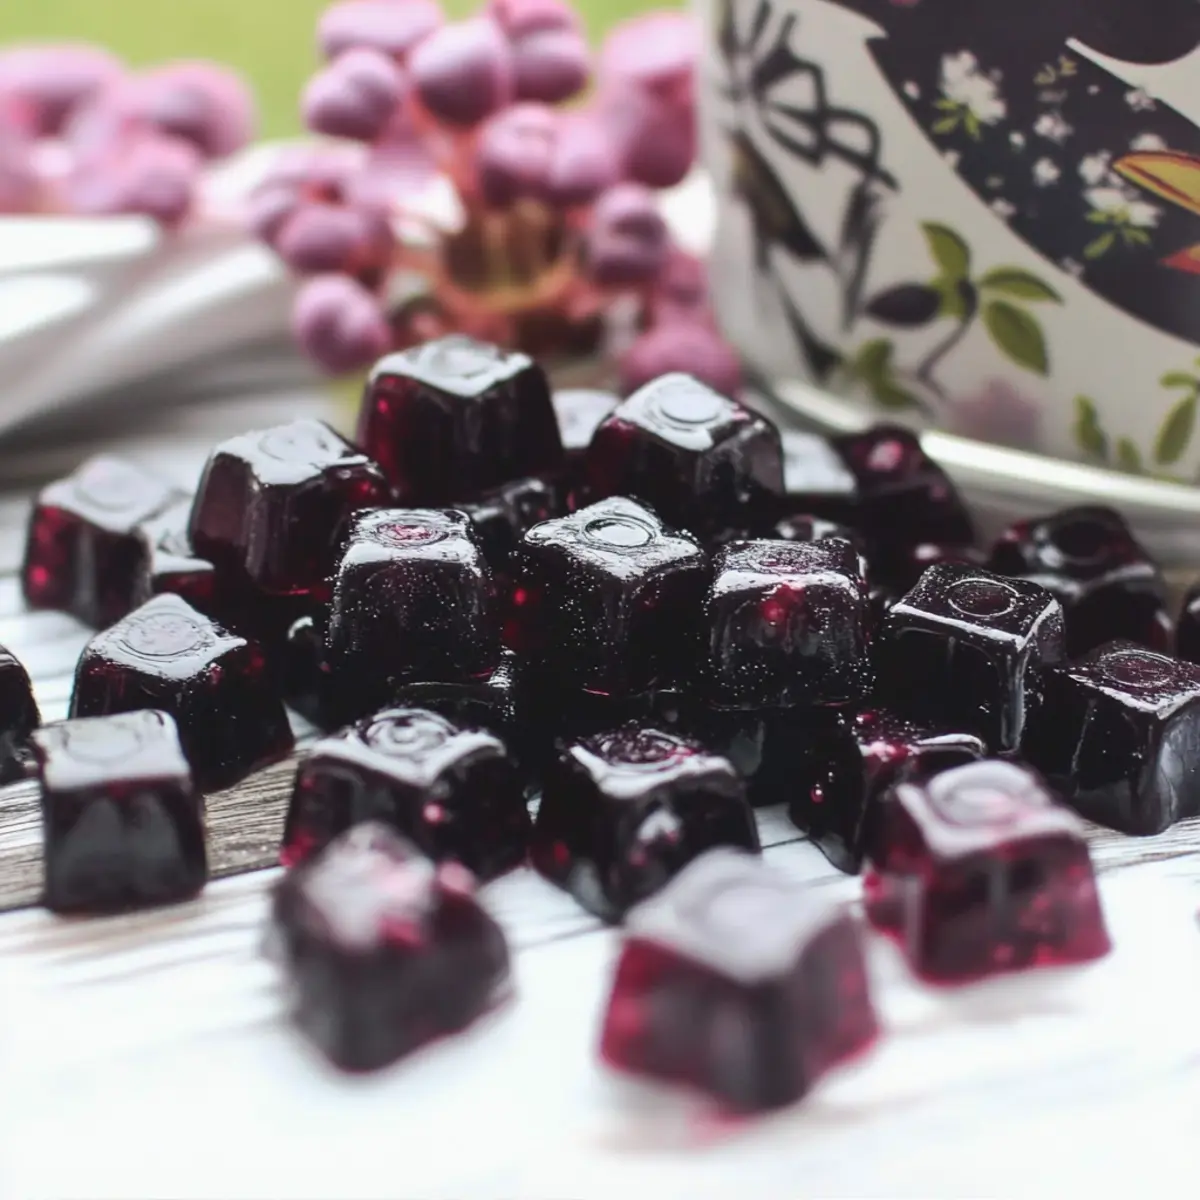
- Fun Molds: Use fun-shaped silicone molds to make the gummies visually appealing and more enjoyable for kids, making snack time a treat.
- Storage Essentials: Keep your Homemade Elderberry Gummies in an airtight container in the fridge for optimal freshness, lasting up to two weeks.
- Frozen Option: Consider freezing the gummies if you want to extend their shelf life; they can last for up to three months in the freezer.
- Consult for Dosage: Always discuss with a healthcare provider about the right dosage, especially for kids, ensuring they enjoy these treats safely.
Make Ahead Options
These Easy Homemade Elderberry Gummies are perfect for busy home cooks who want to save time without sacrificing quality. You can prepare the gummy mixture up to 24 hours in advance; simply follow the initial steps of combining your ingredients, then refrigerate the mixture in the saucepan. Once you’re ready to make the gummies, gently reheat the mixture over low heat to re-dissolve the gelatin before pouring it into molds. This keeps the gummies just as delicious as fresh! Additionally, once set, these gummies can be stored in the fridge for up to 2 weeks, making them a convenient and healthful snack that is always ready when you are.
Homemade Elderberry Gummies Variations
Feel free to tailor these Homemade Elderberry Gummies to suit your taste and dietary preferences; the options are as delightful as they are nutritious!
-
Vegan Swap: Use agar-agar in place of gelatin for a plant-based texture that retains all the flavor.
-
Sugar-Free Option: Substitute raw honey with stevia or monk fruit to create a deliciously sweet treat without added sugar.
-
Flavor Twist: Experiment by adding different fruit juices; orange or raspberry can give your gummies an exciting zing.
-
Boost the Benefits: Stir in chia seeds or flaxseeds for added fiber and omega-3s, making your gummies even more nourishing.
-
Zesty Kick: Incorporate a splash of fresh lemon juice for a refreshing tartness that perfectly contrasts the sweetness.
-
Nutty Variation: Blend in a touch of almond or coconut extract for a unique flavor profile that’s both surprising and delightful.
-
Mixed Berries: Combine various berry syrups or purees for a colorful mix that both kids and adults will adore!
For even more family-friendly meal ideas, consider pairing these gummies with a satisfying Chicken Caesar Sandwich! Let your creativity run wild while creating your perfect batch of gummies!
Homemade Elderberry Gummies Recipe FAQs
What type of elderberry syrup should I use?
Absolutely! For the best flavor and health benefits, you can use either homemade elderberry syrup or a quality store-bought version. If you’re making your own, make sure to follow reliable recipes for maximum potency.
How should I store my homemade elderberry gummies?
You’ll want to keep your Homemade Elderberry Gummies in an airtight container in the fridge. They will stay fresh for up to 2 weeks. If you’d like to extend their shelf life, you could also freeze them!
Can I freeze my elderberry gummies? How do I do it?
Yes, you can freeze your gummies! To freeze your Homemade Elderberry Gummies, first, place them in a single layer on a baking sheet. Once they are firm, transfer them to an airtight container or freezer bag. They can last up to 3 months in the freezer. To enjoy them, thaw in the fridge overnight or leave them at room temperature for about 30 minutes.
What if my gummies don’t firm up properly?
Very gently, if your gummies don’t set properly, it could be due to insufficient gelatin. Next time, ensure you use enough gelatin (3 tablespoons). If they’re already made, you can remelt the mixture and add more gelatin, whisking until dissolved, then pour back into molds. Be sure to chill thoroughly this time!
Are these gummies suitable for kids?
Definitely! Homemade Elderberry Gummies are a great kid-friendly snack. However, always consult a healthcare provider for proper dosage—generally, kids should enjoy 1–2 gummies per day, while adults can have 2–4. This ensures safe and nutritious snacking for everyone!
Homemade Elderberry Gummies for a Tasty Immune Boost
Ingredients
Equipment
Method
- In a medium saucepan, combine 1 cup of elderberry syrup with 1/4 cup of water. Warm gently over low heat, stirring regularly for 3-5 minutes.
- Once warm, stir in 1/4 cup of raw honey or maple syrup using a whisk until smooth, about 1-2 minutes.
- Slowly sprinkle in 3 tablespoons of gelatin powder while whisking continuously until fully dissolved, about 2-3 minutes.
- Pour the gummy mixture into silicone molds until about three-quarters full.
- Place filled molds in the refrigerator and chill for 2-3 hours until firm.
- Once set, gently pop the gummies out of the molds and store them in an airtight container in the fridge.
Leave a Reply