
As I stood in my kitchen, the heavenly scent of baked oats mingled with warm cinnamon, instantly transporting me back to my childhood mornings filled with comfort and care. Today, I’m thrilled to share my recipe for Healthy Breakfast Granola Cups—a nutritious and delightful way to jump-start your day! These versatile cups not only make breakfast a breeze with their quick prep time, but they’re also a fun canvas for customization, perfect for sprucing up your morning routine. Whether you fill them with creamy yogurt and fresh fruit or enjoy them plain, they promise to be a satisfying snack the whole family will love. Curious about how to make these wholesome treats? Let’s dive in!

Why are Breakfast Granola Cups a Must-Try?
Convenience is key—these cups require minimal time and can be prepped quickly, making breakfast hassle-free for busy mornings. Customizable to fit every taste, feel free to add your favorite nuts, seeds, or dried fruits for a personal touch. Health-conscious individuals will appreciate that they are gluten-free and vegan-friendly, ensuring everyone in the family can enjoy them. Satisfying and nutritious, with whole grains and fiber, you’ll be fueled for the day ahead. Plus, as a delightful snack option, they can easily replace unhealthy fast food choices. For more creative breakfast ideas, check out our Breakfast Granola Cups!
Breakfast Granola Cups Ingredients
Here’s everything you need to create these delightful Breakfast Granola Cups!
For the Base
- Applesauce – Acts as a natural sweetener and moistening agent; substitute with mashed banana or canned pumpkin for varied flavors.
- Honey – Provides sweetness and binding; can be replaced with agave syrup for a vegan option.
- Pure Vanilla Extract – Enhances flavor; omit if not available but will slightly reduce the depth of taste.
- Cinnamon – Adds warmth and flavor depth; substitute with nutmeg or exclude if desired.
- Salt – Enhances sweetness and flavor; can be omitted if making low-sodium versions.
- Rolled Oats – The base structure of the cups, offering fiber and nutrients; certified gluten-free oats can replace for a gluten-free version.
For Serving
- Yogurt/Fresh Fruit – Optional fillings for serving; use Greek yogurt for added protein or any seasonal fruit for freshness.
These Breakfast Granola Cups not only satisfy cravings but also elevate your morning routine with their customizable ingredients!
Step‑by‑Step Instructions for Breakfast Granola Cups
Step 1: Preheat the Oven
Begin by preheating your oven to 330°F (165°C). While the oven warms up, generously grease a muffin or mini-muffin tin with cooking spray or oil to ensure your Breakfast Granola Cups release easily once baked. This step is crucial for achieving cups that maintain their shape and texture after baking.
Step 2: Mix Wet Ingredients
In a large mixing bowl, whisk together the applesauce, honey, and pure vanilla extract until the mixture is smooth and well combined. This should take about 1-2 minutes. The applesauce will act as a natural binder and sweetener, making it essential for not only flavor but also moisture in your Breakfast Granola Cups.
Step 3: Combine Dry Ingredients
Next, stir in the rolled oats, salt, cinnamon, and any optional ingredients such as protein powder or chia seeds. Use a spatula to mix until everything is thoroughly coated with the wet ingredients. This mixture should have a cohesive texture that holds together while still being malleable, which is perfect for molding into your muffin tin.
Step 4: Portion into Muffin Cups
Take the oat mixture and scoop it into the prepared muffin tin, filling each cavity about three-quarters full. Press the mixture firmly against the sides and bottom of each cup, ensuring they are tightly packed. This action is key to helping your Breakfast Granola Cups hold their shape once baked and delivers a delightful crunchy texture.
Step 5: Bake for Perfection
Place the muffin tin in your preheated oven and bake for 12 minutes, or until the tops are lightly golden brown. Keep an eye on them during the last few minutes; they should look crisp around the edges. When done, carefully remove the tin from the oven and allow it to cool for at least 10 minutes before attempting to remove the granola cups, which helps prevent crumbling.
Step 6: Serve and Enjoy
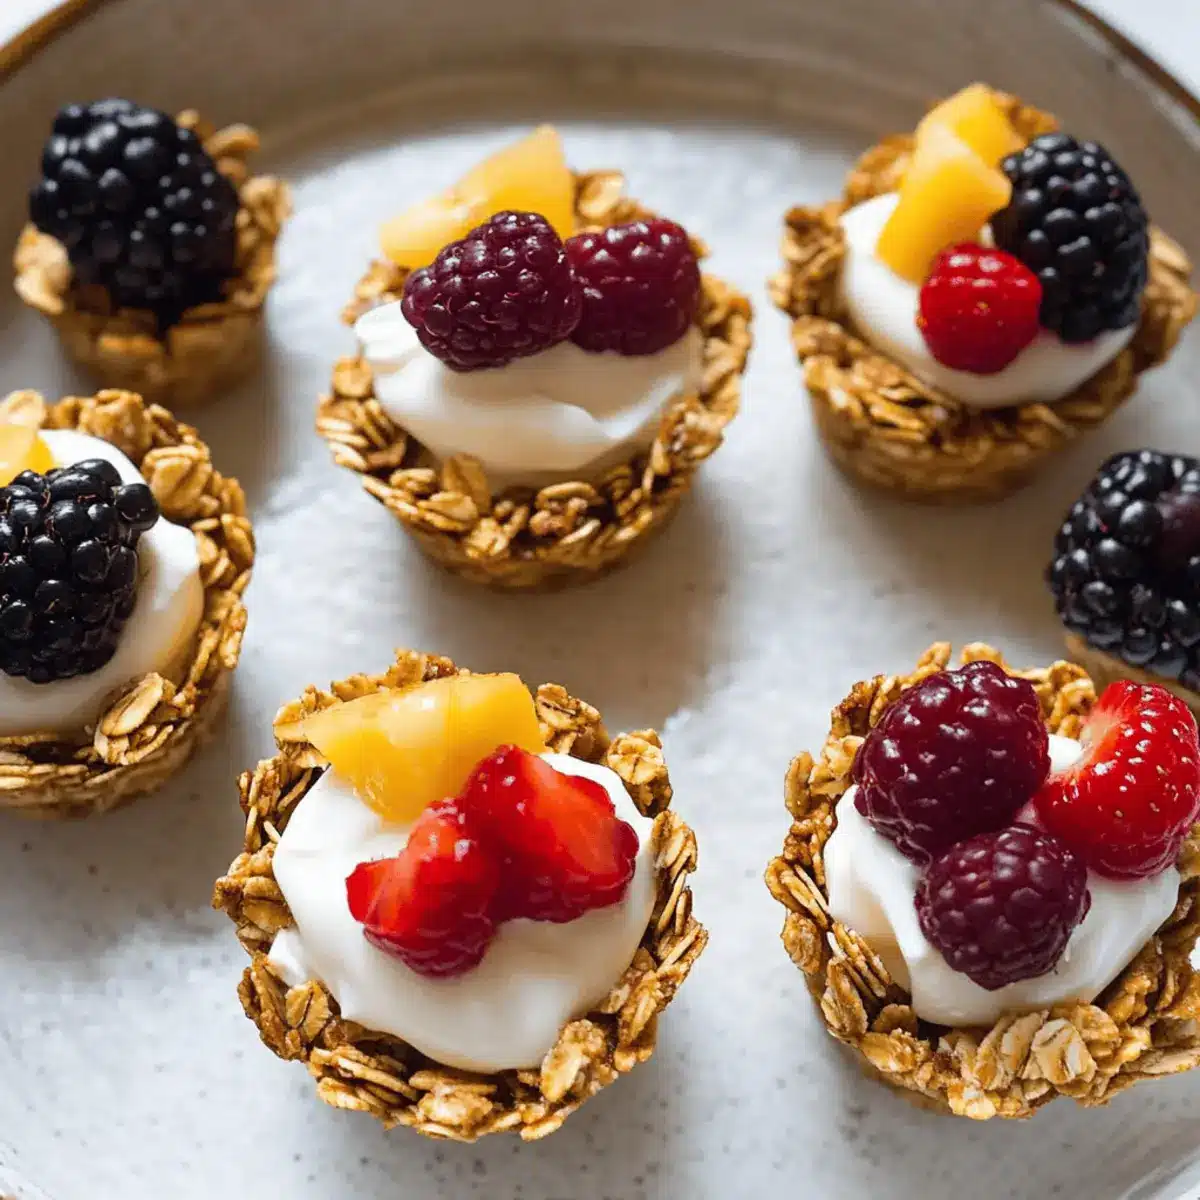
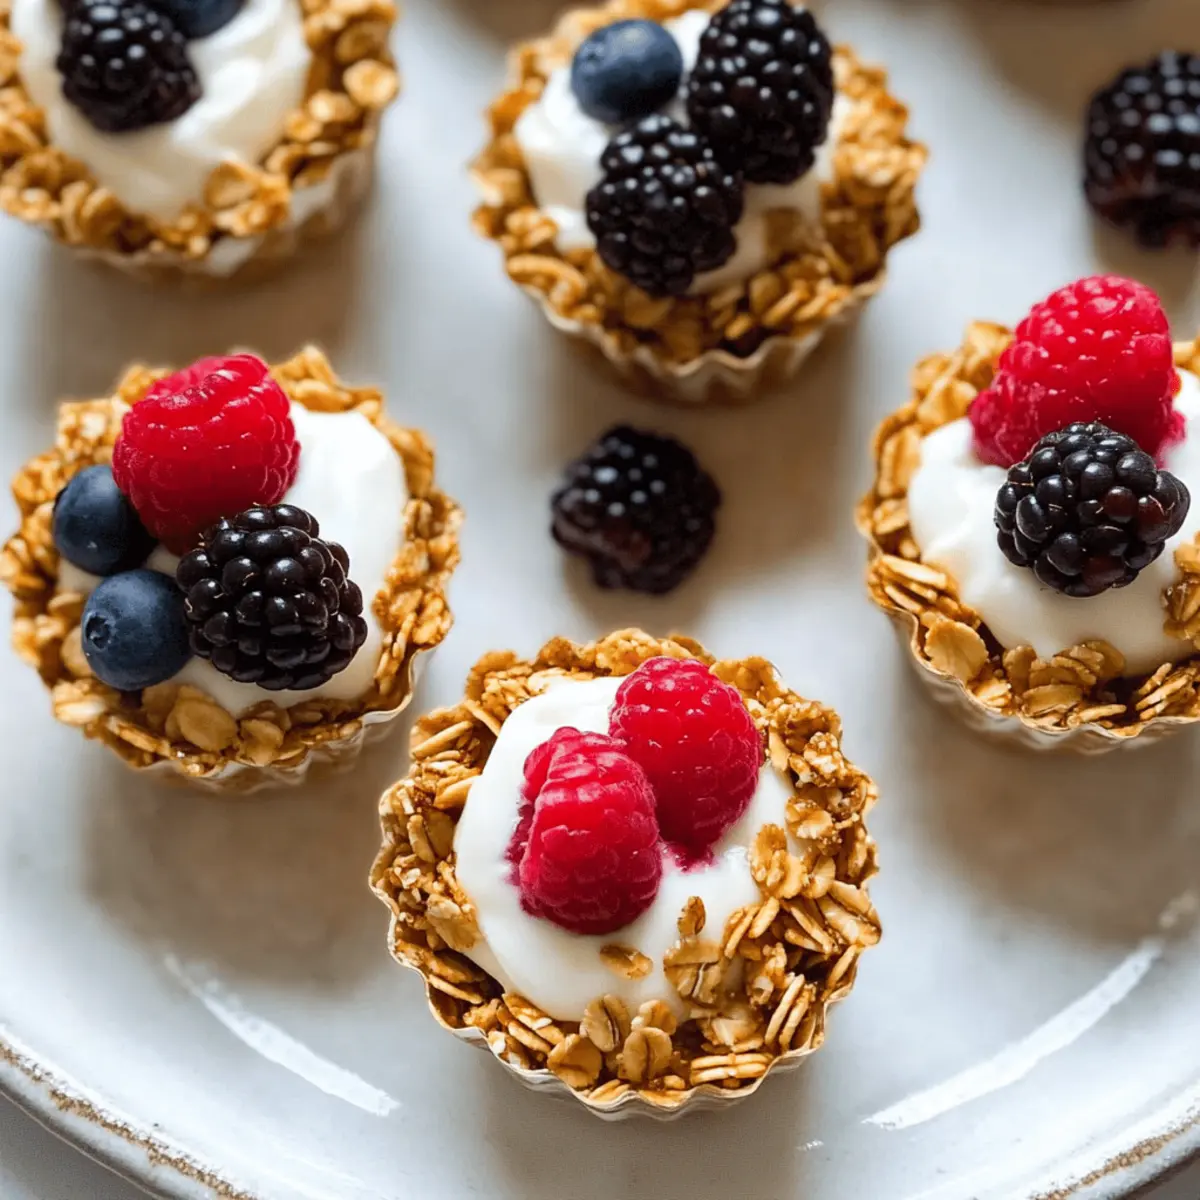
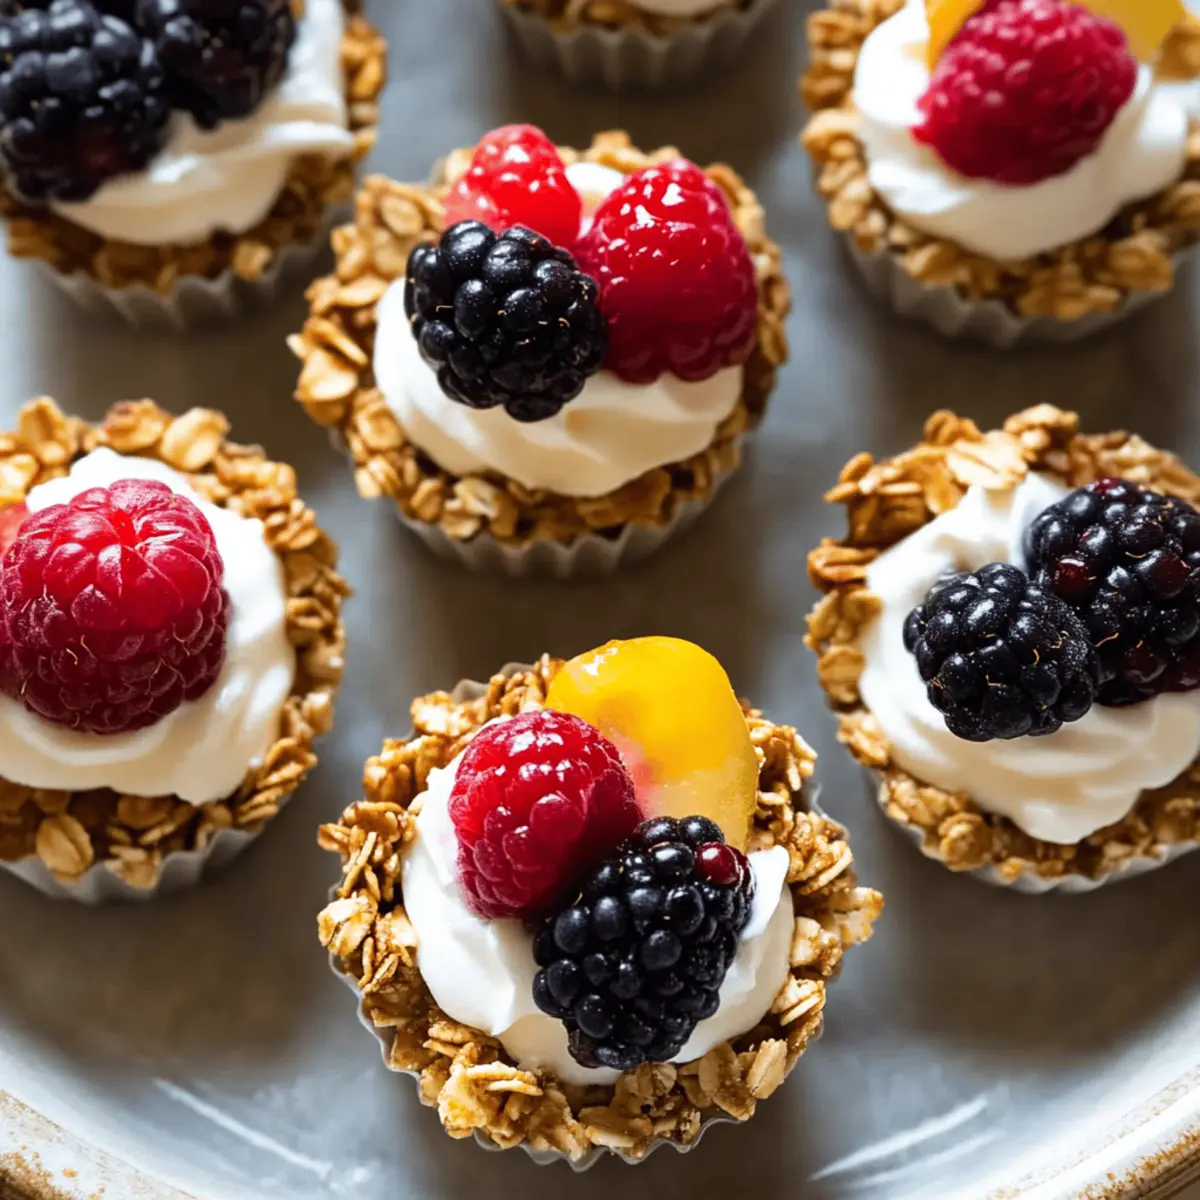
Once cooled, gently run a knife around the edges of each granola cup to help release them from the tin. Serve them warm or at room temperature with a dollop of yogurt and fresh fruit for a nutritious breakfast or snack. You might also enjoy them plain as a quick grab-and-go option that’s both satisfying and healthy.
Storage Tips for Breakfast Granola Cups
Room Temperature: Keep the cups in an airtight container at room temperature for up to 3 days to maintain their freshness and texture.
Fridge: Store leftovers in the refrigerator for up to one week. Make sure to use an airtight container to prevent moisture from affecting their crunchiness.
Freezer: Individual cups can be frozen for up to three months. Wrap them tightly in plastic wrap and place in a freezer bag for best results.
Thawing: Thaw frozen Breakfast Granola Cups completely in the refrigerator overnight before serving, or warm them briefly in the microwave for a few seconds to enjoy them fresh.
What to Serve with Breakfast Granola Cups
Start your day on a delicious note by complementing these wholesome cups with delightful sides and toppings!
- Creamy Greek Yogurt: A rich, tangy addition that balances the sweetness of the granola cups while upping your protein intake.
- Fresh Berries: Juicy, vibrant strawberries or blueberries add a burst of color and flavor, making each bite a delightful experience. Mix berries for a medley of tastes!
- Honey Drizzle: A simple drizzle of honey brings an extra layer of sweetness and a lovely glossy finish, enhancing the overall appeal.
- Sliced Bananas: Creamy banan slices provide a comforting texture and natural sweetness that pairs perfectly with the granola cups.
- Nuts and Seeds: Sprinkle on some chopped almonds or chia seeds for a satisfying crunch and added nutrition, elevating the cups to a nutrient-packed snack.
- Herbal Tea or Fresh Juice: A warm cup of herbal tea or a glass of freshly squeezed juice complements the healthy vibe, making for a refreshing and intentional breakfast experience.
Elevate your breakfast routine with these delicious pairings that enhance the wholesome goodness of your Breakfast Granola Cups!
Expert Tips for Breakfast Granola Cups
-
Pack it Tight: Make sure to tightly pack the mixture into the muffin cups. This helps the Breakfast Granola Cups retain their shape during and after baking.
-
Cool Completely: Let the granola cups cool in the tin for at least 10 minutes. This step reduces the risk of crumbling when you remove them from the mold.
-
Try Superfoods: For an extra nutritional boost, consider mixing in superfoods like hemp seeds or flaxseed meal before baking.
-
Experiment with Flavors: Don’t hesitate to add in your favorite nuts, seeds, or dried fruits to make your Breakfast Granola Cups uniquely yours.
-
Gluten-Free Option: If you need gluten-free options, use certified gluten-free oats to ensure everyone in the family can enjoy these delicious treats.
Breakfast Granola Cups Variations & Substitutions
Feel free to get creative and make these delightful Breakfast Granola Cups uniquely yours with these fun variations!
-
Vegan-Friendly: Replace honey with agave syrup to keep it plant-based and just as sweet! It’s an easy swap that keeps the flavors intact.
-
Fruit-Filled: Add half a cup of dried fruits like cranberries or raisins into the mixture. They provide a sweet surprise with every bite, enhancing the texture and flavor profile!
-
Nutty Twist: Mix in your choice of chopped nuts such as almonds or walnuts for an extra crunch! They add a lovely nuttiness while boosting protein and healthy fats.
-
Chocolate Lover’s Delight: Stir in chocolate chips or cacao nibs for a decadent touch. Imagine the melty richness mingling with the oats—a childlike happiness in each mouthful!
-
Spice it Up: Try using pumpkin pie spice or cardamom instead of cinnamon for seasonal flair! This adds a warm and cozy flavor, transforming your breakfast into a comforting hug.
-
Protein Boost: Swap some of the liquid sweeteners for nut butter like almond or peanut butter. This not only enhances the flavor but adds an extra dose of protein!
-
Gluten-Free Option: Simply use certified gluten-free oats instead of regular rolled oats. A straightforward change ensuring everyone can enjoy these delicious cups!
-
Moisture Up: Consider adding mashed bananas or canned pumpkin instead of applesauce for added flavor and moisture. This gives each cup a rich and hearty texture.
For more creative breakfast ideas, check out our delightful Breakfast Granola Cups and spice up your mornings!
Make Ahead Options
These Healthy Breakfast Granola Cups are perfect for meal prep enthusiasts! You can mix the wet ingredients (applesauce, honey, and vanilla extract) and dry ingredients (rolled oats, cinnamon, and salt) up to 24 hours in advance, storing each mixture in airtight containers in the refrigerator to maintain freshness. When you’re ready to bake, simply combine the mixtures, portion them into the muffin tin, and bake as instructed. If you want even more convenience, you can bake the cups ahead and refrigerate them for up to 3 days or freeze them for up to 3 months! Just remember to cool them completely before storing; they’ll taste just as delicious when reheated. Enjoy a wholesome breakfast without the morning stress!
Breakfast Granola Cups Recipe FAQs
How do I choose ripe ingredients for my Breakfast Granola Cups?
Absolutely! For the applesauce, opt for unsweetened varieties that have a smooth texture. If you’re using fresh fruit like bananas or pumpkins as substitutes, pick ones that are very ripe but not overly mushy—this ensures more sweetness and a wonderful flavor.
What’s the best way to store leftover Breakfast Granola Cups?
You can store your Breakfast Granola Cups in an airtight container at room temperature for up to 3 days. If you want them to last longer, place them in the refrigerator, where they’ll stay fresh for up to a week. Just make sure they’re completely cool before sealing the container to avoid moisture buildup.
Can I freeze Breakfast Granola Cups, and how should I do it?
Very! You can freeze individual Breakfast Granola Cups for up to 3 months. Just wrap each cup tightly in plastic wrap and place them in a freezer bag. When you’re ready to enjoy them, thaw them in the refrigerator overnight or pop them in the microwave for a quick warm-up!
What should I do if my granola cups crumble when removing them from the tin?
If your granola cups crumble, it’s often due to not packing the mixture tightly enough in the muffin tin. Make sure to press the mixture firmly against the sides and bottom while portioning. Additionally, letting them cool in the tin for at least 10 minutes can help them hold their shape better.
Are there any dietary considerations for making Breakfast Granola Cups?
Yes, definitely! These granola cups can be made vegan by substituting honey with agave syrup. For gluten-free options, use certified gluten-free oats. Always check labels on any mix-ins like chocolate or yogurt for potential allergens if you have sensitivities.
How can I customize the flavors of my Breakfast Granola Cups?
The more the merrier! You can add chocolate chips, dried fruits, or your favorite nuts to the mixture for added texture and flavor. Experimenting with spices like pumpkin pie spice or even a touch of cardamom can create a delightful seasonal twist. Just remember to adjust the wet ingredients accordingly if adding extra dry ingredients!
Delicious Breakfast Granola Cups: Quick & Customizable Treats
Ingredients
Equipment
Method
- Preheat your oven to 330°F (165°C) and grease a muffin or mini-muffin tin with cooking spray or oil.
- In a large mixing bowl, whisk together applesauce, honey, and pure vanilla extract until smooth.
- Stir in the rolled oats, salt, cinnamon, and any optional ingredients until thoroughly mixed.
- Scoop the oat mixture into the muffin tin, filling each cavity about three-quarters full, and press firmly.
- Bake for 12 minutes, or until the tops are lightly golden brown, then cool for at least 10 minutes before removing.
- Serve warm or at room temperature with yogurt and fresh fruit, or enjoy them plain.
Leave a Reply