
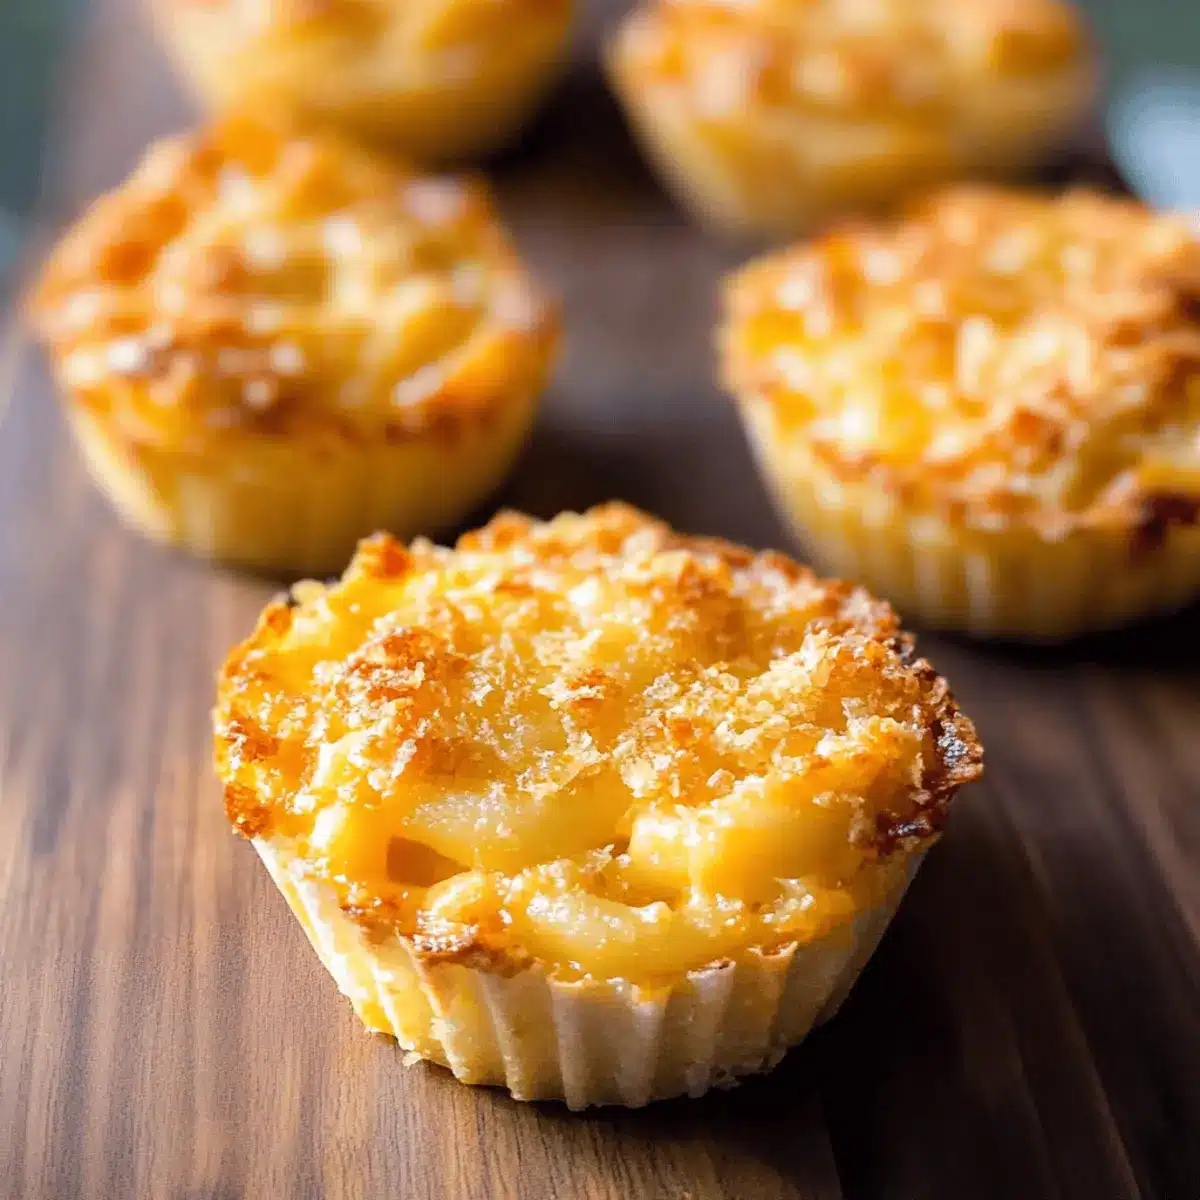
The aroma of creamy macaroni wafting from the oven is enough to transport me back to carefree childhood days, where every bite felt like a warm hug. But why settle for ordinary when you can indulge in these delightfully cheesy Baked Mac and Cheese Cups? Perfectly portioned for snacking or serving as a playful appetizer, these cups are not just a convenient twist on the classic comfort food; they’re also gluten-free and accessible for a variety of dietary preferences. With minimal prep time and straightforward ingredients, whipping up this easy, kid-friendly recipe will become a go-to in your kitchen. So, are you ready to transform your mac and cheese experience and impress your friends and family? Let’s get cooking!
Why Are Baked Mac and Cheese Cups So Special?
Kid-Friendly and Adult-Approved: These Baked Mac and Cheese Cups cater to all ages, making them a crowd-pleaser at any gathering.
Gluten-Free Adaptation: Effortlessly swap out regular pasta for gluten-free options, ensuring everyone can enjoy these cheesy delights without worry.
Easy to Prepare: With straightforward steps, even beginner cooks can nail this recipe, making it ideal for quick weeknight dinners or spontaneous get-togethers.
Portioned Perfection: Sized perfectly for snacking, these cups are an ideal addition to any appetizer spread, pairing wonderfully with a fresh salad or some Potato Egg Cheese for a complete meal.
Versatile Flavor: Feel free to experiment with different cheeses or add in veggies for a nutritious twist, transforming this classic into something uniquely your own.
Don’t miss the chance to impress your loved ones with these delightful bites!
Baked Mac and Cheese Cups Ingredients
For the Pasta
• Pasta – 8 ounces; use shells, elbows, or gemelli for better filling.
For the Cheese Sauce
• Butter – 3 tablespoons; adds creaminess and richness—can substitute with a non-dairy butter for vegan options.
• Garlic – 2 cloves, minced; enhances flavor—substitute with garlic powder for convenience.
• Salt – 1/2 teaspoon; enhances overall flavor—adjust according to personal taste.
• Ground Black Pepper – 1/8 teaspoon; adds warmth and depth—omit for a milder flavor if preferred.
• All-Purpose Flour – 2 tablespoons; serves as a thickener for cheese sauce—substitute with cornstarch for a gluten-free option.
• Whole Milk – 1 cup; creates a creamy texture—use any milk alternative for dairy-free versions.
• Shredded Cheddar Cheese – 2 cups; provides rich, cheesy flavor—shred cheese from a block for optimal melting or use dairy-free cheese for vegan.
For the Topping
• Breadcrumbs – 1/4 cup; adds a crunchy topping—use gluten-free breadcrumbs for a suitable substitution.
These Baked Mac and Cheese Cups promise a cheesy, satisfying experience that everyone can enjoy!
Step‑by‑Step Instructions for Baked Mac and Cheese Cups
Step 1: Preheat and Prepare the Muffin Tin
Begin by preheating your oven to 350°F (175°C). While the oven warms up, take a standard muffin tin and generously grease each cup with butter, ensuring they are well-coated to prevent sticking. This step is crucial for easy removal later, giving you perfectly shaped Baked Mac and Cheese Cups.
Step 2: Cook the Pasta
In a large pot, bring salted water to a rolling boil and add 8 ounces of pasta, cooking it until it reaches al dente, about 6-8 minutes. Stir occasionally to prevent the pasta from sticking together. Once cooked, drain the pasta well and set it aside, ready to be enveloped in the cheesy goodness of your sauce.
Step 3: Make the Cheese Sauce
In a medium saucepan, melt 3 tablespoons of butter over medium heat, then add 2 cloves of minced garlic. Sauté for about 1 minute until fragrant. Next, whisk in 1/2 teaspoon of salt, 1/8 teaspoon of ground black pepper, and 2 tablespoons of flour. Mix until smooth, cooking for another minute before slowly pouring in 1 cup of milk while continually stirring until the mixture thickens and begins to bubble.
Step 4: Stir in the Cheddar Cheese
Once the cheese sauce thickens, remove it from heat and fold in 2 cups of shredded cheddar cheese. Stir until the cheese is fully melted and the sauce becomes creamy and gooey. This vibrant, cheesy mixture is the heart of your Baked Mac and Cheese Cups, ensuring each bite is full of flavor.
Step 5: Combine with Pasta
Gently mix the cooked pasta into the cheese sauce until every piece is generously coated. This step ensures that the pasta receives that delectable cheesy goodness. Use a spatula to help combine thoroughly, ensuring none of the pasta is left unadorned.
Step 6: Fill the Muffin Tin
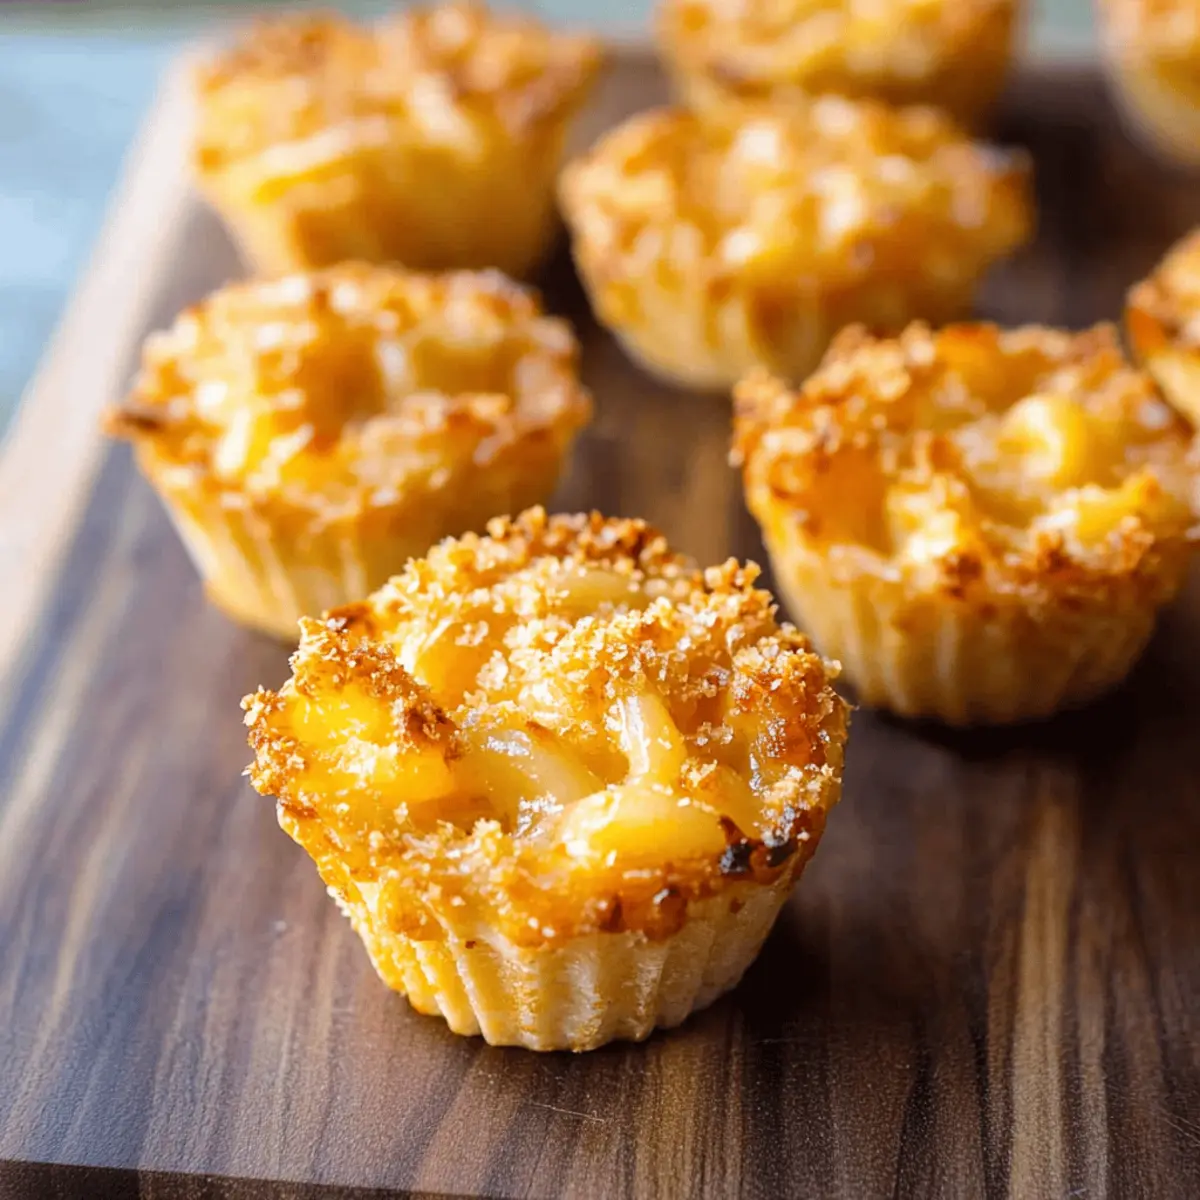
Using a spoon or a small ice cream scoop, fill each greased muffin cup with the mac and cheese mixture, pressing down lightly to pack it in. This ensures that each Baked Mac and Cheese Cup holds its shape while baking. Aim to fill each cup to the top, creating generous, cheesy portions.
Step 7: Add the Crunchy Topping
Sprinkle 1/4 cup of breadcrumbs evenly over the top of each filled muffin cup. The breadcrumbs will create a delightful crunchy topping, adding texture to your Baked Mac and Cheese Cups. For an extra touch, feel free to drizzle a tiny bit of melted butter over the breadcrumbs for added flavor.
Step 8: Bake to Golden Perfection
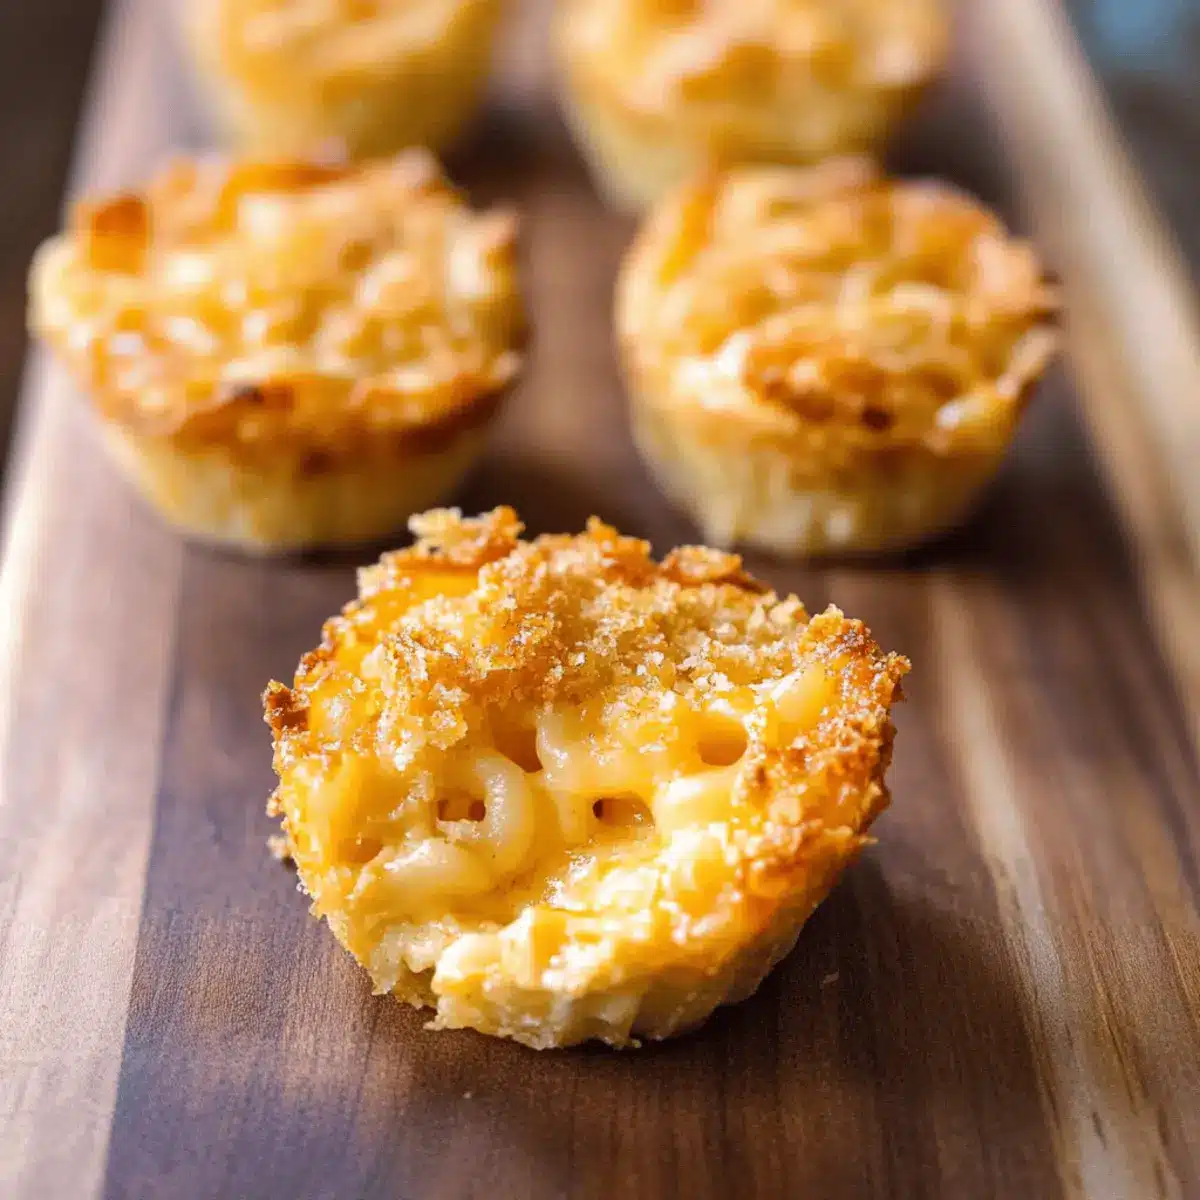
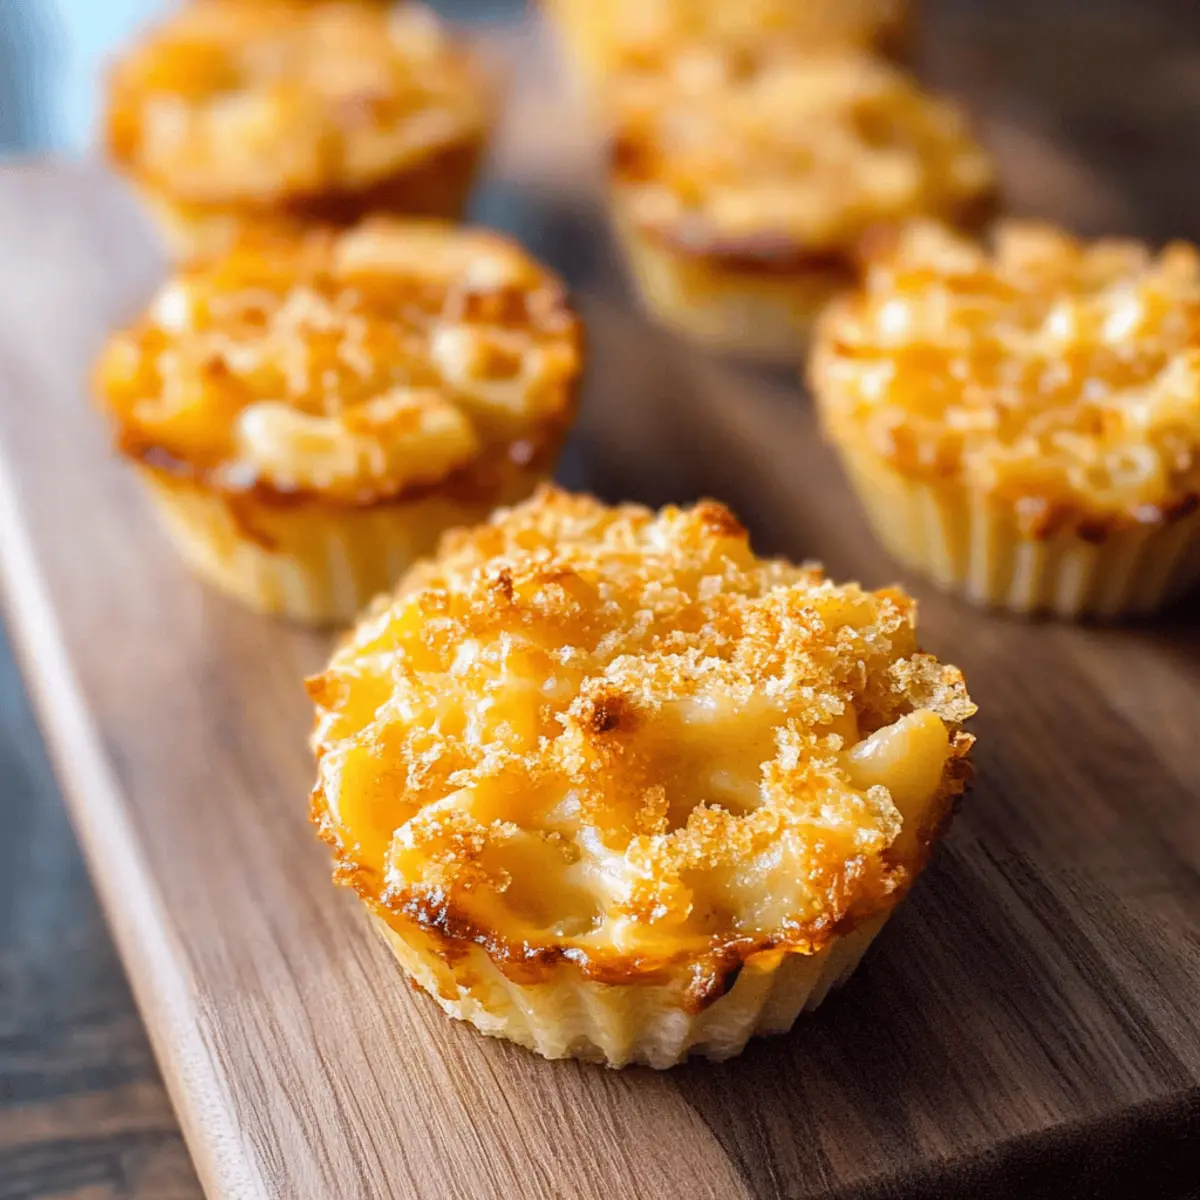
Place the muffin tin in the preheated oven and bake for 30-35 minutes or until the tops are a beautiful golden brown. You’ll know they are ready when the breadcrumbs are crisped and the cheesy aroma fills your kitchen, inviting everyone to gather around for a tasty treat.
Step 9: Cool and Serve
Allow your Baked Mac and Cheese Cups to cool for a few minutes before removing them from the muffin tin. Use a butter knife around the edges to gently loosen them if needed. Serve these cheesy delights warm, ideal for a fun appetizer or snack that everyone will love!
Expert Tips for Baked Mac and Cheese Cups
• Pasta Choice: Using small pasta shapes like shells or elbows makes filling them easier and improves the overall texture of your Baked Mac and Cheese Cups.
• Fresh Cheese: Always shred cheese from a block instead of using pre-shredded varieties. This ensures a creamier sauce without unwanted preservatives that can affect meltability.
• Cooling Time: Allow the cups to cool for a few minutes after baking. This step helps them set and makes them easier to remove from the muffin tin without falling apart.
• Storage: Leftovers can be stored in an airtight container for up to 2-3 days in the fridge. Reheat for quick snacks or meals that are just as delicious as when first made!
• Experiment with Add-ins: Feel free to mix in cooked vegetables or different cheese varieties to customize your Baked Mac and Cheese Cups. This adds flavor and nutrition to your dish!
Baked Mac and Cheese Cups Variations
Inviting a little creativity into your cooking can transform your Baked Mac and Cheese Cups into something irresistibly unique!
- Gluten-Free: Substitute regular pasta and breadcrumbs for gluten-free options to cater to dietary restrictions.
- Vegetarian Boost: Add sautéed vegetables, like spinach or bell peppers, for a nutritious and colorful twist.
- Cheese Variety: Mix different cheeses such as Gouda, Monterey Jack, or Pepper Jack for an exciting flavor profile.
- Spicy Kick: Incorporate diced jalapeños or a dash of cayenne pepper to infuse some heat into your cheesy cups.
- Herb Infusion: Stir in fresh herbs like basil, thyme, or chives to elevate the flavor and add a touch of freshness.
- Protein Power: Add cooked chicken, bacon, or a plant-based protein for a heartier bite that satisfies hunger.
- Mini Mac: Make bite-sized versions using small pasta shapes like orzo or ditalini, perfect for parties or kids’ events.
- Crunchy Topping Alternatives: Swap breadcrumbs for crushed crackers, panko, or even cornflakes for an unexpected textural twist.
These adjustments will keep the essence of classic comfort food while winning over the taste buds of friends and family. For a delightful pairing, consider serving your cheesy delights alongside a fresh salad or some flavorful Bacon Cream Cheese for a fun brunch!
What to Serve with Baked Mac and Cheese Cups
Your delightful Baked Mac and Cheese Cups deserve the perfect companions to create a well-rounded meal experience.
-
Fresh Garden Salad: A medley of crisp greens and colorful veggies provides a refreshing contrast to the richness of the mac and cheese. Drizzle with a light vinaigrette to elevate the flavors!
-
Roasted Vegetables: Simple roasted asparagus or brussels sprouts, seasoned with olive oil and garlic, add a savory touch that complements the creamy bites perfectly.
-
Homemade Garlic Bread: Crunchy on the outside and soft inside, this bread is perfect for scooping up some cheesy goodness, enhancing your snacking experience.
-
Creamy Tomato Soup: A comforting bowl of tomato soup pairs deliciously with your Baked Mac and Cheese Cups, creating a nostalgic combination reminiscent of childhood lunches.
-
Cold Fruit Salad: Refreshing and bright, a fruit salad of seasonal berries cuts through the richness of the cheese, providing a naturally sweet and tart contrast.
-
Zesty Limeade: This tangy drink adds a burst of flavor to your meal, serving as a cool refreshment that cleanses the palate between bites.
-
Chocolate Chip Cookies: Finish your meal with these warm, gooey cookies. Their sweetness will be the icing on the cake after enjoying your savory mac and cheese!
Each of these pairings enhances the overall experience, transforming your gathering into a memorable occasion filled with delicious flavors!
Make Ahead Options
These Baked Mac and Cheese Cups are perfect for busy home cooks looking to save time without sacrificing flavor! You can prepare the entire mixture up to 24 hours in advance; simply follow the recipe until filling the muffin tin. Cover the filled cups tightly with plastic wrap or foil and refrigerate. When ready to bake, remove them from the fridge and let them sit at room temperature for about 15 minutes before baking, which helps maintain that gooey texture. For those needing even more flexibility, freeze the filled cups before baking for up to 3 months—just add a few extra minutes to the baking time if cooking from frozen. You’ll enjoy delicious, cheesy bites with minimal effort!
How to Store and Freeze Baked Mac and Cheese Cups
Fridge: Store leftovers in an airtight container for up to 2-3 days. This ensures that your Baked Mac and Cheese Cups remain fresh and delicious for snacking later.
Freezer: For longer storage, freeze uncooked cups in an airtight container. They can last up to 3 months in the freezer, just remember to increase baking time if cooking from frozen.
Reheating: To reheat, place the cups in a preheated oven at 350°F (175°C) for about 20-25 minutes, or until heated through and crispy on top. Warm, cheesy goodness awaits!
Make-Ahead Tip: Prepare your Baked Mac and Cheese Cups ahead of time, then freeze them before baking. This convenient option ensures you always have a tasty treat ready to go!
Baked Mac and Cheese Cups Recipe FAQs
What type of pasta works best for Baked Mac and Cheese Cups?
Absolutely! I recommend using smaller pasta shapes like shells, elbows, or gemelli. These shapes not only hold the cheese sauce well but also make it easier to fill your muffin cups, ensuring each bite is deliciously cheesy.
How should I store leftover Baked Mac and Cheese Cups?
Very simple! Just place the leftover cups in an airtight container and store them in the refrigerator for up to 2-3 days. This way, you can enjoy those cheesy bites again later without losing any flavor or texture.
Can I freeze Baked Mac and Cheese Cups?
Yes, you can! For longer storage, freeze uncooked cups in an airtight container. They can last up to 3 months in the freezer. Just remember to increase the baking time by about 5-10 minutes when cooking from frozen. You’ll still get that crispy top and gooey inside!
What if my cheese sauce doesn’t thicken properly?
If your cheese sauce isn’t thickening as expected, it could be due to not cooking the flour long enough or adding the milk too quickly. Make sure you whisk the flour into the melted butter until smooth and cook it for about a minute before slowly adding the milk while constantly stirring. This will help create a smooth and creamy sauce.
Are these Baked Mac and Cheese Cups suitable for gluten-free diets?
Absolutely! You can easily adapt this recipe by using gluten-free pasta and breadcrumbs. Just check the labels on your ingredients to ensure they’re gluten-free, and you’ll have a delightful snack that everyone can enjoy.
How can I add variety to the flavor of my Baked Mac and Cheese Cups?
The more the merrier! Feel free to experiment with different cheese blends, such as Monterey Jack or Gouda, for unique flavors. You can also toss in cooked vegetables like broccoli or spinach to boost nutrition and flavor, making each batch distinctly yours!
Baked Mac and Cheese Cups: Cheesy Bites Everyone Will Love
Ingredients
Equipment
Method
- Preheat your oven to 350°F (175°C) and grease a muffin tin with butter.
- Bring salted water to a rolling boil in a large pot and cook 8 ounces of pasta until al dente, about 6-8 minutes. Drain and set aside.
- In a medium saucepan, melt 3 tablespoons of butter over medium heat, add 2 cloves of minced garlic, and sauté for 1 minute. Whisk in 1/2 teaspoon of salt, 1/8 teaspoon of ground black pepper, and 2 tablespoons of flour, cooking for another minute.
- Slowly pour in 1 cup of milk while continually stirring until the mixture thickens and bubbles.
- Remove from heat and fold in 2 cups of shredded cheddar cheese until fully melted and creamy.
- Gently mix the cooked pasta into the cheese sauce, ensuring every piece is coated.
- Fill each greased muffin cup with the mac and cheese mixture, pressing down lightly.
- Sprinkle 1/4 cup of breadcrumbs evenly over the top of each filled muffin cup.
- Bake for 30-35 minutes or until the tops are golden brown. Allow to cool for a few minutes before serving.
Leave a Reply