
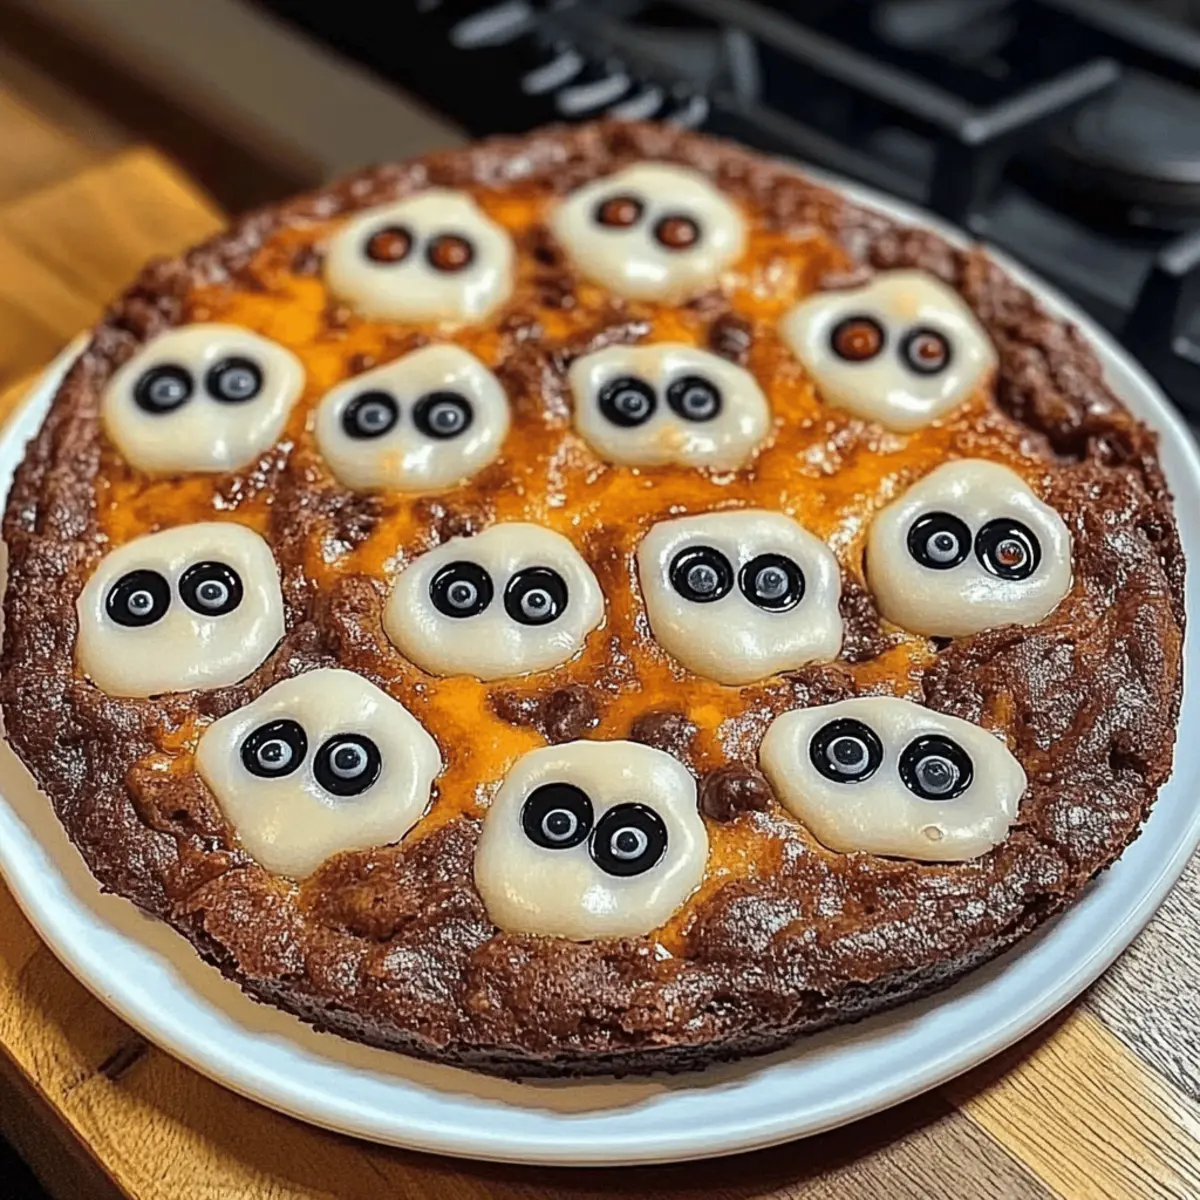
In the midst of autumn’s chill, there’s a hauntingly fun twist on a classic favorite that’s ready to steal the show—meet my delightful Pizza Ghosts! These creepy little bites are the ultimate easy Halloween snacks, bringing a spooky yet tasty vibe to your party spread. Perfectly customizable, you can whip them up in no time, making them an ideal choice for busy home chefs like us. Each ghostly treat offers a delightful combo of cheesy goodness and playful presentation that’s sure to impress both kids and adults. So, are you ready to dive into a world of whimsical flavors and charmingly eerie designs? Let’s conjure up some delicious fun this Halloween!

Why You’ll Love These Pizza Ghosts?
Easy to Make: With just a few ingredients, these Pizza Ghosts are a breeze to whip up, making them perfect for busy parents or home chefs.
Customizable Delight: You can easily adapt the toppings to suit your family’s preferences, ensuring everyone enjoys their spook-tacular treat.
Fun Presentation: Their ghostly shape adds a playful touch to your Halloween spread, sparking joy and excitement among guests of all ages.
Cheesy Goodness: Each bite is a warm, melted cheese experience that combines comfort with a festive twist.
Crowd-Pleasing Flavor: These little beauties are not only visually appealing but also a guaranteed hit at any Halloween party. So, why not pair them with some boo-ffalo chicken dip? It’s a winning combination!
Pizza Ghosts Ingredients
For the Dough
• Pizza Dough – This is the base for our spooky treats; store-bought or homemade works well!
For the Toppings
• Mozzarella Cheese – Melted cheese gives our ghosts that oozy, ghostly look; opt for fresh mozzarella for extra flavor!
• Olive Slices – Use these as eyes for your ghosts, bringing them to life with a fun, spooky expression.
• Pizza Sauce – A tangy sauce to spread underneath the cheese; feel free to substitute with marinara or spaghetti sauce.
Optional Garnishes
• Fresh Basil – Add a sprinkle for a pop of color and fresh flavor; it also resembles a spooky vine!
• Red Pepper Flakes – For those who like a little heat; they can add a devilish kick to your Pizza Ghosts!
These Pizza Ghosts are the perfect easy Halloween snacks that are sure to be a hit at your party!
Step‑by‑Step Instructions for PIZZA GHOSTS
Step 1: Prepare the Dough
Begin by preheating your oven to 425°F (220°C). Roll out your pizza dough on a floured surface to about ¼ inch thick. Using a ghost-shaped cookie cutter or a sharp knife, cut out fun ghost shapes from the dough. Place these ghostly forms on a parchment-lined baking sheet, ready for their spooky toppings.
Step 2: Add the Sauce
Spread a thin layer of pizza sauce onto each ghost shape, leaving the edges free for the melted cheese to bubble up. This tangy sauce will not only enhance the flavor of your Pizza Ghosts but also create a delightful base for the oozy cheese. Ensure even coverage for a tasty result!
Step 3: Layer the Cheese
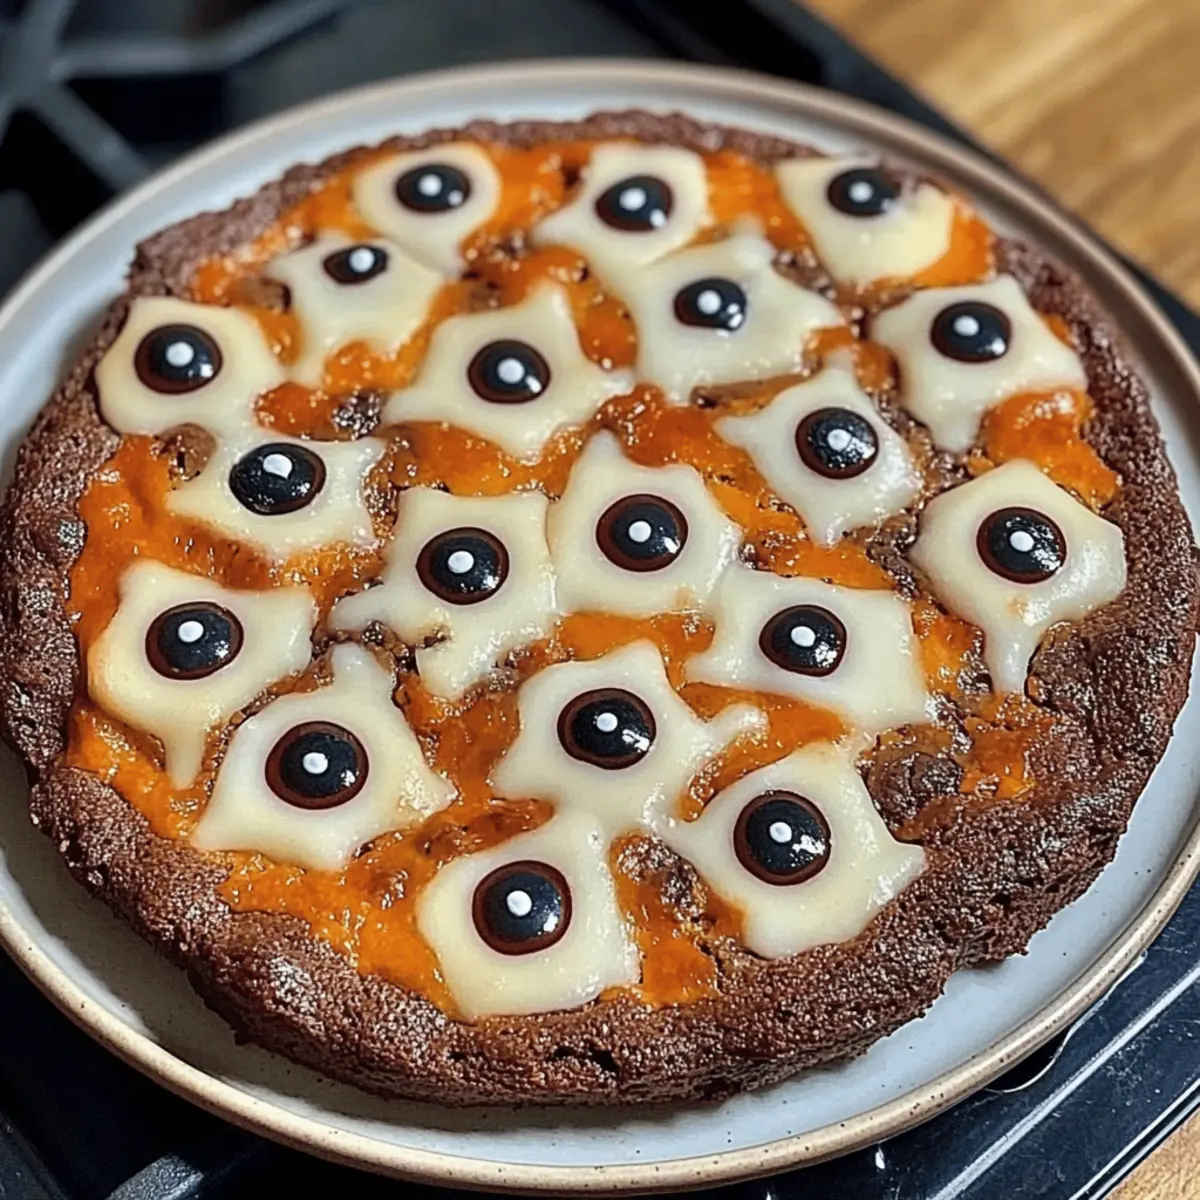
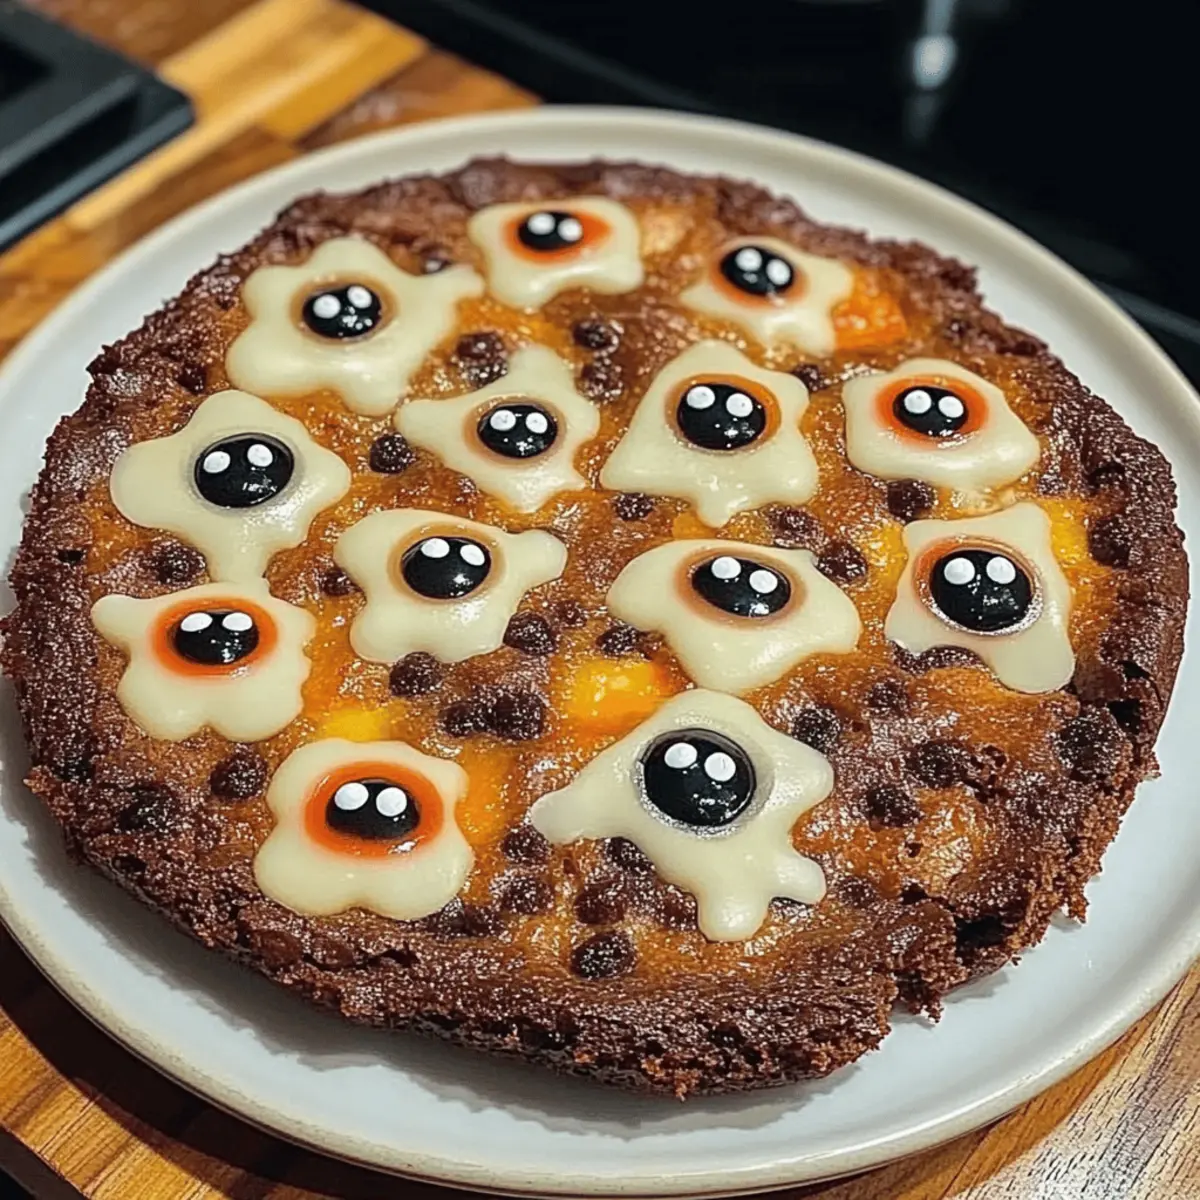
Now, generously sprinkle shredded mozzarella cheese over each ghost, covering the sauce completely. The more cheese, the better for that gooey ghostly look! As you stack, feel free to pile it higher on the ghost bodies for extra meltiness during baking.
Step 4: Create the Eyes
To bring your Pizza Ghosts to life, place two olive slices on each one to serve as their spooky eyes. Position them slightly above the center of the ghost, ensuring they stand out well against the melted cheese. This playful touch will add character and charm to your creative Halloween snacks.
Step 5: Bake the Ghosts
Carefully transfer your baking sheet to the preheated oven and bake for 10–12 minutes, or until the cheese is bubbly and golden brown. Keep an eye on them near the end to avoid overbaking. Once done, the sight of these ghostly treats will surely be a fantastic addition to your Halloween spread!
Step 6: Garnish and Serve
Remove the Pizza Ghosts from the oven and let them cool for a couple of minutes. If desired, sprinkle with fresh basil or a dash of red pepper flakes for a festive flair. Then, proudly arrange them on a Halloween-themed platter and serve immediately for a delightful spooky treat!
What to Serve with Pizza Ghosts?
There’s more to a Halloween feast than just spooky treats—let’s create a delightful spread that captivates the senses!
-
Boo-ffalo Chicken Dip: This rich, creamy dip adds bold flavors to your table. It’s a comfort-food classic that pairs perfectly with the cheesy Pizza Ghosts, making for an irresistible experience.
-
Spiderweb Guacamole: Fresh and creamy, this guacamole not only fits the Halloween theme but also balances the richness of the pizza. Serve it with colorful tortilla chips for a cheerful contrast.
-
Witch’s Brew Punch: A refreshing drink that plays on the festive theme, this sparkly, fruity punch will enchant both kids and adults alike, quenching thirst while adding a magical touch.
-
Caramel Apples: This timeless treat brings a sweet crunch to your Halloween table. The combination of tart apples and gooey caramel will delight your guests after savoring savory bites.
-
Pumpkin Spice Muffins: These moist, spiced muffins offer seasonal warmth and comfort. They provide a perfect sweet contrast alongside your Pizza Ghosts while allowing for a festive fall vibe.
-
Cheesy Garlic Breadsticks: Soft and aromatic, these breadsticks are perfect for dunking into marinara or pizza sauce. Their cheesy goodness pairs nicely with the playful ghostly treats.
-
Halloween-themed Fruit Salad: Brighten up your spread with a colorful fruit salad, using seasonal fruits like oranges, pears, and pomegranates. It adds freshness while being visually captivating in a spooky bowl.
Every item on this list complements the fun and flavors of your Pizza Ghosts, ensuring a memorable Halloween gathering that your guests will love!
How to Store and Freeze Pizza Ghosts
Fridge: Store leftover Pizza Ghosts in an airtight container for up to 3 days. Reheat in the oven for a crispy texture, or microwave for quicker enjoyment.
Freezer: If you want to prepare ahead, freeze unbaked Pizza Ghosts on a baking sheet until solid, then transfer to a freezer bag. They’ll keep well for up to 2 months.
Reheating: For the best results, reheat baked Pizza Ghosts in a 350°F (175°C) oven for about 10 minutes until warmed through and the cheese is melty again.
Make-Ahead: You can prepare the Pizza Ghosts in advance but do not bake them until the day of your Halloween party for the ultimate freshness and flavor!
Variations & Substitutions for Pizza Ghosts
Feel free to get creative and personalize these delightful Pizza Ghosts to suit your taste buds!
-
Dairy-Free: Swap mozzarella cheese with dairy-free cheese alternatives to make these ghosts suitable for lactose-sensitive guests.
-
Add a Protein Boost: Incorporate cooked sausage or pepperoni under the cheese for a heartier option. This will make your ghostly creations not only fun but filling!
-
Sweet Treat Twist: Replace savory toppings with sweet options like Nutella and mini marshmallows for a delicious dessert ghost. Perfect for those with a sweet tooth at your party!
-
Use Flatbreads: If you’re short on time, opt for pita bread or bagels instead of pizza dough. Simply cut out ghost shapes, and you’re ready to bake!
-
Seasoned Options: Mix in Italian herbs or garlic powder to your dough for added flavor. A little extra seasoning elevates your Pizza Ghosts with delicious aromatics!
-
Veggie Variations: Top with sliced bell peppers, mushrooms, or spinach before adding cheese. These can add color and nutrition while keeping the spooky fun in full swing!
-
Spicy Kick: Increase the drama by adding jalapeños or a drizzle of hot sauce. A little heat makes your Pizza Ghosts a thrilling treat!
-
Low-Carb Version: Use cauliflower crust instead of traditional dough for a scrumptious gluten-free option. This swap keeps it both festive and healthy!
These variations will allow you to cater to dietary needs while bringing a world of flavors to your Halloween party. Want to elevate your spread further? Pair these ghosts with a rich boo-ffalo chicken dip for a match made in heaven!
Tips for the Best Pizza Ghosts
-
Dough Choice: Use store-bought pizza dough for convenience or make your own for a personal touch. Just avoid thick dough, as it may not bake evenly.
-
Cheese Layering: Don’t skimp on the mozzarella! A generous layer ensures that your Pizza Ghosts achieve that oozy, ghostly appearance.
-
Olive Placement: For even cuteness, position olive slices right above the center of each ghost. This way, they won’t get lost in the cheese and will pop beautifully against the white.
-
Baking Time: Keep a close eye on your ghosts while they bake. Aim for gooey and golden cheese; overbaking can dry them out.
-
Creative Garnishes: Enhance your Pizza Ghosts with fresh basil or red pepper flakes, adding a pop of color and a hint of flavor to your spooky treats.
These expert tips will help you create the most delightful and creepy Pizza Ghosts for your Halloween celebration!
Make Ahead Options
These Pizza Ghosts are perfect for meal prep, allowing you to savor Halloween fun without the last-minute rush! You can prepare the ghost shapes (cut from the pizza dough) up to 24 hours in advance; simply store them wrapped in plastic wrap in the refrigerator. Additionally, you can pre-spread the pizza sauce on the ghost shapes as well (just keep it covered to maintain freshness). When it’s time to impress your guests, simply layer the mozzarella cheese and olive eyes before baking at 425°F (220°C) for 10–12 minutes. This way, you’ll have delicious, spooky snacks ready to serve with minimal effort!
Pizza Ghosts Recipe FAQs
What should I look for when selecting pizza dough?
Absolutely! For the best results, look for pizza dough that’s smooth and elastic, indicating freshness. If using store-bought dough, check the expiration date and opt for refrigerated varieties over frozen for easier handling. If making your own, a good quality flour will provide the best texture.
How should I store leftover Pizza Ghosts?
To keep your Pizza Ghosts fresh, store them in an airtight container in the refrigerator for up to 3 days. When you’re ready to enjoy them again, reheat them in the oven briefly to restore their crispy texture. A quick microwave reheat is also an option, but it may result in a softer crust.
Can I freeze unbaked Pizza Ghosts?
Yes! If you want to prepare your treats ahead of time, freeze unbaked Pizza Ghosts. Place them on a baking sheet in a single layer until solid, then transfer to a freezer bag. They can be kept for up to 2 months. Bake them straight from the freezer, adding a couple of extra minutes to the baking time.
What if my cheese doesn’t melt well?
Very! If your cheese isn’t melting nicely, it could be due to the type you’re using. Make sure to utilize fresh mozzarella, as it has better melting properties. Additionally, ensuring that your oven is preheated to the right temperature (425°F) is crucial, as lower temperatures can result in uneven melting.
Can I make these Pizza Ghosts vegetarian-friendly?
Absolutely! These spooky snacks are naturally vegetarian if you focus on the base ingredients. Just ensure that your pizza sauce and any additional toppings you choose, like fresh basil or red pepper flakes, don’t contain any hidden meat products.
What’s the best way to reheat Pizza Ghosts without drying them out?
For optimal taste, reheat your Pizza Ghosts in a preheated oven at 350°F (175°C) for about 10 minutes. This method revives the crispy texture of the dough while melting the cheese perfectly. Avoid microwaving for extended periods, as it can make the crust chewy instead of delightful!
Pizza Ghosts: Spook-tacular Mini Treats for Your Halloween Bash
Ingredients
Equipment
Method
- Preheat your oven to 425°F (220°C). Roll out your pizza dough to about ¼ inch thick and cut out ghost shapes using a cookie cutter or knife. Place on a parchment-lined baking sheet.
- Spread a thin layer of pizza sauce onto each ghost shape, leaving the edges free for cheese.
- Generously sprinkle shredded mozzarella cheese over each ghost, covering the sauce completely.
- Place two olive slices on each ghost as eyes, positioned slightly above the center.
- Transfer the baking sheet to the oven and bake for 10–12 minutes until the cheese is bubbly and golden brown.
- Remove from the oven, let cool briefly, and garnish with fresh basil or red pepper flakes before serving.
Leave a Reply