
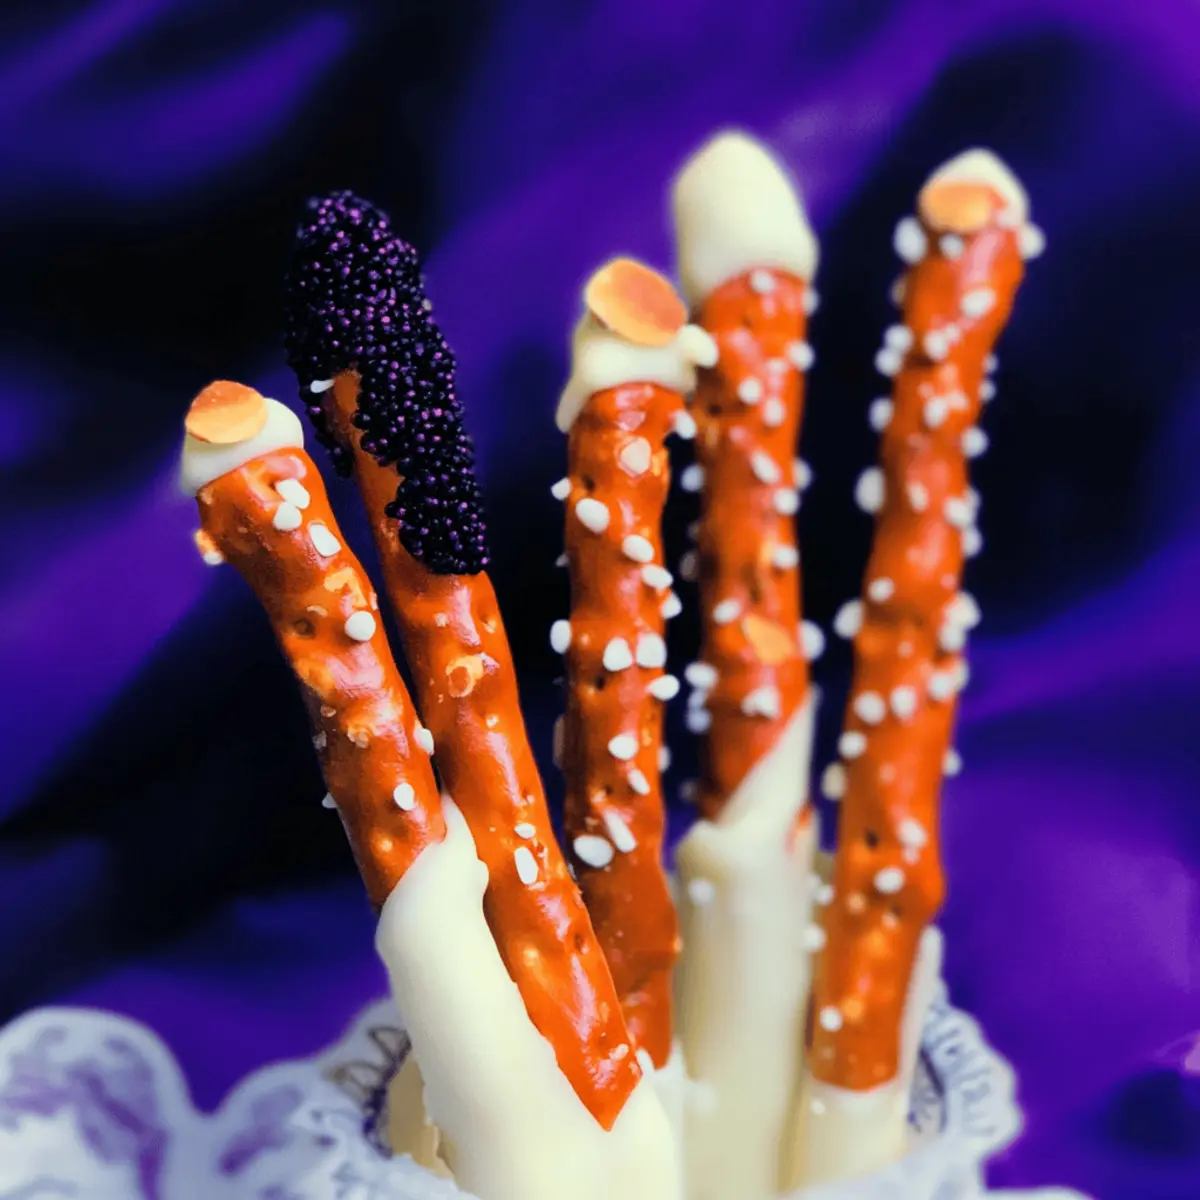
As the leaves begin to turn and the air grows crisp, I can’t help but get excited about Halloween – my favorite season for whimsical treats! One of the best creations to emerge from my kitchen during this time is Witch Finger Pretzel Rods. These spooky snacks are not only quick and easy to whip up, but they also make a delightful centerpiece at any Halloween gathering, ensuring both kids and adults will delight in their eerie charm. With just 20 minutes of prep, you can transform simple pretzel rods into ghoulish delights that are perfect for your next haunted party or festive night in. Ready to add a dash of frightful fun to your treat table? Let’s dive into this fang-tastic recipe!
Why Are Witch Finger Pretzel Rods Fun?
Whimsical Charm: These treats are not just snacks; they’re conversation starters! Quick Prep: In just 20 minutes, you can create these spooky delights, perfect for last-minute gatherings. Customizable Colors: Enjoy endless creative options by using various candy melts. Kid-Friendly Fun: Involve the little ones in the decorating process for a memorable kitchen experience. Crunchy and Sweet: The delightful contrast of pretzels and chocolate will enchant both kids and adults alike! For more Halloween inspiration, check out my easy Halloween cookies for delicious festive ideas.
Witch Finger Pretzel Rod Ingredients
Get ready to create spooky treats!
For the Pretzel Rods
- Large Pretzel Rods – These provide the quirky structure for your witchy fingers; longer rods give a better presentation.
- Almond Slices – These act as the “nails,” adding a realistic creepy detail and a satisfying crunch.
For the Coating
- White Candy Melts (or White Chocolate) – A sweet and smooth coating to create the spooky look; feel free to substitute with other colors for Halloween flair.
- Purple and Orange Food Coloring – Tint the chocolate to suit your Halloween theme; optional but adds that extra splash of festivity!
For Decoration
- Halloween Sprinkles (orange and black) – These festive sprinkles add a decorative touch that enhances the overall appearance of your Witch Finger Pretzel Rods.
Get set to enjoy the eerie delights of these Witch Finger Pretzel Rods that will enthrall your guests at any spooky gathering!
Step‑by‑Step Instructions for Witch Finger Pretzel Rods
Step 1: Prepare the Baking Sheet
Start by lining a 9×13 inch baking sheet with parchment paper. This will prevent the Witch Finger Pretzel Rods from sticking as they cool. Make sure the parchment is smooth and covers the entire surface. Having this ready will streamline your coating process and keep your workspace organized.
Step 2: Melt the Candy Coating
In a microwave-safe bowl, measure out your white candy melts (or white chocolate). Heat them in the microwave in 30-second intervals, stirring in between, until they are completely smooth and melted. This should take about 1-2 minutes. A silky consistency is key here to ensure even coating on your pretzel rods.
Step 3: Add Food Coloring
Once your candy melts are melted and smooth, add a few drops of purple or orange food coloring to achieve your desired spooky hue. Stir thoroughly until the color is uniformly mixed into the melted chocolate. This step is your chance to get creative with the appearance of your Witch Finger Pretzel Rods for Halloween!
Step 4: Coat the Pretzel Rods
Take a large pretzel rod and dip one end into the melted chocolate, twisting it gently to ensure an even coat. Leave about an inch of the pretzel rod uncoated at the other end to create the “finger” look. Repeat this process for all pretzel rods, placing them on the prepared baking sheet as you go.
Step 5: Add Decorations
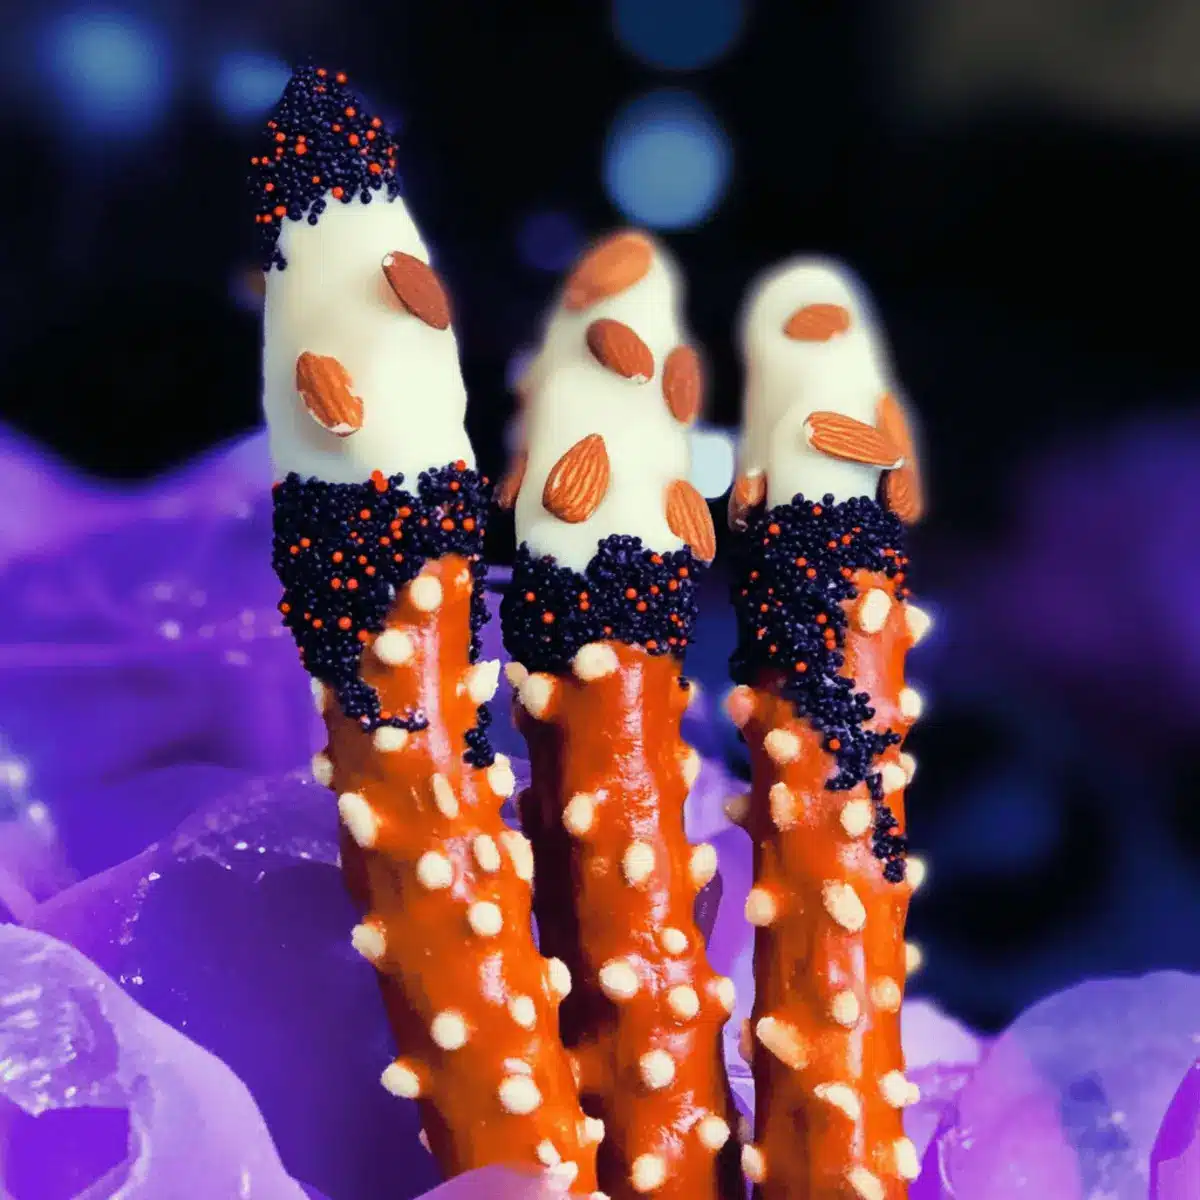
While the melted chocolate is still warm, sprinkle Halloween-themed sprinkles on the coated part of the pretzel rods. Press an almond slice at the tip of each coated pretzel to mimic creepy fingernails. This whimsical detail will make your Witch Finger Pretzel Rods look spookier while adding a delightful crunch.
Step 6: Allow to Set
Let your Witch Finger Pretzel Rods sit at room temperature for about 10-15 minutes until the chocolate hardens. For a quicker option, place them in the freezer for 30-40 minutes. Once the chocolate is set and firm, they are ready to be served at your Halloween gathering or festive party!
Make Ahead Options
These Witch Finger Pretzel Rods are perfect for meal prep enthusiasts looking to save time on busy days! You can make the pretzel rods up to 24 hours in advance by following the first five steps of the recipe—prepare and dip the pretzels, add sprinkles, and place the almond slices as fingernails. Arrange them in an airtight container to maintain their crunchiness, ensuring they’re stored at room temperature. When ready to serve, simply allow them to sit on the counter for a few minutes, and then enjoy these spooky treats that are just as delightful as when they were freshly made. This makes your Halloween festivities smoother and more enjoyable!
How to Store and Freeze Witch Finger Pretzel Rods
Room Temperature: Keep your Witch Finger Pretzel Rods in an airtight container at room temperature for up to a week. This helps maintain their crunchy texture and sweetness.
Refrigeration: If the weather is humid, refrigerate your Witch Finger Pretzel Rods for added freshness. Just be aware that the chocolate coating may get slightly sticky.
Freezing: For longer storage, freeze the pretzel rods in a freezer-safe container for up to 2 months. Make sure to separate layers with parchment paper to prevent sticking.
Reheating: To enjoy them, simply let the frozen Witch Finger Pretzel Rods thaw at room temperature before serving, and they will be as delightful as the day you made them!
What to Serve with Witch Finger Pretzel Rods
These spooky snacks are perfect for creating an unforgettable Halloween feast filled with delightful flavors and eerie charm.
-
Monster Munch Mix: A crunchy blend of popcorn, pretzels, and candies for a fun, munchable addition to your spooky spread that pairs perfectly with the salty sweetness of the pretzel rods.
-
Ghoulish Grapes: Spear green grapes with toothpicks, making them look like witch fingers—fun for kids and a refreshing complement to the rich sweetness.
-
Witch’s Brew Punch: A fizzy green punch with lime sherbet and soda adds a refreshing and festive drink option that enhances the Halloween theme.
-
Creepy Cheese Platter: A colorful array of cheeses and crackers would provide a lovely contrast, offering a savory touch to your dessert table.
-
Pumpkin Cupcakes: Soft, spiced pumpkin cupcakes topped with cream cheese frosting embody the flavors of fall and pair nicely with chocolate treats.
-
Black Cat Cookies: Decorated sugar cookies shaped like black cats add another whimsical element for your guests, maintaining the spooky theme while offering a variety of textures.
-
Spooky Fruit Salad: A mixed fruit salad with blackberries, oranges, and ghostly yogurt dressing is a refreshing way to balance out the sweetness of your Witch Finger Pretzel Rods.
Witch Finger Pretzel Rods Variations
Feel free to unleash your creativity and customize these spooky treats to your heart’s content!
- Candy Melt Colors: Use green or black candy melts for a different ghoulish appearance. The possibilities are endless!
- Nutty Nails: Swap out almond slices for cashew slices, chocolate chips, or even mini marshmallows for a fun twist. Each option brings a unique flavor and texture.
- Gummy Worms: Add gummy worms alongside the sprinkles for a truly creepy effect. These little treats will definitely send shivers down spines!
- Spicy Kick: If you love a little heat, consider drizzling some spicy chocolate over the top. The combination of sweet and spicy will surprise your taste buds!
- Go Vegan: Use dairy-free chocolate and skip the almond slices for an inclusive treat that everyone can enjoy! They’ll still boast the same eerie charm.
- Alternative Dipping: Try dipping the pretzel rods in caramel instead of chocolate, then roll them in crushed nuts or sprinkles. This gives a delightful caramel twist!
- Cereal Coating: After coating in chocolate, roll the pretzels in crushed cereal for a crunchy texture that both kids and adults will love. It’s a playful and crunchy addition!
- Seasonal Sprinkles: Change up the sprinkles according to different seasons; white and blue for winter or red and green for Christmas, keeping the fun alive beyond Halloween with a bit of creativity!
For more festive ideas, check out my easy Halloween cookies for additional treats to round out your spooky gathering!
Expert Tips for Witch Finger Pretzel Rods
-
Candy Coating Consistency: A smooth coating is essential. If your melts are clumping, try adding a few drops of coconut oil to achieve a silky texture.
-
Food Coloring Caution: Mix food coloring thoroughly to avoid uneven color spots; too much coloring can alter the chocolate’s texture, leaving it less appealing.
-
Custom Toppings: Get creative with your “nails”! Consider using cashew slices or even candy eyes for a fun twist, keeping your Witch Finger Pretzel Rods unique every time.
-
Presentation Perfection: For an eerie effect, use a toothpick to add details to the chocolate while it’s still warm. This enhances the creepy, realistic appearance of the witch fingers.
-
Storage Solutions: Keep your pretzel rods fresh by storing them in an airtight container at room temperature for up to a week. If you’re in a humid area, refrigerate to prevent stickiness.

Witch Finger Pretzel Rods Recipe FAQs
What is the best way to choose large pretzel rods?
Absolutely! When selecting large pretzel rods, look for rods that are sturdy and straight, with a nice golden-brown color. Avoid pretzel sticks as they are too short for this recipe and won’t give the desired witch finger effect.
How should I store Witch Finger Pretzel Rods?
I recommend placing your Witch Finger Pretzel Rods in an airtight container at room temperature for up to 7 days. This storage method maintains their crunchy texture and prevents the chocolate from melting. If you’re in a humid area, refrigerate them to avoid stickiness.
Can I freeze Witch Finger Pretzel Rods?
Certainly! To freeze your Witch Finger Pretzel Rods, place them in a freezer-safe container with layers separated by parchment paper to prevent sticking. They will stay fresh for up to 2 months. To thaw, just leave them at room temperature for about 30 minutes before serving.
What if my candy melts are clumping?
Very! If your candy melts are clumping during melting, don’t worry. You can add a few drops of coconut oil to the bowl while they are heating. This helps create a smooth and silky texture, ensuring your coating is even and glossy for the ultimate witchy look.
Are there any allergy considerations for Witch Finger Pretzel Rods?
Absolutely! If you’re making these treats for kids or guests with allergies, ensure the ingredients are safe. Substitute the almonds with pumpkin seeds for nut-free options, and check if the candy melts are gluten-free if needed. Always double-check food labels to avoid allergens.
Can I customize the colors of the candy melts?
Very much! You can use any color candy melts to match your Halloween theme. Try green for witch fingers or even black for a spooky effect! Just remember to stir in the food coloring well to achieve a uniform shade, making your treats both delicious and visually compelling.

Eerie Witch Finger Pretzel Rods: Spooky Treats in 20 Minutes
Ingredients
Equipment
Method
- Line a 9x13 inch baking sheet with parchment paper to prevent sticking.
- In a microwave-safe bowl, heat the white candy melts in 30-second intervals until smooth.
- Add purple or orange food coloring to achieve desired hue; stir thoroughly.
- Dip one end of each pretzel rod into the melted chocolate and leave 1 inch uncoated.
- Sprinkle Halloween-themed sprinkles on chocolate while warm and press an almond slice at the tip.
- Allow to set at room temperature for 10-15 minutes or in the freezer for 30-40 minutes.
Leave a Reply