
As autumn leaves begin to fall and pumpkin spice fills the air, there’s a sweet excitement that comes with Halloween festivities. That’s when I can’t resist whipping up these adorable Pumpkin Patch Dirt Cups. This no-bake dessert brings together layers of creamy chocolate pudding and crunchy crushed cookies, making it a crowd-pleaser at any gathering. With a simple preparation method, these cups capture the whimsy of the season, delighting both kids and adults alike. Plus, they’re perfect for a last-minute treat or a fun project to enjoy with little chefs in the kitchen. Who wouldn’t want to dig into a delicious cup of edible playfulness? Are you ready to make your own whimsical pumpkin patch?

Why Will You Love Pumpkin Patch Dirt Cups?
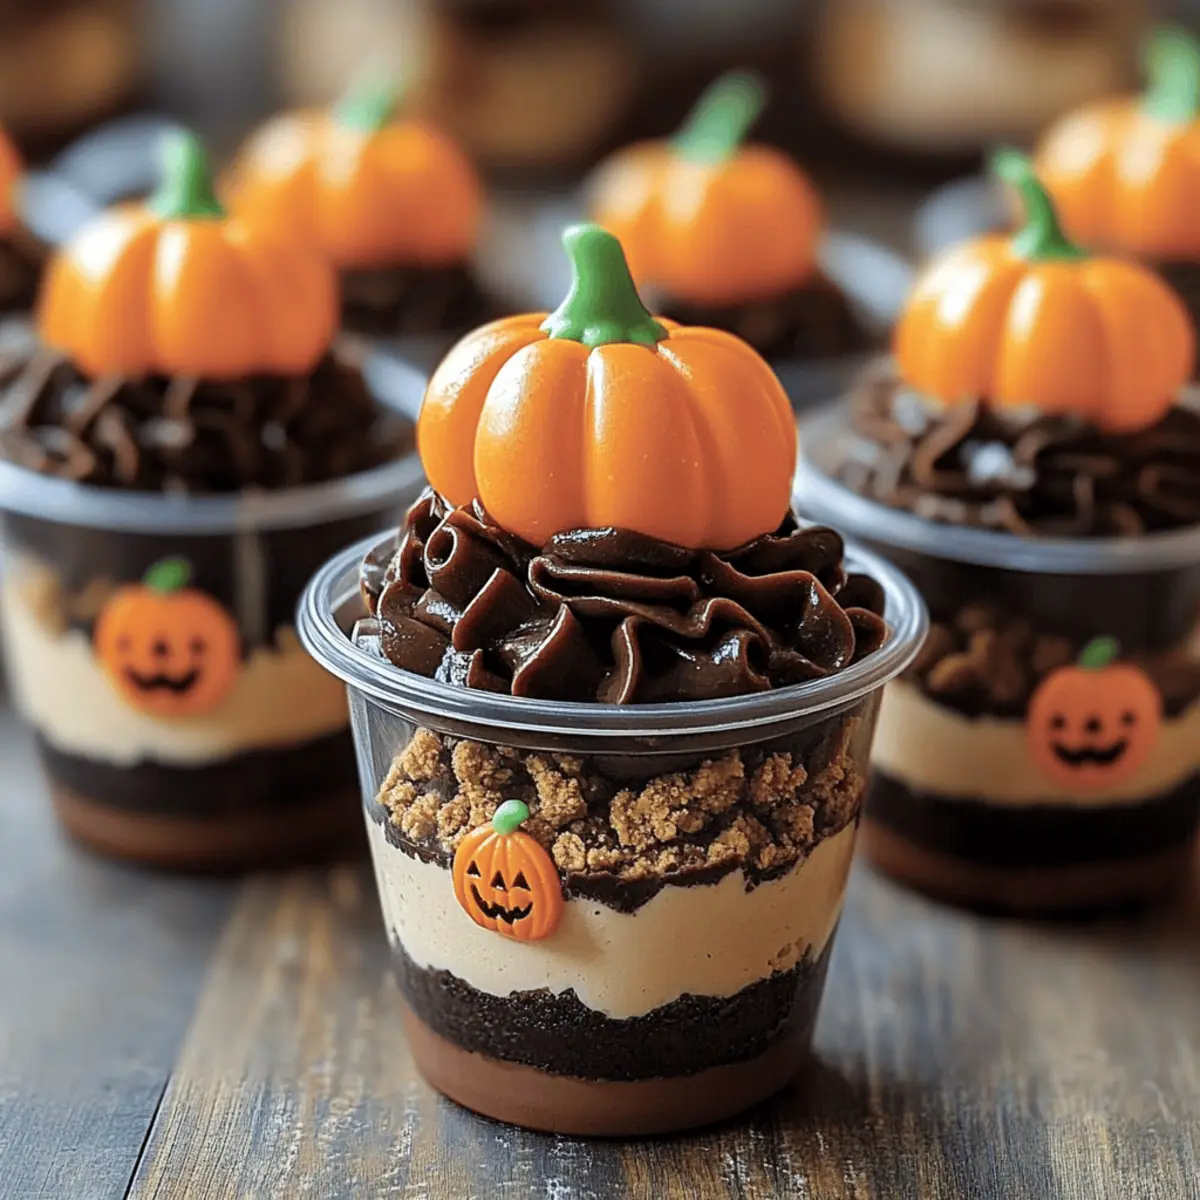
Whimsical Presentation: Each cup is a mini masterpiece, resembling a charming pumpkin patch that’s sure to impress your guests.
No-Bake Delight: Enjoy the ease of a no-bake dessert, making it perfect for a quick and stress-free preparation.
Kid-Friendly Fun: This recipe involves simple steps that make it a wonderful opportunity to involve children in the kitchen, creating sweet memories together.
Crowd-Pleasing Flavor: The combination of rich chocolate pudding and crunchy cookie layers is a guaranteed hit with family and friends, perfect for Halloween parties!
Versatile Twist: Feel free to mix it up and swap chocolate pudding for vanilla or pumpkin flavors for a seasonal twist. Whether you’re hosting a festive gathering or just wanting to treat yourself, these pumpkin patch dirt cups are sure to bring a smile. For another kid-friendly option, check out our Breakfast Granola Cups for a wholesome start to your day!
Pumpkin Patch Dirt Cups Ingredients
For the Pudding Layer
• Cold Milk – Essential for making the instant pudding creamy and smooth. Use any type of milk (almond, soy) for a non-dairy version.
• Instant Chocolate Pudding Mix – Provides structure and rich chocolate flavor. Can replace with vanilla pudding for a different taste.
• Whipped Topping (e.g., Cool Whip) – Adds lightness and creaminess to the pudding. Homemade whipped cream may be used for a richer flavor.
For the Dirt Layer
• Chocolate Sandwich Cookies (e.g., Oreos) – Crushed for the “dirt.” Use any chocolate cookie for a similar effect.
For the Decoration
• Candy Pumpkins – Themed decoration to mimic a pumpkin patch. Alternatives include orange gumdrops or mini marshmallows dyed orange.
• Green Frosting/Sprinkles (Optional) – For decorative vines. Not mandatory for the final appearance but enhances presentation.
For Serving
• Clear Plastic Cups – For displaying layers of the dessert. 8 oz size is ideal for individual servings.
Step‑by‑Step Instructions for Pumpkin Patch Dirt Cups
Step 1: Prepare the Pudding
In a large mixing bowl, combine the instant chocolate pudding mix with 2 cups of cold milk. Whisk vigorously for about 2 minutes until the mixture is smooth and thickened. You’ll know it’s ready when it has a creamy consistency and no lumps remain. This luscious pudding will be the first delicious layer of your Pumpkin Patch Dirt Cups.
Step 2: Fold in Whipped Topping
Gently add in 1 container of whipped topping to your pudding mixture. Using a spatula, carefully fold the whipped topping into the pudding, aiming for a light and fluffy texture. Be cautious not to overmix; you want the mixture to maintain its airy quality. This step enhances the creaminess and makes your pudding irresistible.
Step 3: Crush the Cookies
Place 15-20 chocolate sandwich cookies in a zip-top bag and crush them with a rolling pin until they resemble fine crumbs. Alternatively, you can use a food processor for a quick and even consistency. Set aside these cookie crumbs, as they will serve as the delightful “dirt” layer in your Pumpkin Patch Dirt Cups.
Step 4: Layer the Cups
Take your clear plastic cups and begin assembling the Pumpkin Patch Dirt Cups. Start by spooning a layer of the chocolate pudding mixture into each cup, filling it about halfway. Next, sprinkle a generous layer of crushed cookies over the pudding. Repeat this process, layering pudding and cookie crumbs until the cups are almost full, finishing with a top layer of cookie crumbs for that earthy look.
Step 5: Decorate with Pumpkins
Once you have filled the cups, it’s time for the fun part! Place a few candy pumpkins atop the final layer of cookie crumbs. For an extra touch of whimsy, you can pipe green frosting around the base of the pumpkins or sprinkle green sprinkles to mimic vines. This will transform your Pumpkin Patch Dirt Cups into a festive treat.
Step 6: Chill (Optional)
For the best flavor and texture, refrigerate your completed Pumpkin Patch Dirt Cups for about 20 minutes before serving. Chilling will allow the layers to set beautifully and enhance the overall delight of this dessert. If you are preparing them a day in advance, remember to store the cookie crumbs separately until you’re ready to layer, keeping them crunchy and fresh.

How to Store and Freeze Pumpkin Patch Dirt Cups
Fridge: Keep assembled Pumpkin Patch Dirt Cups covered in the refrigerator for up to 2 days. Add cookie crumbs and decorations just before serving for optimal freshness.
Room Temperature: It’s best to avoid leaving these cups at room temperature for more than 1 hour, as the creaminess of the pudding may spoil.
Make-Ahead: You can prepare layers (pudding and cookie crumbs) separately, store them in airtight containers in the refrigerator for up to 3 days, then assemble when ready to serve.
Freezer: While not ideal for freezing once assembled, you can freeze individual pudding layers in an airtight container for up to 1 month. Thaw in the fridge before serving.
Make Ahead Options
These Pumpkin Patch Dirt Cups are ideal for busy cooks looking to save time while still delivering a festive dessert! You can prepare the chocolate pudding layer and cookie crumbs up to 24 hours in advance, storing them separately in the refrigerator to maintain their texture. Simply mix the pudding and fold in the whipped topping for a creamy delight, then crush the cookies and keep them in an airtight container. When you’re ready to serve, layer the pudding and cookie crumbs in clear cups, decorate with candy pumpkins, and pipe on the green frosting. This way, you’ll have a charming dessert ready for Halloween gatherings with minimal last-minute effort!
What to Serve with Pumpkin Patch Dirt Cups
As you gather around the table with friends and family, consider these delightful side dishes and treats that will take your pumpkin patch celebration to the next level.
-
Crispy Apple Slices: Fresh and crunchy, apple slices provide a sweet contrast to the rich pudding, adding a refreshing crunch everyone can enjoy.
-
Halloween-Themed Fruit Skewers: Combine colorful seasonal fruits on skewers for a fun, healthy option. They add vibrant color and playful appeal to any dessert table.
-
Spiced Pumpkin Muffins: These moist and spiced muffins echo the flavors of the pumpkin theme, creating a cozy, homemade feel perfect for fall gatherings.
-
Cheesy Garlic Breadsticks: Golden brown and cheesy, these breadsticks pair beautifully, offering a savory bite that balances the sweetness of your Pumpkin Patch Dirt Cups.
-
Hot Chocolate or Apple Cider: Serve warm drinks alongside for a comforting experience that enhances the festive atmosphere, perfect for chilly autumn evenings.
-
Caramel Dipped Pretzels: The salty-sweet combination makes these treats a hit among guests, providing crunch and indulgence that complements the creamy dessert.
These options not only round out your meal but also create a delightful autumn dining experience that will keep guests smiling!
Pumpkin Patch Dirt Cups Variations
Feel free to unleash your creativity and make these delightful cups your own with these fun and easy twists!
-
Dairy-Free: Swap cold milk with almond or soy milk for a delightful non-dairy version that everyone can enjoy.
This ensures that those with dietary restrictions won’t feel left out of the Halloween fun. -
Pumpkin Flavor: Substitute chocolate pudding with pumpkin-flavored pudding mix for an extra seasonal touch.
This variation adds a cozy fall flavor that perfectly complements the theme of your dessert. -
Gummy Worms: Amp up the playful factor by adding gummy worms in between the layers for an edible surprise.
Children will be delighted to dig in and find these squirmy treats hiding among the “dirt!” -
Nutty Crunch: Add crushed nuts, like walnuts or pecans, between the layers for added texture and a nutty flavor.
This gives a satisfying crunch that elevates the simple dirt cups into a more sophisticated treat. -
Flavor Infusion: Mix in a teaspoon of vanilla extract or a hint of cinnamon to the pudding for a flavor enhancement.
This small addition can take your cups from good to unforgettable, filling your kitchen with a festive aroma. -
Chocolate Hazelnut: For a decadent twist, try a chocolate hazelnut spread like Nutella instead of pudding for creamy layers.
The rich flavor will surely steal the show and bring a smile to everyone’s face! -
Fruit Layer: Incorporate a layer of fruit, like crushed strawberries or raspberries, for a refreshing twist.
The natural sweetness of the berries contrasts beautifully with the chocolate, creating delightful flavor harmony. -
Savory Surprise: Roll out a savory version by swapping pudding for mousse made from hummus and switching cookies for crushed pita chips.
This unexpected twist can lead to a fun tasting experience that breaks the dessert mold.
No matter how you choose to customize, each variation will still capture the joyful spirit of the Pumpkin Patch Dirt Cups! For more playful recipes, check out our Breakfast Granola Cups to start your day with a smile!
Expert Tips for Pumpkin Patch Dirt Cups
-
Whisking Technique: Ensure to whisk the pudding constantly for at least 2 minutes to avoid lumps, resulting in a smoother, creamier texture.
-
Crunchy Layers: Assemble the cups close to serving time to keep the cookie crumbs crunchy; soggy cookies can ruin the experience!
-
Make Ahead: If preparing in advance, store the cookie crumbs separately until you’re ready to layer them in the cups for best results.
-
Presentation Matters: Use clear plastic cups to showcase those beautiful layers—it’s all part of the fun with Pumpkin Patch Dirt Cups!
-
Decorate Creatively: Let your kids help with adding candy pumpkins and green frosting; it’s a great way to make baking a memorable experience for everyone!
Pumpkin Patch Dirt Cups Recipe FAQs
What kind of milk should I use for Pumpkin Patch Dirt Cups?
Absolutely! You can use any type of milk for this recipe, including whole, almond, or soy milk. Just remember, the creamier the milk, the richer your pudding will be, so choose based on your personal preference!
How should I store my Pumpkin Patch Dirt Cups?
Keep your assembled Pumpkin Patch Dirt Cups tightly covered in the refrigerator for up to 2 days. However, it’s best to add the cookie crumbs and decorative elements right before serving to keep everything fresh and crunchy.
Can I freeze Pumpkin Patch Dirt Cups?
Very! While it’s not ideal to freeze the entire assembled cup due to the cookie texture, you can freeze just the pudding layer in an airtight container for up to 1 month. When you’re ready to enjoy, simply thaw in the fridge overnight before layering with cookies.
What if my pudding isn’t thickening properly?
If your pudding isn’t thickening after whisking it for the recommended 2 minutes, make sure you’re using cold milk as instructed—any warm milk will prevent it from setting as it should. If it’s still too runny, mix in a little bit more pudding mix and whisk until you achieve the right consistency!
Are there any dietary considerations I should be aware of?
Definitely! If you’re making these Pumpkin Patch Dirt Cups for a gathering, consider checking with your guests regarding allergies, particularly for dairy or gluten. You can easily make these dairy-free by using non-dairy milk and whipped toppings, and gluten-free by using gluten-free chocolate cookies!
How do I make Pumpkin Patch Dirt Cups more festive?
To amp up the fun and creativity, consider adding candy corn or gummy worms for an extra whimsical touch. You can also incorporate orange-colored sprinkles to enhance that pumpkin patch feel! If you’re feeling adventurous, you could even switch out the chocolate pudding for pumpkin-flavored pudding, giving it a seasonal twist!

Pumpkin Patch Dirt Cups: A Fun No-Bake Fall Treat
Ingredients
Equipment
Method
- In a large mixing bowl, combine the instant chocolate pudding mix with cold milk. Whisk vigorously for about 2 minutes until smooth and thickened.
- Gently fold in whipped topping into the pudding mixture avoiding overmixing.
- Crush the chocolate sandwich cookies in a zip-top bag with a rolling pin until fine crumbs form.
- Layer the cups with chocolate pudding, followed by cookie crumbs, repeating the process until nearly full.
- Decorate with candy pumpkins on top and add green frosting or sprinkles if desired.
- Chill the cups for about 20 minutes before serving for best flavor and texture.
Leave a Reply