
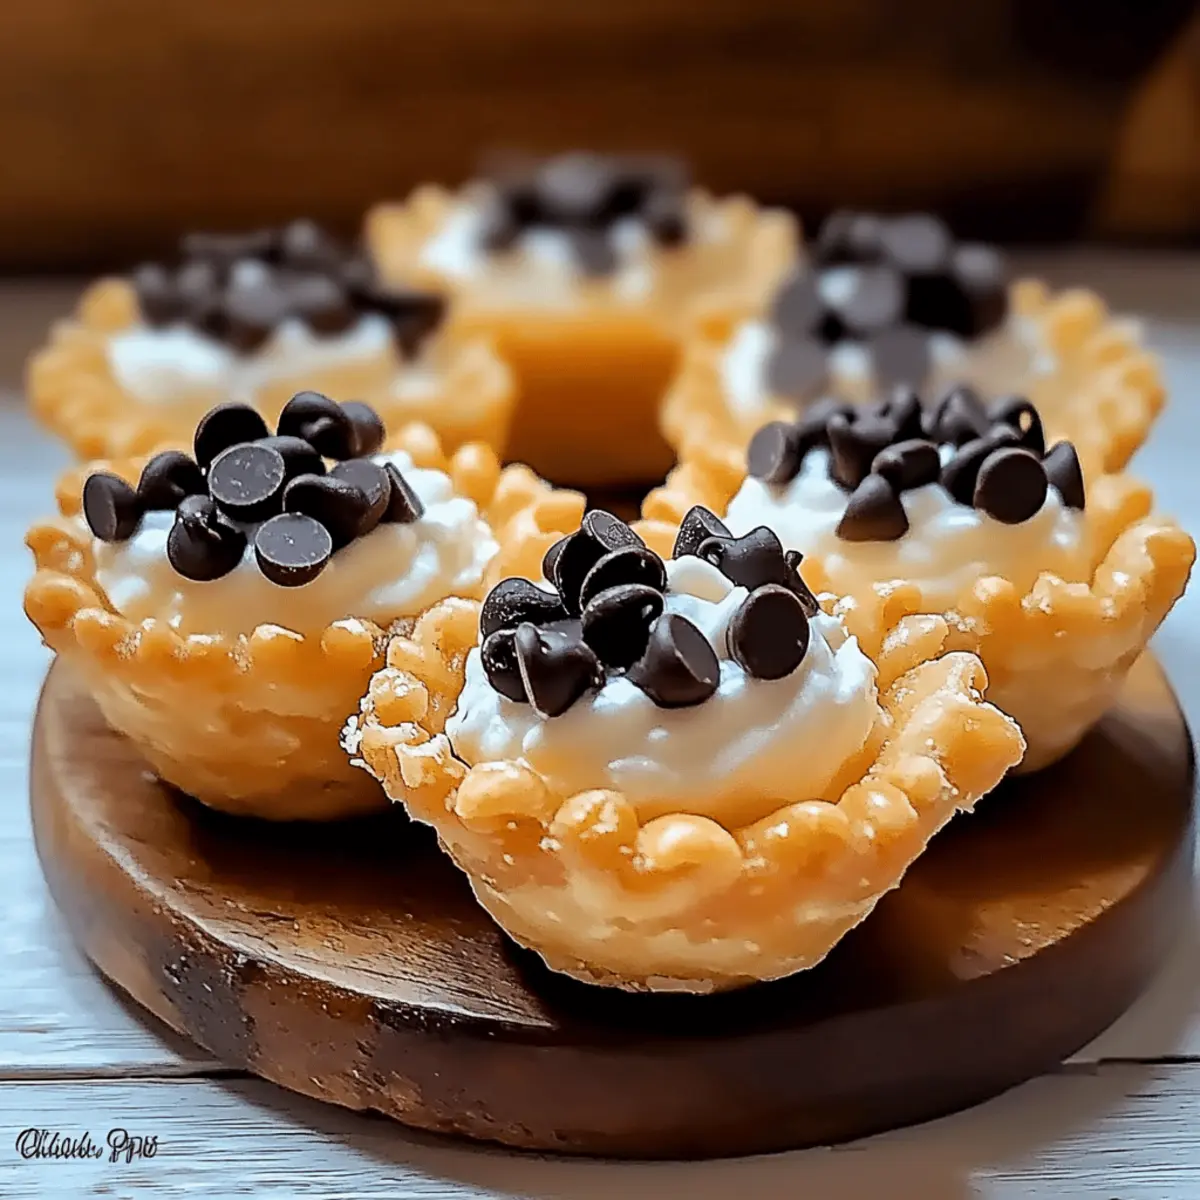
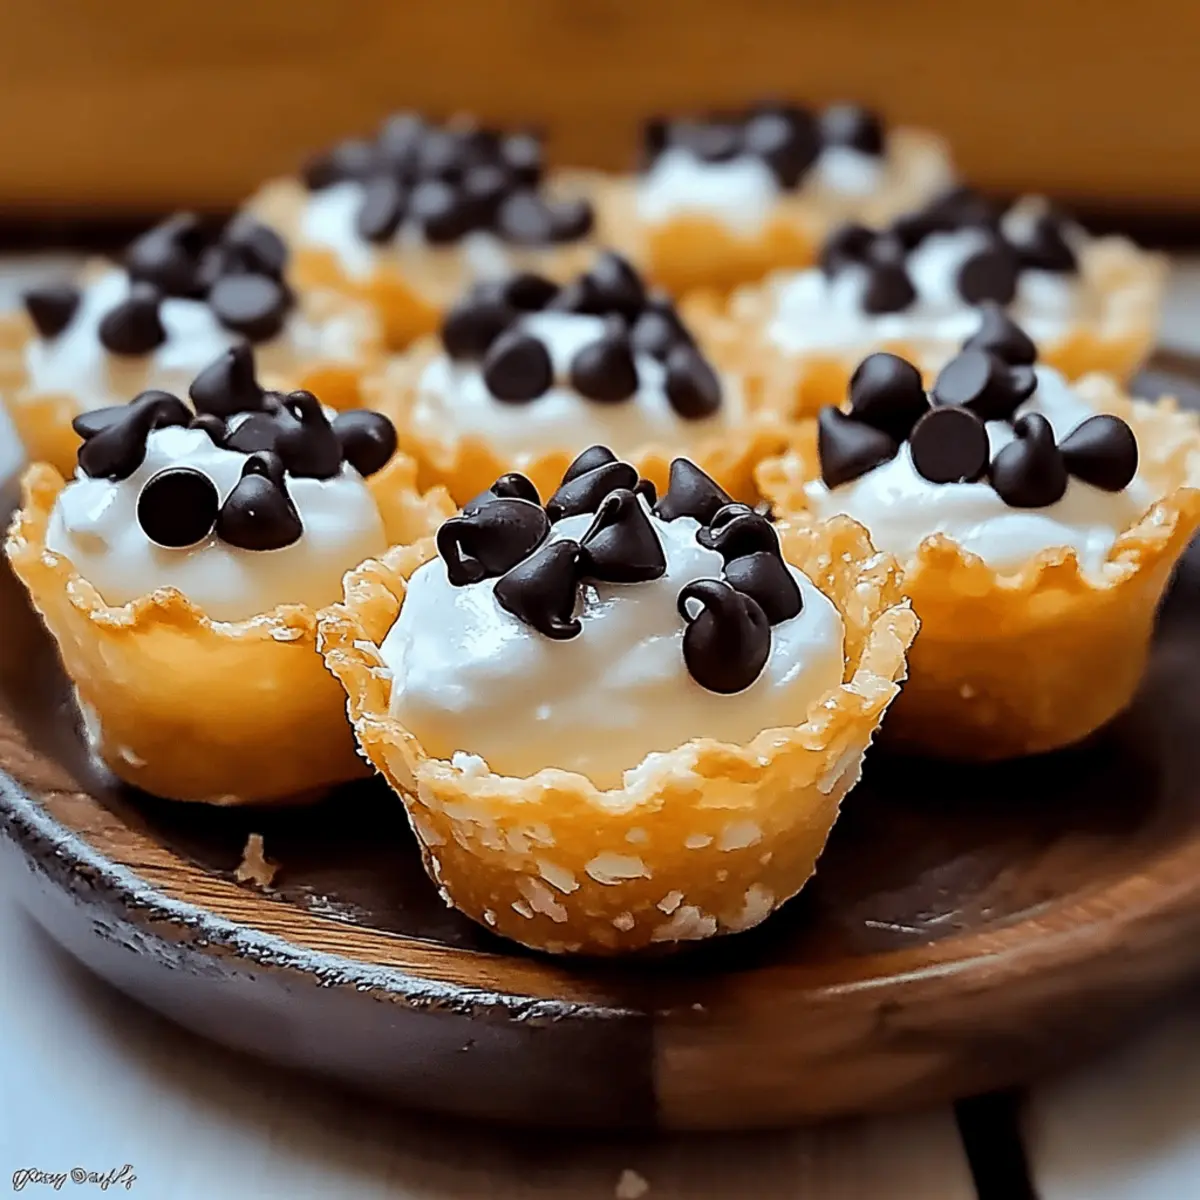
As I stood in my kitchen, the sweet aroma of baked pastry wafted through the air, instantly transporting me to an Italian bakery filled with delectable treats. That’s when the idea for these Mini Cannoli Cups hit me—a delightful twist on a classic that’s sure to please! Not only are these Mini Cannoli Cups incredibly easy to make, but they can also be tailored to fit various dietary needs, including gluten-free and dairy-free options. With their crispy, golden shells and creamy ricotta filling, they’re perfect for gatherings or a cozy night in. So, whether you’re an experienced chef or a curious beginner, get ready to wow your taste buds and those of your loved ones! Curious how to whip up these charming little delights?
Why are Mini Cannoli Cups a Must-Try?
Irresistible Flavor: Each bite bursts with the delicious combination of creamy ricotta and sweet vanilla, truly a flavor sensation.
Customizable Treat: Easily tweak the recipe to suit various diets, whether it’s gluten-free or dairy-free, everyone can enjoy.
Effortless Preparation: With a straightforward method, even beginners can impress guests in no time.
Perfect for Parties: These delightful treats are ideal for gatherings; pair them with fresh berries or a touch of gelato for added flair.
Make Ahead Convenience: Bake the shells in advance and assemble later for a stress-free dessert option, just like my popular Breakfast Granola Cups do!
Mini Cannoli Cups Ingredients
• For the Shells
- Pre-made Pie Crust or Phyllo Dough – Provides structure and flavor; choose based on preference. Can substitute with wonton wrappers for a unique twist.
• For the Filling
- Ricotta Cheese – Essential for creamy filling; ensure it is well-drained for the best texture.
- Powdered Sugar – Adds sweetness and smoothness to the filling.
- Vanilla Extract – Enhances flavor; can substitute with almond extract or orange zest for a different taste.
- Chocolate Chips (optional) – For topping; can substitute with chopped nuts or candied fruit for variety.
Step‑by‑Step Instructions for Mini Cannoli Cups
Step 1: Preheat Oven
Begin by preheating your oven to 375°F (190°C). This ensures that your Mini Cannoli Cups will bake evenly and achieve that delightful golden-brown color. While the oven heats up, gather your pre-made pie crust or phyllo dough, as it will be needed shortly for shaping the shells.
Step 2: Prepare Pastry Shells
Roll out your dough on a floured surface and use a round cutter to cut circles. Gently press each circle into a greased mini muffin tin, ensuring the dough covers the sides for a sturdy shell. This setup will create perfect little cups for your creamy filling once baked.
Step 3: Bake Shells
Pop the prepared muffin tin into your preheated oven and bake for 8-10 minutes. Keep an eye on them, as you want the shells to turn golden brown, not burnt. The aroma will fill your kitchen as they bake, getting you excited for the Mini Cannoli Cups to come!
Step 4: Cool Completely
Once baked, carefully remove the muffin tin from the oven and let the shells cool in the tin for a few minutes. This helps them set properly. Then, transfer the shells to a wire rack to cool completely; they should be firm to the touch.
Step 5: Make the Filling
In a mixing bowl, combine well-drained ricotta cheese, powdered sugar, and vanilla extract. Blend the mixture until it’s silky and smooth. If you’re feeling adventurous, you can add some lemon zest or spices at this stage for an extra flavor burst in your creamy filling for the Mini Cannoli Cups.
Step 6: Assemble
Once the shells have cooled, it’s time to fill them. Using a piping bag, fill each shell with your luscious ricotta mixture, taking care to fill them generously. You can smooth the filling to the top or create a swirl for an appealing look.
Step 7: Serve or Chill
Now that your Mini Cannoli Cups are filled, serve them immediately for the best crunch and flavor! Alternatively, you can refrigerate them for up to four hours to let the flavors meld, ensuring a delightful chilled treat. Just remember, these are best enjoyed fresh!
What to Serve with Mini Cannoli Cups?
Elevate your dessert experience by pairing these delightful treats with accompaniments that enhance their creamy and crispy goodness.
-
Fresh Berries: Juicy strawberries and raspberries add a burst of freshness that perfectly balances the rich filling. This combination brings a beautiful color contrast that’s as pleasing to the eye as it is to the palate.
-
Gelato: A scoop of creamy gelato, particularly pistachio or vanilla, complements the cannoli’s textures beautifully while enhancing the Italian flair of your dessert spread. Each bite creates a heavenly mix of flavors and temperatures.
-
Espresso: The boldness of a freshly brewed espresso cuts through the sweetness, providing an elegant end to a meal. It’s a classic Italian pairing that brings out the depth of flavors in the Mini Cannoli Cups.
-
Prosecco: Bubbles in a chilled glass of Prosecco create a celebratory atmosphere. The crisp effervescence enhances the dessert without overwhelming its delicate flavors, making each sip a refreshing experience.
-
Chocolate Sauce: Drizzle warm chocolate sauce over the cannoli for an indulgent twist. The rich sweetness of the chocolate pairs perfectly with the creamy filling, creating a decadent treat that’s hard to resist.
-
Citrus Zest: A sprinkle of lemon or orange zest over the top not only adds pops of color but also brightens up the overall flavor. This touch of citrus enhances the dessert’s refreshing qualities, making it a delightful surprise.
Expert Tips for Mini Cannoli Cups
-
Shape Perfection: Make sure to press the dough firmly into the muffin tin, ensuring a sturdy shell that holds up when filled; this prevents any leakage of the creamy filling.
-
Drain Well: To achieve the best texture for your ricotta filling, drain it well using a fine-mesh strainer; excess moisture can result in a soggy filling in your Mini Cannoli Cups.
-
Quick Assembly: Fill the pastry shells close to serving time to maintain their crispiness; if done too early, moisture can compromise their delightful crunch.
-
Experiment Boldly: Feel free to customize your filling with different extracts or spices; try adding lemon zest for a refreshing twist or a pinch of cinnamon for warmth.
-
Storage Savvy: If you’re making these in advance, store unfilled pastry shells in an airtight container at room temperature for up to 3 days for optimal freshness.
Make Ahead Options
These Mini Cannoli Cups are perfect for meal prep enthusiasts! You can bake the pastry shells up to 3 days in advance and store them in an airtight container at room temperature to maintain their crispiness. Additionally, you can prepare the ricotta filling 24 hours before serving; just keep it covered in the refrigerator. To prevent the shells from getting soggy, fill them no more than 4 hours before serving. When ready to serve, simply pipe the filling into the cooled shells and add your desired toppings for a delightful and stress-free dessert. With these make-ahead options, you’ll enjoy restaurant-quality results with minimal effort!
How to Store and Freeze Mini Cannoli Cups
Room Temperature: Store unfilled pastry shells in an airtight container at room temperature for up to 3 days to retain their crispiness.
Fridge: If assembled, Mini Cannoli Cups can be refrigerated for up to 4 hours. This allows the flavors to meld, but they are best served fresh to maintain crunch.
Freezer: Unfilled pastry shells freeze well for up to 2 months. Just wrap tightly in plastic wrap and place in an airtight container. Thaw before filling.
Reheating: If you need to re-crisp baked pastry shells, place them in a preheated oven at 350°F (175°C) for 5–7 minutes. Enjoy your Mini Cannoli Cups at their best!
Mini Cannoli Cups Variations & Substitutions
Feel free to get creative with your Mini Cannoli Cups, transforming them into a delightful treat that’ll suit everyone’s palate!
-
Gluten-Free: Substitute with gluten-free pie crust or phyllo dough for a delicious alternative that everyone can enjoy.
-
Dairy-Free: Replace ricotta with dairy-free cream cheese for a vegan-friendly option that retains that creamy goodness.
-
Nutty Twist: Add crushed pistachios or almonds to the filling for a rich, nutty flavor that enhances the overall experience.
-
Citrusy Zing: Swap vanilla extract with lemon extract or zest, bringing a refreshing brightness to your cannoli cups.
-
Chocolate Lovers: Mix in chocolate chips directly into the filling for double the sweetness and a decadent chocolatey kick.
-
Spiced Up: Sprinkle in cinnamon or nutmeg in the filling for a warm, cozy sensation that’s perfect for colder days.
-
Creamy Cocoa: Combine cocoa powder with powdered sugar for a chocolate flavor highlight that’ll satisfy any chocoholic.
-
Bold Flavor: Add a pinch of cayenne pepper for an unexpected kick, giving your Mini Cannoli Cups a uniquely spicy twist.
For even more delightful inspirations, you might enjoy adding a touch of freshness from berries alongside your Mini Cannoli Cups or trying out my popular Breakfast Granola Cups for a versatile treat!

Mini Cannoli Cups Recipe FAQs
How do I choose the right ricotta cheese for the filling?
Absolutely! When selecting ricotta for your Mini Cannoli Cups, look for well-drained, whole milk ricotta for the best texture. Block-style ricotta usually has less moisture than the more common tub-style, which can be watery and impact the filling’s consistency. Aim for ricotta that’s creamy and smooth to ensure a rich filling that melts beautifully in your mouth.
How should I store my Mini Cannoli Cups?
Not a problem at all! If your Mini Cannoli Cups are assembled, it’s best to refrigerate them for up to 4 hours to retain optimal freshness. However, if you need to store unfilled pastry shells, they can be kept at room temperature in an airtight container for about 3 days to maintain their delightful crunch.
Can I freeze the pastry shells for my Mini Cannoli Cups?
Most definitely! To freeze unfilled pastry shells, wrap them tightly in plastic wrap and place them in an airtight container. They can be frozen for up to 2 months. When you’re ready to enjoy, simply thaw them at room temperature or in the refrigerator before filling with your delicious ricotta mixture, and you’re good to go!
What should I do if my ricotta filling is too runny?
Oh no, let’s fix that! If your ricotta filling turns out too runny, start by draining the ricotta through a fine-mesh strainer for about 30 minutes to remove excess moisture. If it’s still not the right consistency, you might try adding a tablespoon of powdered sugar or cornstarch, mixing until smooth, to help thicken it up. This should give you that perfect creamy texture for your Mini Cannoli Cups!
Can I make Mini Cannoli Cups without dairy?
Very easily! For a dairy-free version of your Mini Cannoli Cups, simply replace the ricotta cheese with a dairy-free cream cheese alternative. There are many brands available now that mimic the taste and texture beautifully. You can also add a little coconut cream to enhance creaminess, while a splash of vanilla extract will maintain that rich flavor.
How do I ensure my pastry shells stay crispy?
The more the merrier when it comes to pastry crispiness! To ensure your Mini Cannoli Cups have a delightful crunch, fill the pastry shells as close to serving time as possible. Additionally, be sure the ricotta filling is well-drained and use a thicker dough for the shells. If you’re making them in advance, store them unfilled to prevent any sogginess.
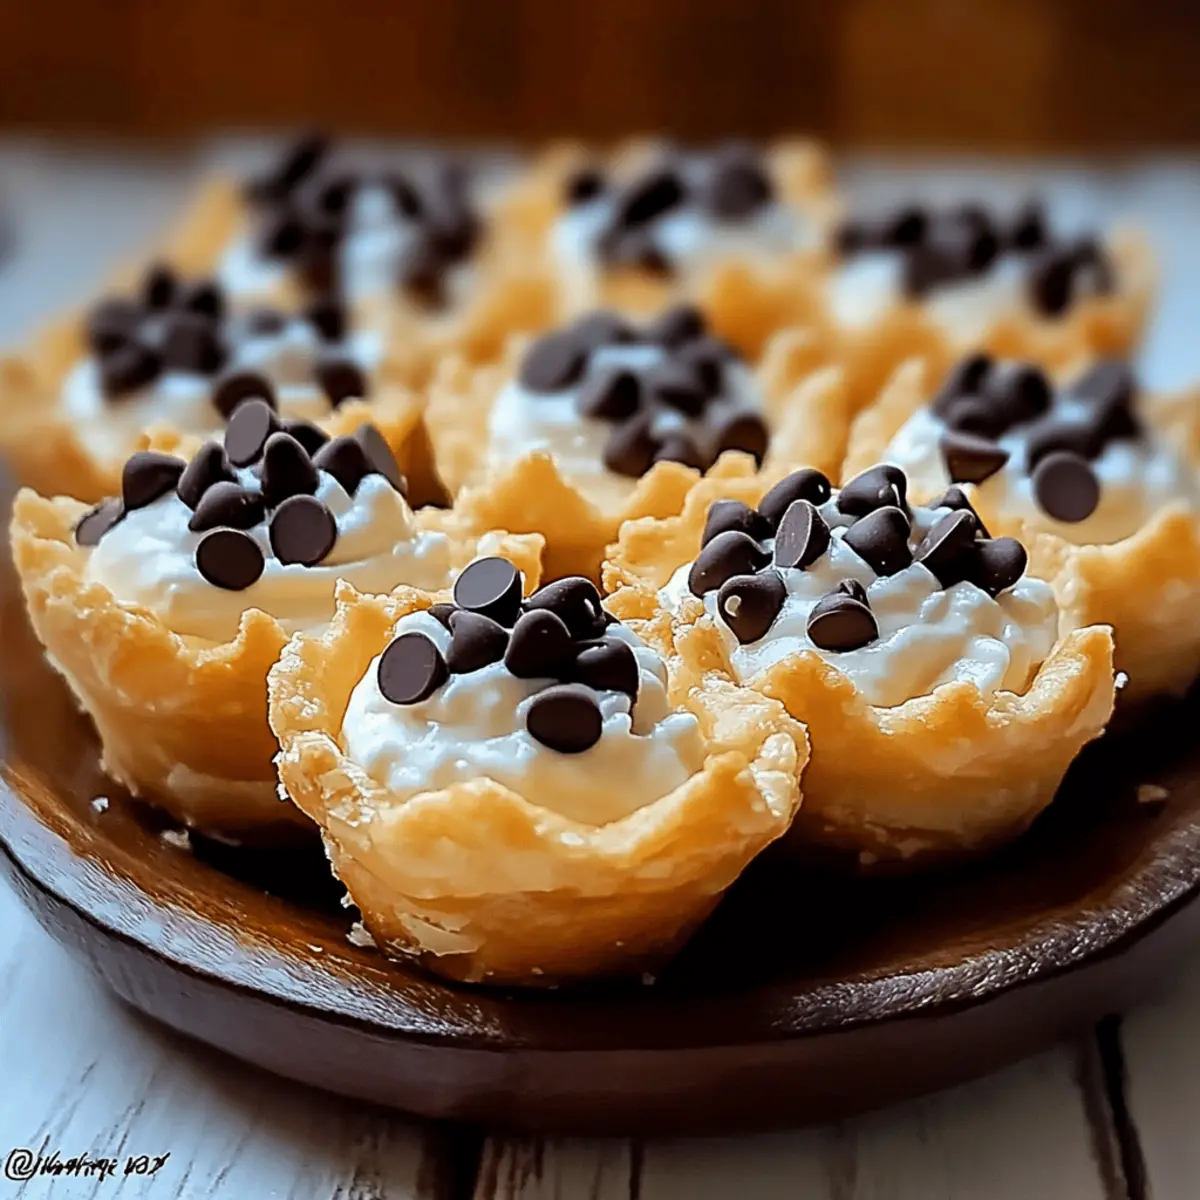
Mini Cannoli Cups with Delightful Creamy Filling
Ingredients
Equipment
Method
- Preheat your oven to 375°F (190°C).
- Roll out your dough and cut circles. Press into a greased mini muffin tin.
- Bake for 8-10 minutes until golden brown.
- Let the shells cool completely.
- In a bowl, combine well-drained ricotta cheese, powdered sugar, and vanilla extract. Blend until smooth.
- Fill each shell with the ricotta mixture using a piping bag.
- Serve immediately or refrigerate for up to four hours.
Leave a Reply