
As I flipped through my recipe box, a small crumpled card caught my eye—baby blue ink scrawled across it: “High Protein Pancake Bowls.” This wasn’t just any ordinary breakfast; it was a game-changer, perfect for those hectic mornings when you need a wholesome start without spending hours in the kitchen. These fluffy pancake bowls, rich in creamy Greek yogurt and eggs, are not only meal prep friendly but also cater to those who want a nutritious boost while saying goodbye to fast food. With endless topping possibilities, from fresh berries to crunchy nuts, these bowls ensure your breakfast feels special every single time. Curious how to whip up your own batch? Let’s dive in!
Why Choose High Protein Pancake Bowls?
Fuel Your Mornings: These High Protein Pancake Bowls are not just delicious but loaded with protein, keeping you satisfied throughout the day.
Meal Prep Perfection: Easily whip up a batch ahead of time, allowing you to enjoy a cozy breakfast on busy mornings without the hassle of cooking.
Versatile Toppings: Customize each bowl to your liking—add fresh berries, crunchy nuts, or a drizzle of maple syrup for endless flavor combinations.
Health-Conscious Comfort: With options for gluten-free and dairy-free variations, these pancake bowls fit a variety of dietary needs, so everyone can indulge guilt-free.
Quick and Easy: Ready in just about 30 minutes, this recipe combines simplicity with nourishment, making it perfect for chefs and food lovers alike.
Elevate your breakfast game and say goodbye to fast food with these delightful pancake bowls!
High Protein Pancake Bowls Ingredients
For the Batter
- Eggs – Provide structure and protein; consider using flax eggs for a vegan option.
- Greek Yogurt – Adds creaminess and boosts protein content; non-dairy yogurt can be a substitute.
- Sweetener – Enhances flavor; adjust based on personal taste preferences.
- Vanilla Extract – Introduces warmth and depth of flavor; opt for pure extract for the best results.
- All-Purpose Flour – Gives base structure to the pancake bowls; gluten-free flour can be used as a substitute.
- Baking Powder – Ensures the bowls rise and become fluffy; check for freshness for optimal results.
For the Toppings
- Fresh Berries – Adds flavor and valuable antioxidants; any seasonal berries work well for variety.
- Nuts – Provides crunch and healthy fats; almonds or walnuts are excellent choices for added texture.
- Maple Syrup – For a touch of sweetness; pure maple syrup is advisable for the best flavor.
Indulge in these High Protein Pancake Bowls and make your breakfasts healthier and more exciting!
Step‑by‑Step Instructions for High Protein Pancake Bowls
Step 1: Prepare Batter
In a large mixing bowl, whisk together 3 eggs, 1 cup of creamy Greek yogurt, your preferred sweetener, and 1 teaspoon of pure vanilla extract until the mixture is smooth and luminous. This rich batter sets the base for your delightful High Protein Pancake Bowls, ensuring they’ll be fluffy and delicious.
Step 2: Combine Dry Ingredients
Gradually sift in 1 cup of all-purpose flour and 2 teaspoons of baking powder to your wet ingredients. Gently fold these dry components into the batter, being careful not to overmix; this will maintain the light, airy texture crucial for your pancake bowls. The batter should remain slightly lumpy for the best results.
Step 3: Preheat Oven
While your batter rests, preheat the oven to 350°F (175°C). This temperature is crucial for baking your High Protein Pancake Bowls evenly, ensuring they rise beautifully. You can prepare your ramekins during this time for a seamless transition to baking.
Step 4: Divide Batter
Lightly grease four ramekins using cooking spray or a bit of butter. Carefully divide the batter among the ramekins, filling each one to about three-quarters full—leave a little space at the top for them to rise and puff up in the oven.
Step 5: Bake
Place the filled ramekins into the preheated oven and bake for 25 minutes. You’ll know they’re done when they look golden brown and have puffed up, creating a delightful aroma throughout your kitchen.
Step 6: Serve
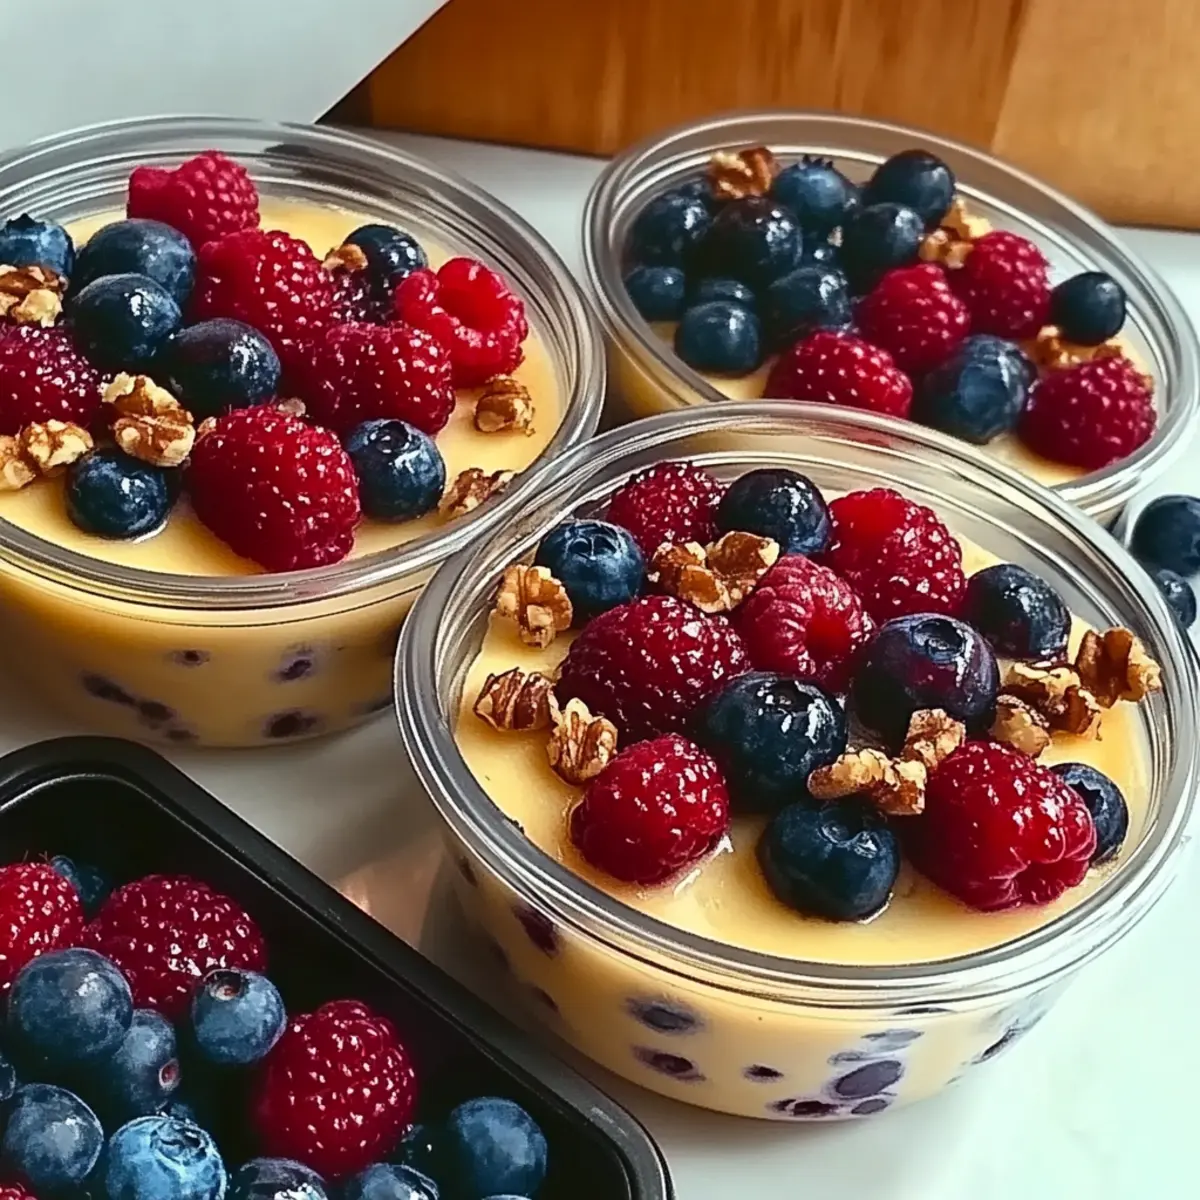
Once baked, remove the ramekins from the oven and allow them to cool slightly—about 5 minutes—before serving. Top each bowl with fresh berries, a drizzle of maple syrup, or a sprinkle of nuts for an irresistible finish. If meal prepping, allow the pancake bowls to cool completely and store them in airtight containers for later enjoyment.
Make Ahead Options
These High Protein Pancake Bowls are perfect for busy mornings, allowing you to prep and enjoy a nutritious breakfast with ease! You can prepare the batter up to 24 hours in advance by mixing the wet and dry ingredients separately and storing them in airtight containers in the refrigerator. When you’re ready to bake, simply combine the components, fill your greased ramekins, and bake as directed. For cooked pancake bowls, they can be stored in the refrigerator for up to 4 days. Just let them cool completely before sealing them in airtight containers. When it’s time to serve, gently reheat in the microwave for 20-30 seconds to enjoy that fluffy texture, preserving all the deliciousness of your freshly made pancake bowls!
Expert Tips for High Protein Pancake Bowls
-
Mix Wisely: Avoid overmixing the batter, as it can lead to dense pancake bowls. A few lumps are perfectly fine to keep them light and fluffy.
-
Prepping Ahead: If you plan to keep some for later, store wet and dry ingredients separately until you’re ready to bake for the best texture.
-
Cooling Off: Let the pancake bowls cool completely before sealing them in airtight containers. This prevents moisture buildup and keeps them fresh longer.
-
Customized Sweetness: Taste the batter before baking and adjust the sweetener to your liking; everyone’s preference is different!
-
Explore Toppings: Get creative with toppings based on what you love—try nut butter, seeds, or even a sprinkle of cinnamon to elevate your High Protein Pancake Bowls.
Storage Tips for High Protein Pancake Bowls
Fridge: Store cooked High Protein Pancake Bowls in airtight containers for up to 4 days. This keeps them fresh while retaining their fluffy texture.
Freezer: For longer storage, freeze individual servings in airtight containers or freezer bags for up to 2 months. Make sure to label them with dates for easy tracking.
Reheating: To reheat, simply pop them in the microwave for about 30-60 seconds or warm in the oven at 350°F (175°C) until heated through. This will give them back their delightful fluffiness.
Cooling: Allow pancake bowls to cool completely before sealing in storage containers. This prevents condensation, which can make them soggy.
High Protein Pancake Bowls Variations
Feel free to explore these delicious twists on your High Protein Pancake Bowls—each adds a unique flavor experience!
-
Dairy-Free: Substitute Greek yogurt with non-dairy alternatives, like coconut or almond yogurt, for a creamy, plant-based option. You won’t miss the dairy at all!
-
Gluten-Free: Opt for a gluten-free flour blend instead of all-purpose flour to cater to gluten sensitivities, ensuring no one misses out on this fluffy delight.
-
Flavor Add-ins: Boost taste by incorporating almond or peanut butter into the batter, or fold in mashed bananas or grated apples for natural sweetness. It adds a delightful twist!
-
Chocolate Chips: Add a handful of dairy-free chocolate chips to the batter, letting each bite burst with sweet, indulgent flavor. A treat that feels like dessert for breakfast!
-
Nutty Crunch: Enhance texture and taste by mixing in chopped nuts, like walnuts or pecans. They add that extra crunch and heartiness each bite deserves!
-
Spices: For a warm, spicy kick, blend in cinnamon or nutmeg to the batter before baking. These cozy flavors will make your kitchen feel like a café!
-
Berry Medley: Top your pancake bowls with a mix of fresh berries for a colorful and antioxidant-rich topping. The more, the merrier! You can never have enough berries.
-
Savory Option: Try adding cheese and herbs such as spinach and feta for a savory take on these pancake bowls. It will surprise and delight anyone at the breakfast table, making them feel unique and special!
For more wholesome ideas, check out my High Protein Egg Salad or try a tasty High Protein Chicken Orzo dish to complement your breakfast!
What to Serve with High Protein Pancake Bowls?
Elevate your breakfast experience by pairing wholesome pancake bowls with delightful sides or toppings that contrast in texture and flavor.
- Fresh Fruit Salad: A vibrant mix of seasonal fruits adds a refreshing burst of sweetness and a splash of color to your meal.
- Greek Yogurt Parfait: Layering creamy yogurt with granola and berries complements the fluffy bowls while enhancing protein intake.
- Honey Drizzle: A simple drizzle of honey brings a sticky sweetness that pairs beautifully with the pancake’s mild flavors.
- Smoothie: A creamy smoothie with spinach and banana offers a nutrient-packed drink that’s both filling and energizing.
Consider pairing your High Protein Pancake Bowls with a warm cup of herbal tea or rich coffee for a cozy morning routine.
High Protein Pancake Bowls Recipe FAQs
How should I select eggs for the best High Protein Pancake Bowls?
Absolutely, fresh eggs are key! Look for eggs that are clean, without any cracks, and with a sell-by date in the future. The yolks should be a vibrant yellow or orange for optimal flavor and nutrition. If you prefer a vegan option, consider substituting with flax eggs, which can be made by mixing 1 tablespoon of ground flaxseed with 2.5 tablespoons of water—let it sit until it thickens, about 5 minutes.
What is the best way to store leftover pancake bowls?
Very important! Store your cooked High Protein Pancake Bowls in airtight containers in the fridge for up to 4 days. This ensures they remain fresh and fluffy. For longer storage, freeze individual servings in airtight containers or freezer bags. Just remember to label them with the date so you can track how long they’ve been stored.
Can I freeze High Protein Pancake Bowls? If so, how?
Absolutely! To freeze these delightful pancake bowls, let them cool completely after baking. Then, wrap each ramekin securely in plastic wrap or place them in freezer bags, removing as much air as possible. They can be frozen for up to 2 months. When you’re ready to enjoy, simply thaw in the fridge overnight and reheat in the microwave or oven at 350°F (175°C) until warmed through.
What if my pancake bowls don’t rise properly?
If you notice your High Protein Pancake Bowls didn’t rise as expected, it might be because of stale baking powder. Always check the expiration date on your baking powder before use! Additionally, it’s crucial not to overmix the batter; keep it slightly lumpy for a light, fluffy texture. If you’ve overbaked them, they could turn out dry instead of soft—keep an eye on them as they bake!
Are these pancake bowls safe for special dietary needs?
Certainly! The great thing about High Protein Pancake Bowls is their adaptability. You can easily make them gluten-free by using a suitable gluten-free flour blend. For a dairy-free option, substitute Greek yogurt with non-dairy yogurt alternatives like coconut or almond yogurt. Always check labels for allergies, and feel free to customize toppings as needed to fit dietary restrictions.
How do I keep the toppings fresh when storing the pancake bowls?
The more the merrier! To keep toppings fresh, store them separately in airtight containers in the fridge. This way, they retain their flavor and texture without making the pancake bowls soggy. You can add fresh berries, nuts, or maple syrup just before serving to enjoy a burst of flavor!
High Protein Pancake Bowls for a Cozy Breakfast Boost
Ingredients
Equipment
Method
- In a large mixing bowl, whisk together the eggs, Greek yogurt, sweetener, and vanilla extract until smooth.
- Gradually sift in the all-purpose flour and baking powder, gently folding into the batter.
- Preheat the oven to 350°F (175°C) while the batter rests.
- Lightly grease four ramekins and divide the batter among them, filling each three-quarters full.
- Bake in the preheated oven for 25 minutes until golden brown and puffed.
- Allow to cool for about 5 minutes before serving topped with berries, maple syrup, or nuts.
Leave a Reply