
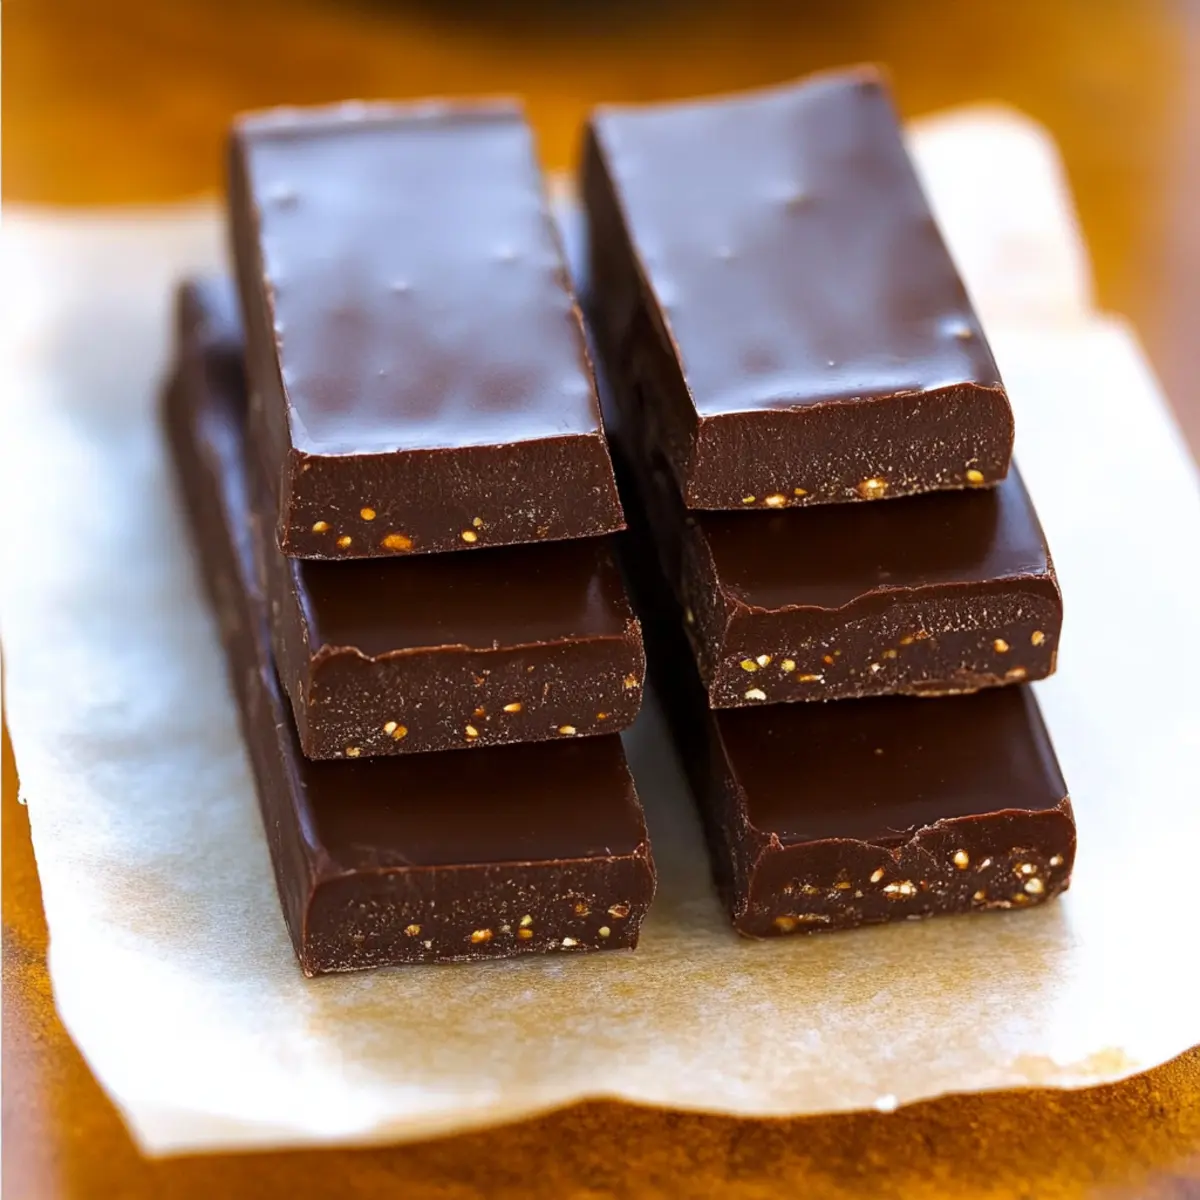
It was a lazy Sunday afternoon when I decided to conquer my chocolate cravings without the guilt of store-bought bars. Enter these 3-Ingredient Homemade Chocolate Bars, a quick and seamless way to satisfy those sweet desires! Best of all, these delectable treats require no baking and offer endless possibilities for customization—from refreshing mint to decadent rocky road. With just a handful of ingredients, you’re not only treating yourself but also embracing a healthier alternative that can be tailored to fit keto or sugar-free diets. Whether you’re whipping these up for a quiet night in or planning a fun kitchen project with the kids, these bars are bound to put a smile on your face. Curious about the best flavor combinations to try?
What makes homemade chocolate bars so special?
Customization Galore: Creating homemade chocolate bars means you can experiment with flavors like mint or rocky road to satisfy every palate.
Healthy Treat: With just three ingredients, you can indulge guilt-free, making these bars a great alternative to store-bought snacks.
Quick and Easy: In less than five minutes, you can whip up a delightful treat that requires no baking!
Family Fun: Involving the kids in making these bars turns it into a fun, bonding activity that everyone can enjoy.
Diet-Friendly: Whether you’re on a keto journey or seeking sugar-free options, this recipe can easily adapt to your dietary needs.
Try pairing these bars with fresh fruit or make a delicious chocolate sauce for drizzling!
Homemade Chocolate Bars Ingredients
Indulge in this quick, delicious treat!
For the Base
- Cacao or Cocoa Powder – Provides the rich chocolate flavor; for a caffeine-free option, try substituting with carob powder.
- Coconut Oil – Adds smoothness and a luscious texture; replace with almond oil or unsalted butter if desired.
- Maple Syrup/Honey/Agave – Serves as the sweetener; use vanilla stevia drops for a sugar-free twist, adjusting to taste.
Optional Add-Ins
- Cocoa Nibs – Adds crunch and a bit of bitterness, enhancing the chocolate experience.
- Chia Seeds – Great for a nutritional boost; they offer a delightful texture.
- Nuts (Almonds/Walnuts/Pecans) – Incorporate for added crunch and flavor; perfect for personalizing your bars.
- Flavor Extracts (Vanilla/Peppermint) – Customizes the taste to your liking; just a few drops can transform the flavor profile!
Dive into the world of DIY confections with these Homemade Chocolate Bars and let your creativity run wild!
Step‑by‑Step Instructions for Homemade Chocolate Bars
Step 1: Melt the Coconut Oil
Begin by gently melting 1/2 cup of coconut oil in a small saucepan over low heat. Stir continuously to avoid burning, watching for a clear liquid consistency. This step should take about 3-5 minutes. If you prefer, you can use a microwave-safe bowl and melt it in the microwave in 30-second intervals until completely liquid.
Step 2: Mix the Ingredients
In a medium mixing bowl, combine the melted coconut oil with 1 cup of cacao or cocoa powder and 1/4 cup of maple syrup (or your chosen sweetener). Use a whisk or spatula to mix thoroughly until you achieve a thick, smooth consistency. Ensure there are no lumps for a creamy texture in your Homemade Chocolate Bars, which enhances their deliciousness!
Step 3: Customize Your Flavor
If you’d like to add optional ingredients such as cocoa nibs, nuts, or flavor extracts, fold them into the chocolate mixture now. Stir gently to distribute everything evenly throughout the mixture. This step allows you to personalize your Homemade Chocolate Bars, creating unique flavors that cater to your cravings.
Step 4: Pour into Molds
Carefully pour the chocolate mixture into a flat container or silicone chocolate mold, smoothing it out evenly with a spatula. Make sure there are no air bubbles trapped in the mixture, as this could affect the final shape of your bars. Take a moment to admire your hard work before placing it in the fridge!
Step 5: Chill the Mixture
Refrigerate the chocolate mixture for at least 30 minutes, or until fully set. If you’re feeling impatient, you can place it in the freezer for about 15-20 minutes instead. The chocolate should be firm to the touch and hold its shape before proceeding to the next step, ensuring the perfect texture for your Homemade Chocolate Bars.
Step 6: Cut and Enjoy
Once set, remove the chocolate from the refrigerator or freezer. If using a container, lift the entire block out and place it on a cutting board. Cut into bar shapes using a sharp knife, or pop the bars out of the silicone molds. Enjoy your delectable Homemade Chocolate Bars immediately, or store them in an airtight container in the fridge for future cravings!
Homemade Chocolate Bars Variations
Unleash your creativity and tailor these chocolate bars to suit your cravings with delightful twists!
- Mint Flavor: Add a few drops of pure peppermint extract for a refreshing chocolate experience. Your taste buds will dance with joy from the burst of minty goodness!
- Rocky Road: Mix in mini vegan marshmallows and chopped nuts before chilling to create a delightful treat reminiscent of the classic dessert. The combination of flavors and textures will take you on a sweet nostalgia trip!
- Coconut Delight: Incorporate shredded coconut directly into the mixture for a tropical twist. Every bite will transport you to a sun-soaked paradise!
- Espresso Infusion: Add 1/8 tsp of instant coffee granules for a caffeine boost that’ll elevate your chocolates to a whole new level of indulgence. The rich, deep flavor will awaken your senses!
- Nutty Twist: Fold in chopped almonds or crushed pecans for a satisfying crunch. The contrasting textures will make each bite a delightful surprise!
- Sugar-Free Sweetness: Swap the sweetener for vanilla stevia drops to make your bars keto-friendly without sacrificing taste. Adjust the sweetness to your preference for a guilt-free treat!
- Chili Chocolate: Add a pinch of cayenne pepper for a spicy kick that complements the rich chocolate beautifully. It’s an adventurous flavor combination that will leave you wanting more!
- Fruit Fusion: Mix in dried fruits like cranberries or chopped apricots for a burst of fruity flavor. This will not only add sweetness but also enhance the visual appeal of your treats!
As you can see, the possibilities are endless! And if you’re looking for more chocolate inspiration, check out these delicious Peanut Butter Chocolate bars or try your luck with some Rocky Road Chocolate treats.
What to Serve with 3-Ingredient Homemade Chocolate Bars
Perfectly crafted for enjoyment, these treats beckon for delightful companions to create a full meal experience.
-
Fresh Berries: Bright and juicy, strawberries or raspberries add a burst of flavor that beautifully contrasts with the creamy richness of the chocolate.
-
Creamy Greek Yogurt: A tangy spoonful of Greek yogurt creates a lovely balance, adding a rich texture while delivering a protein boost.
-
Nutty Granola: The crunch of nutty granola or clusters introduces a satisfying texture; enjoyed as a crunchy side, it complements the smooth chocolate.
-
Chilled Almond Milk: Smooth and nutty, a glass of chilled almond milk offers a refreshing drink option, enhancing the treat’s fancy while keeping it light.
-
Homemade Whipped Cream: A dollop of whipped cream lends an indulgent, airy side while accentuating the rich chocolate flavor, making each bite a little more special!
-
Mint Tea: The fresh, herbal notes of mint tea cleanse your palate and create a refreshing finish to your chocolatey experience.
-
Chocolate Sauce Drizzle: For an extra chocolatey kick, serve a drizzle of homemade chocolate sauce alongside your bars. Divine decadence that’s guaranteed to elevate the treat!
-
Coconut Flakes: Adding coconut flakes on top gives a tropical twist and a chewy texture, making flavors pop and bringing a new dimension to your homemade bars!
Expert Tips for Homemade Chocolate Bars
- Choose Good Quality: Use high-quality cacao or cocoa powder for a rich chocolate flavor that elevates your homemade chocolate bars.
- Measure Accurately: Carefully measure the ingredients, especially the coconut oil and sweetener; too much may alter the texture and firmness.
- Let It Cool: Allow the chocolate mixture to cool slightly before adding sensitive add-ins like nuts, which can get too warm if added too soon.
- Perfect Portion Control: Cut your bars into even portions to help with serving sizes and prevent temptation to overindulge!
- Troubleshooting Texture: If your mixture is too thick, warm it slightly and add a little more coconut oil; this ensures a smooth pour into molds.
- Flavor Variations: Get creative with add-ins like sea salt or crushed herbs for a unique twist on your homemade chocolate bars!
Make Ahead Options
These Homemade Chocolate Bars are perfect for busy home cooks looking to save time! You can prepare the chocolate mixture up to 24 hours in advance, allowing it to chill in the refrigerator until you’re ready to serve. Simply follow the initial steps of melting the coconut oil and mixing in the cacao powder and sweetener. Once combined, pour the mixture into molds and let it set in the fridge. To maintain the bars’ delicious texture, keep them stored in an airtight container and refrigerate until you’re ready to cut and enjoy. When you want to serve, just slice them into bars, and you’ll have a delightful treat with minimal effort!
How to Store and Freeze Homemade Chocolate Bars
Fridge: Keep your homemade chocolate bars in an airtight container to maintain freshness for up to two weeks. This helps retain their creamy texture and prevents them from softening.
Freezer: For longer storage, place the bars in a freezer-safe container. They can be frozen for up to three months, ensuring you always have a guilt-free treat on hand!
Reheating: If your bars become too hard, let them sit at room temperature for a few minutes before enjoying. You can also gently melt them in the microwave to use as a rich chocolate drizzle.
Wrapping: For extra protection, wrap individual bars in parchment paper before freezing. This way, you can grab and go, satisfying your chocolate cravings anytime!
Homemade Chocolate Bars Recipe FAQs
What type of cacao or cocoa powder should I use?
Absolutely! For the best flavor, opt for high-quality unsweetened cacao or cocoa powder. Organic varieties are fantastic if you can find them. If you prefer a caffeine-free option, carob powder works beautifully as a substitute!
How should I store my homemade chocolate bars?
To keep your homemade chocolate bars fresh, store them in an airtight container in the fridge for up to two weeks. This prevents them from softening and maintains their creamy texture! If you want them to last longer, pop them in the freezer where they’ll stay good for up to three months.
Can I freeze homemade chocolate bars?
Yes, indeed! Freezing is an excellent way to preserve your chocolate bars. After cutting them into shape, place them in a freezer-safe container or wrap them individually in parchment paper to prevent freezer burn. To enjoy, simply thaw them in the fridge or at room temperature for a few minutes.
What can I do if my chocolate mixture is too thick?
No worries! If your chocolate mixture is too thick to pour, simply warm it slightly over low heat or in the microwave, then add a tablespoon of coconut oil to thin it out. This will help you achieve that smooth consistency you need for easy pouring into molds.
Are these chocolate bars suitable for dietary restrictions?
Very much so! These homemade chocolate bars can easily be tailored for various dietary needs. Swap the sweetener for a sugar-free option like vanilla stevia drops for a sugar-free alternative. Additionally, you can use almond oil instead of coconut oil for a coconut-free version. Just be mindful of any nut allergies if you’re adding nuts!
Indulge in Easy Homemade Chocolate Bars with 3 Simple Ingredients
Ingredients
Equipment
Method
- Melt the Coconut Oil: Melt 1/2 cup of coconut oil in a small saucepan over low heat for 3-5 minutes, or microwave in 30-second intervals until liquid.
- Mix the Ingredients: In a medium bowl, combine melted coconut oil, 1 cup of cocoa powder, and 1/4 cup of the sweetener. Whisk until thick and smooth.
- Customize Your Flavor: Fold in any optional ingredients like cocoa nibs or nuts to personalize your bars.
- Pour into Molds: Pour the mixture into a flat container or silicone mold and smooth it out, ensuring no air bubbles.
- Chill the Mixture: Refrigerate for at least 30 minutes, or freeze for 15-20 minutes until firm.
- Cut and Enjoy: Once set, remove from molds and cut into bar shapes or enjoy immediately.
Leave a Reply