
The aroma of homemade teriyaki sauce simmering on the stove instantly whisks me back to my childhood kitchen, where comfort food reigned supreme. Today, I’m excited to share my Savory Teriyaki Chicken Casserole—a dish that combines tender chicken, wholesome rice, and colorful vegetables, all enveloped in a rich, tangy teriyaki sauce. This recipe is not just delicious; it’s a lifesaver for busy weeknights when you crave something hearty and satisfying without the hassle. With its quick prep time and family-friendly appeal, you can gather everyone around the table in no time. Plus, it’s a great way to sneak in some vibrant veggies! Are you ready to transform your dinner routine with this delightful dish?
Why is Teriyaki Chicken Casserole a Must-Try?
Simplicity: This casserole boasts a straightforward prep process, making it ideal for both novice cooks and busy home chefs.
Flavor Explosion: Each bite combines the savory richness of teriyaki sauce with tender chicken and colorful vegetables, creating a dish that’s anything but ordinary.
Weeknight Hero: Perfect for those rushed evenings, this meal comes together quickly, allowing you to spend more time with loved ones rather than in the kitchen.
Health Conscious: Packed with lean protein and veggies, this dish is a nutritious alternative to fast food, ensuring your family eats well.
Versatile Delight: Feel free to customize with your favorite veggies or even switch out the chicken for tofu to cater to diverse dietary preferences. Whether served alongside a fresh salad or paired with steamed rice, this Teriyaki Chicken Casserole is bound to impress everyone at the table!
Teriyaki Chicken Casserole Ingredients
For the Teriyaki Sauce
- Low-Sodium Soy Sauce – This salty umami flavor forms the base of the teriyaki sauce; substitute with tamari for a gluten-free option.
- Water – Helps to dilute the soy sauce for a balanced flavor that enhances the dish.
- Brown Sugar – Adds sweetness to the sauce, balancing the saltiness; replace with honey for a different, lighter flavor.
- Ground Ginger – Provides warmth and spice; fresh ginger can be used for an even fresher taste.
- Minced Garlic – Elevates the flavor with its aromatic profile; fresh garlic is preferred if available.
- Cornstarch + Water – Used to thicken the teriyaki sauce; arrowroot starch can be a substitute.
For the Casserole
- Boneless Skinless Chicken Breasts – The main protein source, tender and easy to shred post-cooking, but thighs can be used for a richer flavor.
- Refrigerated Stir-Fry Vegetables (Broccoli, Carrots, Snow Peas, etc.) – Facilities a burst of nutrients and color; frozen mixed vegetables can be a quick alternative.
- Cooked Brown or White Rice – Acts as a hearty base that absorbs the flavors; use quinoa for a lower-carb option.
This delightful Teriyaki Chicken Casserole brings together all these wholesome ingredients for a dinner that is as nutritious as it is satisfying!
Step‑by‑Step Instructions for Teriyaki Chicken Casserole
Step 1: Preheat the Oven
Begin by preheating your oven to 350°F (175°C). While the oven warms up, grab a 9×13-inch baking pan and lightly coat it with non-stick spray to ensure a hassle-free cleanup later. This sets the stage for your delicious Teriyaki Chicken Casserole, preparing everything for a perfect bake.
Step 2: Prepare the Teriyaki Sauce
In a small saucepan over medium heat, combine low-sodium soy sauce, water, brown sugar, ground ginger, and minced garlic. Stir the mixture continuously and bring it to a gentle boil, allowing those lovely flavors to mingle for about 2-3 minutes. The aroma will fill your kitchen, hinting at the deliciousness to come!
Step 3: Thicken the Sauce
In a small bowl, whisk together cornstarch and a bit of water until smooth, then slowly add this slurry to the boiling sauce. Cook while stirring for another 2-3 minutes until the sauce thickens; it should coat the back of a spoon. Once done, remove it from the heat, and let it cool slightly as you move on to the next step.
Step 4: Assemble the Casserole
Place the boneless skinless chicken breasts in the prepared baking pan, arranging them in a single layer. Surround the chicken with the colorful stir-fry vegetables, creating a vibrant base for your Teriyaki Chicken Casserole. This mix of protein and veggies sets the tone for a wholesome family meal.
Step 5: Add the Sauce
Pour one cup of the freshly made teriyaki sauce over the chicken and vegetables, ensuring everything is well coated. Cover the baking pan tightly with aluminum foil to lock in moisture, enhancing the flavors as it bakes. Place the pan in the preheated oven for 30 minutes, or until the chicken reaches an internal temperature of 165°F (74°C).
Step 6: Shred the Chicken
After 30 minutes, carefully remove the pan from the oven and uncover it. Shred the chicken directly in the dish using two forks, letting the tender meat meld with the sauce. Gently mix in the cooked rice, ensuring every grain absorbs the delicious teriyaki flavor. This step is vital for a cohesive and flavorful Teriyaki Chicken Casserole.
Step 7: Final Bake
Return the casserole to the oven, uncovered, and bake for another 10 minutes until everything is heated through and bubbling. The final bake is crucial for allowing the flavors to deepen, and your kitchen will smell heavenly.
Step 8: Serve and Enjoy
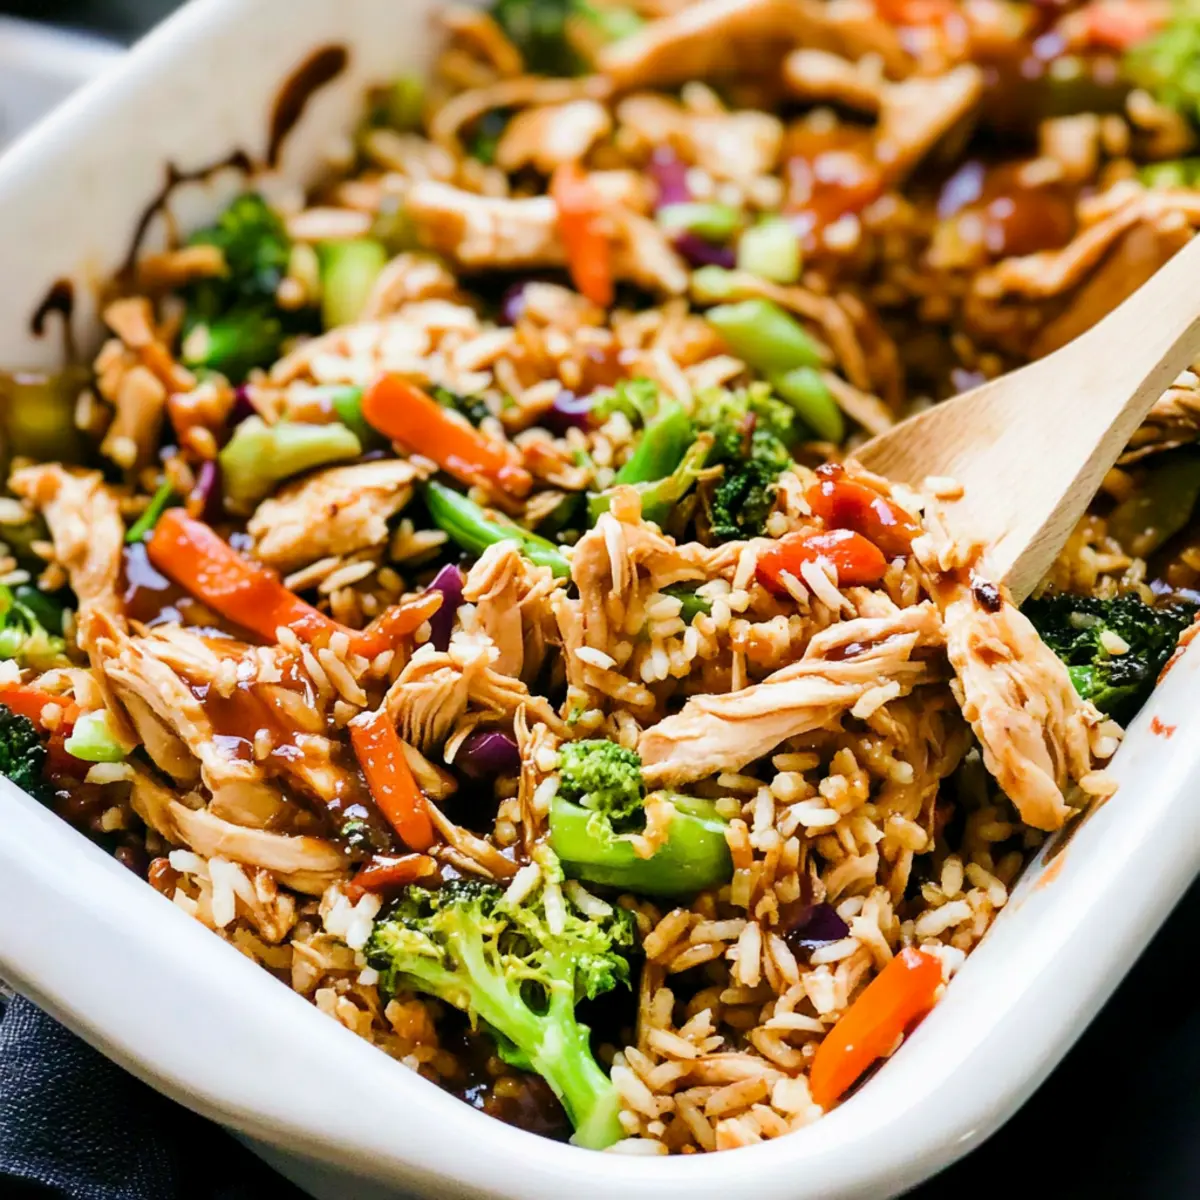
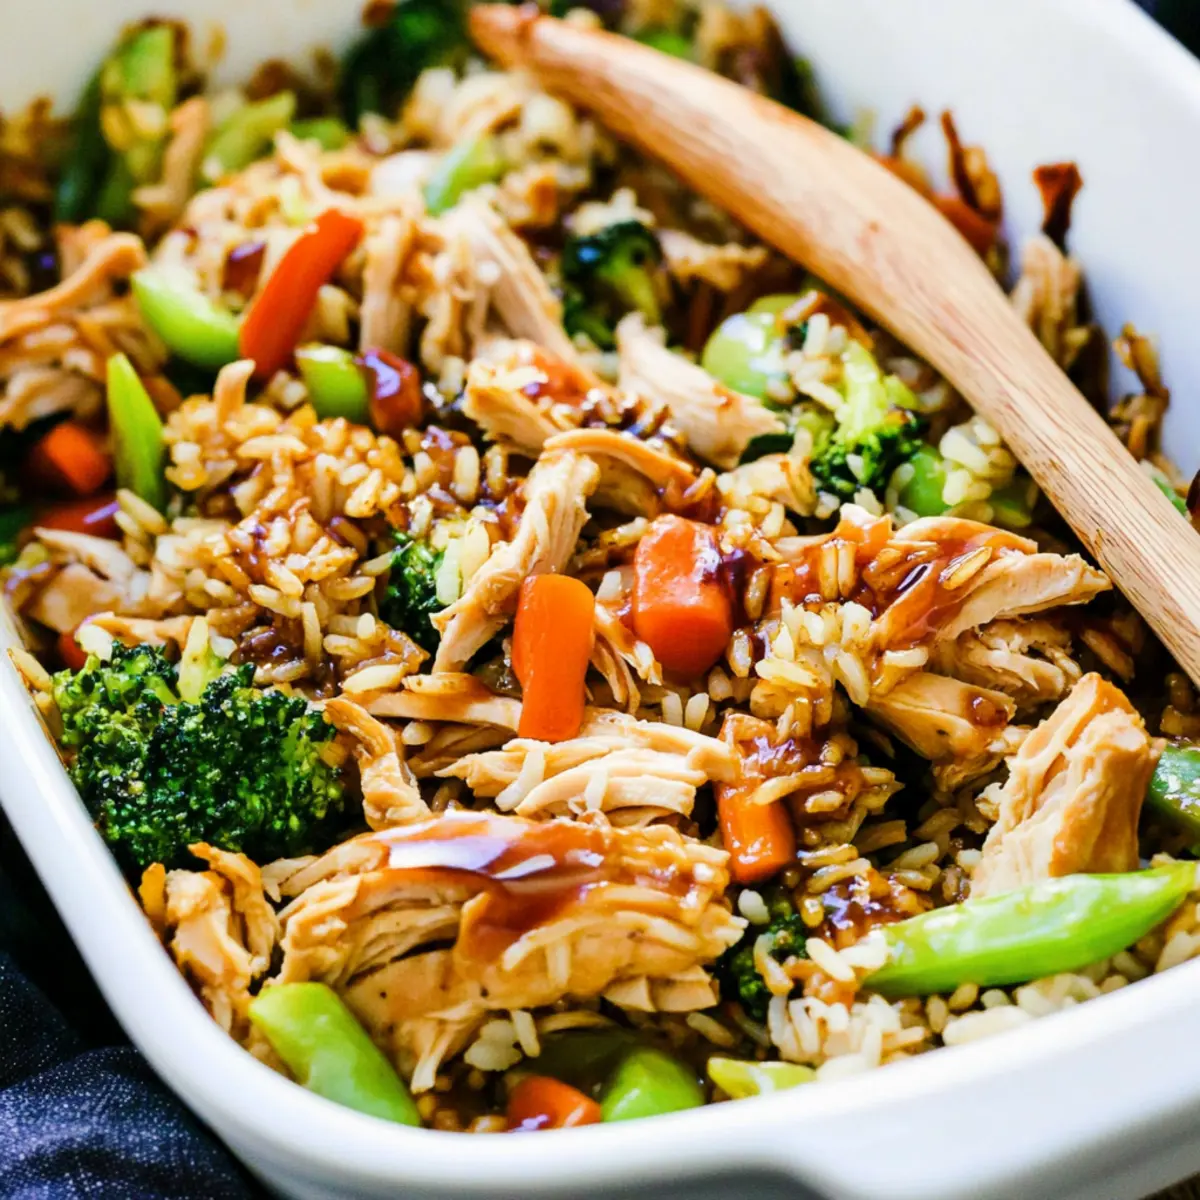
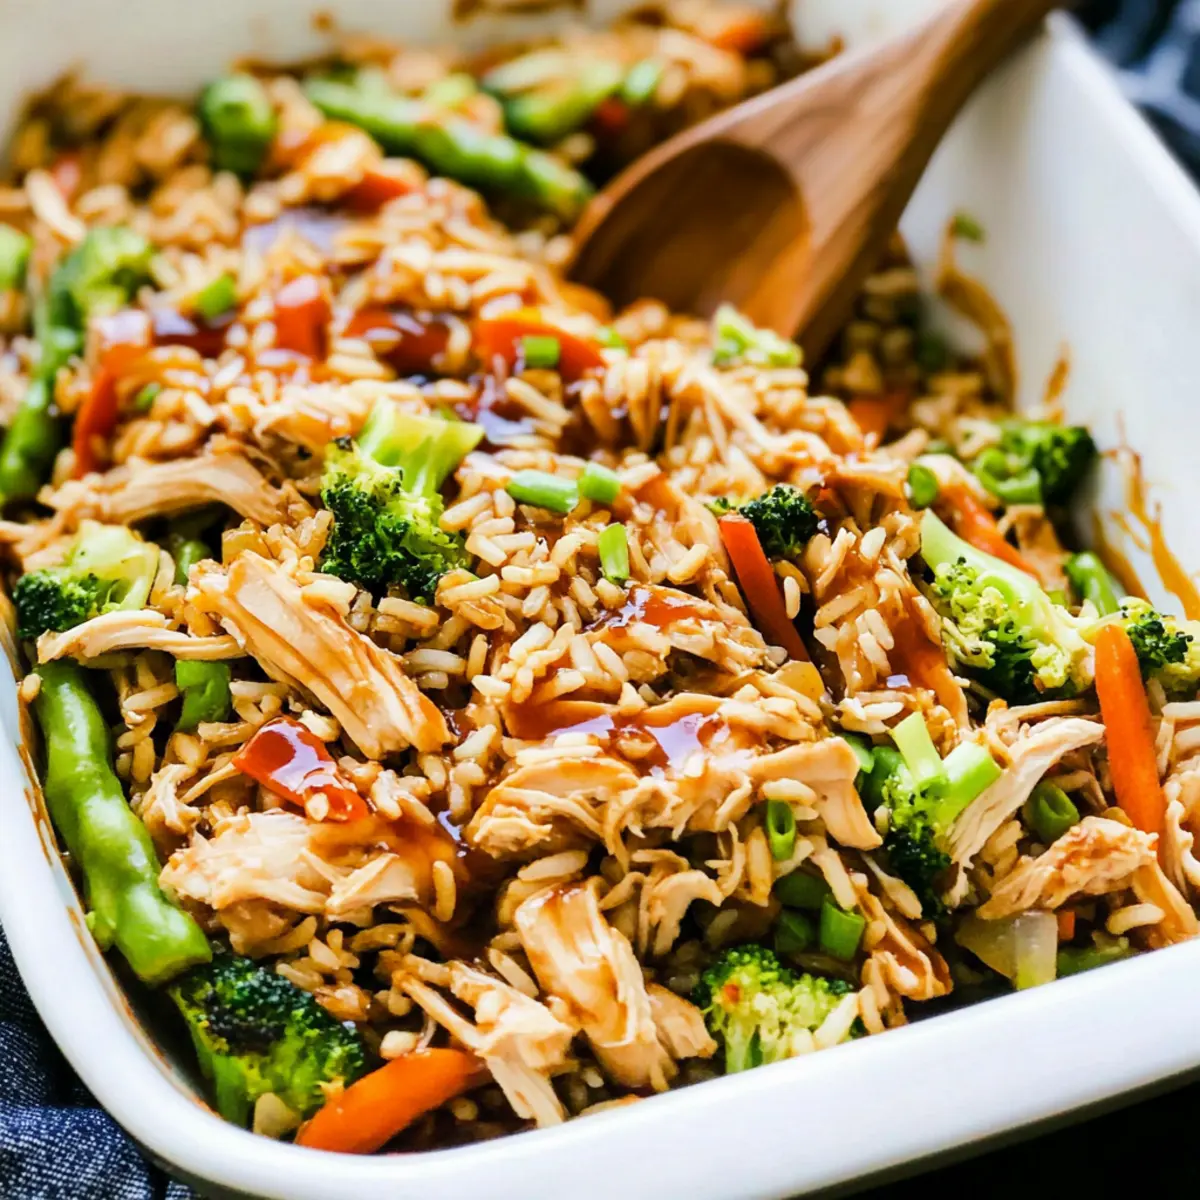
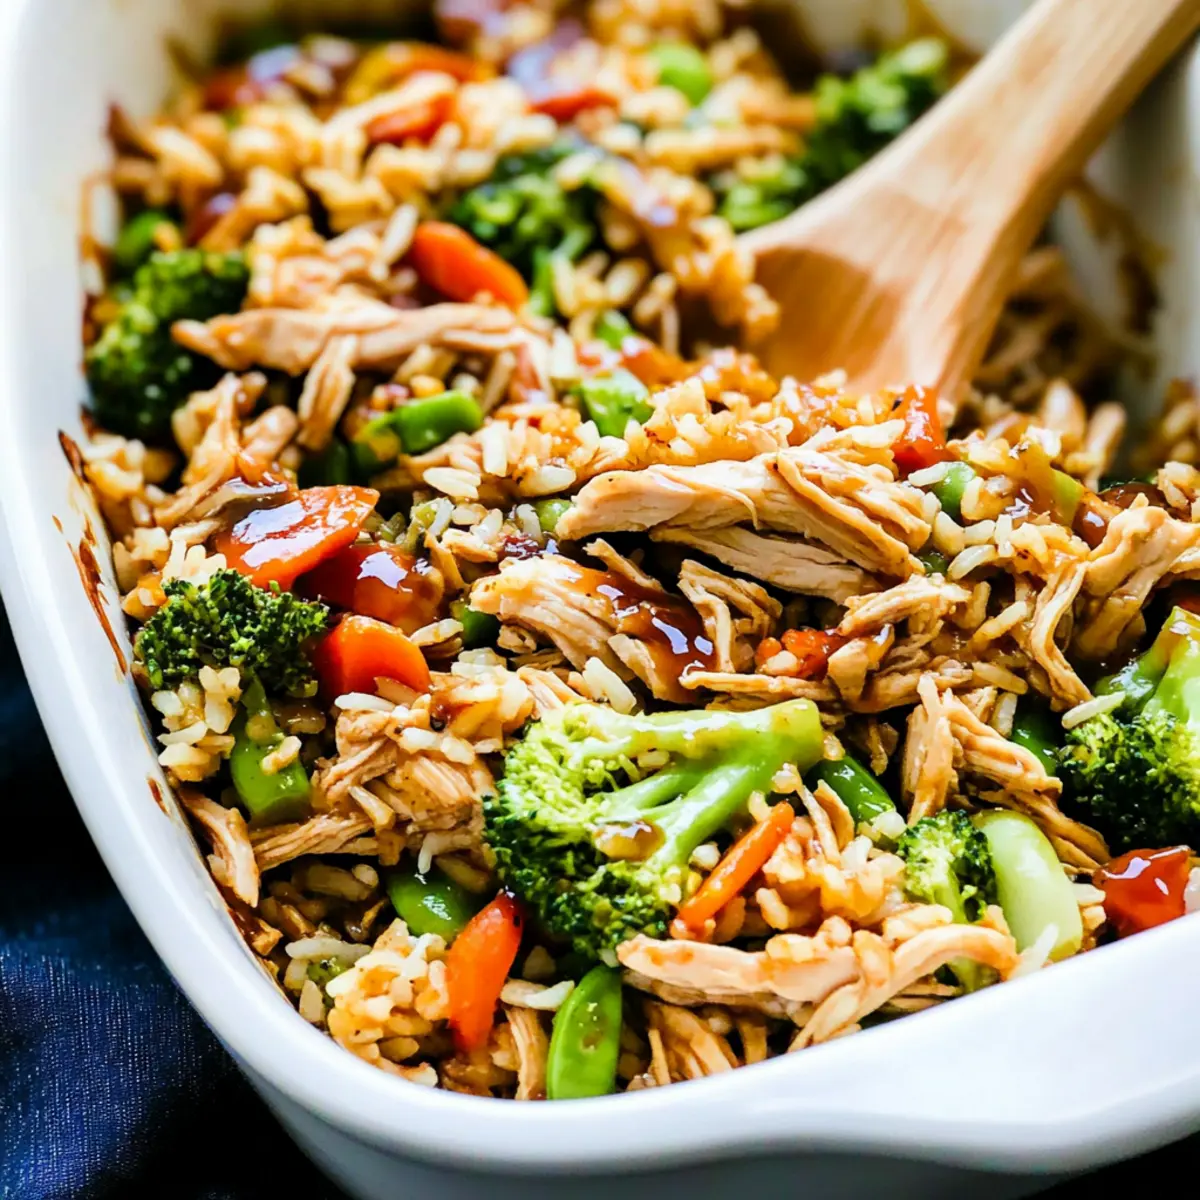
Once baked, let the dish stand for about 5 minutes before serving. This allows the casserole to set slightly, making it easier to scoop onto plates. Garnish with sesame seeds and chopped green onions for a burst of color and flavor. Enjoy your savory Teriyaki Chicken Casserole with family, knowing you’ve created a comforting and satisfying meal!
Teriyaki Chicken Casserole Variations
Feel free to get creative with your Teriyaki Chicken Casserole and customize it according to your taste preferences!
- Dairy-Free: Replace any cheese (if using) with dairy-free cheese or omit it entirely for a deliciously creamy casserole that’s entirely plant-based.
- Vegetarian Option: Swap the chicken for tofu or tempeh for a hearty vegetarian dish that still packs a flavor punch. Toss in additional veggies for extra nutrition!
- Pineapple Twist: Add pineapple chunks to the mixture for a sweet and tangy contrast that brightens the overall flavor of your casserole. They bring a fun, tropical flair!
- Nutty Crunch: Fold in some roasted cashews or slivered almonds to add a delightful crunch and enhance the texture of your dish, making each bite irresistible.
- Spicy Kick: If you enjoy heat, toss in some Sriracha or red pepper flakes to the teriyaki sauce for a spirited twist that elevates the classic flavors.
- Quinoa Substitute: Use cooked quinoa instead of rice for a protein-packed alternative that’s gluten-free and loaded with nutrients. This can give your casserole a unique texture.
- Sauce Upgrade: Experiment with a homemade teriyaki sauce using fresh ingredients for an even more vibrant flavor profile. Incorporating fresh garlic and ginger can be a game changer.
- Seasonal Veggies: Use seasonal vegetables like bell peppers, zucchini, or asparagus to keep your dish fresh and exciting all year round, ensuring every dinner feels special.
For a delightful family night, why not pair your casserole with a refreshing salad or some garlic bread from my Garlic Chicken Gnocchi recipe? Your loved ones will appreciate the variety and flavor!
How to Store and Freeze Teriyaki Chicken Casserole
Fridge: Store leftovers in an airtight container for up to 3 days. Allow the casserole to cool completely before sealing to maintain freshness.
Freezer: For longer storage, freeze in a freezer-safe container for up to 3 months. Make sure to label and date the container for easy tracking.
Reheating: Reheat individual portions in the microwave or warm up in the oven at 350°F until heated through, adding a splash of water or sauce if needed to maintain moisture.
Portioning: For convenience, consider dividing the casserole into smaller portions before freezing. This way, you can easily thaw and enjoy the Teriyaki Chicken Casserole whenever cravings strike!
Make Ahead Options
This Teriyaki Chicken Casserole is a fantastic choice for meal prep, saving you precious time on busy weeknights! You can prepare the teriyaki sauce and refrigerate it for up to 3 days, ensuring that the flavors meld beautifully. Additionally, you can chop your vegetables and store them in an airtight container for up to 24 hours ahead of time. When you’re ready to cook, simply layer the chicken and veggies in your baking pan, pour the chilled sauce over them, and bake according to the instructions. By prepping in advance, you ensure that your casserole is just as delicious while getting dinner on the table with minimal effort!
Expert Tips for Teriyaki Chicken Casserole
-
Moist Chicken: Use a meat thermometer to avoid overcooking; chicken should reach 165°F to stay juicy and tender.
-
Shred While Warm: Shredding the chicken while it’s warm helps it mix better with the rice and sauce, ensuring every bite is flavorful.
-
Sauce Thickness: Adjust the cornstarch amount for the teriyaki sauce thickness to match your preference; too little makes it runny, while too much can turn it gloopy.
-
Veggie Variety: Feel free to swap in your favorite fresh or frozen vegetables; just make sure they’re cut to similar sizes for even cooking.
-
Customize: Consider adding pineapple chunks for a sweet contrast or swapping chicken for tofu for a delicious vegetarian Teriyaki Chicken Casserole.
What to Serve with Savory Teriyaki Chicken Casserole
Elevate your dinner experience with these delightful pairings that enhance the flavors and comfort of your homemade dish.
-
Steamed Broccoli: A crisp and green side, adding a fresh crunch and a nutritious boost that complements the casserole’s savory depth. It’s a perfect example of simple elegance on the plate.
-
Garlic Breadsticks: Soft, warm, and buttery, these breadsticks are great for soaking up any extra teriyaki sauce, turning your meal into a comforting feast. They add a delightful chewy texture that your family will love.
-
Cucumber Salad: A refreshing mix of cucumbers, rice vinegar, and sesame oil adds a light, crisp contrast, cutting through the richness of the casserole. This salad brings a vibrant and crunchy element to the table.
-
Miso Soup: Warm and soothing, a bowl of miso soup complements the flavors of the teriyaki chicken while adding a warm, savory note to your meal. The umami profile beautifully ties everything together.
-
Honey-glazed Carrots: Sweet, tender carrots glazed with honey offer an appealing contrast, enhancing the ensemble with their natural sweetness and vibrant color. Their slight caramelization brings a wonderful taste sensation.
-
Fried Rice: Pack on the flavors with a side of fried rice, where crispy veggies and scrambled eggs meld together, matching the hearty nature of the casserole. This dish echoes the rice element, creating a satisfying duo.
-
Chilled Sake or Green Tea: For drinks, chilled sake offers a refreshing and subtly sweet pairing, perfect for a Japanese cuisine night. Alternatively, serve unsweetened green tea to cleanse the palate and enhance the meal’s flavors.
-
Fruit Sorbet: For dessert, a light fruit sorbet provides a refreshing finish, cleansing the palate after the savory richness of the casserole. It’s a sweet yet light treat everyone will enjoy!
Teriyaki Chicken Casserole Recipe FAQs
How do I select the best chicken for this casserole?
Absolutely! When choosing chicken for your Teriyaki Chicken Casserole, look for boneless, skinless breasts with a nice pink hue. Avoid any packages with dark spots or an off smell. Fresh chicken should feel firm to the touch. If you want a richer flavor, you can opt for thighs, which have more fat and tenderness.
What’s the best way to store leftovers?
Very! To store your Teriyaki Chicken Casserole, let it cool completely, then place it in an airtight container. It can stay in the refrigerator for up to 3 days. For optimal texture, reheat in the oven at 350°F until warmed through, which helps revive that casserole charm.
Can I freeze the casserole for later use?
Absolutely! To freeze, portion your cooled casserole into freezer-safe containers or wrap tightly with plastic wrap and aluminum foil. It can be frozen for up to 3 months. Just make sure to label and date each container. When you’re ready to enjoy it again, thaw overnight in the fridge and reheat in the oven.
What should I do if the sauce is too thick or thin?
No worries! If your teriyaki sauce turns out too thick, simply whisk in a tablespoon of water or more soy sauce until you reach your desired consistency. If it’s too thin, you can mix a teaspoon of cornstarch with a little water to create a slurry, then stir that in while heating until it thickens up nicely.
Is this casserole suitable for people with allergies?
Very! This Teriyaki Chicken Casserole can be modified to suit various dietary needs. For gluten-free options, use tamari instead of soy sauce. If someone is allergic to soy, you can make the sauce with coconut aminos. Always check ingredient labels for hidden allergens, especially in sauces and pre-packaged items.
How can I add more veggies to this dish?
Absolutely! Feel free to incorporate a variety of vegetables into your casserole. You can use fresh or frozen options like bell peppers, green beans, or snap peas. Just ensure to cut them into similar sizes for consistent cooking. Mix and match based on what you have at home or your family’s preferences!
Delicious Teriyaki Chicken Casserole for Family Nights
Ingredients
Equipment
Method
- Preheat your oven to 350°F (175°C) and coat a 9x13-inch baking pan with non-stick spray.
- In a small saucepan over medium heat, combine soy sauce, water, brown sugar, ground ginger, and minced garlic. Stir and bring to a gentle boil for 2-3 minutes.
- Whisk cornstarch and a tablespoon of water until smooth, then slowly add to the boiling sauce. Cook for another 2-3 minutes until thickened.
- Place chicken breasts in the baking pan, surrounding them with stir-fry vegetables.
- Pour one cup of teriyaki sauce over the chicken and vegetables, cover with aluminum foil, and bake for 30 minutes.
- Remove from oven, shred chicken, and mix in cooked rice.
- Return to oven uncovered for an additional 10 minutes until heated through.
- Let stand for 5 minutes before serving. Garnish with sesame seeds and chopped green onions.
Leave a Reply