
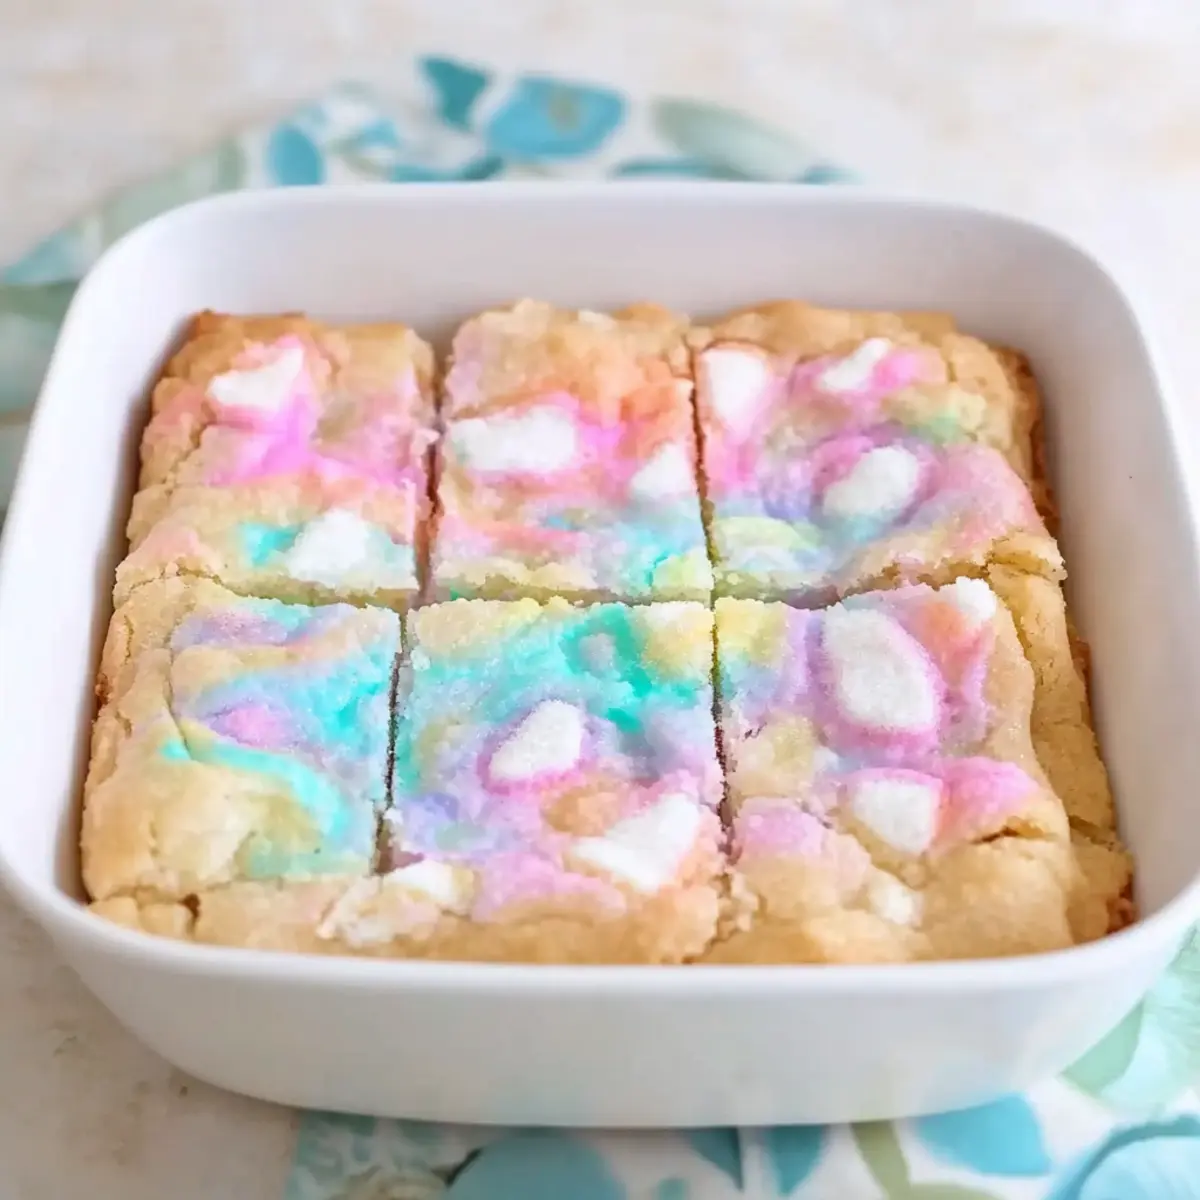
As I watched my kids’ eyes light up upon spotting those sugary little critters each Easter, I knew I had to create something memorable—and what could be more fun than Easter Peeps Sugar Cookie Bars? Picture this: a soft, chewy sugar cookie base topped with vibrant, melting Peeps, offering a delightful treat that’s as much a feast for the eyes as it is for the tastebuds. Not only is this recipe quick and easy, perfect for those bustling holiday weekends, but the colorful bars also bring a sense of nostalgic joy that makes them a hit with both children and adults alike. So, whether you’re hosting a festive brunch or just looking to brighten up your afternoon, this treat is bound to add some sweet spring vibes to your table. Ready to dive into a fun baking adventure?
Why Are These Bars a Must-Bake?
Quick and Easy: These Easter Peeps Sugar Cookie Bars come together in a flash, making them perfect for last-minute baking.
Festive Appeal: With their vibrant colors and whimsical design, they instantly elevate any spring celebration.
Soft and Chewy: The blend of cookie dough and melted Peeps creates a delightful texture you won’t be able to resist.
Versatile Treats: Whether for Easter brunch or a kids’ party, these bars are a sure way to spread joy—and check out more delightful desserts like [Healthy Carrot Cookies](https://stewspire.com/healthy-carrot-cake-oatmeal-cookies/)!
Nostalgic Flavor: The combination of classic sugar cookies and marshmallow sweetness evokes memories of childhood Easters—perfect for kids and adults alike.
Don’t miss out, dive into this sweet adventure and enjoy every colorful bite!
Easter Peeps Sugar Cookie Bars Ingredients
• For the Cookie Base
- Refrigerated Sugar Cookie Dough – A 16.5 oz tube is recommended for ease of use; you can also make homemade sugar cookie dough for an extra touch.
• For the Topping
- Peeps (about 8) – These colorful marshmallow treats add a vibrant, sweet, and gooey topping that beautifully enhances the appeal of your Easter Peeps Sugar Cookie Bars.
Make these deliciously fun treats for your spring celebrations and watch everyone indulge in their festive charm!
Step‑by‑Step Instructions for Easter Peeps Sugar Cookie Bars
Step 1: Preheat the Oven
Begin by preheating your oven to 350°F (175°C). While the oven warms up, grab an 8×8 inch baking dish and grease it thoroughly with non-stick spray. This will ensure easy removal of your delicious Easter Peeps Sugar Cookie Bars once they are baked.
Step 2: Prepare the Cookie Base
Take half of the refrigerated sugar cookie dough and press it evenly into the bottom of the greased baking dish. Use your fingers or a spatula to create a smooth, flat layer. This chewy cookie base will provide a perfect foundation for the bars, so aim for an even thickness.
Step 3: Add the Peeps
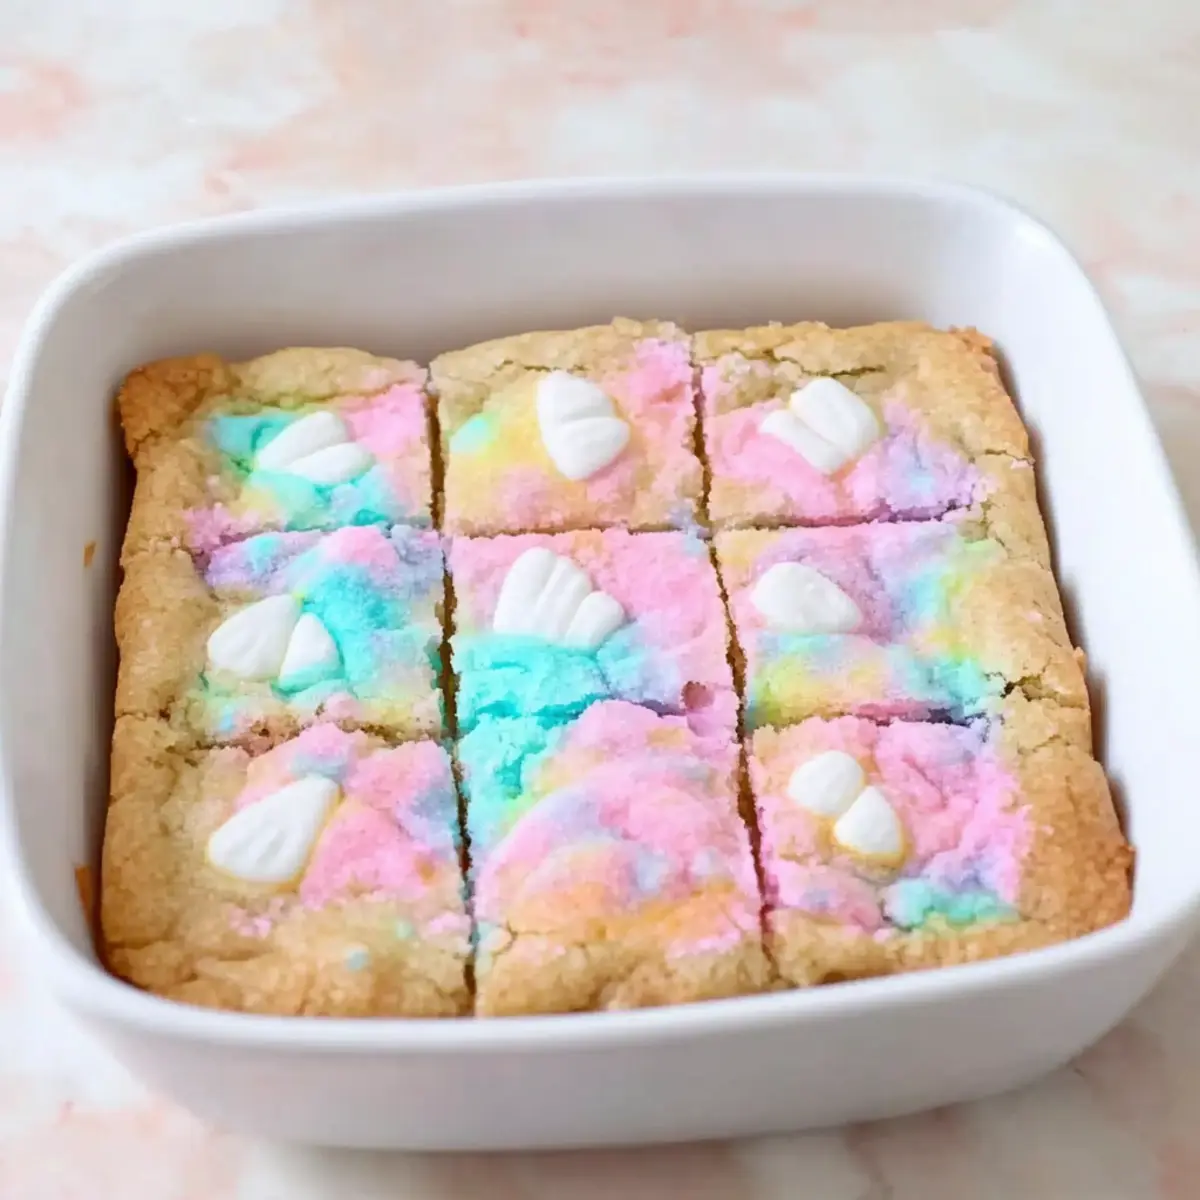
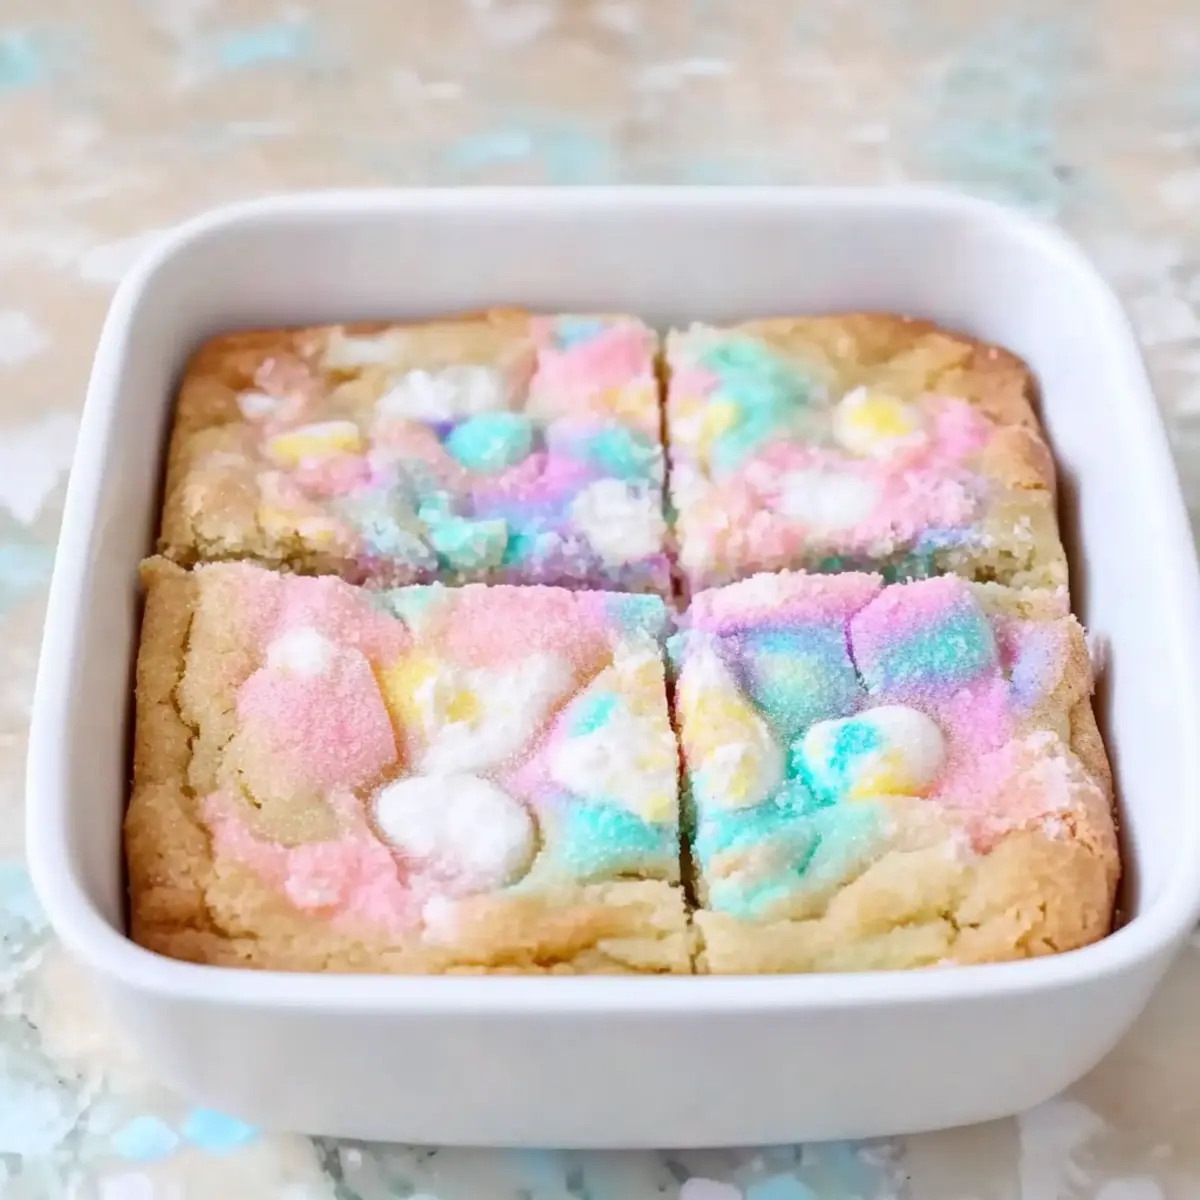
Now it’s time for the fun part! Place the colorful Peeps evenly across the cookie dough layer. Make sure to arrange them so that every square will have a vibrant pop of color, ensuring that your Easter Peeps Sugar Cookie Bars will look as delightful as they taste.
Step 4: Top with Remaining Dough
Next, break the remaining cookie dough into small pieces and sprinkle them over the Peeps. This will create a cozy blanket over the vibrant toppings. The bits of dough will bake up soft and chewy, providing a lovely contrast to the gooey, melted Peeps underneath.
Step 5: Initial Baking
Carefully transfer your baking dish into the preheated oven and bake for 8 minutes. Check in as they bake: the edges should start to appear set, while the center will remain soft. You’re looking for a slight golden hue starting to form at the edges.
Step 6: Swirl the Peeps
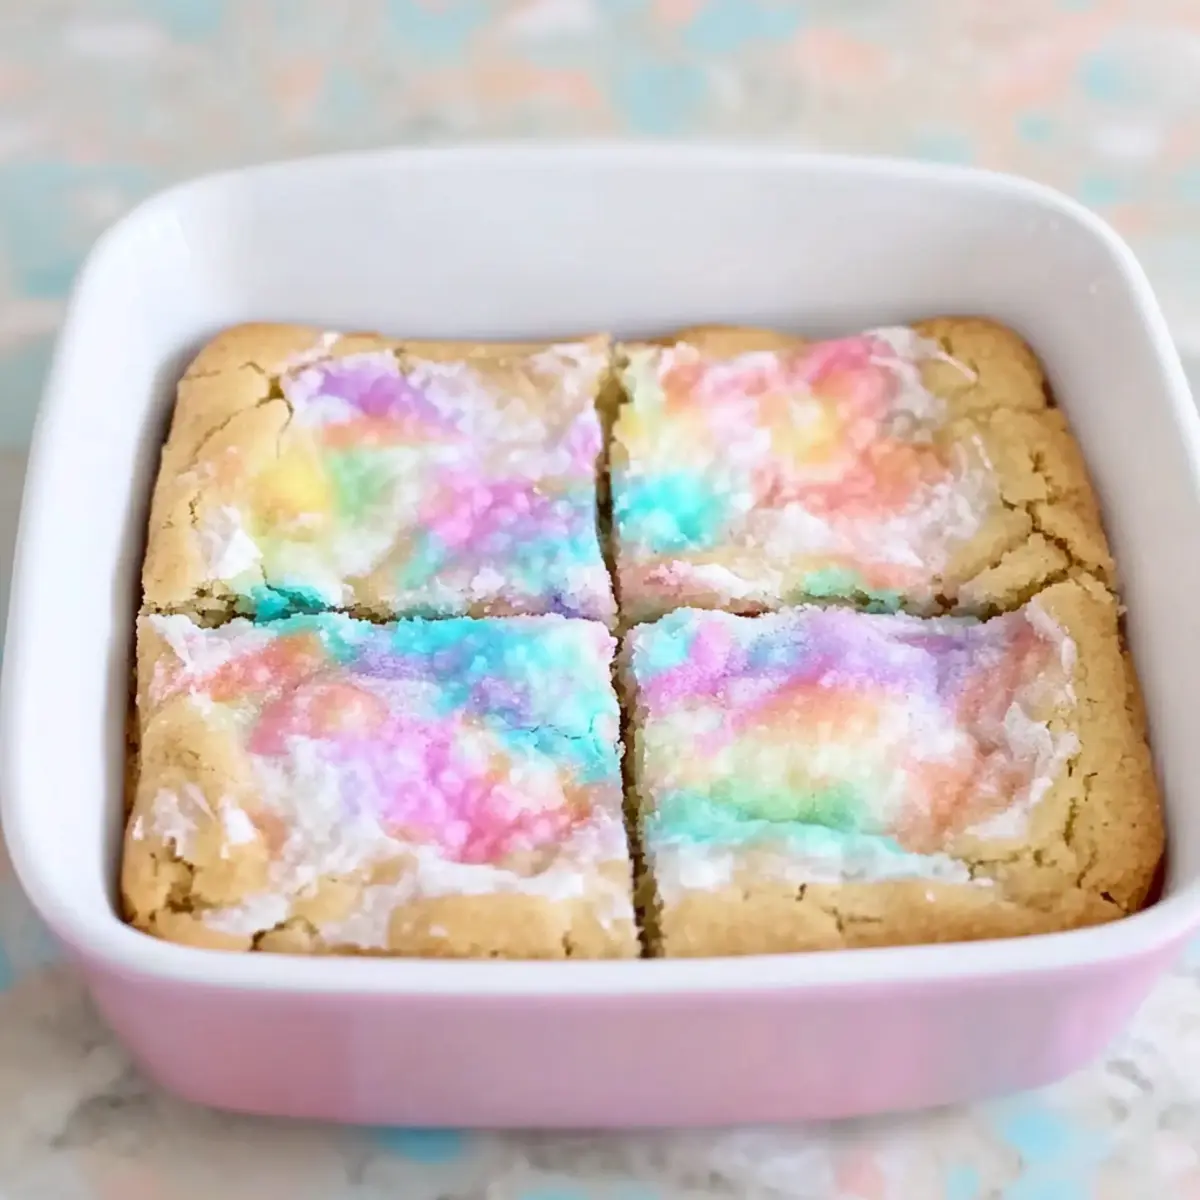
Once the initial baking time is up, remove the dish from the oven. Using a lightly sprayed spatula, gently swirl the softened Peeps in a circular motion. This will create a glossy, marbled effect across the top of your Easter Peeps Sugar Cookie Bars, which adds to their festive charm.
Step 7: Complete the Baking
Return the dish to the oven and bake for an additional 12 minutes, or until the top is golden brown and the center is fully cooked through. You’ll know they’re done when the edges are set, and a toothpick inserted in the center comes out clean.
Step 8: Cool and Firm Up
Once out of the oven, allow the bars to cool completely at room temperature in the baking dish. This cooling step helps the bars firm up nicely, making them easier to slice. Patience is key as the delightful flavors meld together while cooling!
Step 9: Chill for Perfect Slicing
For best results, place the cooled baking dish in the refrigerator for one hour. This chilling time will help the bars hold their shape when sliced and enhance the flavors of your Easter Peeps Sugar Cookie Bars.
Step 10: Slice with Ease
When you’re ready to serve, use a butter knife sprayed with non-stick spray to cut the chilled bars into squares. This will help prevent sticking to the gooey marshmallow topping from the melted Peeps, resulting in beautifully neat slices ready to indulge!
What to Serve with Easter Peeps Sugar Cookie Bars
These colorful treats are perfect for sweetening up your spring gatherings and pairing beautifully with delightful accompaniments.
-
Whipped Cream: This light and fluffy topping adds a creamy texture that balances the sweetness of the bars.
-
Fresh Berries: Strawberries or blueberries introduce a refreshing tartness that perfectly complements the sweetness of the Peeps.
-
Vanilla Ice Cream: A scoop of creamy vanilla ice cream brings a rich, luscious contrast to the chewy cookie bars, creating a delightful dessert experience.
-
Milk: A classic pairing that offers a refreshing drink option, helping to wash down every gooey bite with a nostalgic vibe.
-
Fruit Salad: A colorful mix of seasonal fruits adds a vibrant and healthy touch, enhancing the festive atmosphere around Easter celebrations.
-
Chocolate Drizzle: Drizzle some melted chocolate over the bars for a decadent touch that amps up the dessert’s visual and flavor appeal.
Serving these delightful additions alongside your Easter Peeps Sugar Cookie Bars will surely create a memorable spring celebration!
Easter Peeps Sugar Cookie Bars Variations
Feel free to play around with these ideas to make your Easter Peeps Sugar Cookie Bars uniquely yours!
- Gluten-Free: Use a gluten-free sugar cookie dough to accommodate dietary restrictions while keeping the delicious factor intact.
- Add Sprinkles: Sprinkle colorful confetti or themed sprinkles over the melted Peeps for an extra festive crunch and pop of color.
- Chocolate Lovers: Drizzle melted chocolate over the top of the bars after cooling for a rich and indulgent twist that everyone will adore.
- Fruit Infusion: Add chopped freeze-dried strawberries or raspberries into the cookie base for a fruity burst that complements the sweetness of the Peeps.
- Nutty Texture: Fold in some chopped nuts like pecans or almonds into the cookie dough for a delightful crunch that contrasts with the gooey topping.
- Flavor Experiment: Mix in some vanilla or almond extract into the dough for an extra layer of flavor; it really elevates the cookie experience!
- Sweet Heat: Spice things up by adding a pinch of cinnamon or even cayenne pepper to the cookie dough for a surprising and delightful kick.
- Meringue Topping: After baking, spoon some meringue over the top and lightly torch it for a visually stunning and deliciously different finish.
Embrace your creativity in the kitchen, and don’t forget to explore more scrumptious treats like [Healthy Carrot Cookies](https://stewspire.com/healthy-carrot-cake-oatmeal-cookies/) and [Bake Peanut Bars](https://stewspire.com/no-bake-peanut-butter-chocolate-oat-bars/) to keep your dessert table exciting!
Expert Tips for Easter Peeps Sugar Cookie Bars
-
Chill the Dough: Prior to baking, chilling the cookie dough helps maintain the cookies’ softness, ensuring your Easter Peeps Sugar Cookie Bars come out tender and chewy.
-
Swirl Gently: When swirling the Peeps, use a light touch. This way, you keep their vibrant colors intact, giving your bars a neat and festive appearance.
-
Spray the Knife: To avoid sticking while slicing, always spray your knife with non-stick spray before cutting the bars. This keeps the gooey marshmallow topping smooth and intact.
-
Storage Matters: Keep any leftover bars refrigerated in an airtight container. This helps maintain their freshness and color vibrancy for several days.
-
Add More Fun: Consider drizzling melted chocolate or adding colorful sprinkles on top before serving for an extra touch of festive joy!
Make Ahead Options
These Easter Peeps Sugar Cookie Bars are a fantastic option for busy home cooks who want to simplify their meal planning! You can prepare the cookie base up to 24 hours in advance by baking it according to the instructions and then allowing it to cool completely before refrigerating. Just remember to cover it tightly to maintain its freshness and texture. The Peeps can be added right before baking, which allows them to keep their vibrant colors intact. When ready to serve, simply warm them slightly in the oven for a few minutes (to refresh the gooey topping) before slicing. With this make-ahead strategy, you’ll have a delightful dessert ready for your festivities, all while saving precious time!
How to Store and Freeze Easter Peeps Sugar Cookie Bars
Fridge: Keep your leftover Easter Peeps Sugar Cookie Bars in an airtight container for up to 5 days to maintain their freshness and vibrant colors.
Freezer: For longer storage, you can freeze the bars by wrapping them tightly in plastic wrap and then in foil. They should stay good for up to 3 months!
Thawing: When ready to enjoy, thaw the bars in the refrigerator overnight. Reheat in the microwave for a few seconds if desired for that fresh-baked warmth.
Reheating: If you prefer warm bars, lightly microwave each piece for about 10-15 seconds to bring back their deliciousness without losing texture!
Easter Peeps Sugar Cookie Bars Recipe FAQs
What kind of sugar cookie dough should I use for this recipe?
Absolutely! For the best results, I recommend using a refrigerated sugar cookie dough tube (16.5 oz) for ease of preparation. If you prefer an extra touch, homemade sugar cookie dough works wonderfully too, allowing you to customize flavors to your liking!
How long can I store leftover Easter Peeps Sugar Cookie Bars?
To maintain their freshness and vibrant colors, store your leftover bars in an airtight container in the refrigerator for up to 5 days. Chilling helps the bars continue to taste delightful, so they’ll be just as enjoyable on day five as they are on day one!
Can I freeze Easter Peeps Sugar Cookie Bars? How?
Very much so! For longer storage, you can freeze the bars for up to 3 months. Wrap each bar tightly in plastic wrap, then place them in a freezer-safe bag or container to avoid freezer burn. This way, you can enjoy these sweet treats later on!
What’s the best way to thaw and reheat frozen bars?
When you’re ready to enjoy your frozen Easter Peeps Sugar Cookie Bars, thaw them in the refrigerator overnight. To bring back their delicious warm texture, simply microwave each piece for 10-15 seconds. It’s a quick way to revive that fresh-baked goodness!
Are there any dietary considerations for this recipe?
Absolutely! If allergies are a concern, be aware that the sugar cookie dough and Peeps may contain gluten and other allergens, depending on the brand. Always check the packaging for any dietary restrictions. For a gluten-free alternative, consider using gluten-free sugar cookie dough to ensure everyone can enjoy these festive bars!
Easter Peeps Sugar Cookie Bars for Fun Spring Celebrations
Ingredients
Equipment
Method
- Preheat your oven to 350°F (175°C) and grease an 8x8 inch baking dish with non-stick spray.
- Press half of the refrigerated sugar cookie dough evenly into the bottom of the greased baking dish.
- Place the Peeps evenly across the cookie dough layer.
- Sprinkle the remaining cookie dough over the Peeps.
- Bake for 8 minutes until the edges start to set.
- Gently swirl the softened Peeps with a lightly sprayed spatula.
- Return to the oven and bake for an additional 12 minutes until golden brown.
- Allow the bars to cool completely in the baking dish.
- Chill in the refrigerator for one hour before slicing.
- Slice with a butter knife sprayed with non-stick spray for easy cutting.
Leave a Reply