
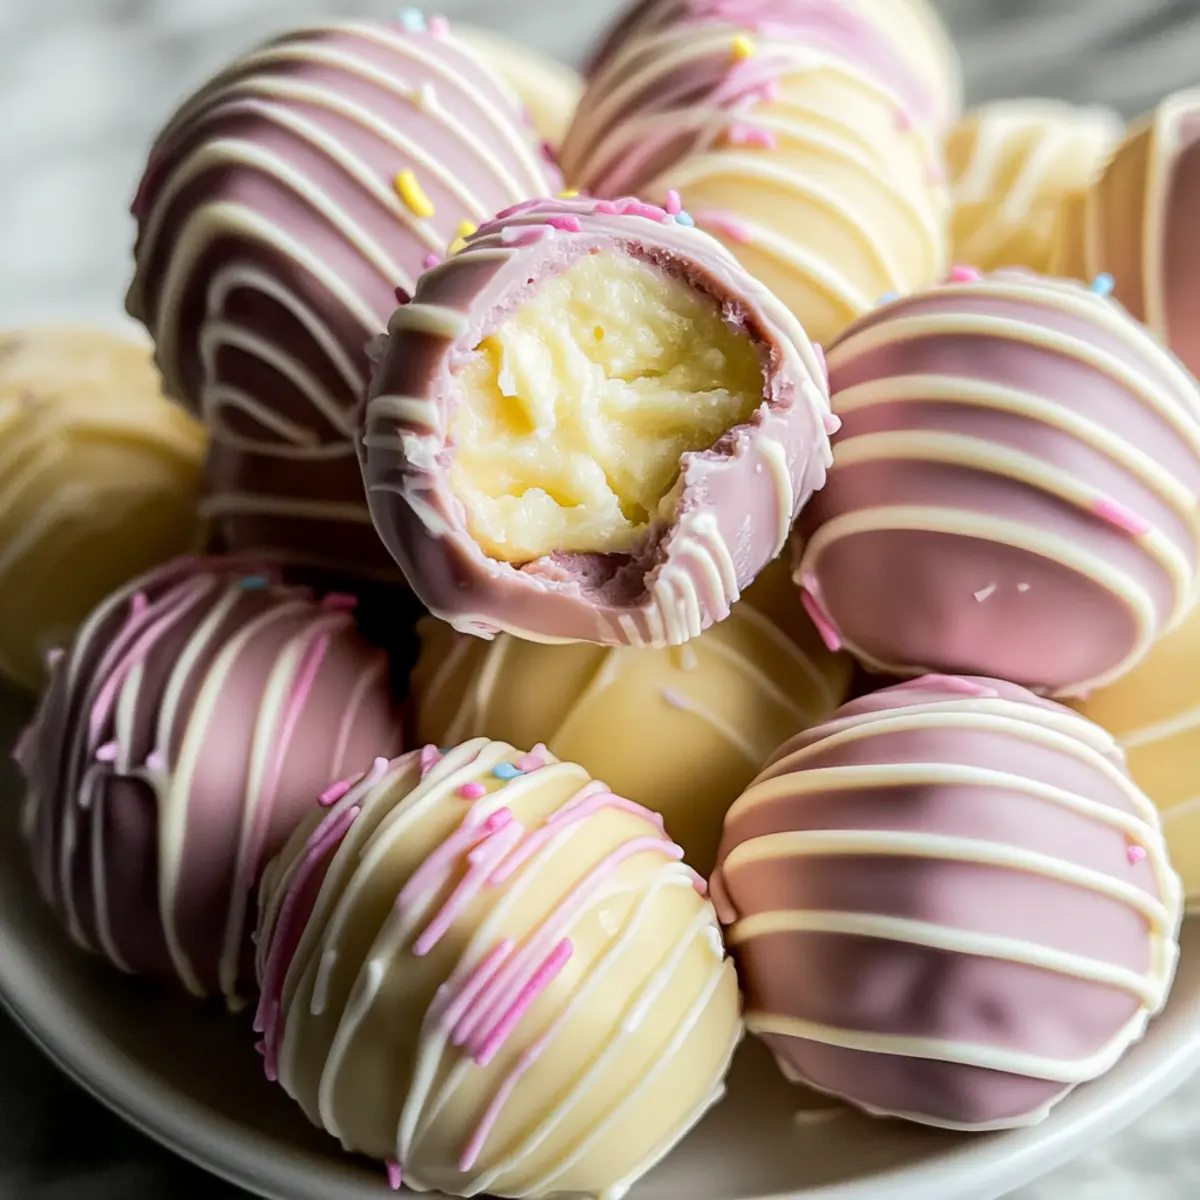
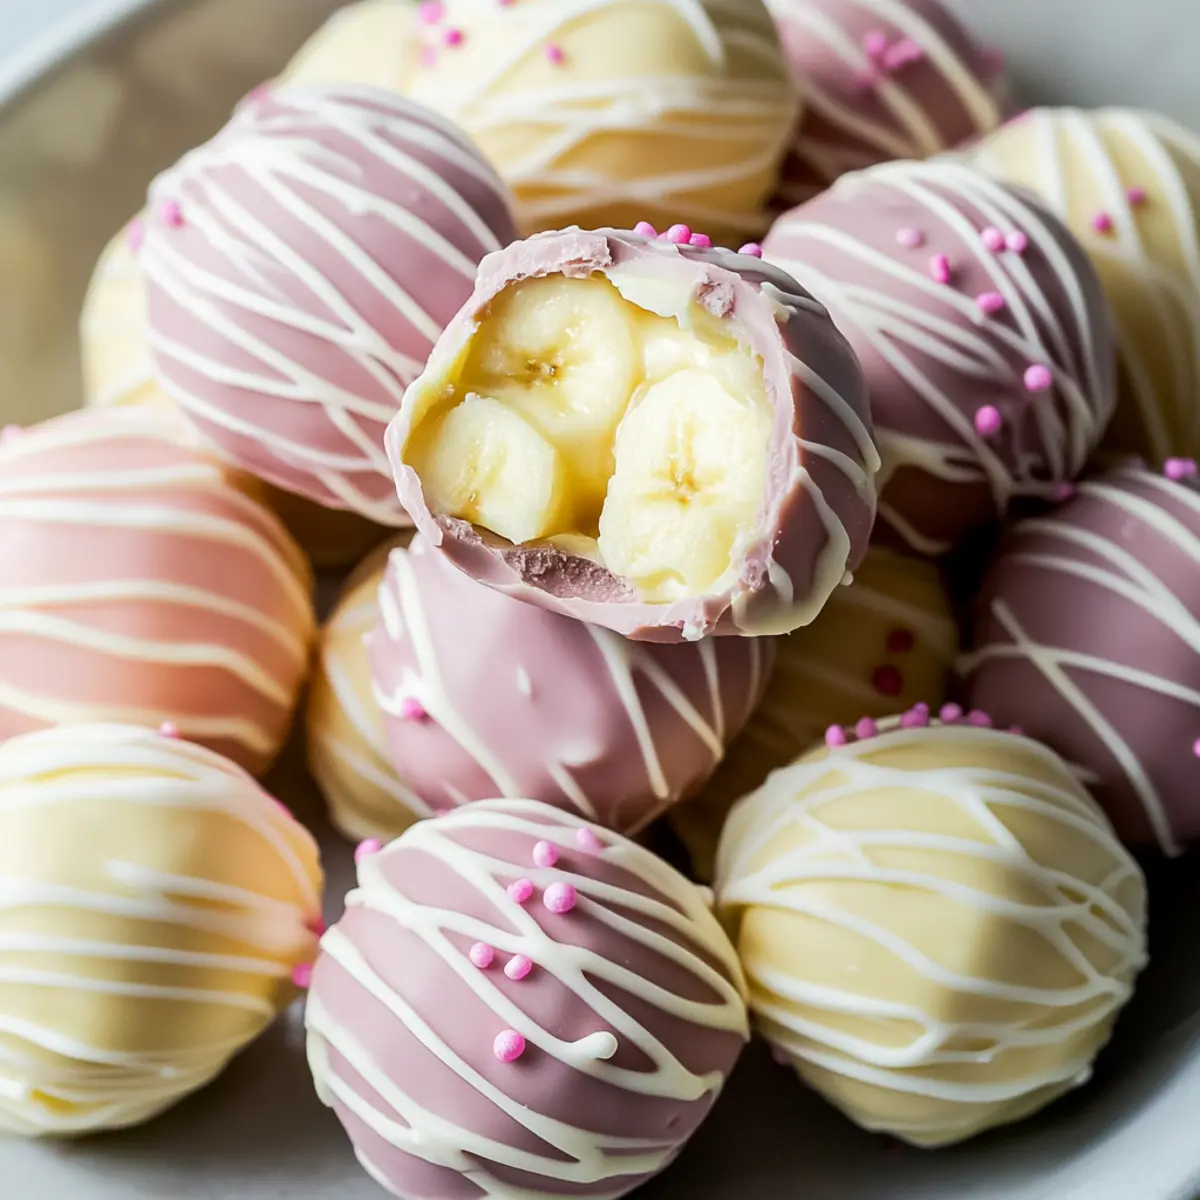
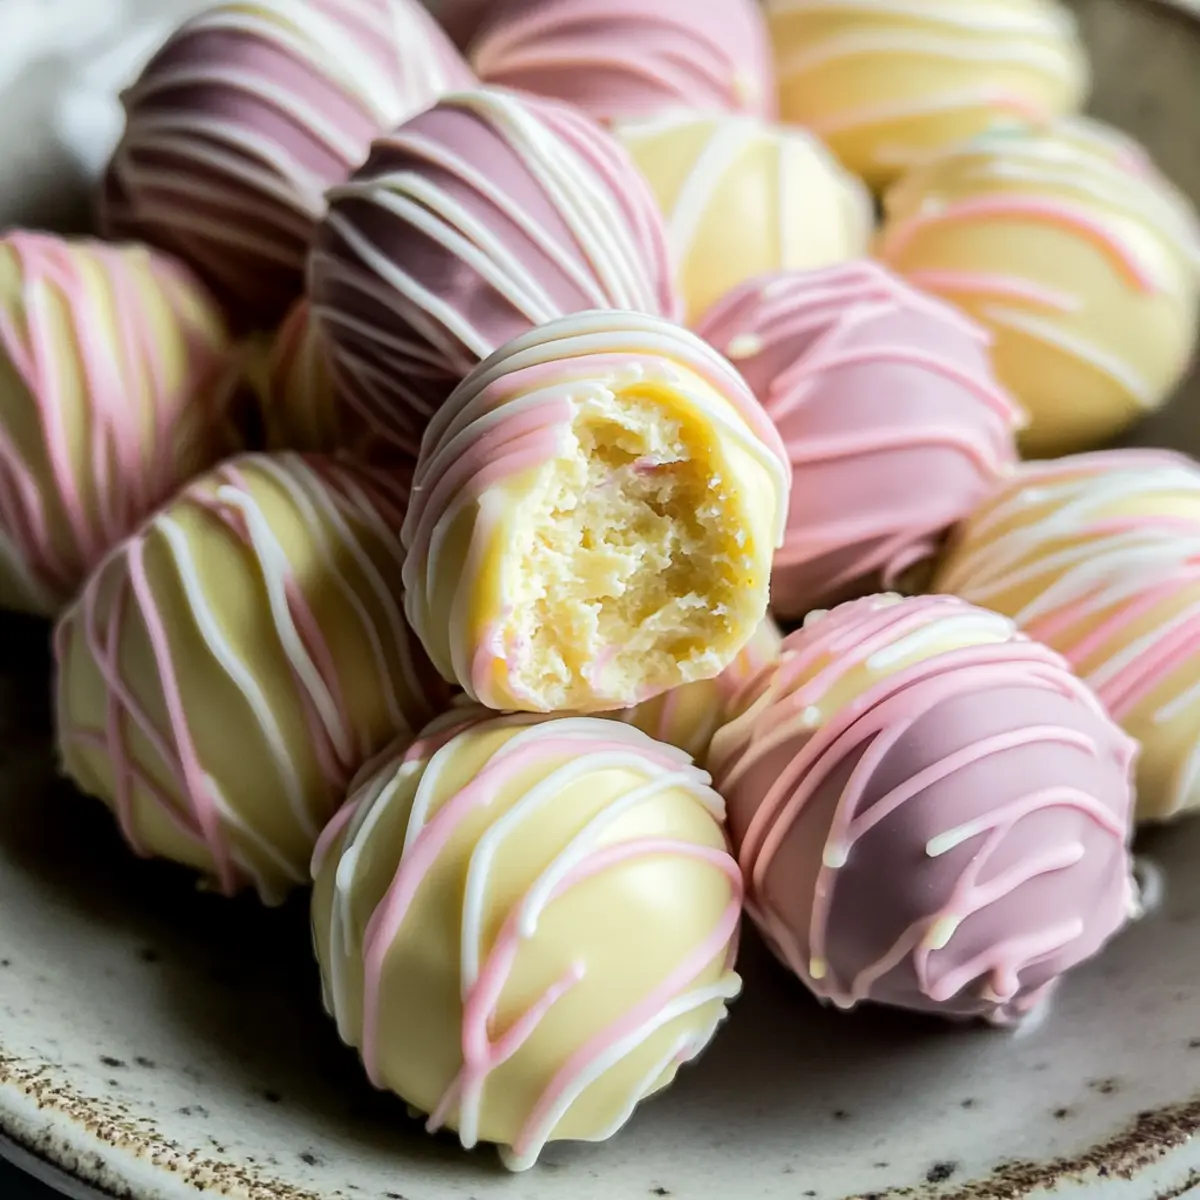
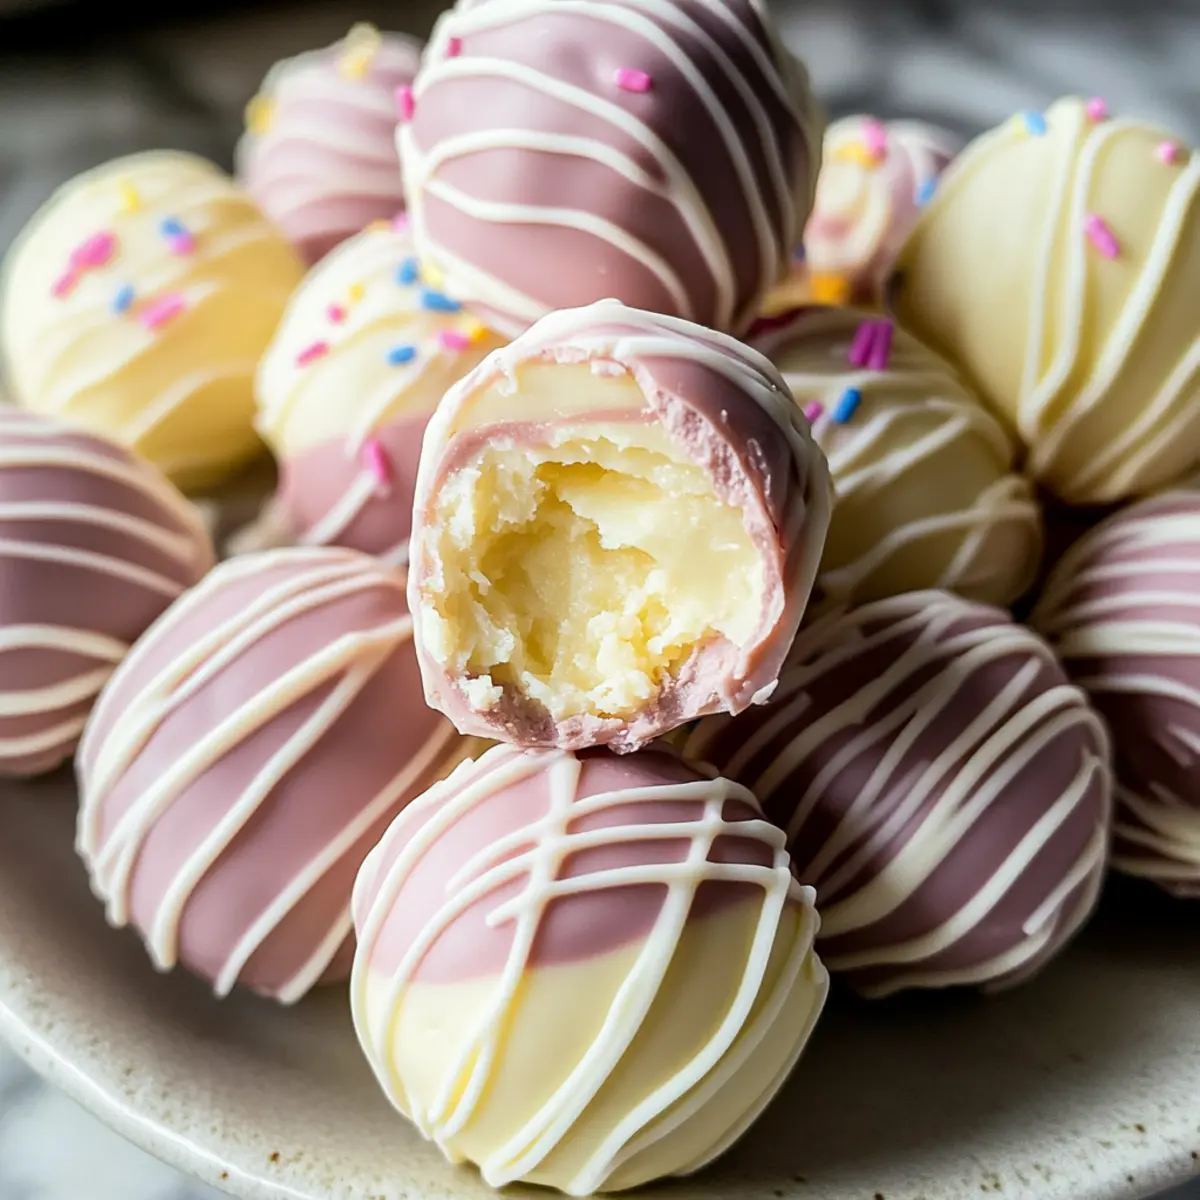
As the sun begins to warm the earth and spring blooms around us, I find myself reminiscing about the joyful chaos of Easter gatherings—kids giggling, pastel decorations everywhere, and, of course, delightful treats that capture the season’s spirit. This year, I’m excited to share a new family favorite: No-Bake Banana Pudding Easter Truffles. These dreamy bites boast a creamy banana pudding center nestled inside a crispy crushed vanilla wafer coating, all dressed up in a vibrant, pastel chocolate shell. Not only are they a simple dessert to whip up, ensuring you can spend more time with loved ones, but they also double as a fun activity for kids to join in on the preparation. So, are you ready to make some sweet memories in the kitchen this Easter? Let’s dive into this delightful recipe!
Why are these truffles a must-try?
Deliciously Unique: The creamy banana pudding center paired with a crunchy vanilla wafer coating offers a blissful bite that you won’t find in traditional treats.
Kid-Friendly Fun: Involve the little ones in the kitchen! These delightful truffles are perfect for family bonding, making sweet memories together.
No-Bake Convenience: With a quick and easy process, these truffles require minimal effort. Just chill and serve, leaving you more time to enjoy the festivities.
Festive Flair: Their pastel chocolate coating and optional sprinkles make for a visually appealing dessert that is sure to impress at any Easter gathering.
Versatile Variations: Feel free to play around! Try our Coconut Banana Truffles or Peanut Butter Banana Truffles for delightful twists on this classic favorite.
Banana Pudding Easter Truffles Ingredients
For the Truffle Filling
• Crushed Vanilla Wafers – Provides structure and crunch; can substitute with graham crackers for a different flavor.
• Cream Cheese (softened) – Adds creaminess and richness to the filling; use full-fat or reduced-fat versions as preferred.
• Banana Pudding Mix (dry, 3.4 oz) – Imparts the classic banana flavor; a high-quality brand enhances the taste.
• Milk – Moistens the filling mixture; whole, almond, or any preferred milk works well.
• Vanilla Extract – Adds depth of flavor; optional but recommended for enhanced taste.
For the Chocolate Coating
• White Chocolate Chips or Candy Melts (2 cups) – Forms the outer coating; can substitute with milk or dark chocolate for a richer flavor.
• Food Coloring (optional) – To dye the chocolate for festive colors; use pastel colors for a delightful spring look.
For Decoration
• Crushed Vanilla Wafers or Easter Sprinkles – Enhances visual appeal and adds texture to your Banana Pudding Easter Truffles.
Step‑by‑Step Instructions for Banana Pudding Easter Truffles
Step 1: Prepare the Filling
In a large mixing bowl, combine 1 ½ cups of crushed vanilla wafers, 8 oz of softened cream cheese, 3.4 oz package of banana pudding mix, ½ cup of milk, and 1 teaspoon of vanilla extract. Use a hand mixer to blend until a smooth dough forms, which should take about 2-3 minutes. The mixture should be cohesive and slightly sticky, perfect for shaping.
Step 2: Shape Truffles
Once the mixture is ready, scoop tablespoon-sized portions and roll them into balls using your hands. Place each ball on a parchment-lined baking sheet, ensuring they are spaced apart. Once shaped, cover the sheet with plastic wrap and chill the truffles in the refrigerator for 30-45 minutes, or until they firm up nicely and can hold their shape.
Step 3: Melt Chocolate
While the truffles chill, prepare the chocolate coating. In a microwave-safe bowl, add 2 cups of white chocolate chips or candy melts. Microwave in 30-second intervals on medium power, stirring between each interval until completely smooth and melted, which usually takes about 1-2 minutes total. Be cautious not to overheat the chocolate to prevent it from seizing.
Step 4: Coat Truffles
Once the chocolate is melted and smooth, remove the cooled truffles from the refrigerator. Using a fork, dip each truffle into the melted chocolate, ensuring it’s fully coated. Allow the excess chocolate to drip off back into the bowl before placing them back on the parchment-lined baking sheet.
Step 5: Decorate
Before the chocolate coating sets, sprinkle the tops of the truffles with either crushed vanilla wafers or colorful Easter sprinkles for an added festive touch. Be quick, as the chocolate begins to harden after a few minutes. This will add both visual appeal and texture, making your Banana Pudding Easter Truffles even more delightful.
Step 6: Set and Serve
Let the truffles sit at room temperature for about 10-15 minutes to allow the coating to harden. If you prefer a firmer texture, place them in the refrigerator for an additional 15-20 minutes. Once set, serve the truffles in a decorative bowl or gift them in a charming box, celebrating the festive spirit of Easter with this sweet no-bake treat.
Make Ahead Options
These Banana Pudding Easter Truffles are perfect for meal prep enthusiasts! You can prepare the filling and shape the truffles up to 24 hours in advance. Simply follow the first two steps of the recipe and place the rolled truffles in an airtight container in the refrigerator to maintain their freshness. When you’re ready to serve, melt the chocolate and coat the chilled truffles as directed. It’s best to do the coating just before serving to ensure the chocolate sets nicely and remains vibrant. This way, you’ll enjoy all the deliciousness of these truffles without any last-minute rush, making your Easter celebration even sweeter!
Variations & Substitutions for Banana Pudding Easter Truffles
Feel free to unleash your creativity and make this delightful dessert your own with these tasty suggestions!
-
Coconut Twist: Roll truffles in shredded coconut for a tropical flavor that adds both texture and flair. This little twist can elevate the truffles, making them feel like a mini vacation in each bite!
-
Nutty Delight: Add 1/4 cup of creamy peanut butter to the filling for a scrumptious peanut butter-banana combination. The nutty flavor complements the sweetness of the banana, creating a harmonious blend that kids and adults will love.
-
Minty Freshness: Stir in a few drops of mint extract into the melted chocolate for a refreshing twist. This adds a lovely cooling effect to every bite, perfect for those who enjoy a hint of minty sweetness!
-
Chocolate Lover’s Dream: Swap the white chocolate coating with rich dark or milk chocolate for a truly indulgent experience. This minor adjustment transforms the flavor profile, catering to chocoholics everywhere.
-
Fruit Medley: Mix in a handful of mini chocolate chips or dried fruit like cranberries or raisins in the filling for an unexpected flavor burst. It introduces delightful surprises with every bite!
-
Spicy Kick: Add a sprinkle of cayenne pepper or chili powder to the chocolate for a cheeky heat that contrasts beautifully with the sweetness. It’s an adventurous choice that adds excitement to your truffles!
-
Vegan Version: For a plant-based alternative, use coconut cream instead of cream cheese and plant-based milk. Additionally, opt for vegan chocolate chips or carob chips as your outer coating. These changes create a delicious, inclusive treat for everyone to enjoy.
-
Fruit-Infused: Replace banana pudding mix with instant vanilla pudding then fold in some mashed ripe bananas for a fresh fruit flavor. This enhances the natural taste of bananas while maintaining a creamy texture.
For more delightful inspirations, check out our Strawberry Banana Pudding for a fruity twist, or perhaps indulge in our High Protein Pudding for a guilt-free treat!
Expert Tips for Banana Pudding Easter Truffles
• Choose Ripe Bananas: Using ripe bananas enhances the banana flavor, making your truffles even more delicious.
• Melt Chocolate Gently: Melt chocolate in short intervals to avoid overheating, which can lead to a seized texture.
• Chill Before Coating: Ensure the truffles are firm before dipping to prevent them from losing shape in the melted chocolate.
• Colorful Creations: Use different pastel food coloring shades for the chocolate to create a festive look, perfect for Easter celebrations.
• Storage Savvy: Keep truffles in an airtight container; they last for up to 5 days in the refrigerator or can be frozen for up to 2 months.
• Creative Garnishing: Don’t hesitate to experiment with decorations, like fun sprinkles or coconut, to personalize your Banana Pudding Easter Truffles.
How to Store and Freeze Banana Pudding Easter Truffles
Fridge: Keep your truffles in an airtight container for up to 5 days. This helps maintain their creamy texture and prevents them from drying out.
Freezer: For longer storage, freeze the truffles in a single layer on a baking sheet before transferring them to a freezer-safe bag or container. They can last up to 2 months this way.
Thawing: To enjoy frozen Banana Pudding Easter Truffles, move them to the fridge for several hours or overnight to let them thaw gradually while retaining their delicious flavor.
Reheating: These truffles are best served chilled, so there’s no need for reheating. Simply take them out of the fridge or freezer and enjoy!
What to Serve with Banana Pudding Easter Truffles
As you create delightful memories with these no-bake treats, consider pairing them with some complementary dishes to enhance your Easter celebration.
- Coconut Cream Pie: This tropical dessert’s creamy texture and sweet coconut flavor harmonize beautifully with the banana notes in your truffles.
- Berry Salad: A refreshing mix of strawberries, blueberries, and raspberries adds a burst of color and tartness that contrasts the sweetness of the truffles perfectly.
- Mint Iced Tea: This cool, refreshing beverage balances out the rich creaminess of the truffles while adding a hint of brightness to your gathering.
- Mini Cheesecakes: Crafted with a light and fluffy filling, these treats echo the creaminess of the truffles, making them a delicious duo on your dessert table.
- Chocolate-Covered Strawberries: Their luscious chocolate exterior and juicy fruit interior make them an irresistibly delightful companion for the Easter truffles.
- Pineapple Upside-Down Cake: Offering a lovely caramelized sweetness, this cake brings a delicious contrast that complements the flavors of your Banana Pudding Easter Truffles.
- Peach Sweet Tea: This Southern staple adds a fruity twist that pairs wonderfully with the classic banana flavors of the truffles.
- Vanilla Ice Cream: Creamy and smooth, a soft scoop of this favorite complements the texture of your truffles while enhancing their dessert experience.
- Easter Egg Cookies: Decorated or plain, these cookies add a festive touch to your spring celebration, making them a perfect accompaniment to your truffles.
- Sparkling Lemonade: A fizzy, citrusy drink brightens your table and offers a refreshing contrast to the rich, creamy truffle goodness.
Banana Pudding Easter Truffles Recipe FAQs
How do I choose ripe bananas for the truffles?
Absolutely! Look for bananas that have a rich yellow color with a few brown spots; that’s a sign they’re perfectly sweet and flavorful. Avoid ones that are too green as they won’t provide the same tasty sweetness in your truffles.
What is the best way to store Banana Pudding Easter Truffles?
You can keep your truffles in an airtight container in the refrigerator for up to 5 days. This storage method preserves their creamy texture and prevents them from drying out. If you want to enjoy them later, consider freezing!
Can I freeze Banana Pudding Easter Truffles?
Yes, you can! To freeze, place the truffles in a single layer on a baking sheet and freeze until solid. Then transfer them to a freezer-safe bag or container. They’ll last in the freezer for up to 2 months. Just remember to thaw them in the fridge for several hours or overnight before serving.
What if my chocolate coating is too thick?
Not to worry! If your chocolate is too thick to coat the truffles evenly, you can thin it out by adding a small drizzle of vegetable oil or coconut oil. Stir it in until you achieve a smoother consistency that’s easier for dipping.
Are there any dietary considerations for these truffles?
Very much! Always check the labels on your ingredients, especially the pudding mix and chocolate. If you’re concerned about allergies, you can substitute with gluten-free wafers or dairy-free chocolate chips, ensuring that everyone can enjoy these delightful Banana Pudding Easter Truffles!
What should I do if my truffles are falling apart?
If your truffles are crumbling, it might be a sign they are not firm enough. Ensure they’ve chilled long enough (30-45 minutes) before coating. If needed, place them back in the fridge for a bit longer. Alternatively, you can add a little more cream cheese to help hold everything together.
Banana Pudding Easter Truffles – A Must-Try No-Bake Treat
Ingredients
Equipment
Method
- In a large mixing bowl, combine 1 ½ cups of crushed vanilla wafers, 8 oz of softened cream cheese, 3.4 oz package of banana pudding mix, ½ cup of milk, and 1 teaspoon of vanilla extract. Use a hand mixer to blend until a smooth dough forms, about 2-3 minutes.
- Scoop tablespoon-sized portions and roll them into balls using your hands. Place each ball on a parchment-lined baking sheet and chill for 30-45 minutes.
- Melt 2 cups of white chocolate chips or candy melts in a microwave-safe bowl in 30-second intervals, stirring in between until smooth.
- Dip each chilled truffle into the melted chocolate, allowing excess to drip off, and place back on the parchment-lined baking sheet.
- Before the coating sets, sprinkle the tops with crushed vanilla wafers or Easter sprinkles.
- Let truffles sit for about 10-15 minutes to harden. Serve in a decorative bowl or gift them.
Leave a Reply