
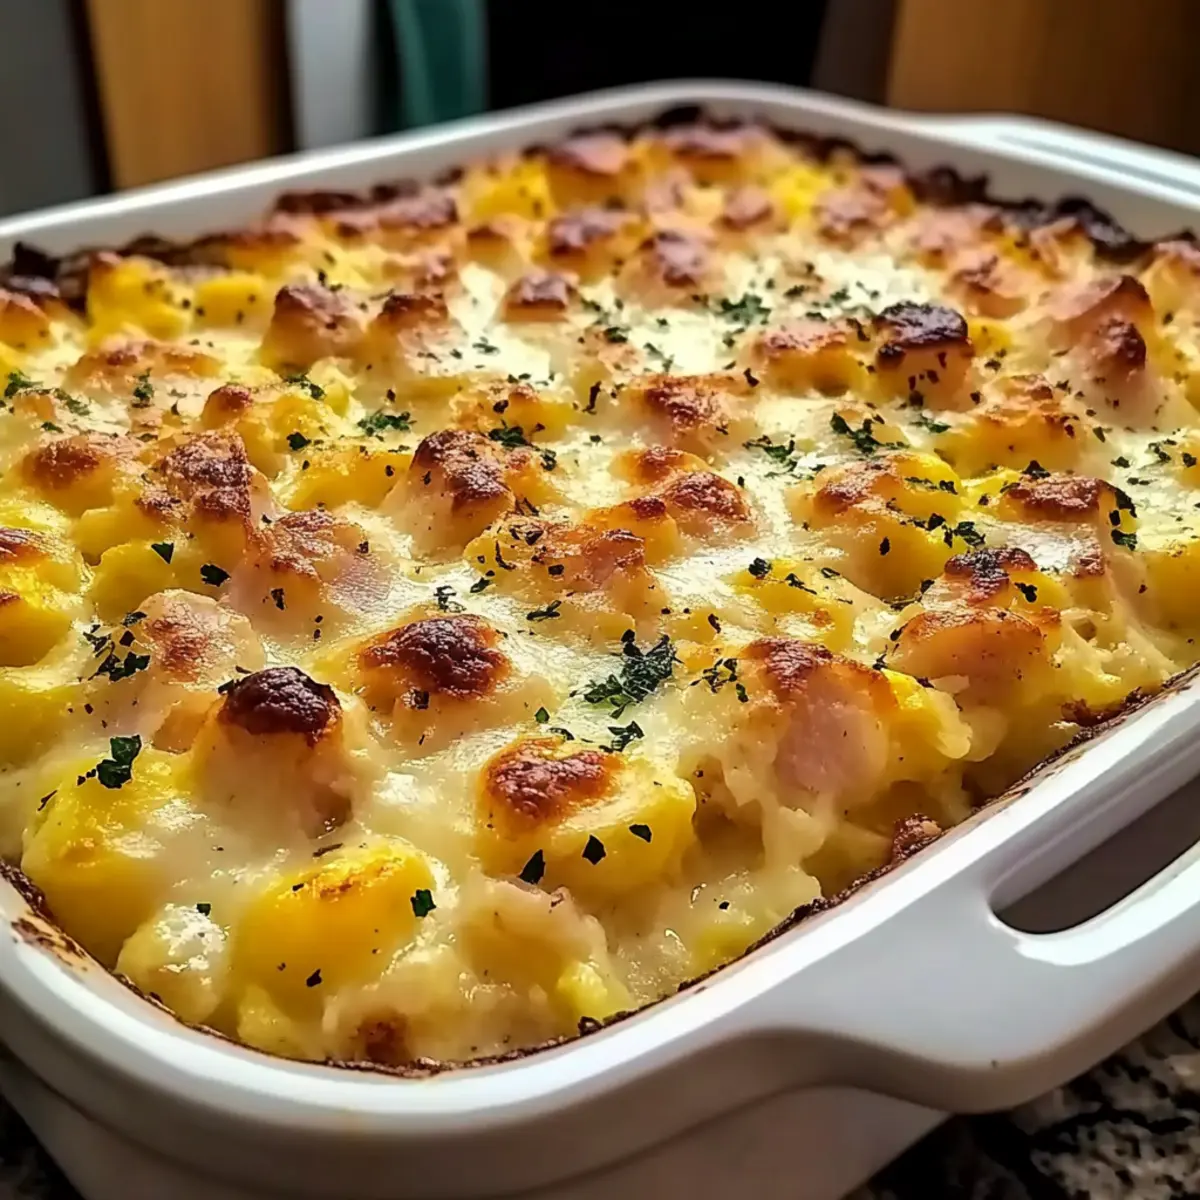
As the aroma of baked eggs and cheesy goodness fills the kitchen, I can’t help but think of those family gatherings where everyone fights for the last slice of this Classic Easter Dinner Casserole. This comforting dish layers tender ham, fluffy eggs, and gooey cheese, effortlessly blending flavors that evoke memories of joyous celebrations. With its easy prep, you’ll impress everyone without spending hours in the kitchen, making it the ultimate crowd-pleaser for brunch or dinner. Whether you’re using leftover holiday ham or whipping it up for a special occasion, this casserole is the perfect centerpiece for your table. Curious about how to bring this hearty comfort food to life? Let’s dive into the delicious details!

Why is this casserole a must-try?
Ease of Preparation: You’ll love how simple it is to whip up this Classic Easter Dinner Casserole without spending hours in the kitchen.
Savory Layers: Each bite offers a delightful blend of tender ham, fluffy eggs, and gooey cheese, ensuring a rich, comforting experience.
Crowd-Pleaser: Whether it’s brunch or dinner, this dish is guaranteed to impress family and friends—no one will leave the table hungry!
Make-Ahead Magic: Prep it a day in advance and just pop it in the oven when you’re ready, making it a stress-free addition to your celebrations.
If you’re searching for more comforting options, check out my Cordon Bleu Casserole or try the delightful Doritos Casserole Savory next!
Classic Easter Dinner Casserole Ingredients
For the Casserole
- Diced Ham – For best results, use leftover Easter ham or smoked ham for a rich, savory flavor.
- Large Eggs – Essential for the custard base, they bind the casserole and create a fluffy, tender texture.
- Milk – Whole milk or cream adds creaminess and helps set the casserole perfectly.
- Bread Cubes – Day-old bread absorbs the egg mixture, ensuring a soft but sturdy base; fresh bread may result in sogginess.
- Shredded Cheddar Cheese – Adds a sharpness that beautifully balances the savory ham and creamy eggs.
- Mozzarella Cheese – For that irresistible gooeyness, it melts beautifully into the dish.
- Dijon Mustard – A subtle tangy flavor enhancer; adjust to your taste for a personal touch.
- Salt – Essential for seasoning, it brings out all the casserole’s wonderful flavors.
- Black Pepper – Provides warmth to the flavor profile; feel free to adjust to your preference.
This Classic Easter Dinner Casserole is bound to be a hit at your table!
Step‑by‑Step Instructions for Classic Easter Dinner Casserole
Step 1: Preheat and Prepare
Begin by preheating your oven to 350°F (175°C). While it warms up, grab a 9×13-inch baking dish and grease it with a little butter or non-stick spray to prevent sticking. This step sets the foundation for your Classic Easter Dinner Casserole, ensuring it bakes evenly and doesn’t cling to the dish.
Step 2: Layer the Ham
Once your dish is prepped, evenly layer the diced ham across the bottom. Use leftover Easter ham or smoked ham for the best flavor. Spread it out so every bite of the casserole receives that rich, savory goodness. This delicious base is the heart of your casserole.
Step 3: Whisk the Egg Mixture
In a large bowl, whisk together the eggs, milk, Dijon mustard, salt, and black pepper until smooth and well combined. This fluffy custard is key to the texture of your Classic Easter Dinner Casserole. Aim for a pale yellow color, ensuring all ingredients are thoroughly mixed together, about 1-2 minutes of whisking.
Step 4: Combine with Bread
Next, distribute the bread cubes over the ham evenly. Pour the egg mixture gently over the bread, ensuring it’s well soaked. Use a fork to press down the bread slightly, ensuring it absorbs the custard. This step is crucial for achieving the perfect consistency and flavor throughout the casserole.
Step 5: Add Cheese Layers
Generously sprinkle shredded cheddar and mozzarella cheese over the top of the casserole. This cheesy layer melts beautifully during baking, creating that gooey texture everyone loves. Make sure every corner of the dish is covered for maximum cheesiness and flavor in your Classic Easter Dinner Casserole.
Step 6: Bake until Golden
Place the casserole in your preheated oven and bake uncovered for 35–40 minutes. You’ll know it’s done when the top is golden brown and a knife inserted in the center comes out clean. The aroma will fill your kitchen, tempting everyone to gather around as it nears perfection.
Step 7: Rest and Slice
Once baked, remove the Classic Easter Dinner Casserole from the oven and let it rest for about 5 minutes. This resting period allows the custard to set, making slicing easier. You’ll be rewarded with perfectly structured slices, ready to serve to your family or friends.
Make Ahead Options
These Classic Easter Dinner Casserole preparations can save you valuable time on busy mornings! You can assemble the entire casserole up to 24 hours in advance by following the initial steps, covering it tightly with plastic wrap, and refrigerating. This ensures the bread absorbs all the delicious flavors without becoming mushy. To maintain the quality, be sure to whisk the egg mixture just before pouring it over the bread to keep everything fresh. When you’re ready to serve, just pop the casserole into a preheated oven and bake as directed—no stress, just a delightful meal that tastes just as delicious as if you made it on the spot!
Expert Tips for Classic Easter Dinner Casserole
-
Choose Day-Old Bread: Opt for day-old bread as it absorbs the egg mixture better; fresh bread can lead to a soggy casserole.
-
Watch the Eggs: Avoid overbeating the eggs to prevent excess liquid, ensuring your Classic Easter Dinner Casserole has just the right custard texture.
-
Soak the Bread: Make sure all bread cubes are pressed into the egg mixture for even soaking, which guarantees every bite is flavorful and delicious.
-
Baking Time Matters: Keep an eye on the casserole while baking; every oven is different. Ensure a golden top and a clean knife when checking for doneness.
-
Rest Before Slicing: Let the casserole rest for 5 minutes after baking. This allows the custard to set properly, making slicing a breeze and improving texture.
What to Serve with Classic Easter Dinner Casserole?
As the delightful aroma wafts through your kitchen, it’s time to think about the perfect accompaniments that will elevate your meal into a memorable feast.
-
Fresh Garden Salad: A crisp salad filled with mixed greens and a tangy vinaigrette adds a refreshing crunch that balances the richness of the casserole.
-
Roasted Asparagus: Lightly drizzled with olive oil, roasted asparagus brings a satisfying snap that complements the casserole’s creamy texture.
-
Sweet Balsamic Glazed Carrots: The natural sweetness of glazed carrots provides an inviting contrast, enhancing the hearty savory flavors of your Classic Easter Dinner Casserole.
-
Garlic Bread: Warm, buttery garlic bread is perfect for soaking up the deliciously gooey bits left on your plate, making every bite a treat.
-
Deviled Eggs: This classic appetizer offers a creamy, tangy bite that pairs beautifully with the casserole, reminiscing of holiday gatherings and family traditions.
-
Refreshing Lemonade: A glass of icy lemonade brightens up the meal with its refreshing citrus notes, making it an ideal beverage to wash down your comforting dish!
-
Fruit Salad: A vibrant fruit salad adds a touch of natural sweetness and texture, balancing the savory richness of the casserole and enticing your guests with colorful freshness.
How to Store and Freeze Classic Easter Dinner Casserole
Fridge: Store leftover casserole in an airtight container for up to 3 days; this keeps it fresh and prevents odors from mingling.
Freezer: For longer storage, freeze the casserole in a tightly wrapped container for up to 3 months. Ensure it’s completely cooled before placing it in the freezer.
Reheating: To reheat, thaw in the fridge overnight, then bake in the oven at 350°F (175°C) for about 20–25 minutes, or until heated through. Enjoy your comforting Classic Easter Dinner Casserole again!
Classic Easter Dinner Casserole Variations
Feel free to get creative with this Classic Easter Dinner Casserole and make it your own!
-
Turkey Swap: Replace the ham with leftover roasted turkey for a delightful twist. This option gives a wholesome, savory flavor perfect for using holiday leftovers.
-
Vegetarian Delight: Swap out the ham for sautéed vegetables or spinach. This tweak not only brightens the dish but also adds a colorful and nutritious twist to your casserole.
-
Dairy-Free Alternative: Use almond milk and dairy-free cheese to cater to lactose sensitivities, bringing the same comfort of the classic dish to those with dietary restrictions.
-
Herb Infusion: Add fresh or dried herbs like thyme or rosemary to the egg mixture for an aromatic flavor boost. These herbs elevate the dish with their fragrant essence that pairs beautifully with the richness of cheese.
-
Spicy Kick: Mix in diced jalapeños or crushed red pepper flakes for a little heat. This adds a fun and adventurous flavor profile that spice lovers will appreciate.
-
Gluten-Free Version: Use gluten-free bread to make this dish suitable for those avoiding gluten. It’s just as delicious and ensures everyone can enjoy it at the table.
-
Creamy Spin: Incorporate cream cheese into the egg mixture for extra richness and creaminess. This twist takes the texture to the next level with its luscious mouthfeel.
-
Mexican Fiesta: Mix in some salsa and black beans for a southwestern vibe. Top it with pepper jack cheese, and you’ve got a fiesta-inspired casserole that’s bursting with flavor.
If you find yourself loving casseroles, you may also want to check out my Sticky Beef Noodles or try the comforting Cordon Bleu Casserole for more hearty ideas!
Classic Easter Dinner Casserole Recipe FAQs
What type of ham is best for the casserole?
I recommend using leftover Easter ham or smoked ham for that rich, savory flavor perfect for your Classic Easter Dinner Casserole. If you’re in a pinch, honey-baked ham can also add a delightful sweetness to your dish!
How should I store leftovers?
Leftover casserole can be stored in an airtight container in the fridge for up to 3 days. Just make sure it’s completely cooled before sealing it, as this helps maintain its freshness and prevents odors from mingling in your fridge.
Can I freeze the casserole?
Absolutely! To freeze your Classic Easter Dinner Casserole, first, let it cool completely. Then, wrap it tightly in plastic wrap or aluminum foil and store it in a freezer-safe container. It can be frozen for up to 3 months. For best results, thaw overnight in the fridge before reheating.
What can I do if the casserole turns out soggy?
If your casserole is soggy, it’s likely due to using fresh bread instead of day-old. But there’s a fix! Next time, ensure you use day-old bread, which absorbs the egg mixture better. Additionally, after pouring the egg mixture over the bread, let it sit for about 10 minutes to give the bread time to soak up the liquid before baking.
Is this casserole suitable for dietary restrictions?
Yes! You can make it vegetarian by substituting sautéed vegetables or spinach for the ham. If you need gluten-free options, simply swap out regular bread for gluten-free bread, and for dairy-free, try using nut milk and dairy-free cheese alternatives to accommodate dietary needs.
How long should I let the casserole rest before slicing?
Let the Classic Easter Dinner Casserole rest for about 5 minutes after removing it from the oven. This resting period allows the custard to set, making it easier to slice and ensuring each piece holds its shape beautifully for serving!
Classic Easter Dinner Casserole That Everyone Will Love
Ingredients
Equipment
Method
- Preheat your oven to 350°F (175°C) and grease a 9x13-inch baking dish.
- Layer the diced ham evenly across the bottom of the dish.
- Whisk together the eggs, milk, Dijon mustard, salt, and black pepper until smooth.
- Distribute the bread cubes over the ham, then pour the egg mixture gently over the bread.
- Sprinkle shredded cheddar and mozzarella cheese over the top.
- Bake uncovered for 35–40 minutes until golden brown.
- Let the casserole rest for about 5 minutes before slicing.
Leave a Reply