
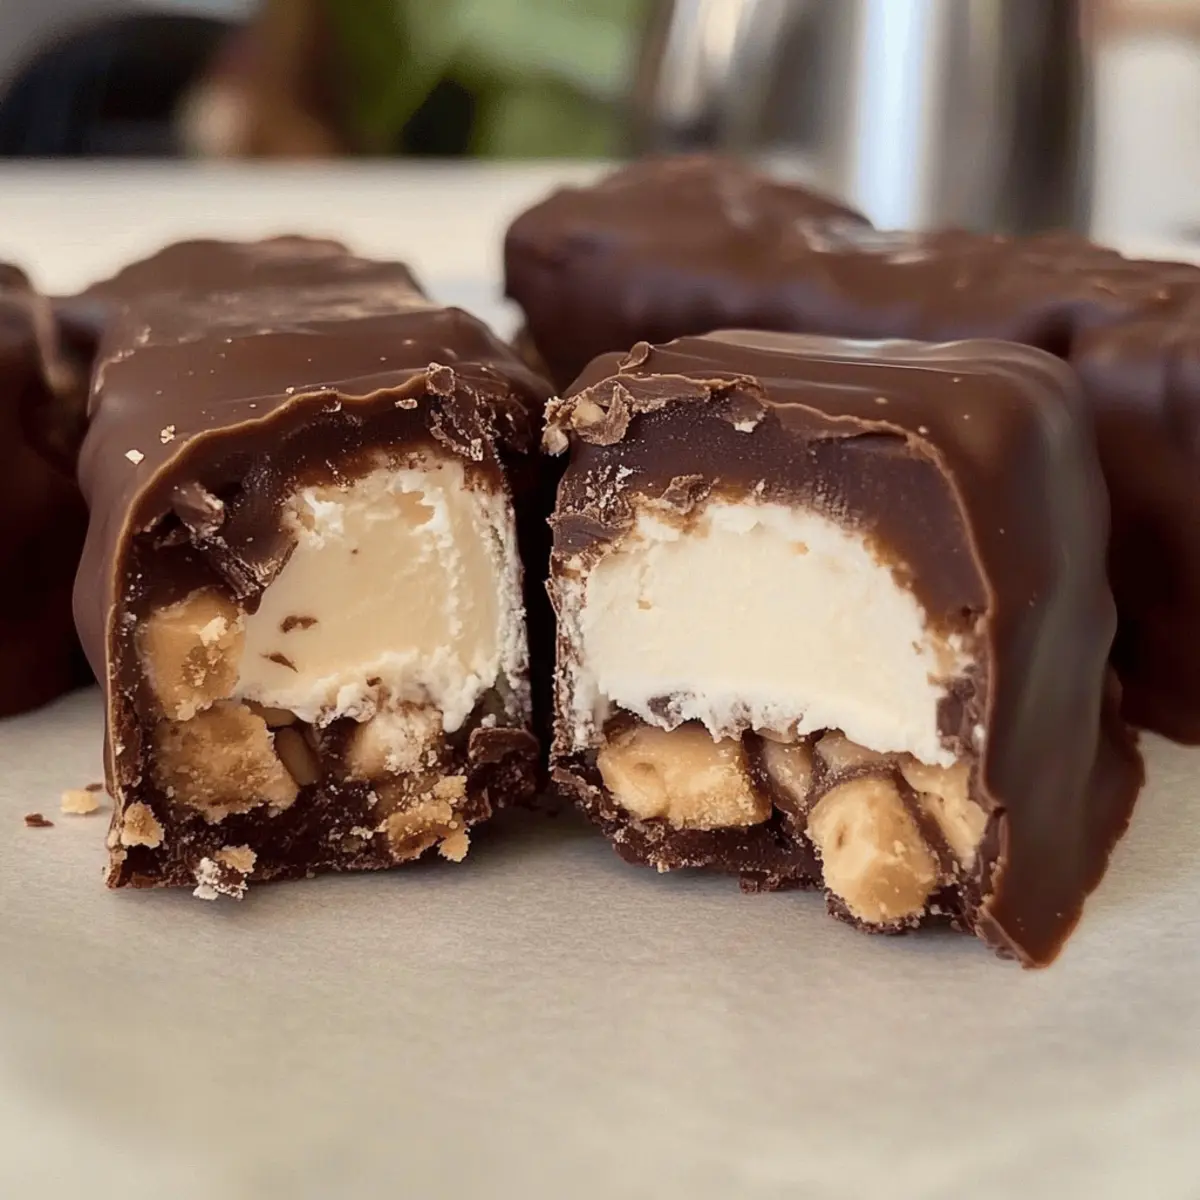
As I rummaged through my pantry one sunny afternoon, the craving for something sweet struck me like a lightning bolt. That’s when I stumbled upon the perfect blend of nostalgia and health: Healthy Twix Ice Cream Bars. These bars bring together the best of both worlds—indulgent flavors without the guilt. With a creamy, dreamy ice cream base free from dairy, gluten, and refined sugar, they promise to satisfy your sweet tooth all summer long. Best of all, this recipe is quick and easy to whip up, making it the ideal treat for impromptu gatherings or a refreshing dessert on warmer days. Are you ready to discover a healthier way to enjoy a beloved candy classic?
Why Are These Ice Cream Bars Amazing?
Health-Conscious Delight: Indulge without the guilt! These Healthy Twix Ice Cream Bars are perfect for satisfying cravings while sticking to a gluten-free, vegan lifestyle.
Unmatched Creaminess: Thanks to the raw cashews and oat milk, you’ll experience a luxuriously creamy texture that feels decadent without the dairy.
Quick and Simple: Perfect for busy days, this easy recipe can be prepared with minimal effort, making it ideal for anyone longing for homemade sweetness.
Endless Customization: Swap ingredients like oat milk for almond milk or use different nut butters to make these bars your own!
Crowd-Pleasing Treat: Serve these delightful bars at your next gathering, and watch them disappear in no time! They’re sure to impress everyone, from family to friends.
If you’re looking for more guilt-free desserts, check out my Healthy Carrot Cake or my delightful Healthy Breakfast Granola.
Healthy Twix Ice Cream Bars Ingredients
• Whip up these bars with wholesome goodness!
For the Ice Cream Base
- Raw Cashews – Soaking them overnight ensures a smooth, creamy texture for your Healthy Twix Ice Cream Bars.
- Full Fat Oat Milk – This forms the creamy base; swap for almond or cashew milk for unique flavor profiles.
- Honey or Maple Syrup – Acts as a natural, sweetener; use maple syrup for a fully vegan version.
- Vanilla Extract – Enhances flavor; opt for pure vanilla for the best aroma.
- Salt – A pinch balances sweetness and intensifies flavor.
For the Cookie Pieces
- Maple Syrup – Adds sweetness to the cookie bites while keeping it refined sugar-free.
- Melted Butter (or Vegan Butter) – Contributes to cookie texture; swap for vegan butter for a plant-based option.
- Almond Flour – Keeps the recipe gluten-free and adds structure to the cookies.
- Baking Powder – Helps cookies rise slightly, providing a light texture.
For the Caramel Layer
- Peanut Butter – Adds creaminess to the caramel; substitute with almond butter or sunbutter for nut allergies.
- Coconut Oil – Smoothens both the caramel and the chocolate coating for a shiny finish.
For the Chocolate Coating
- Dark Chocolate Chips – The main component of the coating; choose dairy-free chips for a vegan option.
Feel free to gather these ingredients, and let’s create some magic in the kitchen!
Step‑by‑Step Instructions for Healthy Twix Ice Cream Bars
Step 1: Prepare Ice Cream Base
Start by soaking 1 cup of raw cashews in 1 cup of full-fat oat milk overnight. This crucial step ensures a silky-smooth texture in your Healthy Twix Ice Cream Bars. Once soaked, drain and rinse the cashews before moving on to the blending process.
Step 2: Blend
The following day, toss the soaked cashews into your blender with the oat milk, 1/4 cup of honey or maple syrup, 1 teaspoon of vanilla extract, and a pinch of salt. Blend on high for about 2-3 minutes until the mixture is completely smooth and creamy, resembling a thick milkshake.
Step 3: Freeze Ice Cream
Pour the luscious ice cream mixture into a loaf pan lined with parchment paper, smoothing the top with a spatula. Cover and freeze for at least 2 hours or until the ice cream is firm and set. This step is essential for creating the perfect texture in your Healthy Twix Ice Cream Bars.
Step 4: Make Cookie Pieces
Preheat your oven to 350°F (175°C). In a bowl, mix together 1/4 cup maple syrup, 1/4 cup melted butter or vegan butter, and 1 teaspoon of vanilla extract. Gradually fold in 1 cup of almond flour and 1 teaspoon of baking powder until a dough forms. Spread this mixture onto a baking sheet and bake for 5-8 minutes, or until golden brown.
Step 5: Prepare Caramel
In a mixing bowl, combine 1/2 cup of peanut butter, 1/4 cup of maple syrup, 2 tablespoons of coconut oil, and a pinch of salt. Stir vigorously until smooth and creamy. This rich blend will become the mouthwatering caramel layer in your Healthy Twix Ice Cream Bars, bringing them one step closer to perfection.
Step 6: Assemble Bars
Remove the ice cream from the freezer and spread the prepared caramel layer evenly over the frozen ice cream. Next, sprinkle the cookie pieces generously on top, pressing them in slightly to ensure they adhere. Return the assembled bars to the freezer for an additional 2 hours to firm up.
Step 7: Chocolate Coating
To create the chocolate coating, melt 1 cup of dark chocolate chips and 2 tablespoons of coconut oil together in the microwave. Do this in short bursts of 15 seconds, stirring in between until fully melted and glossy. This coating adds a delicious finish to your Healthy Twix Ice Cream Bars.
Step 8: Final Touches
Once the bars are fully frozen and firm, remove them from the freezer and slice them into your desired size. Dip each piece into the melted chocolate mixture, allowing the excess to drip off. Place the coated bars back on parchment paper and let them set until the chocolate hardens completely. Enjoy your delicious guilt-free treat!
How to Store and Freeze Healthy Twix Ice Cream Bars
Fridge: Store any leftover Healthy Twix Ice Cream Bars in an airtight container in the fridge for up to 3 days, though for best texture, keep them frozen.
Freezer: For longer storage, wrap individual bars in parchment paper and place them in a Ziploc bag. They will last in the freezer for up to 3 months without losing their delicious flavor.
Reheating: When ready to enjoy, remove from the freezer and let sit at room temperature for about 5–10 minutes before biting into them for the perfect soft, creamy texture.
Avoid Freezer Burn: Ensure the bars are well-wrapped to prevent freezer burn and maintain taste and quality for your Healthy Twix Ice Cream Bars.
Expert Tips for Healthy Twix Ice Cream Bars
-
Soak Cashews Properly: Make sure to soak raw cashews overnight for a creamy ice cream base; this step is essential for achieving the desired texture in your Healthy Twix Ice Cream Bars.
-
Chocolate Melting Method: Microwave dark chocolate chips in short intervals of 15 seconds to prevent burning. Stir often until perfectly smooth and glossy for a beautiful coating.
-
Cookie Piece Thickness: When baking cookie pieces, spread the dough evenly. Too thick, and they won’t have a crunchy texture; too thin, and they may burn.
-
Caramel Consistency: Ensure your peanut butter, maple syrup, and coconut oil mixture is smooth before spreading. A clumpy caramel layer won’t blend well with the ice cream.
-
Freezing Time: Be patient with freezing! Allow at least 2 hours for the ice cream and an additional 2 hours after assembly to ensure your Healthy Twix Ice Cream Bars hold their shape when served.
Make Ahead Options
These Healthy Twix Ice Cream Bars are perfect for meal prep enthusiasts looking to save time on busy days! You can prepare the ice cream base up to 24 hours in advance by soaking the cashews in oat milk overnight and blending them the next day. The cookie pieces can also be baked and stored in an airtight container for up to 3 days. For the caramel layer, mix and refrigerate it in a sealed jar for up to 5 days until you’re ready to assemble. When it’s time to serve, simply layer the caramel and cookie pieces on the frozen ice cream and then dip them in chocolate. With these prep-ahead steps, you’ll enjoy delicious, guilt-free treats with minimal last-minute effort!
What to Serve with Healthy Twix Ice Cream Bars
Treat your family and friends to a delightful meal experience that perfectly complements these indulgent yet guilt-free chocolate bars.
-
Fresh Berries: Juicy strawberries, blueberries, or raspberries add a burst of freshness, enhancing the chocolatey richness and balancing the dessert with a light touch.
-
Coconut Whipped Cream: Light and airy, this dairy-free whipped cream provides a luscious accompaniment that mirrors the creaminess of your ice cream bars, making every bite decadently smooth.
-
Nutty Granola: A sprinkle of crunchy granola adds texture to your dessert experience. The nuttiness pairs beautifully with the flavors of the ice cream and chocolate coating for a satisfying contrast.
-
Chilled Herbal Tea: Refreshing and soothing, a cup of iced peppermint or chamomile tea complements the sweetness of the bars without overwhelming the palate, providing a lovely sipping option.
-
Homemade Fruit Sorbet: For an extra cold treat, a scoop of fruity sorbet adds another layer of flavor. Choose tropical fruits like mango or refreshing lemon to make it a vibrant pairing.
-
Chocolate-Dipped Strawberries: Elevate your dessert table with these sweet, juicy fruits dipped in vegan chocolate. They’re both a decadent treat and an eye-catching addition that echoes the flavors of your ice cream bars.
-
Caramel Drizzle: A light caramel drizzle over your Healthy Twix Ice Cream Bars enhances the dessert’s rich flavors while adding a delicious finishing touch that ties everything together.
-
Coffee or Espresso: The boldness of coffee or a shot of espresso intensifies the chocolate notes in the bars, creating a perfect finishing touch to a warm summer evening or an afternoon break.
Healthy Twix Ice Cream Bars Variations
Feel free to let your creativity shine by customizing these delicious bars to match your preferences and dietary needs!
- Nut-Free Option: Substitute peanut butter with sunbutter to ensure a safe, nut-free caramel layer.
- Dairy-Free Chocolate: Choose high-quality dairy-free dark chocolate chips for a fully vegan experience that still delivers rich flavor.
- Different Milk: Swap out full-fat oat milk for almond or cashew milk, bringing new flavors and textures to your ice cream.
- Added Protein: Mix in a scoop of your favorite protein powder into the ice cream base for a protein boost without any guilt.
- Flavor Boost: Add a splash of almond or peppermint extract for a delightful twist that jazzes up the vanilla flavor.
- Texture Variation: Fold in some chopped nuts or dairy-free chocolate chunks into the ice cream base before freezing for added crunch.
- Cookie Swap: Experiment with different gluten-free flours for the cookie pieces; coconut flour can give a unique twist to the texture.
- Heat it Up: For a spicy kick, add a pinch of cayenne pepper to the chocolate coating, enlightening the taste buds with a sweet and spicy combination.
These variations aim to inspire your unique creations while enjoying these Healthy Twix Ice Cream Bars. Don’t forget to pair your bars with my Garlic Butter Steak for a perfect summer gathering!
Healthy Twix Ice Cream Bars Recipe FAQs
How do I choose ripe ingredients for Healthy Twix Ice Cream Bars?
Absolutely! For the best flavor, ensure your cashews are fresh and not stale. Look for cashews with a creamy color and no dark spots. If using oat milk or any plant milk, choose those without added sugars to maintain the refined sugar-free aspect of your bars.
How should I store Healthy Twix Ice Cream Bars, and how long do they last?
I recommend storing leftover Healthy Twix Ice Cream Bars in an airtight container in the fridge for up to 3 days. However, for the best texture and flavor, keep them in the freezer. If properly wrapped in parchment paper and placed in a Ziploc bag, they can last for up to 3 months without losing quality.
Can I freeze Healthy Twix Ice Cream Bars?
Yes! After you’ve assembled your Healthy Twix Ice Cream Bars, you can wrap them individually in parchment paper and freeze them. This way, you can enjoy a delicious treat whenever you want! Just remember to let them sit at room temperature for about 5–10 minutes before enjoying for the best creamy texture.
What should I do if my chocolate coating isn’t smooth?
Very! If your chocolate coating isn’t melting smoothly, it’s likely due to overheating. Microwave your dark chocolate chips in 15-second intervals, stirring frequently to encourage even melting. If you find it’s still too thick, adding a teaspoon or two of coconut oil can help achieve that glossy finish you’re looking for.
Are there any dietary considerations I should keep in mind when making these bars?
Absolutely! These Healthy Twix Ice Cream Bars are naturally dairy-free, gluten-free, and refined sugar-free. If you have nut allergies, feel free to substitute peanut butter with sunflower seed butter or use a nut-free milk alternative. Always check labels on store-bought ingredients to ensure they align with your dietary needs!
Creamy Healthy Twix Ice Cream Bars You’ll Love This Summer
Ingredients
Equipment
Method
- Soak raw cashews in oat milk overnight. Drain and rinse before blending.
- Blend soaked cashews with oat milk, honey or maple syrup, vanilla extract, and salt until smooth.
- Pour blend into a loaf pan lined with parchment paper and freeze for at least 2 hours.
- Preheat oven to 350°F (175°C). Mix maple syrup, melted butter, and vanilla. Add almond flour and baking powder to form dough.
- Spread dough on a baking sheet and bake for 5-8 minutes until golden.
- Mix peanut butter, maple syrup, coconut oil, and salt until smooth to create caramel layer.
- Spread caramel over frozen ice cream, add cookie pieces on top, and freeze for another 2 hours.
- Melt dark chocolate chips and coconut oil in short intervals until glossy. Coat bars in chocolate mixture.
- Let coated bars set on parchment paper until chocolate hardens.
Leave a Reply