
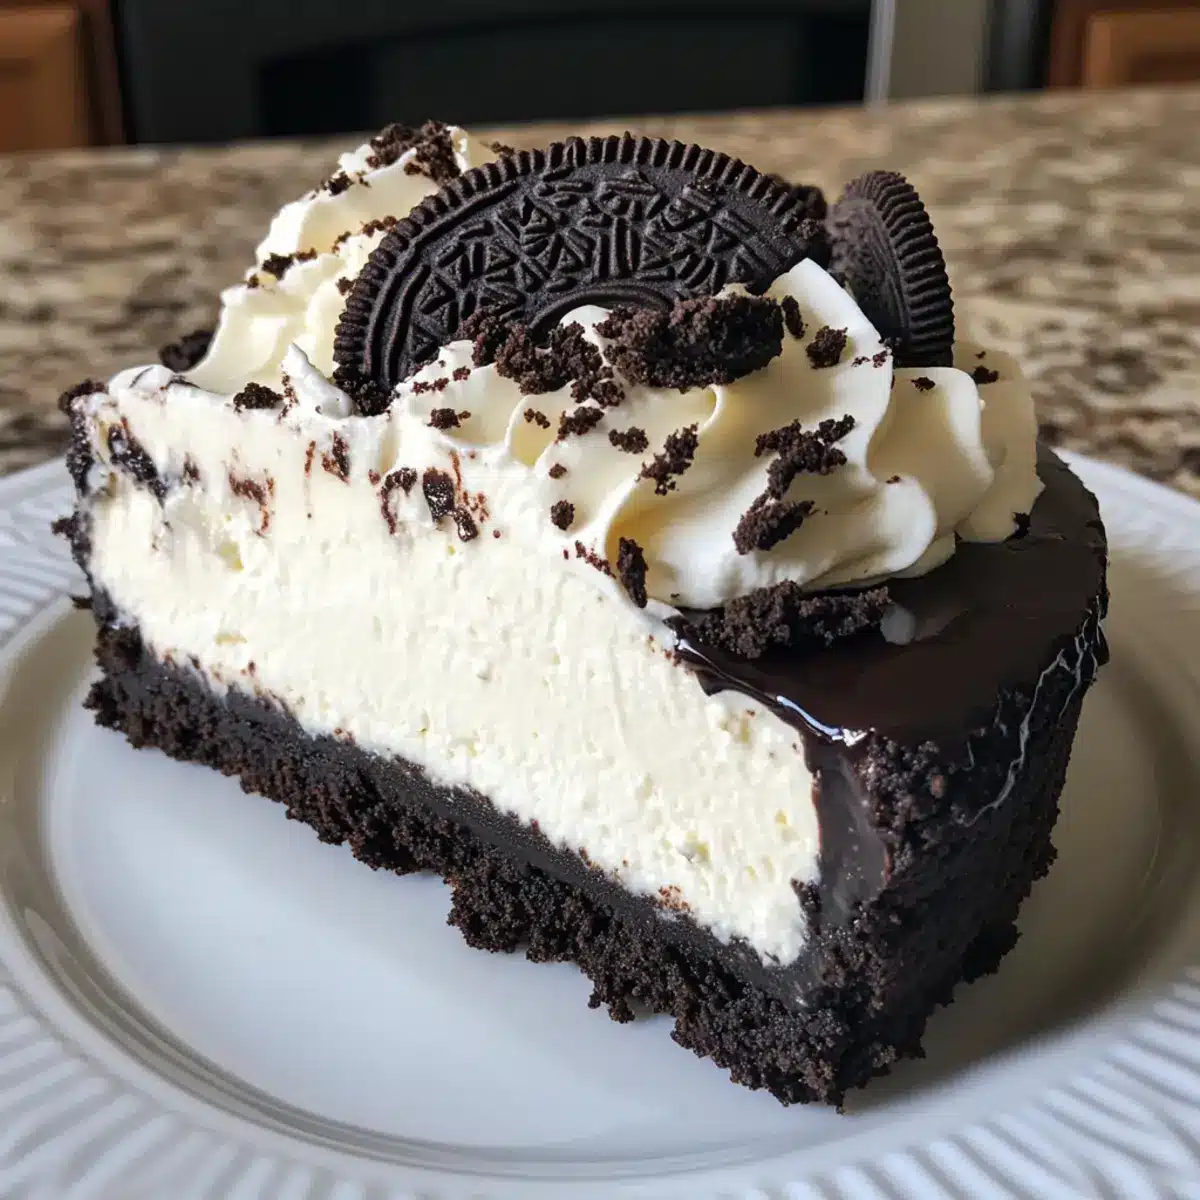
As I stood in my kitchen, the smell of crushed Oreos lingered in the air, instantly transporting me to carefree days filled with sweet indulgence. This No-Bake Oreo Cheesecake is a homage to those moments—an irresistibly creamy dessert that requires no oven and no fuss. With its luscious Oreo cookie crust and velvety filling awash in crushed Oreos, this treat is perfect for anyone craving a slice of nostalgia. Plus, it’s a quick prep, making it ideal for impromptu gatherings or cozy nights in. And who can resist a silky dark chocolate ganache topping, enhanced by fluffy whipped cream? As you indulge in this delightful dessert, what memories will it inspire for you?
Why Is This Cheesecake a Must-Try?
Simplicity: With no baking required, this No-Bake Oreo Cheesecake is easy enough for anyone to master.
Decadent Flavor: The combination of cream cheese, Oreo cookie, and dark chocolate ganache creates an unforgettable taste sensation.
Perfect for Any Occasion: Whether it’s a casual family dinner or a festive celebration, this dessert fits right in.
Quick Preparation: You can whip it up in no time, leaving more hours for savoring each delicious bite.
Nostalgic Treat: This cheesecake brings back sweet memories while satisfying modern cravings for rich desserts. Consider trying it with fresh berries or drizzle caramel sauce for even more deliciousness! If you’re looking for more inspiration, check out my recipes for Banana Pudding Dream and Peanut Butter Chocolate.
No-Bake Oreo Cheesecake Ingredients
For the Crust
• Oreo Cookies – Essential for creating a deliciously crunchy crust; feel free to use gluten-free Oreos for a gluten-free version.
• Butter – Unsalted butter adds richness and helps bind the crust together perfectly.
For the Filling
• Full-Fat Cream Cheese – The main ingredient providing the cheesecake’s creamy structure; make sure it’s cold for smooth mixing.
• Powdered Sugar – Adds just the right sweetness to the filling; can be swapped with granulated sugar, but blending may be less smooth.
• Vanilla Paste – Deepens the flavor of the cheesecake; if you don’t have it, vanilla extract works well as a substitute.
• Heavy Cream – Vital for whipping to stiff peaks, giving the cheesecake a light and fluffy finish; avoid using light whipping cream, as it results in a less rich texture.
• Crushed Oreos – Incorporate this into the filling for added Oreo flavor and texture throughout.
For the Ganache
• Semi-Sweet Dark Chocolate – Provides a rich chocolate flavor; milk chocolate can be used for those who prefer a sweeter taste.
• Butter – Adds a touch of richness to the ganache; helps create a smooth texture when melted with the chocolate.
• Heavy Cream – Mix this into the ganache for a silky finish; using cold cream helps achieve the perfect consistency.
For Decoration
• Whipped Cream – A fluffy topping that elevates the cheesecake’s presentation; pipe around the edges for a beautiful finish.
• Mini Oreos – Use to garnish the top of your cheesecake, adding a fun decorative touch that echoes the flavors inside.
Enjoy crafting this delightful No-Bake Oreo Cheesecake!
Step‑by‑Step Instructions for No-Bake Oreo Cheesecake
Step 1: Prepare the Springform Pan
Start by greasing a 23 cm (9-inch) springform pan and lining the bottom with parchment paper for easy cheesecake removal later. This ensures your No-Bake Oreo Cheesecake has a neat presentation. Set the pan aside while you prepare the crust.
Step 2: Make the Oreo Crust
In a food processor, pulse Oreo cookies until they become fine crumbs. Melt unsalted butter and pour it over the cookie crumbs, blending until thoroughly combined. Press this mixture firmly into the bottom of the prepared pan, creating an even layer. Chill the crust in the refrigerator for at least 15 minutes to set.
Step 3: Prepare the Cheesecake Filling
Using a handheld mixer or stand mixer, beat cold cream cheese, powdered sugar, and vanilla paste in a large bowl until the mixture is smooth and creamy. This should take about 3-4 minutes on medium speed. Then, with the mixer on low, gradually add heavy cream and continue mixing until stiff peaks form, signaling a light and airy cheesecake filling.
Step 4: Incorporate Crushed Oreos
Fold in the crushed Oreos gently using a spatula. Be careful not to over-mix, as you want to maintain the light texture of the No-Bake Oreo Cheesecake. Once well combined, pour the filling over the chilled crust in the springform pan, smoothing the top with an offset spatula.
Step 5: Chill the Cheesecake
Cover the filled pan with plastic wrap and refrigerate the cheesecake for 6-8 hours, or until fully set. This chilling step is crucial for achieving the perfect creamy texture, so be patient while it firms up in the cold.
Step 6: Prepare the Ganache
To make the chocolate ganache, melt semi-sweet dark chocolate and butter together in a microwave-safe bowl in 30-second intervals, stirring each time until melted and smooth. Once melted, stir in cold heavy cream until the mixture is silky and well combined. Let it cool slightly before pouring over the chilled cheesecake.
Step 7: Set the Ganache
Pour the slightly cooled ganache over the top of the set No-Bake Oreo Cheesecake, ensuring an even layer. Refrigerate for an additional 20 minutes to allow the ganache to set properly and create a beautiful, glossy finish atop the cheesecake.
Step 8: Decorate and Serve
Whip the remaining heavy cream to stiff peaks and pipe it around the edge of the cheesecake for a decorative touch. Finish by garnishing with halved mini Oreos on top. Slice your delightful No-Bake Oreo Cheesecake and serve it chilled to enjoy the perfect blend of flavors!
Make Ahead Options
These No-Bake Oreo Cheesecakes are perfect for meal prep, saving you time on busy days! You can prepare the crust and filling up to 24 hours in advance; just be sure to cover the cheesecake tightly with plastic wrap to keep it fresh and prevent any fridge odors from seeping in. For optimal flavor, chill the cheesecake for at least 6-8 hours before adding the ganache. When ready to serve, make the ganache and pour it over the cheesecake, allowing it to set for 20 minutes in the fridge. With these make-ahead tips, you can enjoy a delicious dessert without any last-minute stress!
No-Bake Oreo Cheesecake Variations
Feel free to let your creativity shine by customizing this No-Bake Oreo Cheesecake to suit your taste!
- Gluten-Free: Use gluten-free Oreo cookies instead of standard Oreos for a deliciously creamy dessert that everyone can enjoy.
- Minty Twist: Add a few drops of peppermint extract to the filling to create a refreshing mint Oreo cheesecake that’s perfect for the holidays.
- Mocha Flavor: Stir in a teaspoon of instant espresso powder to the cheesecake filling for a delightful coffee kick that pairs beautifully with the chocolate.
- Fruit Infusion: Toss in some crushed berries like raspberries or strawberries, giving your cheesecake a fruity burst of flavor that’ll brighten each bite.
- Nutty Crunch: Incorporate crushed nuts like walnuts or almonds into the crust for added texture and a delightful flavor contrast.
- Extra Sweetness: Drizzle caramel sauce over the top of the ganache for a luscious blend of chocolate and caramel that will have everyone’s taste buds dancing.
- Fruity Garnish: Top with fresh berries or a sprig of mint to add a pop of color and freshness to this decadent dessert.
- Layered Delight: For an impressive presentation, create a layered dessert by alternating layers of cheesecake and whipped cream in individual glasses.
Whether you want a classic taste or an adventurous twist, these suggestions are sure to enhance your cheesecake experience. If you’re in the mood for more delicious no-bake options, check out my recipes for Peanut Butter Chocolate and Banana Pudding Dream for more sweet inspirations!
How to Store and Freeze No-Bake Oreo Cheesecake
Fridge: Store the cheesecake tightly wrapped in plastic wrap or in an airtight container in the refrigerator for up to 3-4 days. This helps it stay fresh and delicious.
Freezer: If you need longer storage, freeze the cheesecake for up to 2 months. Slice it into portions, wrap each piece in plastic wrap, and place them in a freezer-safe container.
Thawing: To enjoy your frozen No-Bake Oreo Cheesecake, transfer it to the fridge for several hours or overnight, allowing it to thaw slowly for the best texture.
Reheating: There’s no need to reheat this cheesecake; serve it chilled for the best experience!
What to Serve with No-Bake Oreo Cheesecake
Looking to create a delightful spread that’s as tempting as your dessert?
-
Fresh Berries: The brightness of strawberries, raspberries, or blueberries adds a burst of freshness that beautifully cuts through the richness of the cheesecake. Consider layering them on top for a vibrant presentation!
-
Caramel Sauce: A drizzle of warm caramel enhances the dessert’s sweetness while adding a luscious, silky texture that perfectly complements the crunchy Oreo crust.
-
Chocolate Milkshake: This indulgent beverage pairs wonderfully with your cheesecake and delivers a rich, chocolaty flavor that Oreo fans will adore. Serve it in a tall glass for a nostalgic feel!
-
Coffee or Espresso: A warm cup of coffee or a shot of espresso creates an exquisite contrast, enhancing the chocolate and cream flavors in the cheesecake. It’s the perfect way to balance the sweetness.
-
Toasted Nuts: Chopped toasted almonds or pecans sprinkled on the cheesecake add a delightful crunch and nutty flavor, elevating each bite with an extra layer of texture.
-
Mint Chocolate Chip Ice Cream: This creamy treat marries seamlessly with the Oreo flavor, providing a refreshing finish. A scoop beside your cheesecake makes for a fun and indulgent dessert experience!
-
Whipped Cream: A generous dollop or decorative piping around the cheesecake provides extra creaminess and elevates your dessert’s presentation, making it even more inviting.
Expert Tips for No-Bake Oreo Cheesecake
Chill Ingredients: Ensure your heavy cream and cream cheese are very cold before mixing; this helps achieve the best texture for the cheesecake.
Avoid Over-Mixing: After folding in the crushed Oreos, mix gently to prevent losing the airy texture, which is crucial for a fluffy No-Bake Oreo Cheesecake.
Ganache Consistency: Allow the ganache to cool slightly before pouring it on the cheesecake to avoid melting the filling beneath; this will ensure a lovely layered look.
Proper Storage: Wrap the cheesecake tightly in plastic wrap or use an airtight container to keep it fresh for up to 3-4 days in the refrigerator.
Presentation Matters: Use a piping bag for whipped cream around the edges and elegant mini Oreos on top, enhancing both the aesthetics and flavor of your dessert.
No-Bake Oreo Cheesecake Recipe FAQs
How do I select the best Oreos for the cheesecake?
Absolutely! When selecting Oreos, look for packages that have no dark spots or have not been crushed. Fresh Oreos will create a crunchier crust and richer flavor. If you’re opting for a gluten-free version, be sure to choose gluten-free Oreos, which are becoming increasingly available in most grocery stores.
What’s the best way to store No-Bake Oreo Cheesecake?
Very easy! Wrap the cheesecake tightly in plastic wrap or store it in an airtight container in the refrigerator for up to 3-4 days. If you’re making it in advance, storing it a day before serving allows the flavors to meld beautifully, making it even tastier!
Can I freeze No-Bake Oreo Cheesecake?
Of course! To freeze, slice the cheesecake into individual portions. Wrap each slice tightly in plastic wrap, then place them in a freezer-safe container or bag. It’ll keep well for up to 2 months. When you’re ready to enjoy, simply transfer a slice to the fridge for several hours to thaw.
How can I troubleshoot a runny cheesecake filling?
No worries! If your filling is runny, it typically indicates that the heavy cream wasn’t whipped to stiff peaks or the cream cheese wasn’t cold enough. Make sure to beat the cream until it holds firm peaks and use very cold cream cheese for better results. If it still doesn’t set, consider adding a bit more powdered sugar to help stabilize the filling.
Are there any dietary considerations for this cheesecake?
Definitely! If you have dairy allergies, you can use dairy-free cream cheese and whipped cream, and substitute coconut cream for the heavy cream. Additionally, check if your Oreos are safe for any specific allergies; some brands offer allergy-friendly alternatives. Always read labels to ensure you accommodate any dietary restrictions.
How long does the ganache need to cool before pouring it on the cheesecake?
Great question! After melting the dark chocolate and butter, allow the ganache to cool for about 10-15 minutes at room temperature before pouring it over the cheesecake. This will prevent the ganache from melting the cheesecake filling, maintaining that beautiful layered look!
Indulge in No-Bake Oreo Cheesecake: Creamy & Irresistible Delight
Ingredients
Equipment
Method
- Prepare the Springform Pan: Grease a 23 cm (9-inch) springform pan and line with parchment paper.
- Make the Oreo Crust: Pulse Oreo cookies until fine crumbs. Melt butter and mix with crumbs. Press into pan and chill for 15 minutes.
- Prepare the Cheesecake Filling: Beat cream cheese, powdered sugar, and vanilla until smooth. Gradually add heavy cream and mix until stiff peaks form.
- Incorporate Crushed Oreos: Gently fold in crushed Oreos and pour filling over crust.
- Chill the Cheesecake: Cover with plastic wrap and refrigerate for 6-8 hours until set.
- Prepare the Ganache: Melt chocolate and butter together. Stir in cold heavy cream until silky. Let it cool slightly.
- Set the Ganache: Pour over set cheesecake and refrigerate for 20 minutes.
- Decorate and Serve: Whip remaining heavy cream and pipe around the edge. Garnish with mini Oreos.
Leave a Reply