
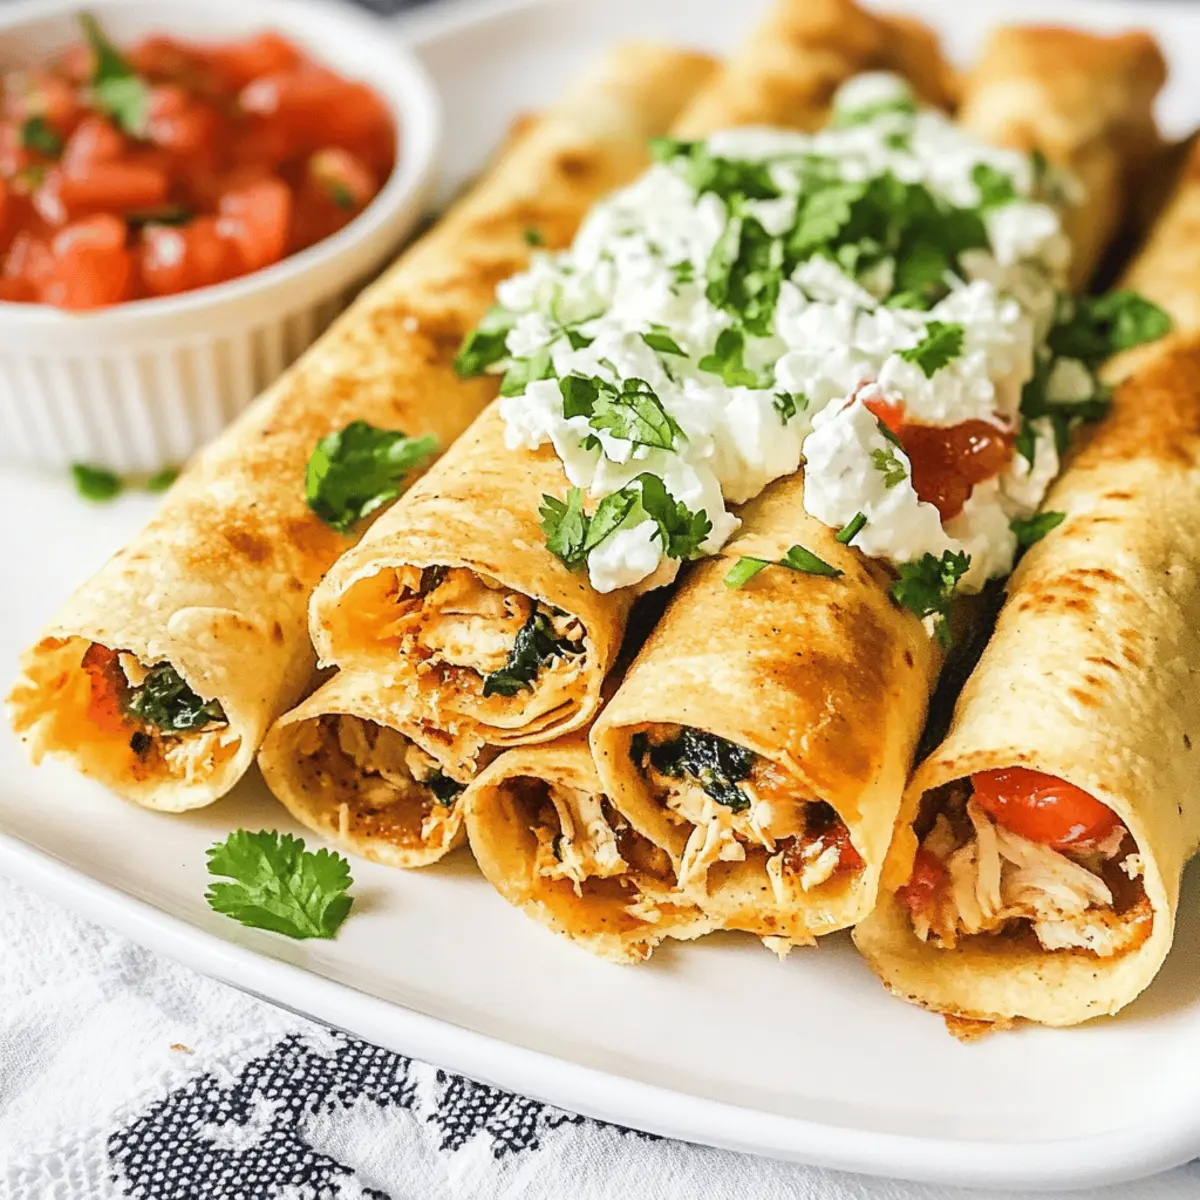
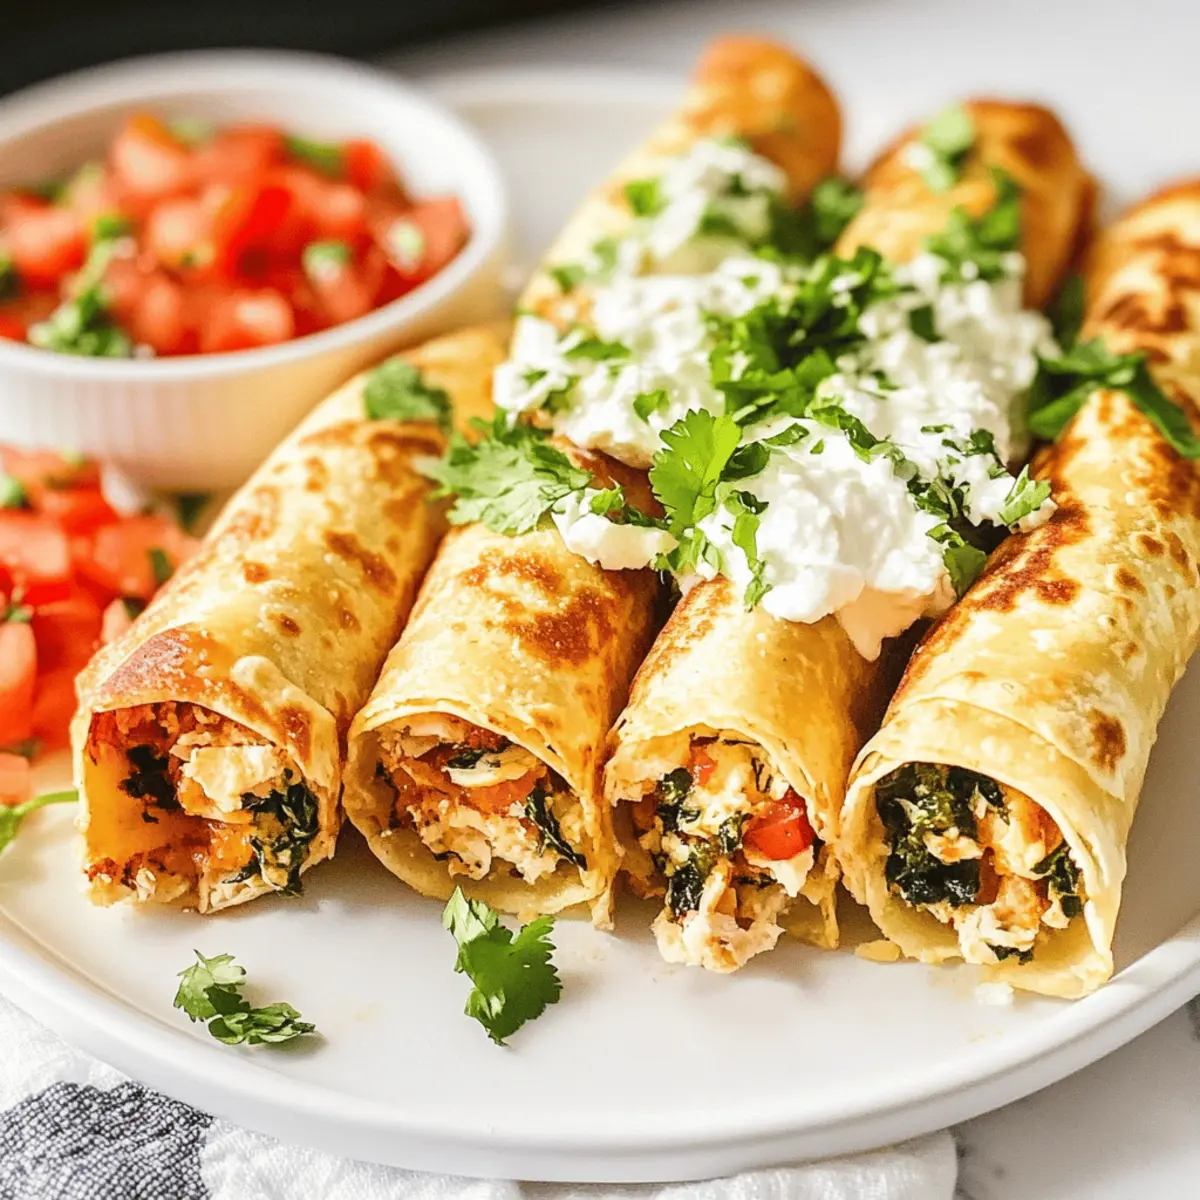
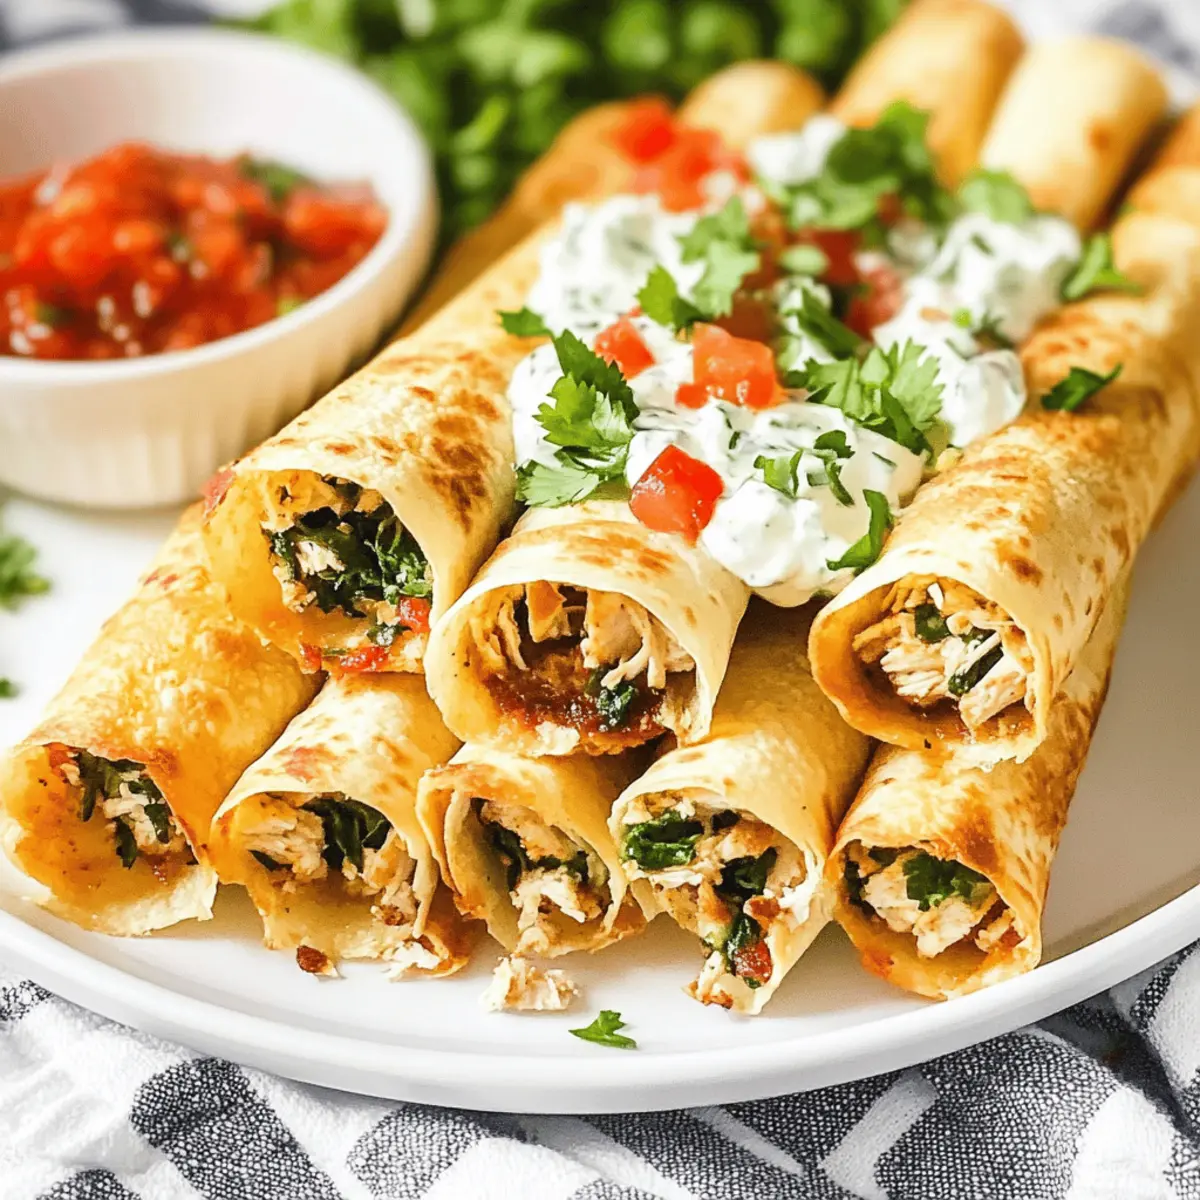
“Did you just say crispy chicken taquitos?” I overheard one of my friends exclaim, and I couldn’t help but crack a smile. These delightful morsels are not just quick dinner ideas; they’re a culinary hug for your taste buds. With just 15 minutes of prep time, my Crispy Chicken Taquitos combine shredded chicken, creamy cheese, and a handful of vibrant greens into a perfectly crispy package. As a busy cook, I appreciate how these finger foods can easily transform into a crowd-pleasing appetizer or a satisfying family meal. They’re versatile enough to customize with different salsas or even swap in beef or pork for a twist. What’s your favorite filling to make these taquitos your own? Let’s dive in and create something special!
Why Are Crispy Taquitos a Must-Try?
Quick Preparation: With only 15 minutes to whip these up, they’re perfect for a busy weeknight or a last-minute gathering.
Customizable Fillings: Whether you prefer chicken, beef, or pork, this recipe invites you to get creative with your choice of ingredients.
Amazing Flavor Fusion: The blend of cream cheese and savory chicken ensures every bite is bursting with deliciousness.
Perfect for Sharing: These finger foods become the highlight of parties, proving to be a hit among both kids and adults.
Healthier Options: Bake them instead of fry for a guilt-free version that still delivers on crunch. Discover even more delicious Mexican recipes to elevate your dinner game!
Crispy Taquitos Ingredients
For the Filling
• Shredded Cooked Chicken (3 cups) – Perfect for a flavor-packed base; using leftover rotisserie chicken saves time!
• Cream Cheese (6 ounces, softened) – Adds creaminess to the filling; you can experiment with cottage cheese for a lighter twist.
• Baby Spinach (1½ cups, chopped) – Provides nutritious greens; kale can be used for a heartier option.
• Shredded Colby Jack Cheese (1½ cups) – Melts beautifully to create a gooey texture; feel free to swap in your favorite Mexican blend cheese.
• Salsa (½ cup) – Enhances the flavor with moisture; pick a spicy, mild, or homemade version to suit your taste.
• Sour Cream (⅓ cup) – Brings a creamy element; it’s optional if you’re aiming for lower fat.
For the Shell
• Corn or Flour Tortillas (12, 6-inch) – Essential for wrapping the filling; whole grain tortillas offer a healthier alternative.
For Frying
• Vegetable or Canola Oil – Necessary for frying these crispy taquitos; any high smoke point oil works well.
For Seasoning
• Salt and Pepper – Simple but essential; season to taste for that extra flavor punch.
Step‑by‑Step Instructions for Crispy Chicken Taquitos
Step 1: Heat the Oil
Begin by pouring about ½ inch of vegetable or canola oil into a deep saucepan, then heat it over medium heat until the temperature reaches 350°F. A candy thermometer works great for accuracy. This step is crucial, as properly heated oil ensures that your taquitos will fry to a perfect golden brown and achieve that irresistible crispy texture.
Step 2: Prepare the Filling
In a large mixing bowl, combine 3 cups of shredded cooked chicken with 6 ounces of softened cream cheese, 1½ cups of chopped baby spinach, and 1½ cups of shredded Colby Jack cheese. Add ½ cup of salsa and ⅓ cup of sour cream to the mixture, seasoning with salt and pepper to taste. Mix everything thoroughly until well-combined, creating a creamy, flavorful filling for your taquitos.
Step 3: Assemble the Taquitos
Take a corn or flour tortilla and lay it flat on a clean surface. Scoop a few tablespoons of the filling into the center, spreading it out slightly while leaving space on the edges. Carefully roll the tortilla tightly around the filling, ensuring it stays compact and secure. This rolling technique is vital to prevent any filling from spilling out during frying.
Step 4: Fry the Taquitos
Using tongs, gently place the rolled taquitos seam-side down into the hot oil once it reaches the right temperature. Fry the taquitos for about 2-3 minutes on one side, watching them closely for a lovely golden-brown color. When ready, flip them carefully to fry the other side until crisp and golden, ensuring a delectable crunch in every bite.
Step 5: Drain and Serve
Once the taquitos are nicely fried on both sides, carefully remove them from the oil and transfer them to a plate lined with paper towels to drain excess grease. This step is essential to maintain their crispy texture. Serve the Crispy Chicken Taquitos warm, accompanied by your choice of toppings like homemade salsa or guacamole for an unbeatable flavor experience.
Step 6: Repeat the Process
Continue the frying process with the remaining tortillas and filling. Depending on the size of your pan, you may need to work in batches to avoid crowding. Keep an eye on the oil temperature, adjusting the heat as necessary, to ensure each batch of taquitos comes out crispy and delicious!
Make Ahead Options
These Crispy Chicken Taquitos are perfect for meal prep enthusiasts! You can prepare the filling up to 24 hours in advance by mixing the shredded chicken, cream cheese, spinach, Colby Jack cheese, salsa, and sour cream, then refrigerating it in an airtight container. This not only saves time but keeps the ingredients fresh and flavorful. When you’re ready to serve, simply roll the filling in the tortillas, fry them up, and enjoy that delightful crunch, just as delicious as if made fresh. For longer storage, you can also assemble the taquitos and freeze them un-fried for up to 3 months; just thaw and fry when needed for a quick weeknight dinner!
What to Serve with Crispy Chicken Taquitos
Indulging in crispy chicken taquitos is just the beginning; let’s elevate your meal experience with these tasty accompaniments.
- Fresh Guacamole: Creamy and zesty, guacamole adds a refreshing contrast that brightens each bite of taquitos.
- Salsa Verde: Packed with tangy flavors, this green salsa offers a delightful pop of freshness that complements the richness of the taquitos beautifully.
- Pico de Gallo: Chopped tomatoes, onions, and cilantro deliver a crunchy texture and vibrant flavors, enhancing your taquitos with every mouthful.
- Mexican Street Corn Salad: This creamy, slightly sweet salad adds a fantastic texture and balance to your meal, making for an irresistible combo.
- Black Beans: Hearty and nutritious, seasoned black beans round out the meal, offering protein and fiber for a well-rounded dish.
- Cheesy Queso Dip: The warm, gooey dip serves as an indulgent finishing touch, perfect for dipping taquitos and enjoying a delightful cheesy experience.
- Crispy Tortilla Chips: Pair with some homemade salsa for crunch and fun—an irresistible snack alongside your main dish!
- Margaritas: Sip on a refreshing margarita to perfectly complement the savory flavors of your taquitos, making the meal feel like a festive occasion.
- Churros: Sweet, warm churros dusted in cinnamon sugar can be a delightful finish, wrapping up your tasty Mexican-inspired festivity on a sweet note.
Expert Tips for Crispy Taquitos
• Warm Tortillas: Ensure your tortillas are warm before rolling to prevent cracking. Use a damp paper towel for best results.
• Mix Ahead: Prepare the filling a day in advance and store it in the fridge. This trick saves time on busy weeknights and enhances the flavors!
• Oil Temperature: Maintain the oil temperature at 350°F while frying. If too cool, your taquitos will absorb oil; too hot, and they’ll burn.
• Bake Option: For a healthier alternative, bake your taquitos at 425°F for 15-20 minutes. This method provides a delightful crunch without the frying.
• Fry in Batches: To ensure even cooking, fry the taquitos in small batches. This helps maintain oil temperature and ensures every taquito is perfectly crispy.
• Experiment with Fillings: Feel free to swap shredded chicken with beef or pork. Different salsas can also bring unique flavors to your crispy taquitos!
Taquitos: Creative Variations Await
Feel free to let your culinary creativity shine as you adapt this recipe to your tastes and dietary needs!
-
Beef or Pork: Swap the shredded chicken for tender shredded beef or pork to cater to different preferences; both add delicious flavor!
-
Spicy Kick: Use a zesty mango salsa or a fiery chipotle salsa to elevate the flavor profile for those who love a bit of heat.
-
Cheese Twist: Try using pepper jack cheese for an exciting kick or go with a smoky queso for a unique taste experience.
-
Veggie Delight: Opt for a vegetarian version by using black beans or lentils as a protein alternative mixed with colorful bell peppers and corn.
-
Crispy Baked: Bake your taquitos at 425°F for a healthier version that still delivers crispy textures, making it easy to enjoy guilt-free.
-
Herb Infusion: Add fresh herbs like cilantro or chives to the filling for a bright, refreshing flavor touch that complements the richness.
-
Tortilla Swap: Experiment with different types of tortillas, such as spinach or tomato basil, to add visual appeal and a subtle flavor twist.
-
Extra Crunch: For those who crave even more crunch, consider adding crushed tortilla chips to the filling for an exciting texture contrast.
Remember, these little adjustments not only personalize the recipe but also open up a world of delicious possibilities! For more inventive ideas, don’t forget to check out these amazing quick dinner ideas that everyone will love!
How to Store and Freeze Taquitos
Fridge: Store leftover taquitos in an airtight container for up to 3 days to retain their crispiness. Reheat in the oven for best results.
Freezer: For longer storage, freeze un-fried taquitos on a baking sheet until solid, then transfer to a freezer bag. They can be kept for up to 3 months; no thawing necessary before frying.
Reheating: To reheat cooked taquitos, place them in a preheated oven at 350°F for about 10-15 minutes until they regain their crunch, perfect for enjoying those leftover taquitos!
Make-Ahead: Prepare the filling ahead of time and refrigerate for up to 24 hours, allowing for a quick assembly and frying when you’re ready to enjoy your taquitos!

Crispy Chicken Taquitos Recipe FAQs
How do I choose ripe avocados for guacamole?
Absolutely! When selecting avocados, look for ones that yield slightly to gentle pressure. If they feel too firm, they aren’t ripe yet, but if they feel overly soft, they may be overripe. Ideally, a ripe avocado should have a dark green skin, and a little bump that feels just right.
How should I store leftover taquitos?
Very! To keep your leftover taquitos crispy, store them in an airtight container for up to 3 days in the fridge. For reheating, I recommend popping them in the oven at 350°F for about 10-15 minutes to regain their delightful crunch.
Can I freeze un-fried taquitos?
Absolutely! To freeze your taquitos, place the assembled but un-fried taquitos on a baking sheet in a single layer until solid. Then, transfer them to a freezer bag. They can be stored for up to 3 months. No need to thaw – just fry them straight from the freezer when you’re ready to enjoy!
What are some common mistakes to avoid when frying taquitos?
One common mistake is frying in oil that’s too cool, which causes the taquitos to absorb too much oil. Always ensure the oil reaches 350°F. Also, avoid overcrowding the pan, as this can lower the oil temperature and lead to soggy results. Fry in small batches for best outcomes!
Are there any dietary considerations for pet allergies?
Very! While the ingredients in taquitos are generally safe for most humans, they aren’t suitable for pets, especially those with dairy or seasoning sensitivities. Always keep human food away from pets and consult your vet if unsure about specific ingredients.
What can I use instead of cream cheese in the filling?
You can absolutely substitute cream cheese with cottage cheese for a lighter alternative! If you want a dairy-free option, try using a vegan cream cheese instead. Both options still provide creaminess and work beautifully in creating a delicious filling for your taquitos!
Crispy Taquitos That Make Taco Night Unforgettable
Ingredients
Equipment
Method
- Heat about ½ inch of vegetable or canola oil in a deep saucepan over medium heat until it reaches 350°F.
- In a large mixing bowl, combine shredded chicken, cream cheese, spinach, Colby Jack cheese, salsa, and sour cream. Season with salt and pepper, then mix until well-combined.
- Lay a tortilla flat, scoop a few tablespoons of filling into the center, and roll it tightly around the filling.
- Gently place the rolled taquitos seam-side down into the hot oil and fry for 2-3 minutes until golden brown; then flip and fry the other side.
- Remove the fried taquitos and place them on a paper towel-lined plate to drain excess oil. Serve them warm with toppings like salsa or guacamole.
- Continue frying the remaining tortillas and filling in batches, adjusting oil temperature as necessary.
Leave a Reply