
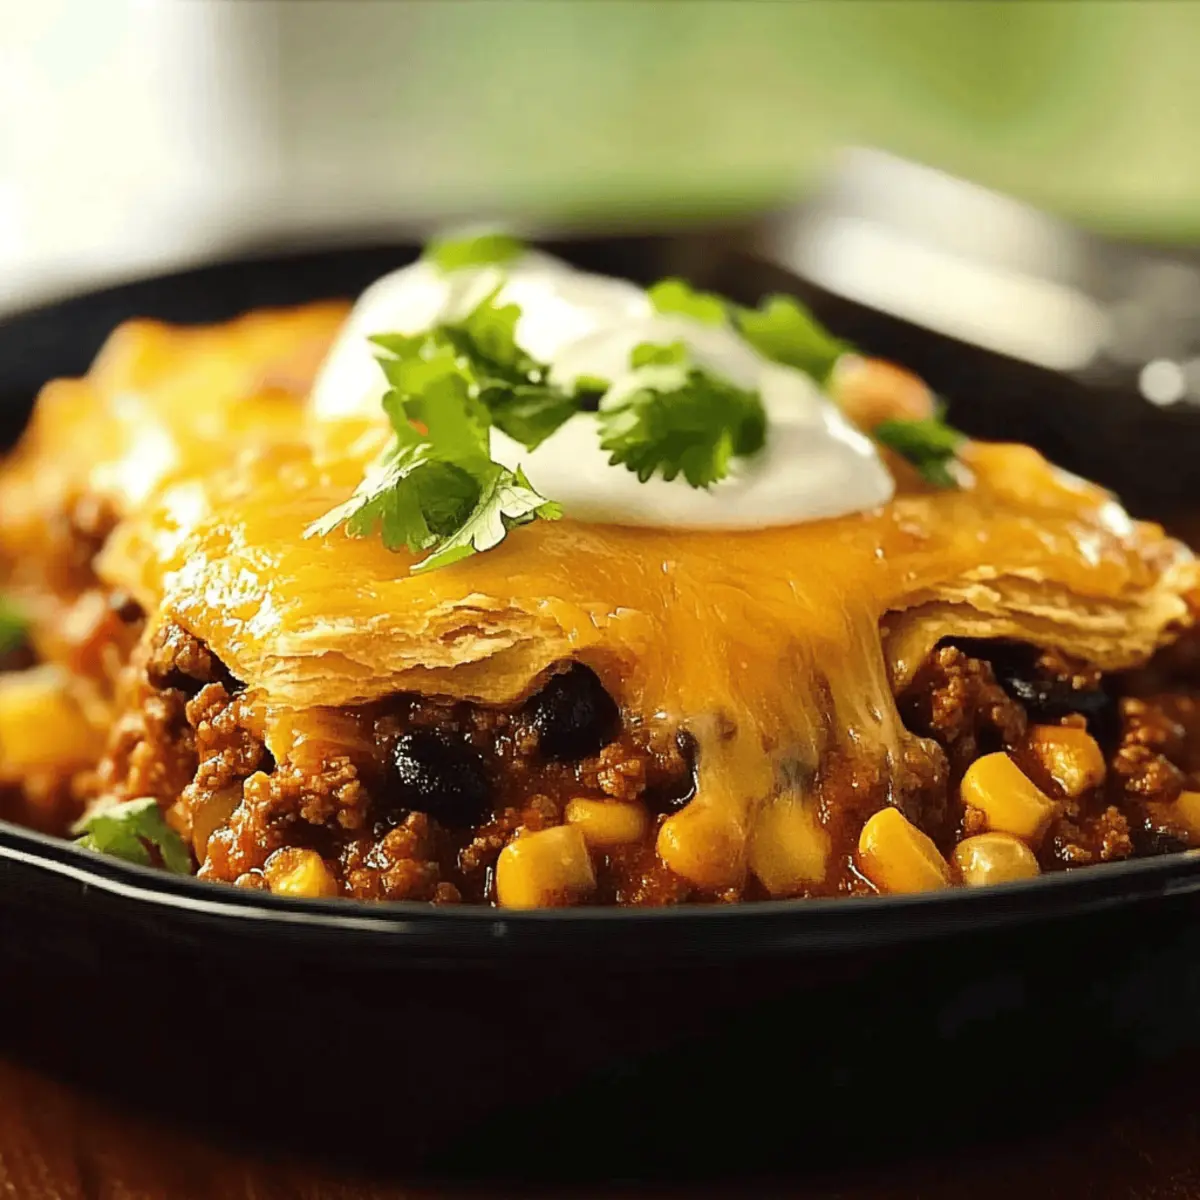
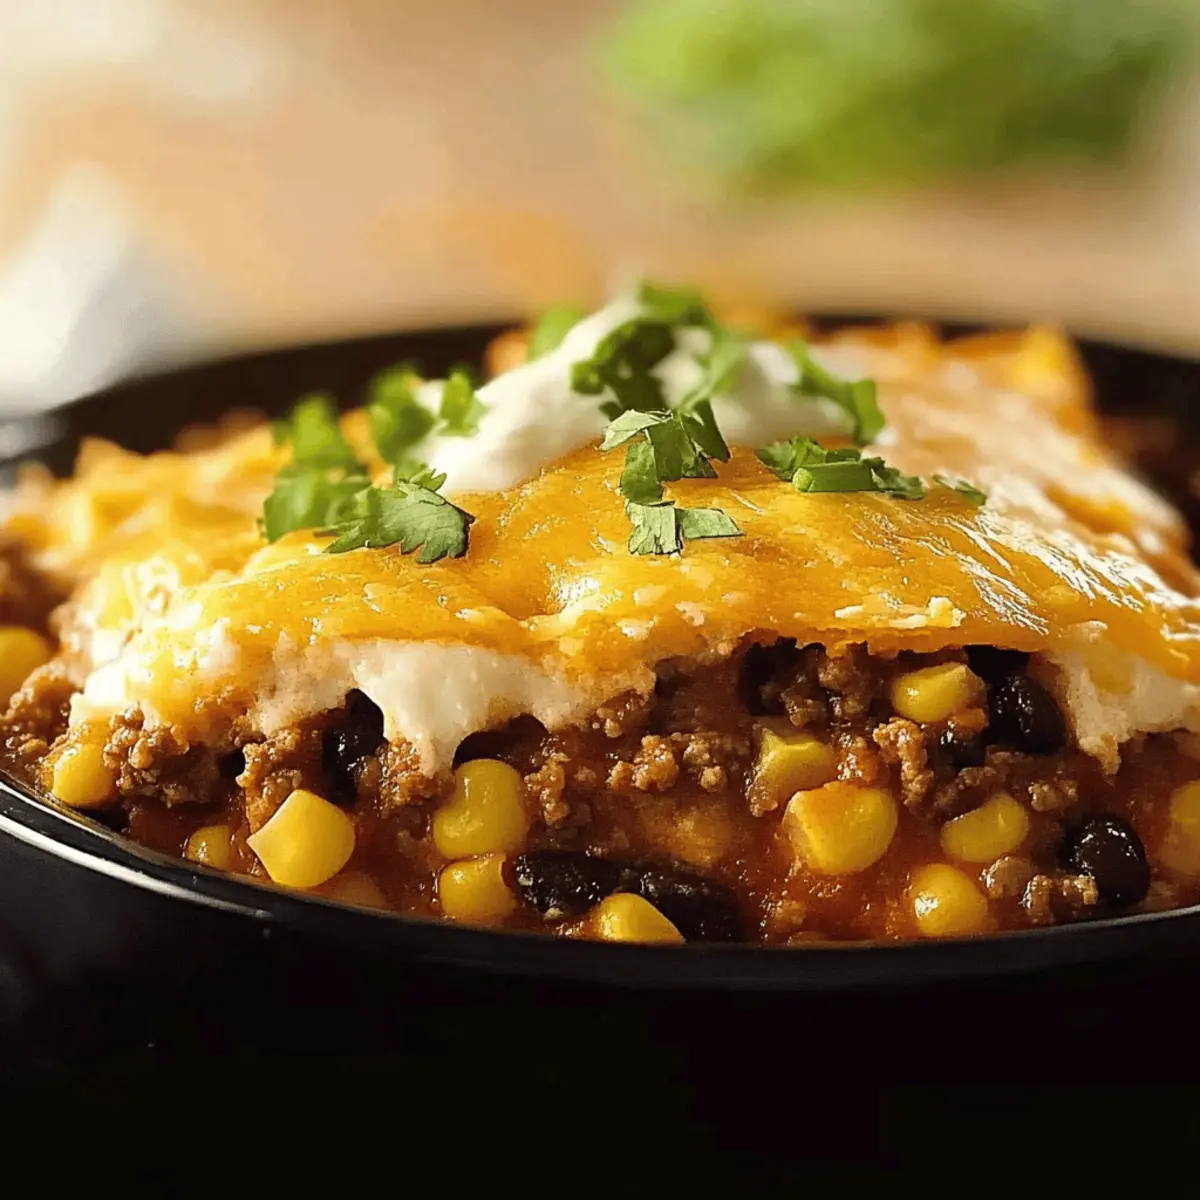
As the smell of seasoned beef and melted cheese wafts through my kitchen, I can’t help but feel a wave of nostalgia wash over me. This Easy Taco Bake isn’t just another meal; it’s a heartwarming reminder of busy weeknights spent with family gathered around the table. With its golden, fluffy Bisquick topping, savory filling, and optional toppings that add freshness, this taco bake is a crowd-pleaser that fits the bill perfectly. Not only is it comfortable and hearty, making it a great choice for family-friendly dinners, but it’s also budget-friendly and can even be prepped ahead or frozen for later use. So, why settle for fast food when you can whip up this delightful meal in no time? Are you ready to uncover the secret to delicious weeknight comfort? Let’s dive into this recipe!
Why is Taco Bake a Must-Try?
Comforting Flavors: Each bite of this Taco Bake is packed with savory beef, melty cheese, and sweet corn, making it a cozy dish for any night of the week.
Family-Friendly: This recipe is perfect for all ages, ensuring everyone at the table leaves satisfied.
Budget-Conscious: Utilizing affordable ingredients, it’s an accessible meal that won’t break the bank.
Versatile Options: Easily customize with your favorite toppings or turn it into a vegetarian delight by substituting beans!
Easy to Make Ahead: Prepare it in advance and freeze for busy nights; a smart time-saver in any kitchen.
If you enjoy hearty comfort food, you might want to check out my Easy Peach Baked Oatmeal for breakfast or consider making a delicious Dorito Taco Pie for taco-themed nights!
Taco Bake Ingredients
• Discover the essential components for a delicious Taco Bake!
For the Filling
- Lean Ground Beef – A flavorful base; choose 90% lean for a healthier option.
- Old El Paso Taco Seasoning – Provides a bold and balanced flavor, simplifying your spice measurements.
- Tomato Sauce – Adds moisture and a tangy kick, marrying the flavors beautifully.
- Whole Kernel Corn – Introduces natural sweetness and texture; be sure to drain it well.
- Shredded Cheddar/American Cheese – Essential for a gooey topping; sharp cheddar ramps up the taste.
For the Crust
- Bisquick Mix – The star ingredient, creating that fluffy and golden crust when combined with liquids.
- Milk – Adds moisture to the Bisquick mix, essential for a smooth batter.
- Eggs – Helps bind the batter and provides structure; don’t skip these for best results!
Optional Toppings
- Sour Cream – Adds a creamy, tangy touch that complements the dish perfectly.
- Fresh Tomatoes – For a pop of color and freshness, diced tomatoes work wonders.
- Shredded Lettuce – Introduces crunch and a refreshing contrast to the hearty filling.
With these simple ingredients, you can create a heartwarming Taco Bake that speaks to the soul. Get ready to gather your loved ones around the table!
Step‑by‑Step Instructions for Taco Bake
Step 1: Preheat Oven & Prep Dish
Begin by preheating your oven to 325°F (163°C). While the oven warms up, grease a 13x9x2-inch baking dish with cooking spray or butter, ensuring a non-stick surface for your savory Taco Bake. This ensures that your delicious layers of seasoned beef and melty cheese will slide out easily when it’s time to serve.
Step 2: Cook Beef & Assemble Filling
In a large skillet over medium heat, brown 1 pound of lean ground beef along with ½ cup of chopped onions, stirring often for about 5-7 minutes until fully cooked. Once the meat is browned and the onions are tender, drain any excess fat. Stir in 1 packet of Old El Paso taco seasoning, 1 can of tomato sauce, and 1 cup of drained whole kernel corn, mixing well. Spread this savory filling evenly into your prepared baking dish, topping it with 2 cups of shredded cheese for that gooey finish.
Step 3: Make Bisquick Batter
In a mixing bowl, whisk together 2 cups of Bisquick mix, 1 cup of milk, and 2 large eggs until the mixture is smooth and well combined. This batter will create a delightful crust atop your Taco Bake. Pour the Bisquick mixture evenly over the meat and cheese layers, ensuring every corner is covered for a golden, fluffy topping once baked.
Step 4: Bake
Place the assembled Taco Bake into the preheated oven and bake for 35 minutes. You’ll know it’s ready when the crust is golden brown and a knife inserted into the center comes out clean. The bubbling edges of the filling will also indicate that the flavors have melded beautifully, enhancing the overall taste.
Step 5: Cool & Serve
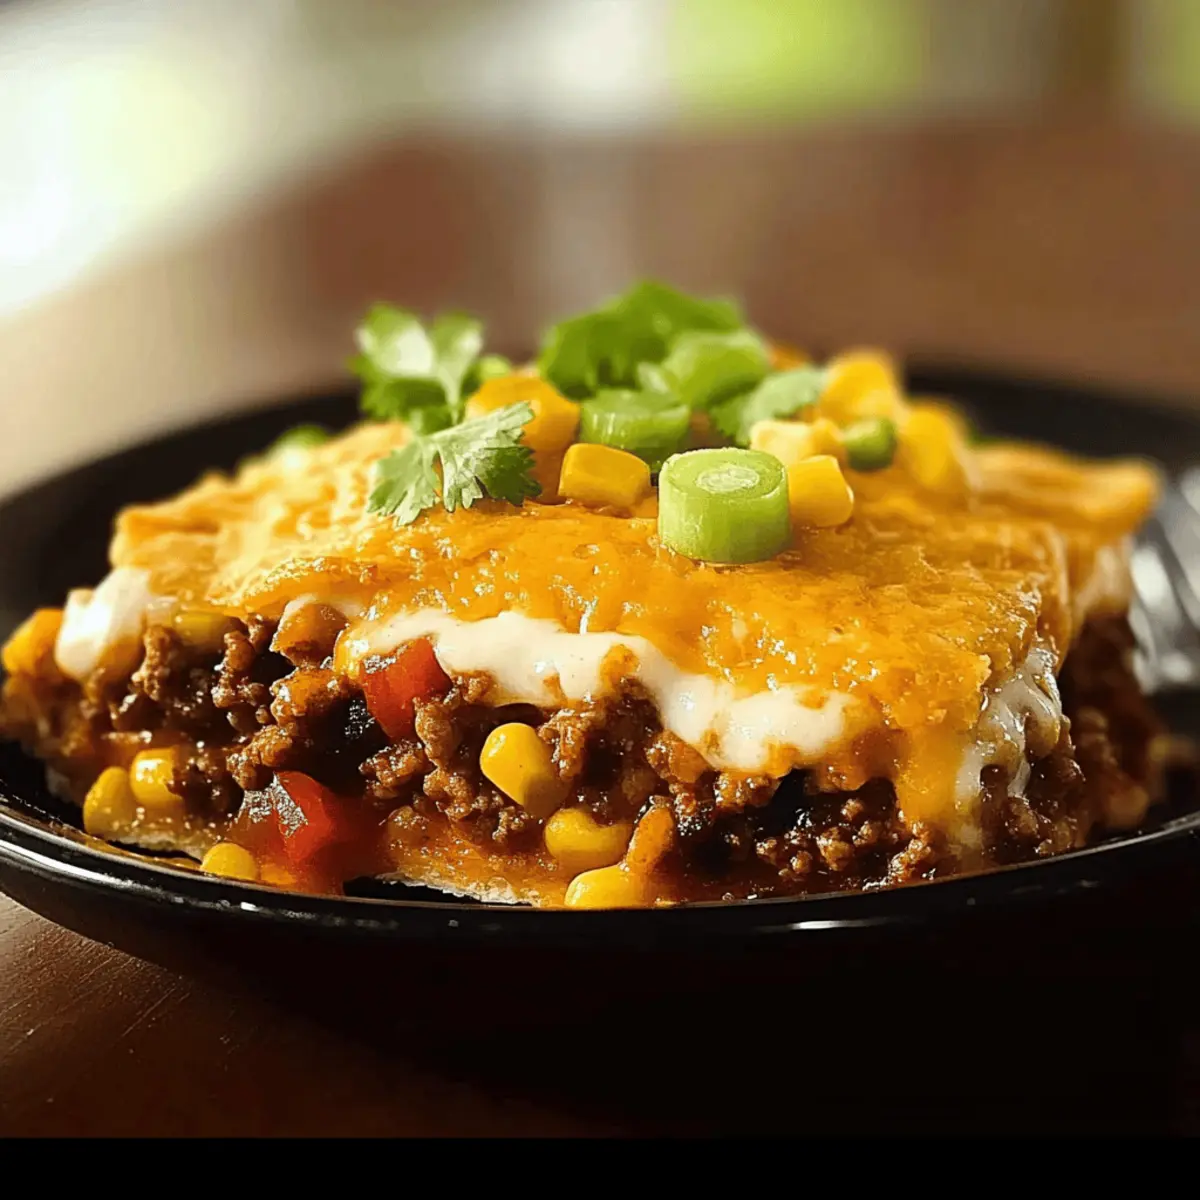
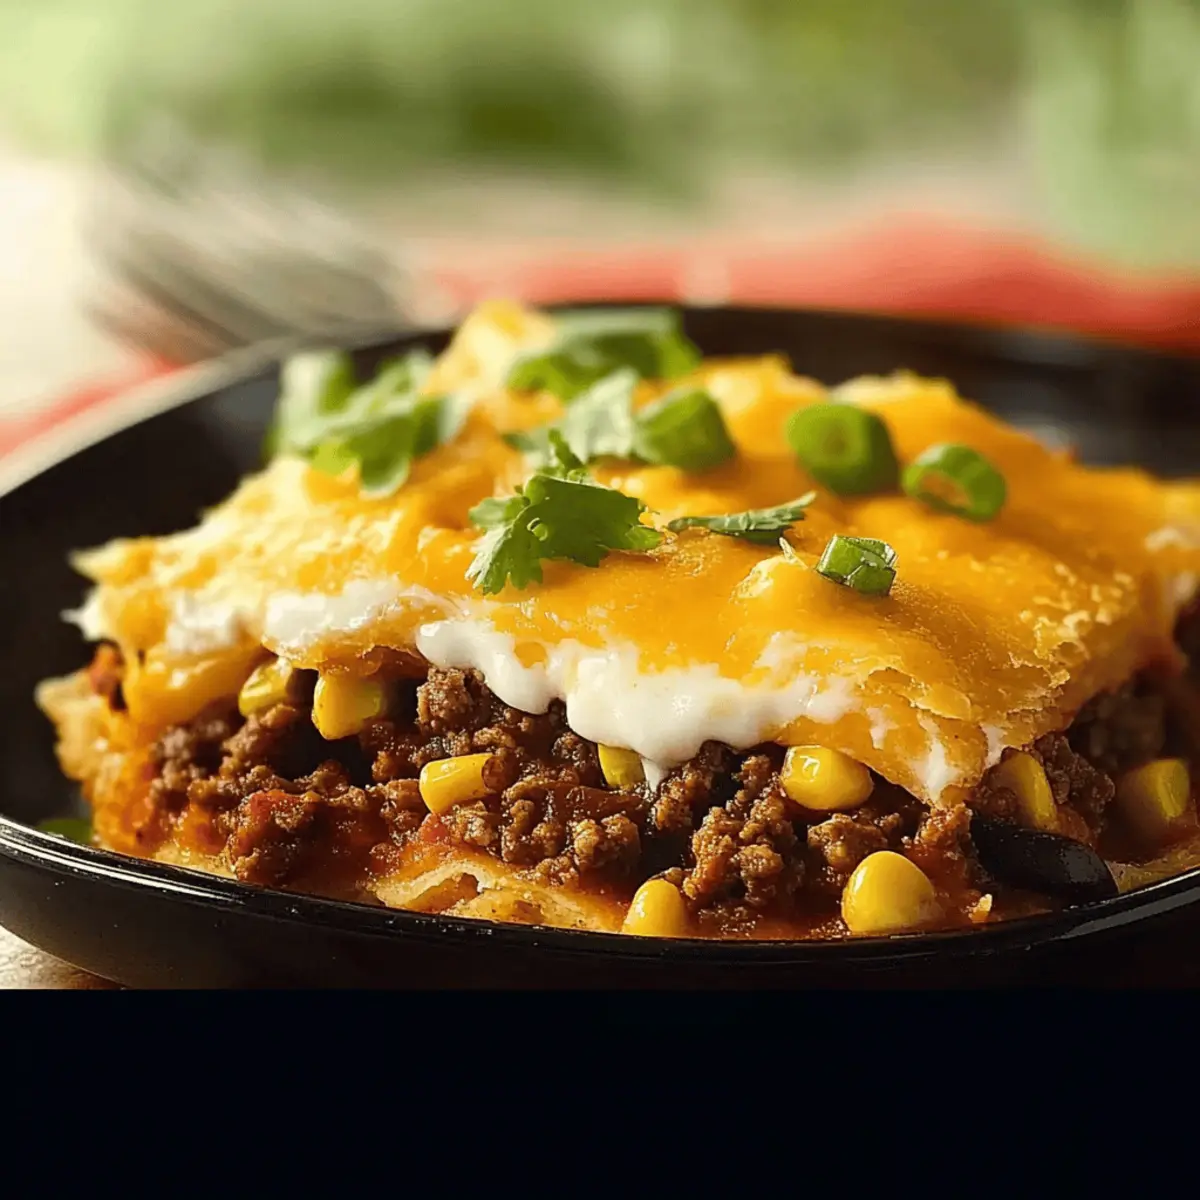
Remove the Taco Bake from the oven and let it cool for about 10 minutes. This cooling period allows the layers to set, making it easier to slice into perfect portions. Once cooled, cut into squares and serve with your favorite toppings like sour cream, diced tomatoes, or shredded lettuce for a fresh kick.
Expert Tips for Taco Bake
- Drain Fat Properly: Always drain the fat after cooking the beef to prevent a soggy texture in your Taco Bake.
- Let it Cool: Allow the Taco Bake to cool for 10 minutes post-baking; this helps layer separation and clean slicing.
- Customize Spices: Feel free to spice things up! Add jalapeños or a spicy taco seasoning for an extra kick in flavor.
- Gluten-Free Alternative: If you need a gluten-free option, simply substitute the Bisquick with a gluten-free baking mix.
- Make Ahead: For easy meal prep, you can prepare the meat mixture up to 24 hours in advance; store it separately until ready to layer.
Taco Bake Variations & Substitutions
Feel free to customize this scrumptious Taco Bake to suit your taste buds and dietary needs!
-
Vegetarian Option: Swap ground beef for a mix of black beans, lentils, or meatless crumbles for a hearty meat-free delight. Your palate will relish the depth of flavor without missing the meat!
-
Breakfast Taco Bake: Replace the tomato sauce and corn with scrambled eggs and breakfast sausage. Top it with cheese, and you’ll transform this dish into a delightful morning feast. Breakfast never tasted so good!
-
Gluten-Free Version: Use a gluten-free baking mix instead of Bisquick, allowing everyone to join in without worry. It’s an easy adjustment that opens this dish up to those with gluten sensitivities.
-
Spicy Twist: Add diced jalapeños or use a spicy taco seasoning to elevate the heat level. Let your taste buds dance with excitement as they experience flavorful heat in each bite!
-
Creamy Dream: Mix in a cup of sour cream to the beef filling before baking for an added layer of creaminess and richness. It’s comfort food with a luscious twist!
-
Individual Taco Bake Cups: Pour the mixture into muffin tins for portable versions. Bake for about 20 minutes, perfect for meal prep or on-the-go lunches! Kids and adults alike will enjoy these fun-sized delights.
-
Change the Cheese: Experiment with different cheeses like pepper jack or queso fresco for unique flavors that can reignite your love for Taco Bake. Each cheese brings a distinct character to the dish.
-
Add Veggies: Introduce bell peppers, diced tomatoes, or zucchini into the beef filling for extra nutrition and a pop of colorful goodness. Who said comfort food couldn’t be healthy?
Looking for more delicious ideas? Consider pairing your Taco Bake with some refreshing Baked Parmesan Zucchini or enjoy a crunchy side of Potato Egg Tacos!
Make Ahead Options
These Easy Taco Bake preparations are ideal for busy weeknights! You can prepare the beef and corn filling up to 24 hours in advance; simply cook the beef with onions, seasoning, tomato sauce, and corn, then refrigerate the mixture in an airtight container. This not only saves you time but also allows flavors to meld beautifully. To maintain quality, ensure it’s cooled completely before refrigerating. On the day you plan to serve, layer the chilled filling in your baking dish, top with cheese, and then pour on the Bisquick batter. Just bake for the directed 35 minutes, and you’ll have a delicious homemade meal ready with minimal effort!
What to Serve with Easy Taco Bake
As you savor the rich flavors of this comforting casserole, don’t forget to enhance your meal with delightful sides that complement it perfectly.
- Mexican Rice: A fragrant, fluffy accompaniment that balances the savory flavors of the taco bake, adding a hearty side that guests will love.
- Refried Beans: Creamy and hearty, these beans contribute a satisfying texture while enriching the meal with protein and fiber.
- Fresh Cabbage Slaw: Crunchy and refreshing, this slaw adds a light, crisp contrast that brightens the flavors and enhances every bite.
- Tortilla Chips: Serve these with salsa or guacamole for a fun, crunchy addition that pairs wonderfully with the savory filling of the taco bake.
For a vibrant finish, consider setting up a toppings bar. Guests can personalize their slices with sour cream, diced tomatoes, or shredded lettuce, making it a fun, interactive dining experience.
- Cornbread: Soft and slightly sweet, cornbread creates a fabulous flavor harmony with the spiciness of the taco bake, offering a comforting bite.
- Guacamole: Creamy and rich, this avocado dip provides a cooling element against the warm taco flavors while bringing in a delightful freshness.
- Sweet Tea: For a classic beverage pairing, serve this refreshing drink; its sweetness counterbalances the savory bite of the dish wonderfully.
- Churros: To end the meal on a sweet note, these cinnamon-sugar treats provide a delightful crunch and are always a hit with family and friends.
How to Store and Freeze Taco Bake
Fridge: Store leftover Taco Bake in an airtight container for up to 4 days. Make sure it cools completely before sealing to maintain freshness.
Freezer: For longer storage, freeze the Taco Bake whole or in portions for up to 3 months. Wrap it tightly in plastic wrap and foil to prevent freezer burn.
Thawing: When ready to enjoy, thaw frozen Taco Bake overnight in the fridge. This allows for even reheating without compromising flavor.
Reheating: Reheat in the oven at 350°F (175°C) for 20-25 minutes until heated through, or microwave individual portions for 2-3 minutes, adding toppings before serving.
Easy Taco Bake Recipe FAQs
How do I choose the best ground beef for my Taco Bake?
Absolutely! For the best flavor and less grease, I recommend opting for 90% lean ground beef. It’s perfect for keeping your filling hearty and satisfying without being overly greasy.
What’s the best way to store leftover Taco Bake?
You can store leftover Taco Bake in an airtight container in the refrigerator for up to 4 days. Just make sure it’s completely cooled before sealing to keep all that deliciousness fresh!
Can I freeze Taco Bake, and if so, how?
Yes! To freeze Taco Bake, wrap it tightly in plastic wrap and then in foil to prevent freezer burn. It will stay fresh for up to 3 months. When you’re ready to enjoy it, thaw it overnight in the fridge and reheat it in the oven at 350°F for 20-25 minutes.
What should I do if my Taco Bake turns out watery?
If your Taco Bake ends up watery, it’s likely because of excess grease or moisture in the filling. Make sure to drain the ground beef thoroughly after cooking and use low-sodium tomato sauce to avoid too much liquid. If you accidentally pour in too much liquid, try adding a little extra Bisquick mix to absorb it.
Is Taco Bake suitable for gluten-free diets?
Very! You can easily make this dish gluten-free by substituting the Bisquick mix with a gluten-free baking mix. Just ensure that all other ingredients are certified gluten-free, especially the taco seasoning and any toppings you choose.
Can I prepare Taco Bake ahead of time?
Absolutely! You can prepare the meat mixture up to 24 hours in advance. Simply store it in the refrigerator until you’re ready to assemble and bake it. This is a great time-saver for busy weeknights!
Delicious Taco Bake: The Ultimate Family Comfort Meal
Ingredients
Equipment
Method
- Preheat your oven to 325°F (163°C) and grease a 13x9x2-inch baking dish.
- Cook 1 pound of lean ground beef and ½ cup of chopped onions in a skillet over medium heat for 5-7 minutes. Drain fat and add taco seasoning, tomato sauce, and 1 cup of corn. Spread in prepared baking dish and top with 2 cups of cheese.
- In a bowl, whisk together 2 cups of Bisquick mix, 1 cup of milk, and 2 large eggs until smooth. Pour over the meat and cheese layers.
- Bake for 35 minutes or until the crust is golden brown. A knife inserted into the center should come out clean.
- Cool for 10 minutes, cut into squares, and serve with toppings.
Leave a Reply