
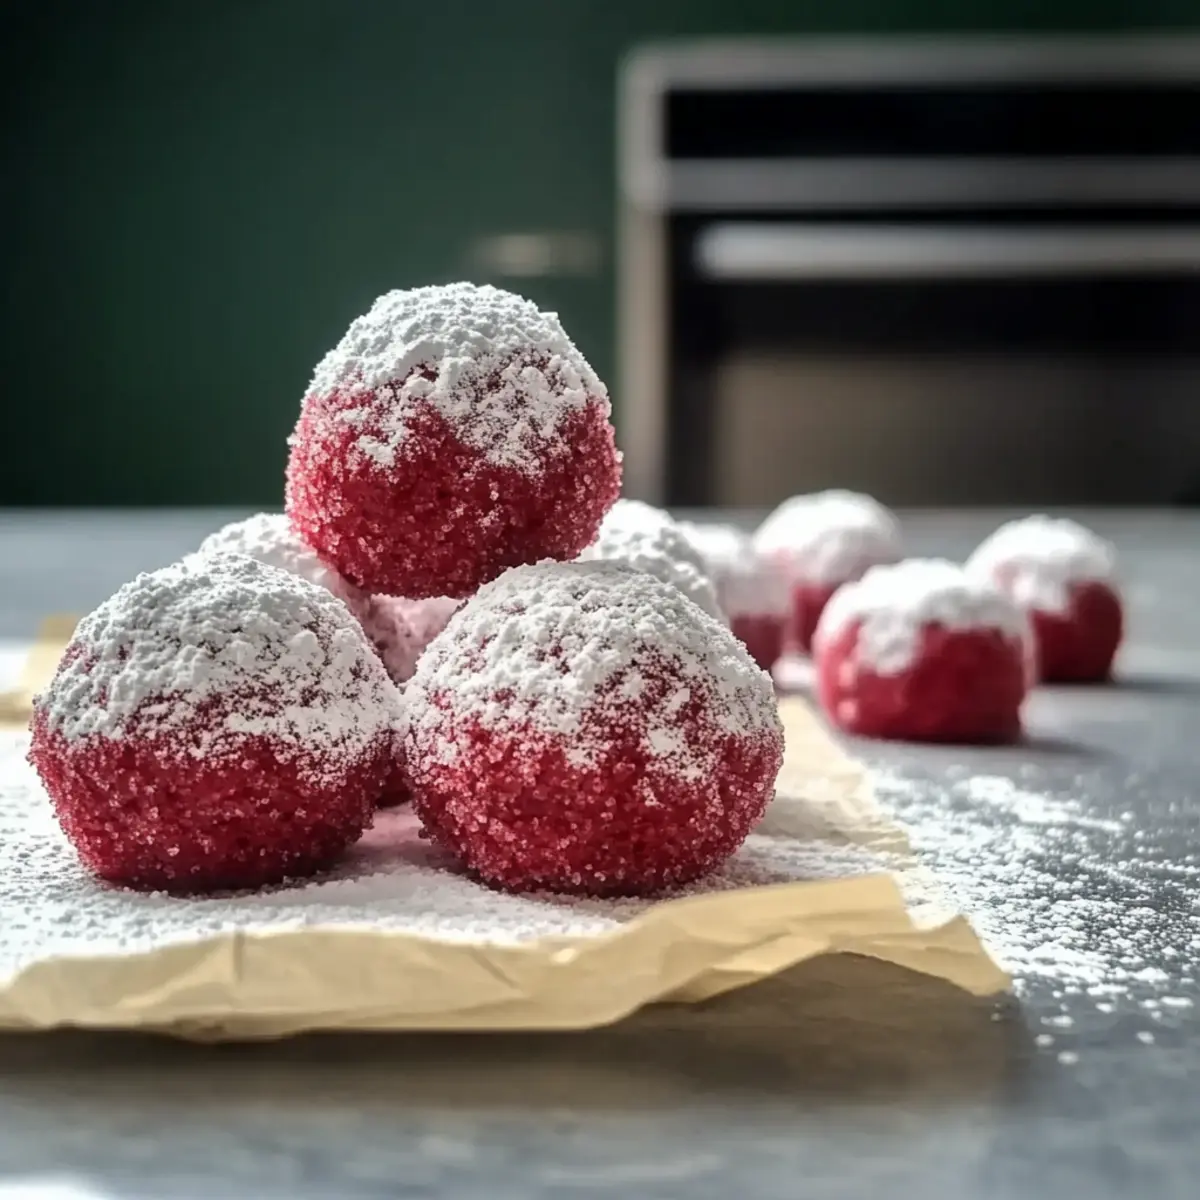
As the holiday season approaches, I find myself daydreaming about the joy of baking. It’s like a time capsule filled with warmth and laughter, where every whisk and fold seems to summon the spirit of festive gatherings. This year, I’m excited to share my recipe for Red Velvet Snowballs—a delightful no-bake treat that captures the essence of holiday cheer. With their stunning red hue and soft, chewy texture enveloped in a snowy powdered sugar coating, these cookies bring a fun twist to traditional baking. They’re not just quick to whip up but also make for a delightful gift or a show-stopping addition to your cookie tray. Who wouldn’t be curious to taste a cookie that looks just as festive as it tastes? Let’s dive into the magic of these vibrant treats that will enchant your family and friends!
Why Are Red Velvet Snowballs a Must-try?
Irresistible beauty: The striking red color of these treats instantly adds a festive flair to your holiday spread.
No-bake simplicity: You can whip these up quickly without the oven—perfect for spontaneous baking days!
Chewy delight: Every bite delivers a luscious chewy interior, perfectly balanced by the sweet powdered sugar coating.
Versatility: These cookies can be easily customized with melt-in-your-mouth fillings like cream cheese or Nutella. Looking for something classic yet unique? Pair them with a warm cup of cocoa or feature them on your holiday cookie platter alongside Battered Fish Chips or Gordon Ramsay Pan Seared Scallops.
Crowd-pleaser: Their whimsical appearance and delightful taste make them a hit at any holiday gathering!
Red Velvet Snowballs Ingredients
For the Dough
- Butter – Adds richness and contributes to the softness of the cookies; ensure it’s softened for easy creaming.
- Sugar – Provides sweetness and helps achieve a light, fluffy texture; you can use granulated or a blend for different profiles.
- Vanilla Extract – Enhances flavor complexity; always opt for pure vanilla for the best taste.
- Red Food Coloring – Adds vibrant color to the dough; gel coloring is preferred for a deeper hue without affecting texture.
- All-Purpose Flour – Forms the structure of the cookies; substitute with a gluten-free blend if necessary.
- Cocoa Powder – Adds flavor and richness; ensure it’s unsweetened to maintain balance with the sugar.
- Baking Powder – Provides leavening for the cookies, keeping them tender yet slightly puffed.
- Salt – Balances sweetness and enhances overall flavor; use fine salt for uniform blending.
For the Coating
- Powdered Sugar – This coating gives the snowball appearance; rolling the cookies in extra powdered sugar after baking enhances the look.
These Red Velvet Snowballs are sure to add a touch of holiday spirit to your festivities!
Step‑by‑Step Instructions for Red Velvet Snowballs
Step 1: Preheat and Prepare
Begin by preheating your oven to 350°F (175°C). While the oven warms up, line a baking sheet with parchment paper to prevent your Red Velvet Snowballs from sticking. This setup will ensure even baking and easy cleanup once your delightful cookies are ready.
Step 2: Cream the Butter and Sugar
In a large mixing bowl, cream together the softened butter and sugar until the mixture is light and fluffy—about 3-5 minutes using an electric mixer. This step incorporates air into the dough, enhancing its texture. You’ll know it’s ready when it turns a pale yellow and has a smooth consistency.
Step 3: Add Flavor and Color
Next, mix in the vanilla extract and red food coloring until the batter reaches a rich, deep red hue. Stir well to evenly distribute the color throughout the mixture, ensuring each Red Velvet Snowball will have that festive appearance. The vibrant color elevates the visual appeal of your holiday cookies!
Step 4: Combine Dry Ingredients
In a separate bowl, whisk together the all-purpose flour, cocoa powder, baking powder, and salt. This ensures even distribution of the dry ingredients and prevents clumping. Once mixed, gradually add the dry ingredients to your butter mixture, stirring gently until a smooth dough forms.
Step 5: Shape the Cookies
With your dough ready, use your hands to roll it into 1-inch balls. Place these shaped balls onto your previously prepared baking sheet, leaving space between each cookie to allow for slight spreading during baking. Aim to place around 12 cookies per sheet, so they have room to puff slightly.
Step 6: Bake to Perfection
Pop the baking sheet into the preheated oven and bake for 10-12 minutes. You’ll want to remove the cookies when they’re set but still soft in the center; they will firm up as they cool. Keep an eye on them, as the edges should be just starting to crinkle without becoming too firm.
Step 7: Cool and Coat
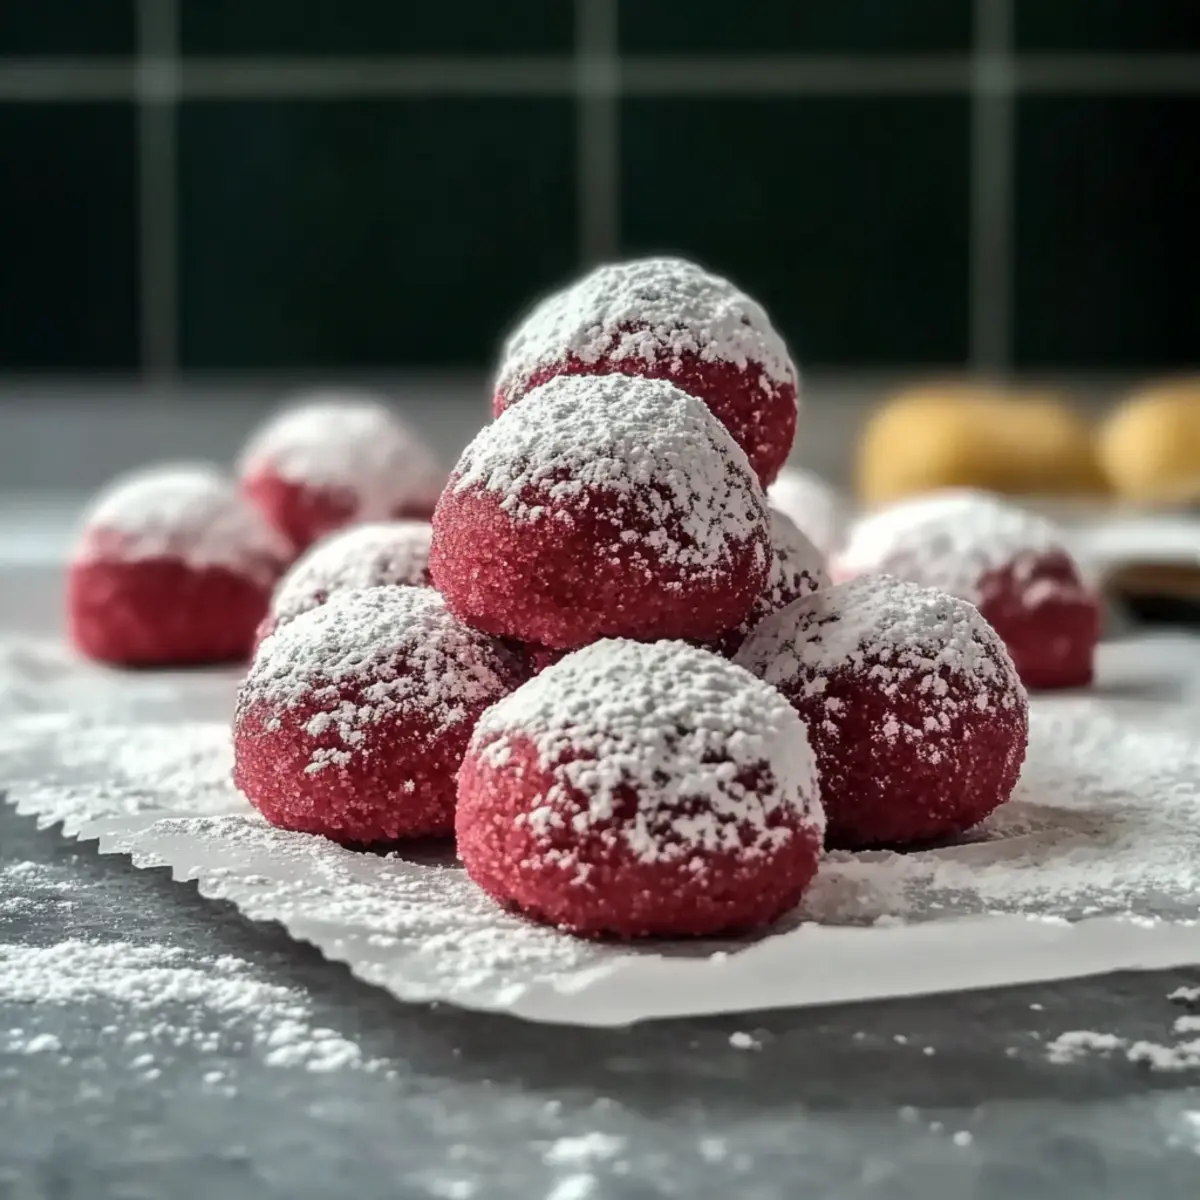
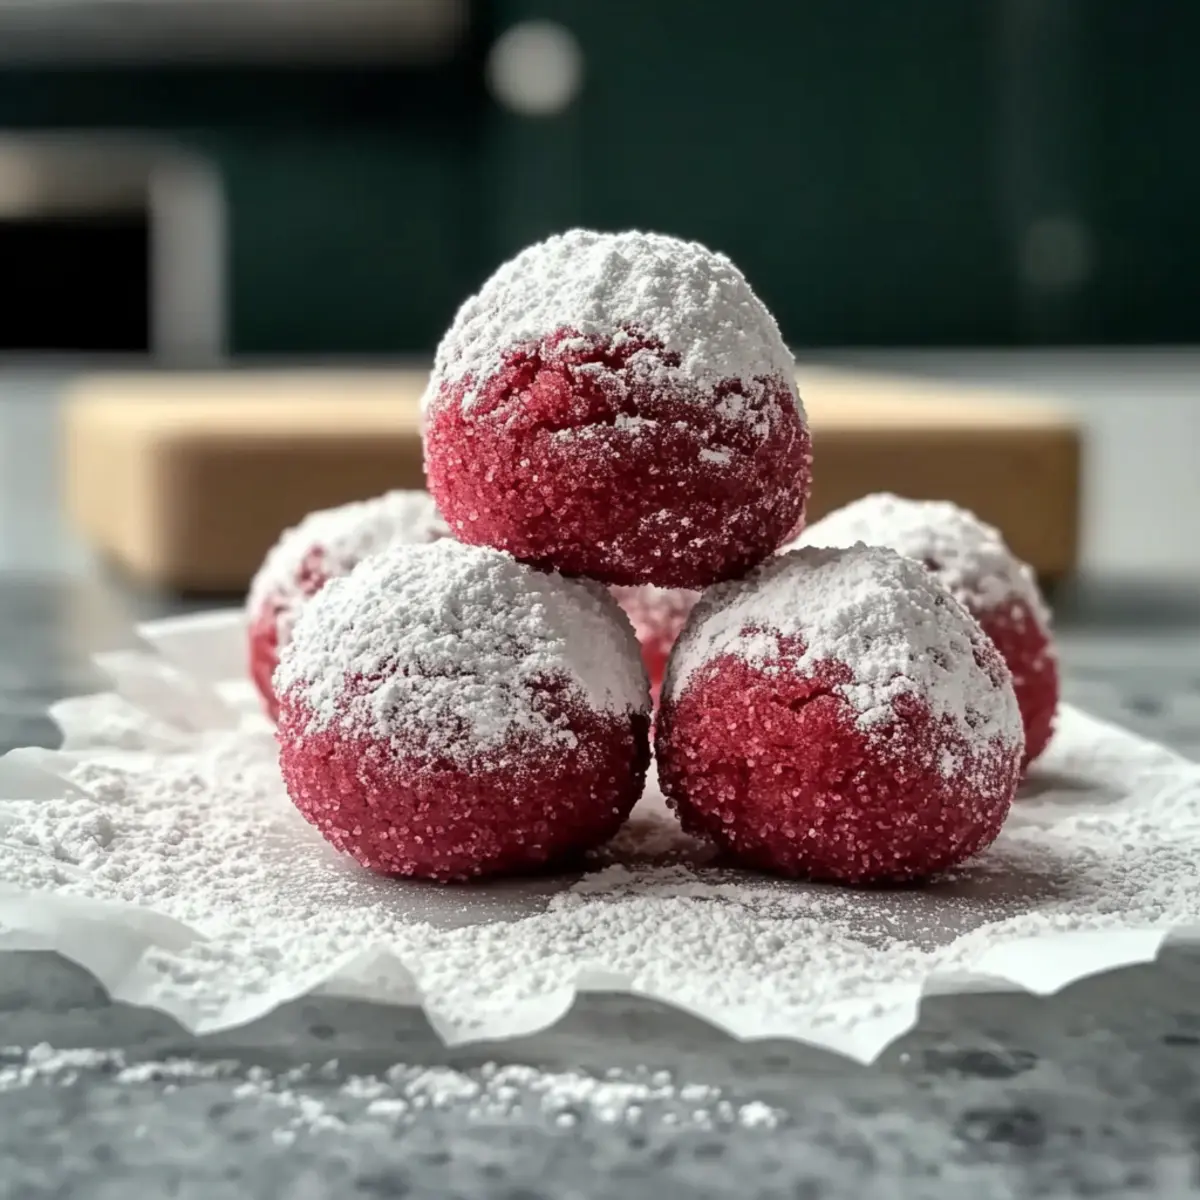
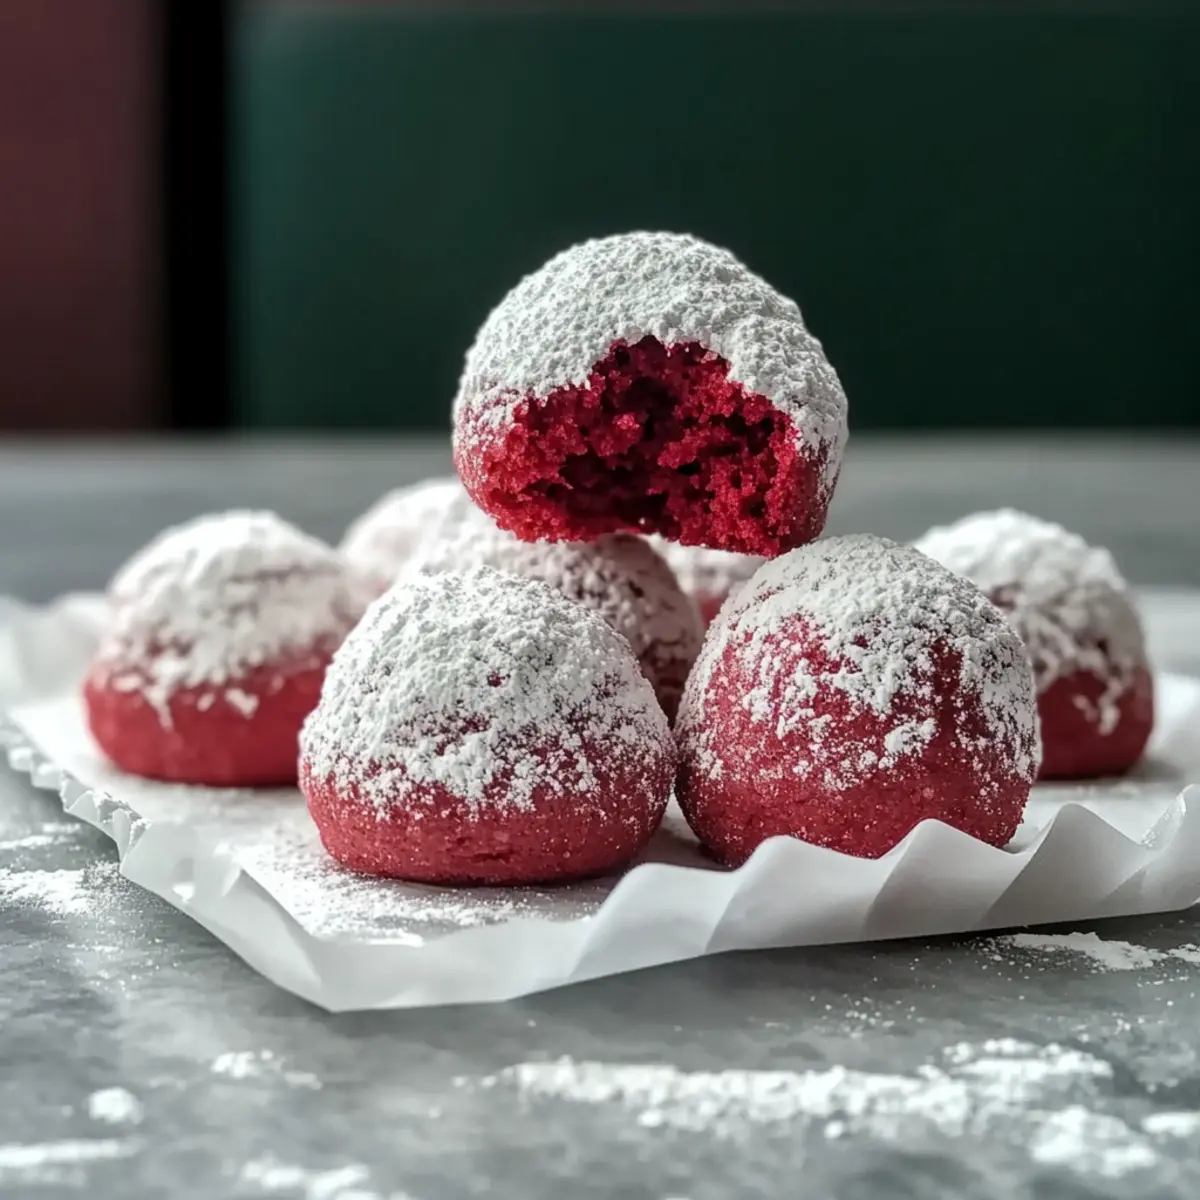
Once out of the oven, let the cookies cool on the baking sheet for about 5 minutes. While they’re still warm, roll each Red Velvet Snowball in powdered sugar to create that beautiful snowball effect. For an extra touch, let them cool slightly more before rolling in powdered sugar again for a snowy finish.
Step 8: Let Them Chill
Allow your Red Velvet Snowballs to cool completely on a wire rack. This final step is crucial for achieving that perfect chewy texture inside. Once cooled, these cookies are ready to be devoured or beautifully packaged as delightful gifts for your friends and family during the holiday season!
Red Velvet Snowballs Variations & Substitutions
Feel free to elevate your Red Velvet Snowballs with these delightful variations that spark creativity and fun in your baking!
-
Gluten-Free: Substitute all-purpose flour with a gluten-free baking blend for a deliciously inclusive holiday treat. Your guests won’t even notice the difference!
-
Nutty Surprise: Add chopped walnuts or pecans to the dough for a delightful crunch that contrasts beautifully with the chewy texture. This nuttiness brings a warm, homey feel to each bite.
-
Chocolate Lovers: Incorporate mini chocolate chips into your dough for a chocolate explosion! This adds a wonderful richness that pairs beautifully with the red velvet flavor.
-
Cream Cheese Filling: For a surprise twist, stuff each cookie with a dollop of cream cheese before baking. The creamy center will melt in your mouth, enhancing the festive spirit of the cookies.
-
Caramel Drizzle: After baking, drizzle warm caramel sauce over the snowballs for an extra layer of sweetness that will enchant your taste buds. This indulgent addition makes these cookies even more spectacular.
-
Spicy Kick: Add a pinch of cayenne pepper or cinnamon to the dough for a warm, spicy undertone that enhances the chocolatey goodness. This unexpected twist adds warmth to the holiday spirit!
-
Coconut Coating: Roll the cooled cookies in shredded coconut after the powdered sugar for a tropical touch that complements the red color beautifully. This variation brings a delightful texture and taste!
-
Different Colors: Use different food coloring to create vibrant snowballs in various shades. This not only makes for a festive display but also adds a playful element to your baking.
Now, imagine how stunning your cookie platter will look with a mix of these variations, especially alongside other festive treats like Red Wine Braised Short Ribs or Gordon Ramsay Pan Seared Scallops. Happy baking!
Expert Tips for Red Velvet Snowballs
- Gel Coloring Choice: Use gel food coloring for a vibrant red hue without altering the dough’s texture. This ensures your cookies look as festive as they taste!
- Quality Ingredients: Opt for high-quality cocoa powder and unsalted butter to enhance flavor and texture. Fresh ingredients make a big difference in your Red Velvet Snowballs!
- Even Baking: Space your cookie balls well on the baking sheet to prevent them from sticking together. This allows for even baking and a perfect puff!
- Double Coating: For an extra snowy finish, roll your warm cookies in powdered sugar twice. This not only enhances appearance but adds extra sweetness, too!
- Storage Secrets: Store cookies in an airtight container at room temperature for up to 5 days. For longer storage, freeze them to maintain their delightful chewiness.
What to Serve with Red Velvet Snowballs
Delight in an enchanting feast by pairing these festive cookies with treats that enhance their charming allure.
-
Creamy Hot Cocoa: This rich, velvety drink embraces the flavors of chocolate, beautifully complementing the sweetness of the cookies. It’s the perfect cozy companion for cold winter nights.
-
Festive Fruit Salad: A colorful medley of seasonal fruits can provide a refreshing contrast, balancing out the richness of the cookies while adding a splash of color to your table.
-
Gourmet Coffee: Whether it’s a rich espresso or creamy latte, the deep, bold flavors of gourmet coffee make a delightful pairing that elevates the cookie experience.
-
Cinnamon Rolls: These warm, gooey pastries, drizzled with icing, bring a comforting element to your holiday spread and play nicely with the cake-like texture of the snowballs.
-
Mint Chocolate Chip Ice Cream: The icy coolness and minty freshness offer a fun twist, creating a harmonious blend of flavors that’s bound to impress.
-
Spiced Apple Cider: A warm cup of spiced apple cider fills your home with a welcoming aroma, making it a fitting companion to these indulgent cookies during holiday gatherings.
-
Chocolate Dipped Pretzels: Crunchy, sweet, and salty, these treats can provide a lovely contrast to the soft, chewy texture of your Red Velvet Snowballs, ensuring every bite is a delight.
How to Store and Freeze Red Velvet Snowballs
Room Temperature: Store your Red Velvet Snowballs in an airtight container at room temperature for up to 5 days to keep them fresh and chewy.
Fridge: If you prefer a longer shelf life, you can refrigerate them in an airtight container for up to a week, but note that they may lose some of their soft texture.
Freezer: For extended storage, freeze the cookies for up to 3 months. Place them in a single layer on a baking sheet to freeze individually, then transfer to a freezer-safe container or bag.
Reheating: When ready to enjoy, thaw cookies at room temperature or gently reheat in the microwave for a few seconds to regain that fresh-out-of-the-oven softness.
Make Ahead Options
These Red Velvet Snowballs are perfect for meal prep enthusiasts! You can prepare the dough up to 48 hours in advance; simply refrigerate it in an airtight container to maintain freshness. Alternatively, you can roll the dough into balls and freeze them for up to 3 months. This way, you’ll have ready-to-bake cookies at your fingertips. When you’re ready to enjoy, bake the frozen dough balls directly without thawing, adding an extra minute or two to the baking time. By prepping ahead, you save time on busy weeknights while still delivering delicious, chewy treats that are just as delightful as freshly baked!
Red Velvet Snowballs Recipe FAQs
How do I choose ripe ingredients for my Red Velvet Snowballs?
Absolutely! For the best results, use room-temperature butter that’s softened, as it will cream easily with sugar. Choose fresh ingredients like unsweetened cocoa powder and high-quality vanilla extract—these can elevate the flavor of your cookies significantly.
How should I store my Red Velvet Snowballs?
Very! Store your Red Velvet Snowballs in an airtight container at room temperature for up to 5 days. If you want to enjoy them longer, refrigerate them for up to a week, although they may lose some softness. The key is to ensure they are kept in a sealed environment to maintain their delightful chewy texture.
Can I freeze Red Velvet Snowballs?
Absolutely! To freeze your Red Velvet Snowballs, arrange them in a single layer on a baking sheet to flash freeze them first. Once they are firm, transfer the cookies to a freezer-safe container or bag. They can be stored for up to 3 months. When you’re ready to enjoy them, thaw at room temperature or pop them in the microwave for a few seconds to regain their initial softness.
What if my cookie dough is too dry?
If you find your cookie dough is too dry, don’t worry! You can add a teaspoon of milk or cream to the mixture to loosen it up. Mix it in gently, and check until you achieve a soft, pliable dough consistency. Remember, humidity and ingredient temperature can affect dough texture, so keep a watchful eye!
Are there any dietary considerations I should be aware of?
Very! If you’re preparing these Red Velvet Snowballs for someone with dietary restrictions, you can substitute the all-purpose flour with a gluten-free blend. Additionally, be sure to check that the food coloring and cocoa powder are free from any allergens. If you’d like a touch of surprise, adding a hidden filling like cream cheese or Nutella could cater to those with a sweet tooth, just be mindful of any allergies!
Red Velvet Snowballs: Irresistibly Chewy Holiday Cookies
Ingredients
Equipment
Method
- Preheat your oven to 350°F (175°C) and line a baking sheet with parchment paper.
- Cream together softened butter and sugar in a large mixing bowl until light and fluffy (about 3-5 minutes).
- Mix in vanilla extract and red food coloring until the batter is a rich red hue.
- In a separate bowl, whisk together flour, cocoa powder, baking powder, and salt. Gradually add to the butter mixture, stirring until smooth.
- Roll the dough into 1-inch balls and place on the baking sheet, leaving space between each cookie.
- Bake for 10-12 minutes until set but soft in the center. Let cool for 5 minutes.
- While warm, roll each cookie in powdered sugar. Optionally roll again for extra powder.
- Allow to cool completely on a wire rack before serving or storing.
Leave a Reply