
There’s something utterly enchanting about the swirling colors of red and white, especially when it comes to holiday treats. As I stood in my kitchen, the scent of peppermint wafting through the air, I couldn’t help but feel a surge of joy at the thought of sharing my Bakery-Perfect Peppermint Swirl Cookies with loved ones. These delightful cookies not only bring festive cheer to your holiday gatherings, but they’re also incredibly easy to make, ensuring you can bake a batch in no time. With each soft, melt-in-your-mouth bite, you’re not just enjoying a cookie; you’re creating memories. Whether you’re searching for the perfect gift or just craving a sweet moment of comfort, these cookies are sure to leave a lasting impression. Are you ready to bring a little holiday magic into your kitchen? Let’s dive into this fun baking adventure!
Why Are Peppermint Swirl Cookies Irresistible?
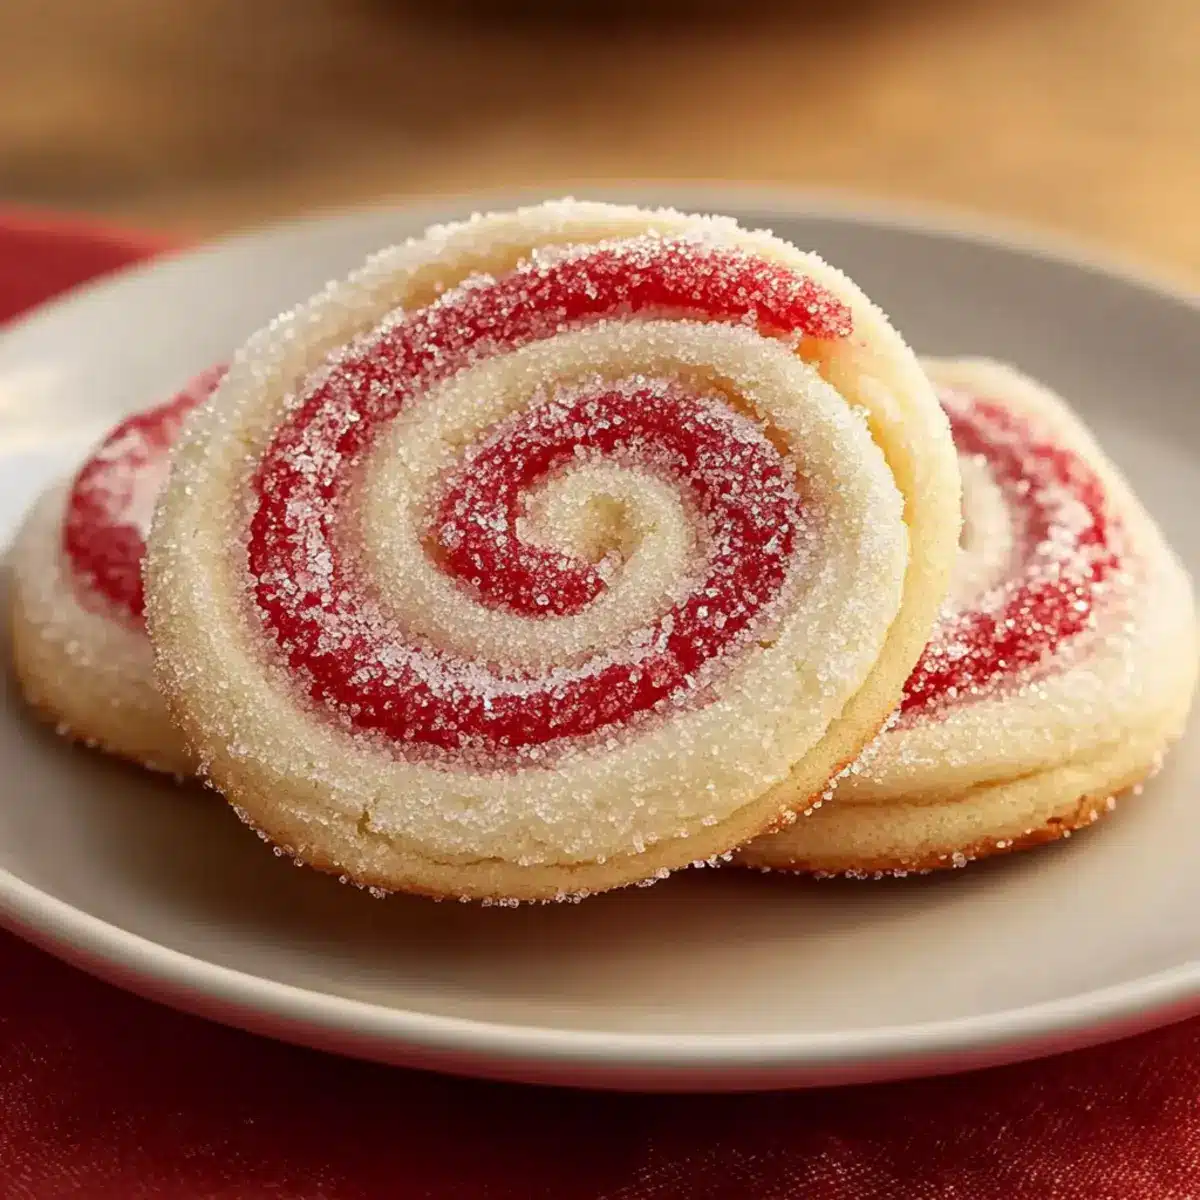
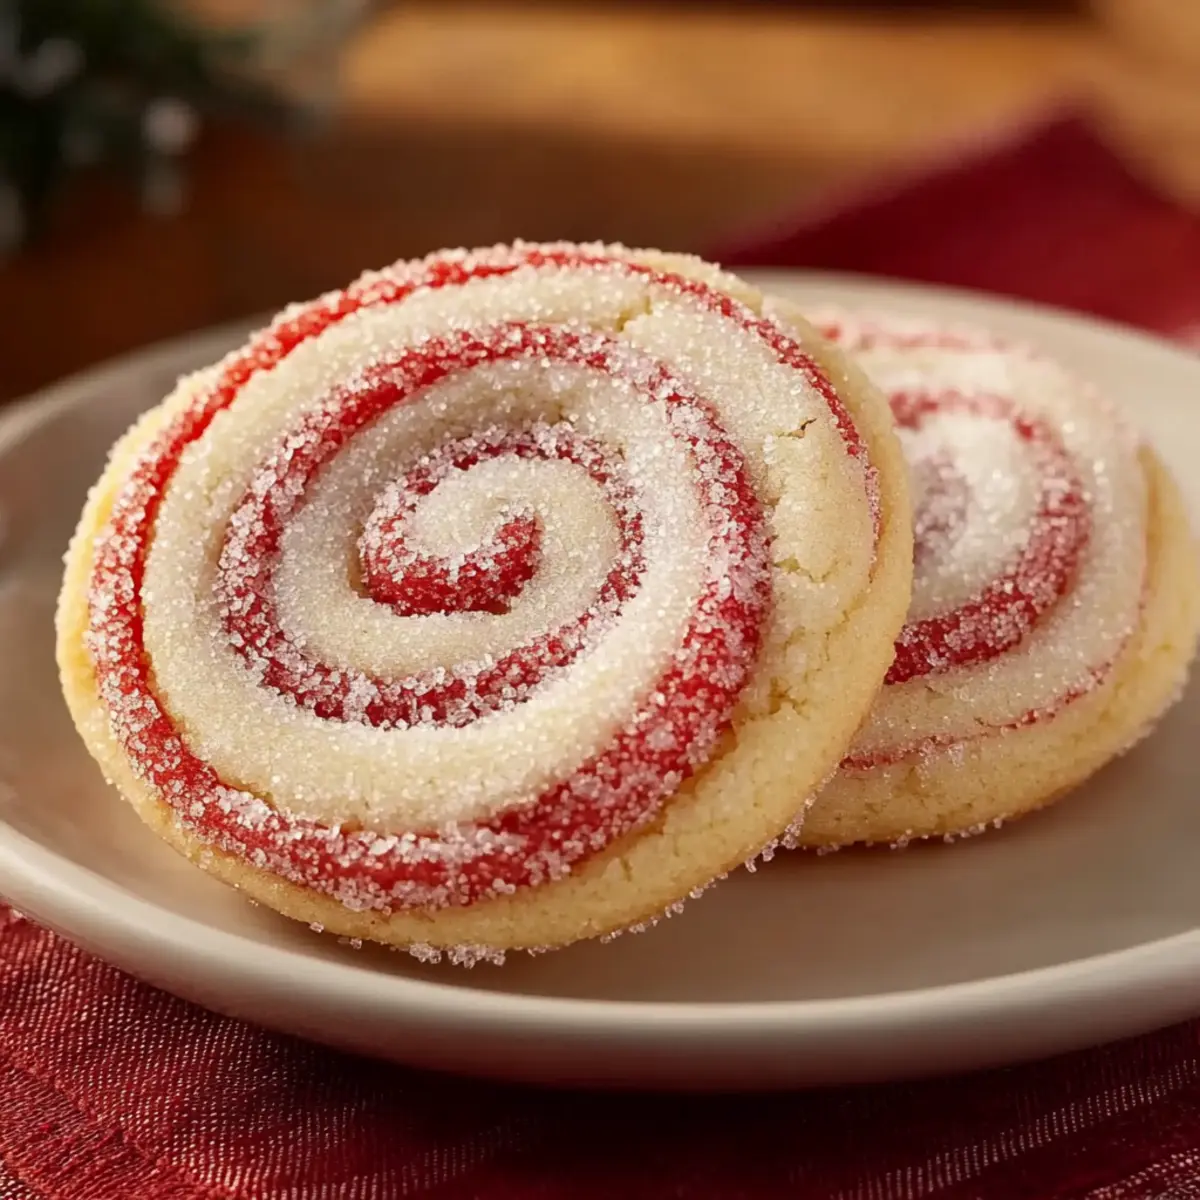
Festive Visual Appeal: The striking red and white swirls make these cookies a showstopper at any holiday gathering.
Effortless Recipe: With simple ingredients and straightforward steps, even novice bakers can achieve bakery-perfect results.
Melt-in-Your-Mouth Texture: Expect a soft and tender crumb that contrasts beautifully with a delightful crunch from the exterior coating.
A Flavorful Kick: The refreshing peppermint extract adds a unique twist that will tantalize your taste buds and evoke festive cheer.
Perfect for Gifting: These cookies not only taste amazing but also look beautiful on a platter, making them a thoughtful gift for friends and family.
Whether you’re baking for a gathering or enjoying a quiet moment with a warm beverage, these Peppermint Swirl Cookies are sure to delight!
Peppermint Swirl Cookies Ingredients
For the Cookie Dough
• All-purpose flour – Provides necessary structure for the cookies; can substitute with gluten-free 1:1 flour blend to accommodate dietary needs.
• Baking powder – Acts as the leavening agent, giving the cookies a delightful lift.
• Salt – Enhances flavor and balances the sweetness beautifully.
• Unsalted butter – Ensures a tender crumb and rich flavor; remember to soften to room temperature for proper creaming.
• Granulated sugar – Sweetens the cookies and helps achieve a light, fluffy texture when creamed with butter.
• Large egg – Binds ingredients together while adding moisture to the dough.
• Vanilla extract – Introduces warm, aromatic depth that elevates the overall flavor profile.
• Peppermint extract – Provides the signature refreshing mint flavor that makes these cookies unmistakably festive.
For the Swirl
• Red gel food coloring – Ensures vibrant swirls without adding excess moisture; the key to that eye-catching effect.
• Coarse sugar or crushed peppermint candies – Used for coating the cookies, adding a delightful sparkle and a lovely crunch.
With these ingredients, you’re well on your way to creating stunning Peppermint Swirl Cookies that will bring joy to your holiday celebrations!
Step‑by‑Step Instructions for Peppermint Swirl Cookies
Step 1: Mix Dry Ingredients
In a medium bowl, whisk together 2 cups of all-purpose flour, 1 teaspoon of baking powder, and 1/4 teaspoon of salt until evenly combined. This mixture will provide the structure your Peppermint Swirl Cookies need. Set the bowl aside while you prepare the wet ingredients, ensuring the dry mix is free of lumps for a smooth cookie dough.
Step 2: Cream Butter and Sugar
In a large bowl, use an electric mixer to cream 1 cup of softened unsalted butter and 1 cup of granulated sugar on medium speed until the mixture is light and fluffy, about 3-5 minutes. The fluffy texture is essential for achieving that melt-in-your-mouth quality in your peppermint cookies. Scrape down the sides of the bowl as necessary to incorporate all ingredients.
Step 3: Add Egg and Extracts
Beat in 1 large egg, 1 teaspoon of vanilla extract, and 1 teaspoon of peppermint extract into the creamed mixture until well blended. This step brings rich flavors to your Peppermint Swirl Cookies, ensuring each bite is bursting with that festive minty kick. Continue mixing until the egg is fully incorporated and the batter is creamy.
Step 4: Combine the Dough
Gradually add the dry ingredients from Step 1 into the wet mixture, mixing on low speed until just combined. Aim for a soft dough consistency—overmixing can lead to tough cookies, so stop as soon as you see no streaks of flour. The dough should be slightly sticky but manageable for shaping in later steps.
Step 5: Divide and Color the Dough
Divide the cookie dough in half: keep one portion plain and add a few drops of red gel food coloring to the second half. Mix the coloring thoroughly until the dough is a vibrant red, resembling festive holiday hues. This coloring will create those magical swirls in your finished Peppermint Swirl Cookies.
Step 6: Chill the Dough
Wrap both portions of the dough tightly in plastic wrap and chill in the refrigerator for at least 30 minutes. This chilling phase will firm the dough, making it easier to handle while rolling and slicing. The cool temperature helps maintain the shape of your cookies as they bake.
Step 7: Roll Out the Dough
On a lightly floured surface, roll out each chilled dough portion into rectangles measuring approximately 10×12 inches. Aim for an even thickness of about 1/4 inch. The contrasting colors will create beautiful swirls, so ensure both pieces are rolled to the same thickness for uniform baking.
Step 8: Create the Swirl Log
Layer the red dough on top of the plain dough, gently pressing them together to avoid air pockets. Carefully roll the layered dough up from one long side to form a tight log, keeping it as even as possible. This step is crucial for achieving the eye-catching peppermint swirls when you slice the log into cookies.
Step 9: Chill the Rolled Log
Wrap the log tightly in plastic wrap and return it to the fridge to chill for at least 2 hours. This second chill ensures clean cuts when slicing and helps maintain the definition of the swirls in your Peppermint Swirl Cookies. Patience here will pay off with impressive results!
Step 10: Preheat the Oven
When ready to bake, preheat your oven to 375°F (190°C) and line your baking sheets with parchment paper. This preparation allows for even baking and helps prevent the cookies from sticking. Ensure your oven is fully preheated before placing the cookies inside for optimal texture.
Step 11: Slice and Arrange
Remove the chilled log from the fridge and use a sharp, non-serrated knife to slice it into 1/4-inch rounds. Arrange the slices on the prepared baking sheets, leaving space between each to allow for spreading during baking. The beautiful swirls should be visible on the edges of each cookie.
Step 12: Bake the Cookies
Bake the cookies in the preheated oven for 8-10 minutes, or until the edges are lightly golden. Keep an eye on them, as baking times can vary. The perfect visual cue is lightly golden edges while the centers remain soft. After baking, allow the cookies to cool on wire racks for a delightful finish.
Expert Tips for Peppermint Swirl Cookies
Perfect Butter Texture: Ensure the unsalted butter is softened properly before creaming. This allows for the incorporation of air, which is key for achieving that melt-in-your-mouth texture.
Chill for Success: Don’t skip the chilling phases. The first chill makes the dough easier to handle, while the second ensures clean cuts and beautifully defined swirls in your Peppermint Swirl Cookies.
Mind the Mix: Be careful not to overmix after adding the flour. This will prevent tough cookies and keep them soft. Mix just until combined for the best results.
Sharp Knife Use: Use a sharp, non-serrated knife for slicing the log. This ensures clean cuts that maintain the swirl definition, contributing to the visual appeal of your cookies.
Watch the Bake Time: Keep a close watch on the cookies as they bake. You’re aiming for lightly golden edges; take them out when they meet this cue to avoid overbaking.
How to Store and Freeze Peppermint Swirl Cookies
Room Temperature: Keep baked Peppermint Swirl Cookies in an airtight container at room temperature for up to 5-7 days to maintain their freshness and delightful texture.
Freezer: For long-term storage, freeze baked cookies in a single layer, then transfer to a freezer bag for up to one month. Thaw at room temperature before serving, allowing the festive flavors to shine.
Raw Dough: Wrap the raw dough tightly in plastic wrap and freeze for 2-3 months. When ready to bake, thaw slightly, slice into rounds, and bake directly from frozen for a quick holiday treat.
Reheating: To enjoy cookies warm, pop them in a microwave for about 10-15 seconds or reheat in a preheated oven at 350°F (175°C) for a few minutes until warmed through.
What to Serve with Peppermint Swirl Cookies?
There’s something magical about creating the perfect cookie experience, especially when paired with delightful accompaniments.
-
Hot Cocoa: This rich, velvety beverage enhances the peppermint flavor, warming hearts as you dip the cookies into its cozy embrace.
-
Coffee or Espresso: A robust brew contrasts beautifully with the sweetness of the cookies, creating a delightful balance that highlights each bite.
-
Milk: The classic pairing offers a creamy backdrop that makes peppermint flavors pop, perfect for both kids and the young-at-heart during the holidays.
-
Holiday Fruit Salad: A fresh citrus medley provides a refreshing contrast to the sweet cookies, adding bright colors and healthful crunch during festive gatherings.
-
Cheesecake Bites: These creamy, rich desserts can mirror the cookies’ festive vibes, providing a textural contrast that’ll leave your guests coming back for more.
-
Chocolate-Dipped Pretzels: Sweet and salty, this pairing creates an irresistible snack vibe perfect for holiday parties, giving added crunch to each cookie bite.
-
Gingerbread Cookies: Embrace the holiday spirit by offering another seasonal cookie, bringing joy to your dessert table with varied flavors and textures.
-
Peppermint Ice Cream: For those with a sweet tooth, a scoop of creamy peppermint ice cream synergizes perfectly, turning your dessert spread into an unforgettable treat.
-
Spiced Apple Cider: Warm, aromatic, and festive—this drink offers a cozy touch that complements the refreshing mint flavor in the cookies as winter evenings draw near.
Peppermint Swirl Cookies Variations & Substitutions
Get ready to make these festive treats your own with some delightful twists and swaps!
- Nut-Free: Use sunflower seed butter in place of unsalted butter for a nut-free version without sacrificing flavor.
- Gluten-Free: Swap all-purpose flour with a gluten-free 1:1 flour blend for a gluten-free treat that everyone can enjoy!
- Dairy-Free: Replace unsalted butter with vegan butter or coconut oil to create delicious dairy-free Peppermint Swirl Cookies.
- Citrus Zest: Brighten the flavor by adding a teaspoon of orange or lemon zest for a fresh and fruity twist that’s delightful!
- Chocolate Boost: Fold in mini chocolate chips or drizzle melted dark chocolate on top for a rich flavor enhancement that makes each cookie decadent!
- Heat Factor: Add a pinch of cayenne pepper to your dough for a surprising spicy kick—perfect for adventurous holiday flavors!
- Different Extracts: Try using almond extract instead of peppermint for a surprisingly warm and nutty flavor that’s still festive.
- Candy Coating: Instead of coarse sugar, use crushed peppermint candy to create a glistening topping that adds extra crunch and holiday spirit to your cookies!
With these variations, you can turn your simple Peppermint Swirl Cookies into a whole range of creative delights that suit every preference. Happy baking!
Make Ahead Options
These Peppermint Swirl Cookies are perfect for busy home cooks looking to save time during the holiday season! You can prepare the dough up to 24 hours in advance—simply follow the recipe instructions until the second chilling phase, then wrap the log tightly in plastic wrap and refrigerate. Alternatively, the pre-formed cookie log can be frozen for up to 2-3 months. When you’re ready to bake, just slice the cookies directly from the chilled or frozen log and place them on the prepared baking sheets. This way, you can enjoy that delightful, fresh-baked cookie experience with minimal effort whenever you need it!
Peppermint Swirl Cookies Recipe FAQs
What is the best way to choose ripe ingredients for this recipe?
For the absolute best Peppermint Swirl Cookies, always start with fresh ingredients. Look for unsalted butter that feels soft to the touch yet firm while still being at room temperature. Ensure that your eggs are fresh (check the sell-by date!), and select flour that feels dry and powdery. If you’re opting for peppermint extracts, make sure they are aromatic and not expired; they should smell sweet and refreshing.
How should I store Peppermint Swirl Cookies?
To keep your beautiful Peppermint Swirl Cookies fresh, simply place them in an airtight container at room temperature. Enjoy them within 5-7 days for the best taste and texture. If you’re in a humid climate, consider adding a piece of bread to the container to absorb moisture and keep the cookies soft.
Can I freeze Peppermint Swirl Cookies?
Absolutely! For optimal freshness, freeze baked Peppermint Swirl Cookies in a single layer on a baking sheet before transferring them to an airtight freezer bag. They can be stored for up to one month. When you’re ready to indulge, thaw them at room temperature or warm them in the oven at 350°F (175°C) for a few minutes. If you freeze the raw dough, it can last up to 2-3 months; just remember to slice the log while it’s slightly frozen for easier cutting!
What if my dough is too sticky?
If your cookie dough feels overly sticky, it might be due to the temperature of the ingredients or humidity. Make sure your butter is just softened—if it’s too warm, it can lead to a sticky dough. You can also chill the dough for another 15-30 minutes, which will make it less sticky and easier to roll. Dust your work surface lightly with flour as you roll out the dough to further manage stickiness without adding too much additional flour.
Are these cookies safe for dogs or people with allergies?
While Peppermint Swirl Cookies are a delightful treat for humans, they are not suitable for pets, particularly dogs, due to the peppermint and sugar content. They might cause digestive upset. For those with allergies, consider checking each ingredient’s labels. You can substitute the all-purpose flour with a gluten-free blend if gluten is a concern, and be cautious with extracts if there are sensitivities to specific flavors.
How can I ensure my cookies have the perfect swirl?
To achieve the stunning swirls in your Peppermint Swirl Cookies, layering the colored dough on the plain dough correctly is key. Make sure to gently press the layers together to eliminate air pockets and then roll them tightly into a log, ensuring the colors blend beautifully without over-mixing. After the second chill, slice using a sharp knife for clean edges that showcase the vibrant swirls. Happy baking!
Delicious Peppermint Swirl Cookies for Holiday Cheer
Ingredients
Equipment
Method
- In a medium bowl, whisk together 2 cups of all-purpose flour, 1 teaspoon of baking powder, and 1/4 teaspoon of salt until evenly combined.
- In a large bowl, use an electric mixer to cream 1 cup of softened unsalted butter and 1 cup of granulated sugar on medium speed until light and fluffy.
- Beat in 1 large egg, 1 teaspoon of vanilla extract, and 1 teaspoon of peppermint extract until well blended.
- Gradually add the dry ingredients into the wet mixture, mixing on low speed until just combined.
- Divide the cookie dough in half; keep one portion plain and mix red gel food coloring into the second half.
- Wrap both portions of dough tightly in plastic wrap and chill in the refrigerator for at least 30 minutes.
- On a lightly floured surface, roll out each chilled dough portion into rectangles measuring approximately 10x12 inches.
- Layer the red dough on top of the plain dough, gently pressing them together, then roll the layered dough into a tight log.
- Wrap the log tightly in plastic wrap and return it to the fridge to chill for at least 2 hours.
- Preheat your oven to 375°F (190°C) and line your baking sheets with parchment paper.
- Slice the chilled log into 1/4-inch rounds and arrange them on the prepared baking sheets.
- Bake the cookies for 8-10 minutes, or until the edges are lightly golden.
Leave a Reply