
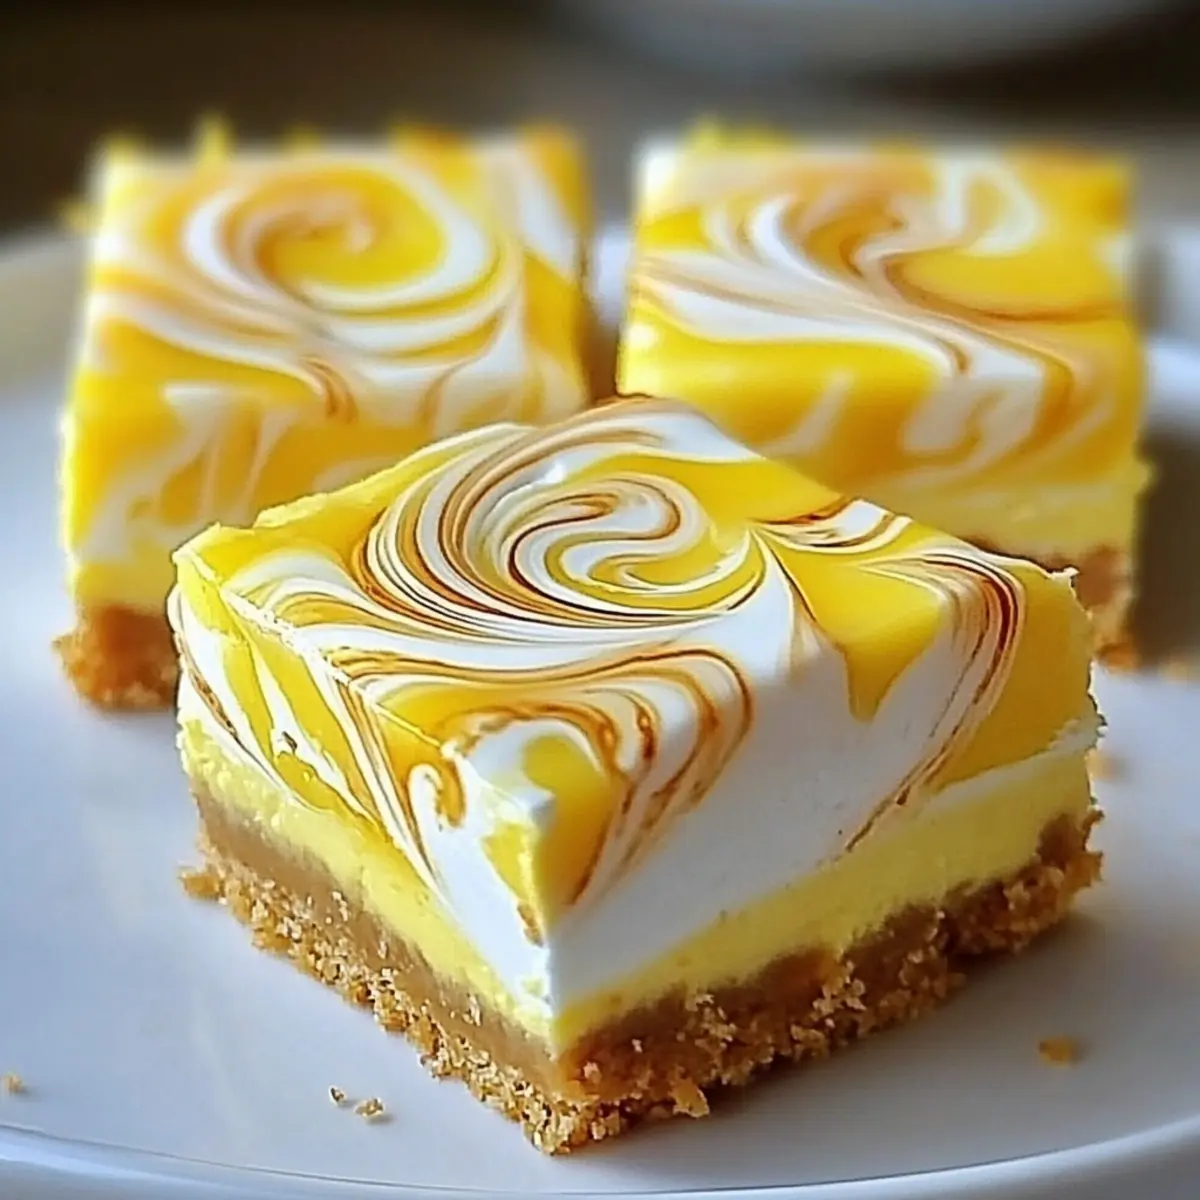
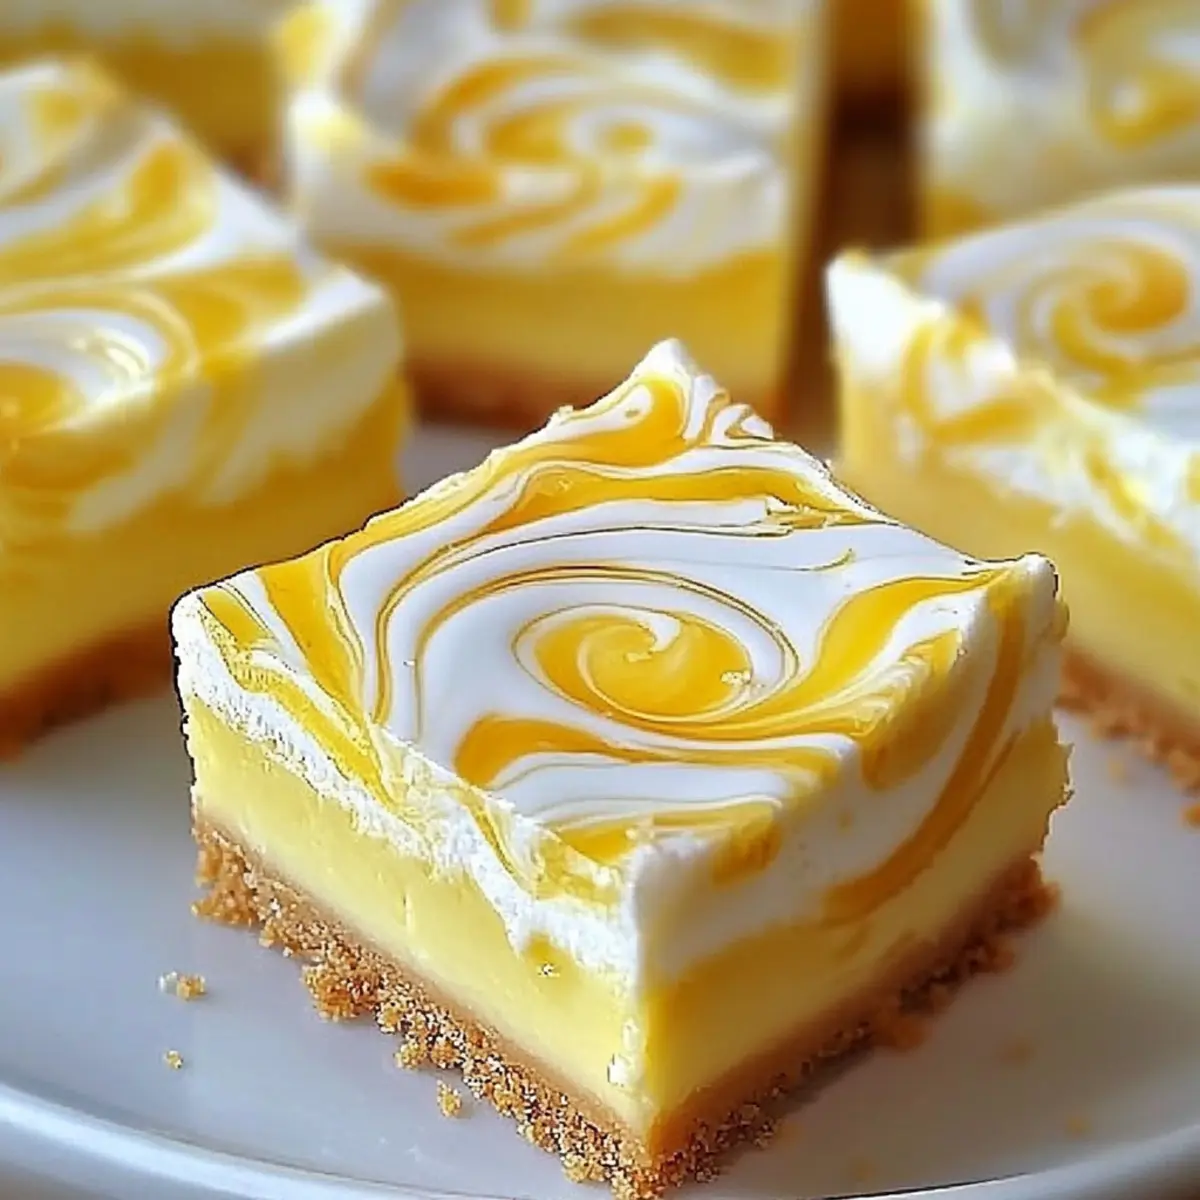
As I flipped through my recipe binder, an unexpected wave of citrusy nostalgia washed over me. There’s something special about the sun-kissed flavor of lemons, which instantly brightens up any dessert. Enter my Elegant Lemon Marbled Cheesecake Bars, a delightful marriage of creamy cheesecake and zesty lemon that promises to uplift your spirits. Not only are these bars light and fresh, they’re also a meal prep-friendly treat perfect for any occasion. The buttery graham cracker crust adds a satisfying crunch, while the vibrant lemon swirl introduces a playful twist to the classic cheesecake experience. Whether you’re treating friends at a gathering or pampering yourself after a long day, these bars deliver a slice of joy. Curious about how to create this stunning dessert? Let’s dive into the recipe!
Why are Lemon Marbled Cheesecake Bars special?
Zesty Refreshment: The bright burst of fresh lemon brings a cheerful tang that dances on your palate, making each bite feel like sunshine on a plate.
Meal Prep Magic: Prepare these bars ahead of time to enjoy throughout the week—a perfect grab-and-go treat for busy days!
Gluten-Free Option: Simply substitute the graham cracker crust with almond flour for a deliciously guilt-free indulgence.
Versatile Flavor: Add unique twists like a ginger snap crust or herb infusions for a creative spin that makes every batch exciting!
Crowd-Pleaser: The light, creamy texture and beautiful marbling make these bars an irresistible hit at any gathering, leaving guests wanting more.
If you love desserts that are not just good but also a joy to make and share, check out my Lemon Feta Pasta for a deliciously bright meal idea to pair with your cheesecake bars!
Lemon Marbled Cheesecake Bars Ingredients
For the Crust
• Graham Crackers – The base structure for the crust; substitute with almond flour for a gluten-free version.
• Unsalted Butter – Binds the crust ingredients together; margarine works for a dairy-free option.
For the Cheesecake Filling
• Cream Cheese – Provides a creamy filling texture; ensure it’s at room temperature for ideal blending.
• Granulated Sugar – Sweetens the cheesecake filling; consider reducing slightly for a lower-sugar version.
• Eggs – Helps set the filling; substitute with an egg replacer for a vegan version.
• Vanilla Extract – Enhances flavor; opt for pure extract for the best results.
• Lemon Zest – Adds aromatic citrus notes; freshly grated is preferred over bottled for better flavor.
• Fresh Lemon Juice – Infuses tangy brightness into the filling; bottled juice can be used but may lack freshness.
• Yellow Food Coloring (optional) – Creates a vibrant marbled effect, though it’s not necessary for flavor.
Embrace the bright flavors of these Lemon Marbled Cheesecake Bars; they’re perfect for any dessert occasion!
Step‑by‑Step Instructions for Lemon Marbled Cheesecake Bars
Step 1: Prepare the Oven and Pan
Begin by preheating your oven to 325°F (160°C). While it heats, take an 8×8-inch baking pan and line it with parchment paper, ensuring it hangs over the edges for easy removal later. This simple step sets the foundation for your Lemon Marbled Cheesecake Bars!
Step 2: Make the Crust
Crush enough graham crackers to make about one and a half cups of crumbs, then mix them with ½ cup of melted unsalted butter until well combined. Press this mixture firmly into the bottom of the lined baking pan to create a solid crust layer. Bake it in your preheated oven for 10 minutes, letting it turn lightly golden while the delicious aroma begins to fill your kitchen.
Step 3: Prepare the Cheesecake Filling
In a large mixing bowl, beat 16 ounces of room-temperature cream cheese until it’s super smooth and creamy. Gradually add ½ cup of granulated sugar, mixing until it’s fully incorporated. Now, crack in 2 large eggs, followed by 1 teaspoon of vanilla extract and the zest of 1 lemon. Mix gently until smooth, being careful not to overbeat after adding the eggs to prevent cracks later.
Step 4: Reserve and Flavor the Batter
Scoop half of your cheesecake filling into a separate bowl and set it aside. To the other half, add the freshly squeezed juice of 1 lemon and a few drops of yellow food coloring for vibrancy, if desired. Stir gently until the juice is evenly incorporated, creating that luscious lemony experience for your Lemon Marbled Cheesecake Bars.
Step 5: Layer and Swirl the Batter
Pour the plain cheesecake filling over the baked crust in the pan, smoothing it into an even layer. Next, drizzle the lemon-flavored batter on top, then take a knife or a skewer and gently swirl it through the layers to create a beautiful marbled effect. Be careful not to over-swirly; you want distinct lemony stripes in your filling!
Step 6: Bake to Perfection
Carefully place the pan in your oven and bake for 30-35 minutes. Keep an eye on the edges; they should look set while the center retains a slight jiggle—a sign that your Lemon Marbled Cheesecake Bars will be soft and creamy once cooled. You want them to be invitingly delicious!
Step 7: Cool and Chill
Once baked, remove the pan from the oven and allow it to cool completely at room temperature for about an hour. After cooling, cover the pan with plastic wrap and refrigerate for at least 4 hours, or overnight if you can wait that long. This step is crucial for the flavors to meld and for the bars to firm up beautifully.
Step 8: Slice and Serve
After chilling, use the parchment overhang to lift your Lemon Marbled Cheesecake Bars out of the pan. Place them on a cutting board and slice into squares or bars. These delightful treats are ready to be served—a perfect sweet ending to any meal, bursting with zesty flair!
Expert Tips for Lemon Marbled Cheesecake Bars
-
Room Temperature Ingredients: Ensure your cream cheese is at room temperature to achieve a smooth, lump-free filling for your Lemon Marbled Cheesecake Bars.
-
Gentle Mixing: Avoid overmixing after adding eggs, which can cause cracks in your bars. Mix just until incorporated for a perfect texture.
-
Chill the Crust: Allow the crust to chill for at least 15 minutes before pouring in the filling. This helps maintain a firm texture during baking.
-
Swirling Technique: When swirling the lemon batter, do so gently. Over-swirling can muddy the marbled effect, so aim for distinct lemony stripes.
-
Cooling Time: Let the bars cool completely at room temperature before refrigerating for at least 4 hours; this helps them set properly for slicing.
Lemon Marbled Cheesecake Bars Variations
Feel free to elevate your Lemon Marbled Cheesecake Bars with these delightful twists—each will add a personal touch to your dessert!
-
Ginger Snap Crust: Swap your graham cracker crust for crushed ginger snaps for a spicy kick that complements the citrus beautifully.
-
Almond Flour Crust: Use almond flour instead of graham crackers for a gluten-free base that’s equally delicious and satisfying. It brings a nutty flavor to the bars, enhancing the overall taste experience.
-
Cranberry Swirl: Add a tart cranberry swirl to the filling for a seasonal touch, perfect for holiday gatherings. This not only adds color but a tangy contrast that brightens the flavors.
-
Lavender Infusion: Infuse the filling with edible lavender for a floral note that elegantly mingles with the lemon. A wonderful surprise that transforms the classic into something uniquely refreshing!
-
Herb Delight: Introduce fresh thyme or rosemary into the lemon mixture for an earthy depth. This unexpected flavor twist creates an intriguing balance that will surely impress.
-
Lower Sugar Version: Cut the sugar in the cheesecake filling by a third for a lighter treat without sacrificing that sweet-tangy goodness.
-
Vegan Option: Substitute cream cheese with a plant-based alternative and use chia seeds or flaxseed meal mixed with water as an egg replacer to make these delightfully vegan-friendly.
If you enjoy customization as much as I do, you’ll love trying these variations. And for a vibrant meal that shines along with your treats, check out my delightful Lemon Feta Pasta—a perfect fresh pairing!
Make Ahead Options
These Lemon Marbled Cheesecake Bars are a fabulous choice for meal prep, allowing you to enjoy their delightful flavors throughout the week! You can prepare the crust and filling up to 24 hours in advance. Simply make the crust and let it cool completely, then prepare the cheesecake filling and store it separately in the refrigerator. When you’re ready to bake, pour the filling over the crust, drizzle with lemon curd, and swirl to create that beautiful marbled effect right before baking. To maintain their creamy texture and bright flavor, cover the bars tightly once cooled and refrigerate for up to 3 days. With this prep method, you’ll have a refreshing dessert that’s just as delicious when you’re ready to serve!
How to Store and Freeze Lemon Marbled Cheesecake Bars
Fridge: Store tightly wrapped in plastic wrap or an airtight container for up to 3 days. This keeps the bars fresh and prevents them from absorbing odors.
Freezer: For longer storage, freeze the bars in a single layer, wrapped in plastic and then foil, for up to 2 months. Thaw overnight in the refrigerator before serving.
Reheating: These bars are best enjoyed cold straight from the fridge, but if you prefer them slightly warm, microwave for about 10-15 seconds before serving.
Make-Ahead Tip: Preparing Lemon Marbled Cheesecake Bars in advance is ideal for hassle-free entertaining!
What to Serve with Elegant Lemon Marbled Cheesecake Bars
Transform your dessert into an unforgettable feast by pairing these delightful bars with complementary dishes!
- Fresh Berries: A mix of strawberries, raspberries, and blueberries adds a colorful, juicy contrast that contrasts beautifully with the creamy bars.
- Whipped Cream: A fluffy dollop of freshly whipped cream creates a rich, indulgent experience that enhances the dessert’s lightness.
- Lemon Sorbet: Serve a scoop of tangy lemon sorbet alongside for a refreshing palate cleanser that echoes the cheesecake’s bright citrus notes.
- Herbed Biscotti: The crunch of almond or lavender biscotti provides a textural contrast while infusing a subtle herbal flavor that pairs wonderfully with the cheesecake’s sweetness.
- Iced Tea: A glass of freshly brewed iced tea with a hint of mint or lemon refreshes your palate, enhancing both the richness and tartness of the dessert.
Indulging in these unique pairings will elevate the experience, making each bite a celebration of flavors and textures!
Lemon Marbled Cheesecake Bars Recipe FAQs
What type of lemons should I use for Lemon Marbled Cheesecake Bars?
Absolutely! Fresh, juicy lemons are ideal for this recipe. Look for lemons that are firm with a vibrant yellow color and just a bit of give when gently squeezed. The zest and juice from fresh lemons will elevate the flavor and aroma of your bars, making them bright and refreshing.
How should I store the Lemon Marbled Cheesecake Bars?
These bars can be kept tightly wrapped in plastic wrap or in an airtight container in the refrigerator for up to 3 days. This ensures they stay fresh and maintain their delightful texture without absorbing any unwanted odors.
Can I freeze Lemon Marbled Cheesecake Bars?
Yes, you can definitely freeze these bars for later enjoyment! To do this, wrap them tightly in plastic wrap, and then in aluminum foil to prevent freezer burn. They can be frozen for up to 2 months. When you’re ready to enjoy, thaw them overnight in the refrigerator before serving.
What should I do if my cheesecake bars have cracks?
Very understandable! Avoiding cracks in your bars can sometimes be a bit tricky. Make sure to keep your cream cheese at room temperature and mix the batter gently—especially after adding eggs. Another helpful tip is to bake them at a lower temperature and check for doneness by looking for set edges while the center remains slightly jiggly.
Are Lemon Marbled Cheesecake Bars suitable for gluten-free diets?
Certainly! You can easily make a gluten-free version of these delectable bars by substituting the graham cracker crust with almond flour. For a delightful twist, mix in a little cocoa powder or even use gluten-free cookies for the crust base!
Can I make these bars vegan?
Absolutely! To create vegan Lemon Marbled Cheesecake Bars, substitute the cream cheese with a vegan cream cheese alternative, use flax eggs instead of regular eggs (1 tablespoon of flaxseed meal mixed with 2.5 tablespoons of water equals one egg), and choose a plant-based margarine to use in the crust. Enjoy your guilt-free, plant-powered dessert!
Lemon Marbled Cheesecake Bars That Brighten Your Day
Ingredients
Equipment
Method
- Preheat your oven to 325°F (160°C). Line an 8x8-inch baking pan with parchment paper.
- Crush graham crackers to make about 1.5 cups of crumbs and mix with 0.5 cup melted butter. Press into the pan to create the crust.
- In a bowl, beat cream cheese until smooth. Gradually add sugar, then mix in eggs, vanilla extract, and lemon zest until smooth.
- Scoop half the filling into another bowl, add lemon juice and food coloring to the other half, stirring gently.
- Pour plain filling over baked crust, drizzle lemon filling on top, and swirl through with a knife.
- Bake for 30-35 minutes until edges are set and center has a slight jiggle.
- Cool completely at room temperature for about an hour, then refrigerate for at least 4 hours before serving.
- Lift bars out using parchment paper, slice into squares or bars, and serve.
Leave a Reply