
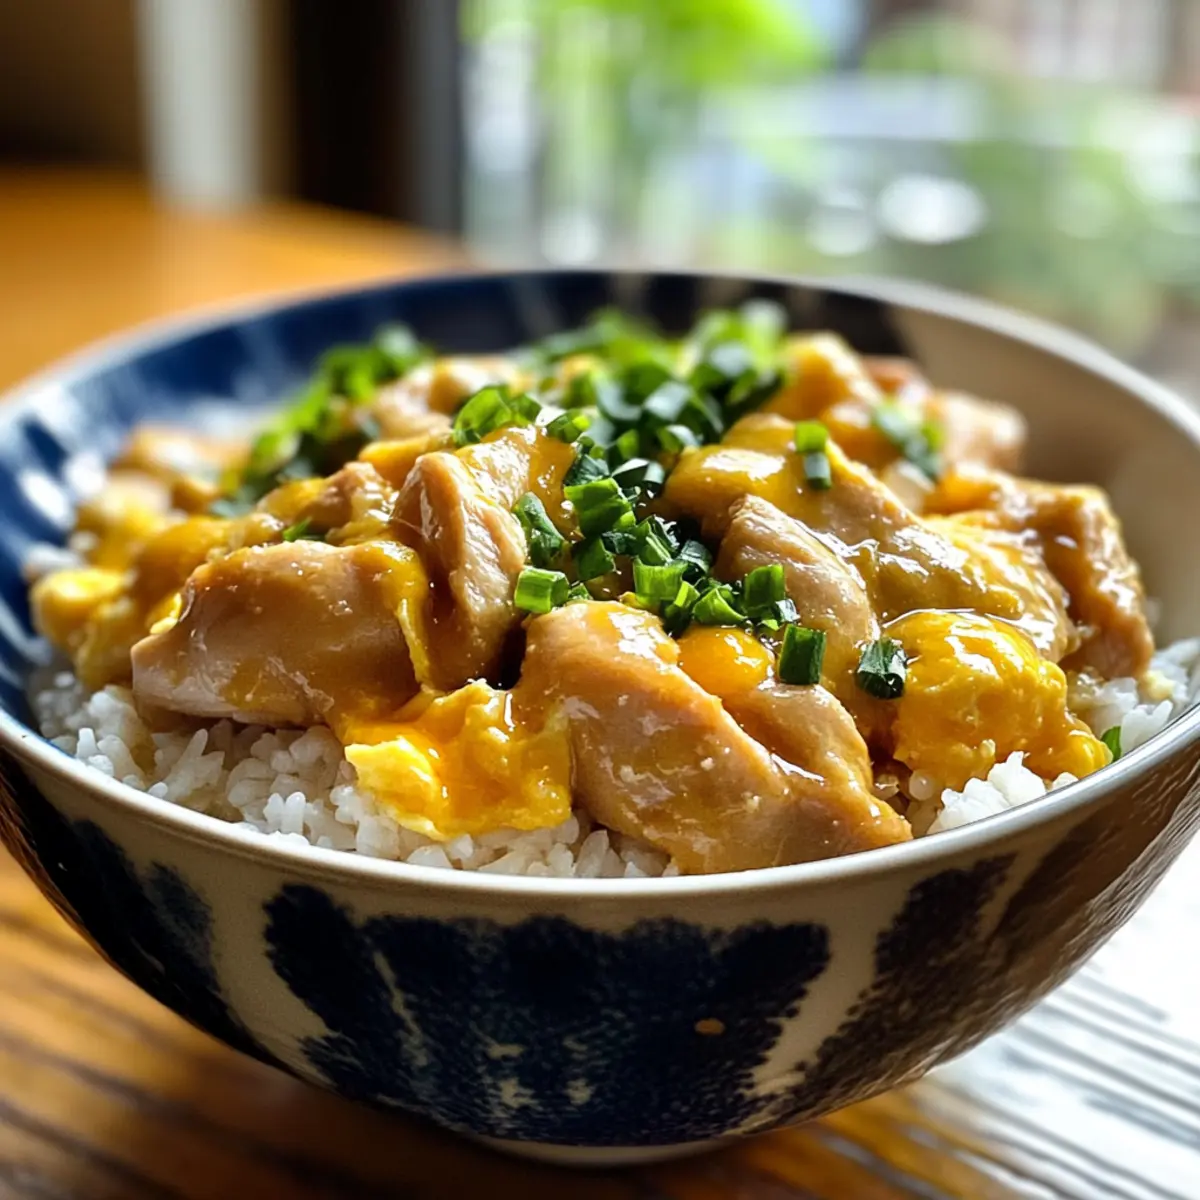
As I stood in my kitchen, the enticing aroma of savory chicken and sweet mirin wafted through the air, instantly transporting me to my favorite Japanese eatery. This Quick & Easy Oyakodon, or Japanese Chicken & Egg Rice Bowl, is my go-to recipe when I crave comfort food that doesn’t require hours of preparation. With tender chicken simmered in a flavorful broth and enveloped in a silky egg scramble, it comes together in just one pan, making it ideal for busy weeknights. Plus, it’s fully customizable—want to sneak in some veggies or mushrooms? Go right ahead! Get ready to whip up this delightful donburi that not only warms the soul but also satisfies your hunger. What toppings will you choose to make it your own?
Why Is Oyakodon a Must-Try?
Quick & Easy: This Oyakodon can be prepared in just one pan, bringing the comfort of homemade Japanese cuisine to your table in less than 30 minutes.
Savory Comfort: The rich combination of tender chicken, flavorful dashi, and silky eggs creates a dish that feels like a warm hug in a bowl.
Customizable Delight: Whether you prefer adding sautéed mushrooms or vibrant greens, this recipe allows you to make it your own—perfect for using up leftovers!
Perfect for Any Day: Ideal as a quick weeknight dinner or a cozy lunch, it’s a dish that even the busiest cooks can master.
Once you’ve tried this recipe, why not explore other delicious options like our Sticky Chicken Bowls or Garlic Chicken Gnocchi? You’ll never have to settle for fast food again!
Japanese Chicken & Egg Rice Bowl Ingredients
For the Chicken Mixture
• Chicken Thighs – Provides protein and tender texture; substitute with chicken breast for a leaner option.
• Onion – Adds sweetness and aroma to the broth; yellow or white onions work best.
• Soy Sauce – Provides saltiness and umami; adjust the amount to taste.
• Mirin – Adds sweetness and depth; can be replaced with a mixture of sugar and a bit of vinegar for a similar profile.
• Sugar – Balances the savory flavors of the broth; use brown sugar for a richer taste.
For the Broth
• Chicken Stock/Dashi – Forms the flavorful base of the broth; substitute dashi with vegetable broth for a vegetarian version.
For the Eggs
• Eggs – Creates a soft, silky scramble that binds the dish; ensure they’re lightly beaten for the best texture.
For Serving
• Rice – Serves as the base for the dish; white rice is traditional, but consider short-grain rice for an authentic texture.
• Optional Garnishes (Green Onion, Sesame Oil, Nori, Togarashi) – Enhance flavor and presentation; adjust according to personal preference.
This delightful Japanese Chicken & Egg Rice Bowl will quickly become your favorite comfort food, perfect for those busy cooking days!
Step‑by‑Step Instructions for Japanese Chicken & Egg Rice Bowl
Step 1: Marinate the Chicken
In a medium bowl, combine bite-sized pieces of chicken thighs with soy sauce, mirin, and sugar. Allow the chicken to marinate for about 5-10 minutes while you prepare the other ingredients. This step not only infuses flavor but also helps tenderize the meat, setting the foundation for your delicious Japanese Chicken & Egg Rice Bowl.
Step 2: Prepare the Eggs
Crack the eggs into a separate bowl and lightly beat them until the yolks and whites are just combined—aim for a silky texture without over-mixing. This should take around 1-2 minutes. Setting these eggs aside will ensure they’re ready to create that fluffy, silky scramble when you bring everything together in your Oyakodon.
Step 3: Sauté the Onions
Heat a non-stick skillet over medium heat and pour in your chicken stock or dashi, bringing it to a gentle boil. Add thinly sliced onions to the skillet and sauté them for about 1 minute, stirring occasionally until they become aromatic and slightly translucent. This step enhances the broth’s flavor, making your Japanese Chicken & Egg Rice Bowl even more irresistible.
Step 4: Cook the Chicken
Carefully add the marinated chicken to the pan with onions, ensuring it’s evenly spaced. Cook for about 1-2 minutes per side until the chicken is nearly cooked through and has a nice golden hue. This quick cooking method locks in the savory flavors, making your chicken perfect for the next step in creating Oyakodon.
Step 5: Add the Eggs
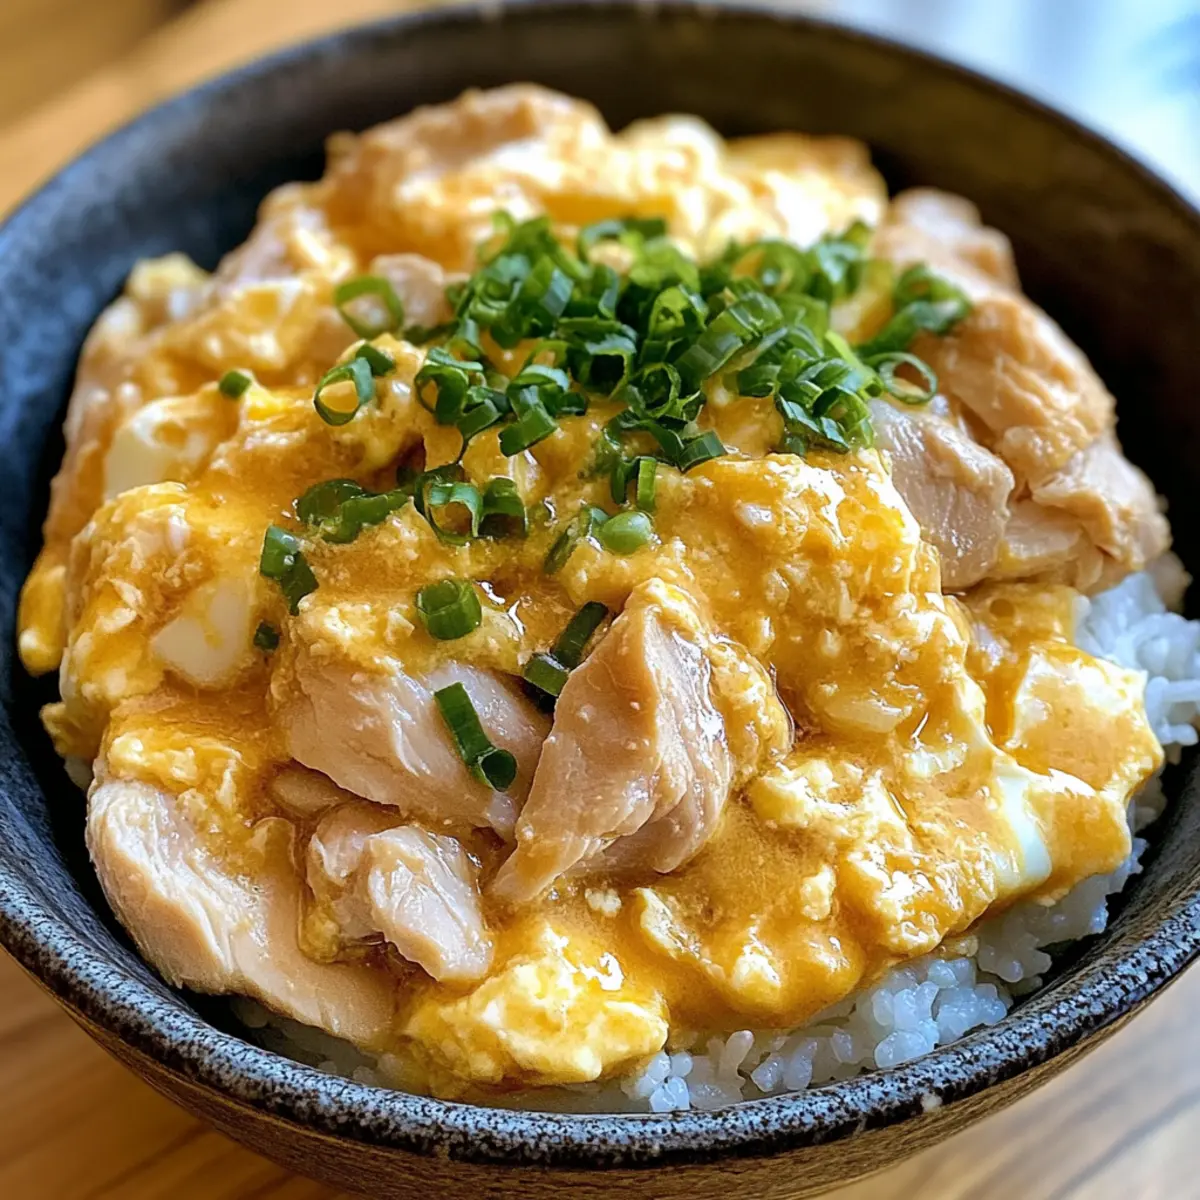
Once the chicken is nearly done, pour the lightly beaten eggs evenly over the chicken and broth mixture in the skillet. Let it sit for a brief moment until the edges of the eggs begin to set, then gently scramble with a spatula until the eggs are slightly runny but not too firm—about 1-2 minutes. This technique will give you that signature soft texture commonly found in a Japanese Chicken & Egg Rice Bowl.
Step 6: Serve the Dish
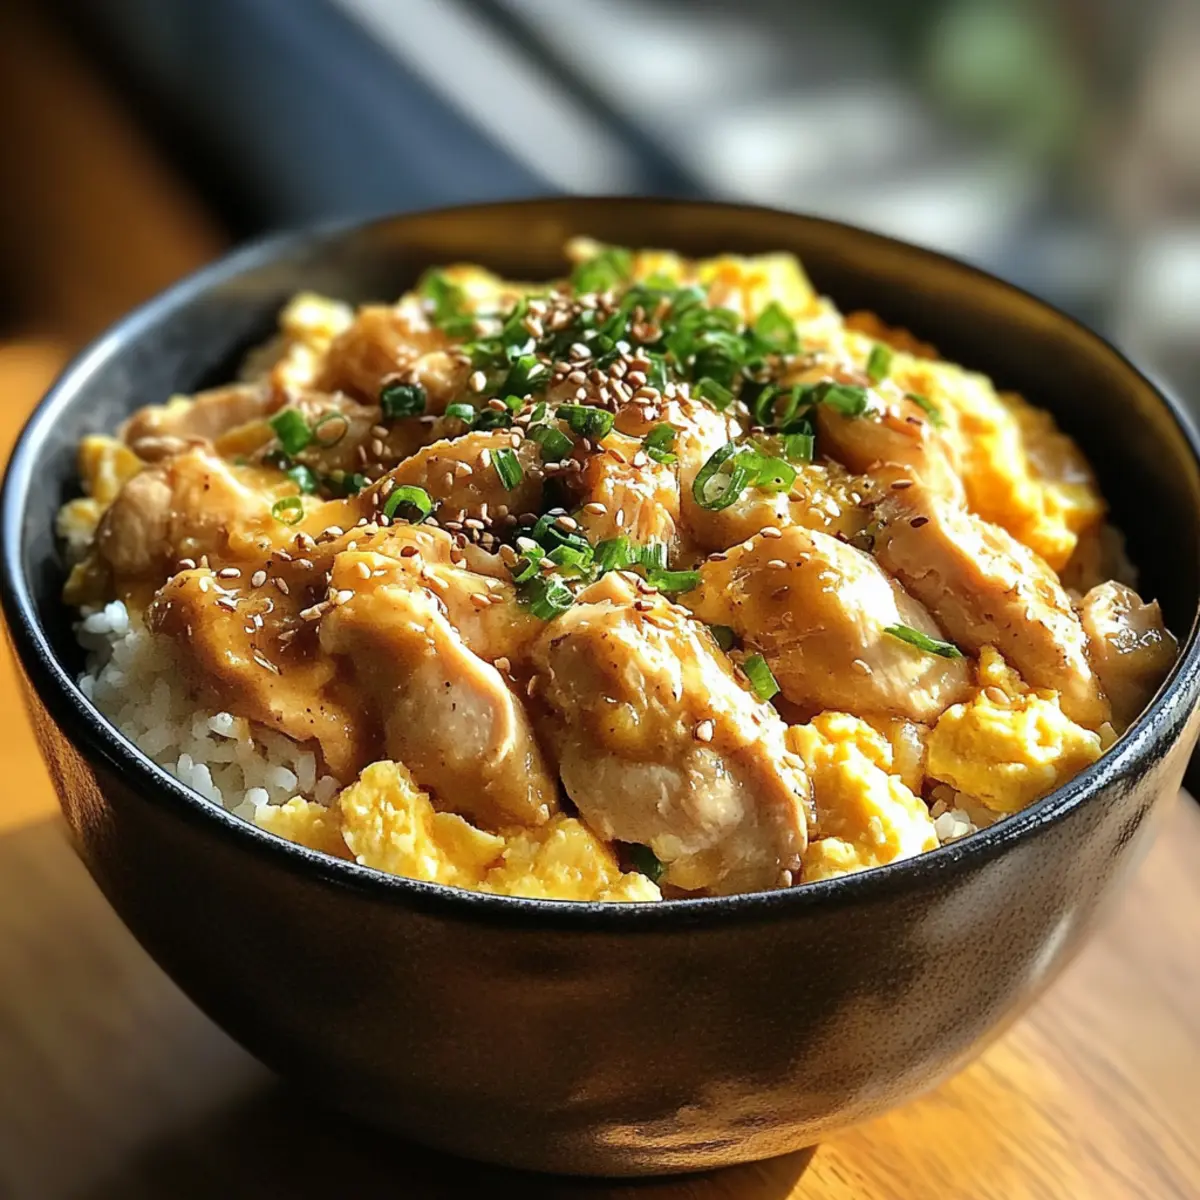
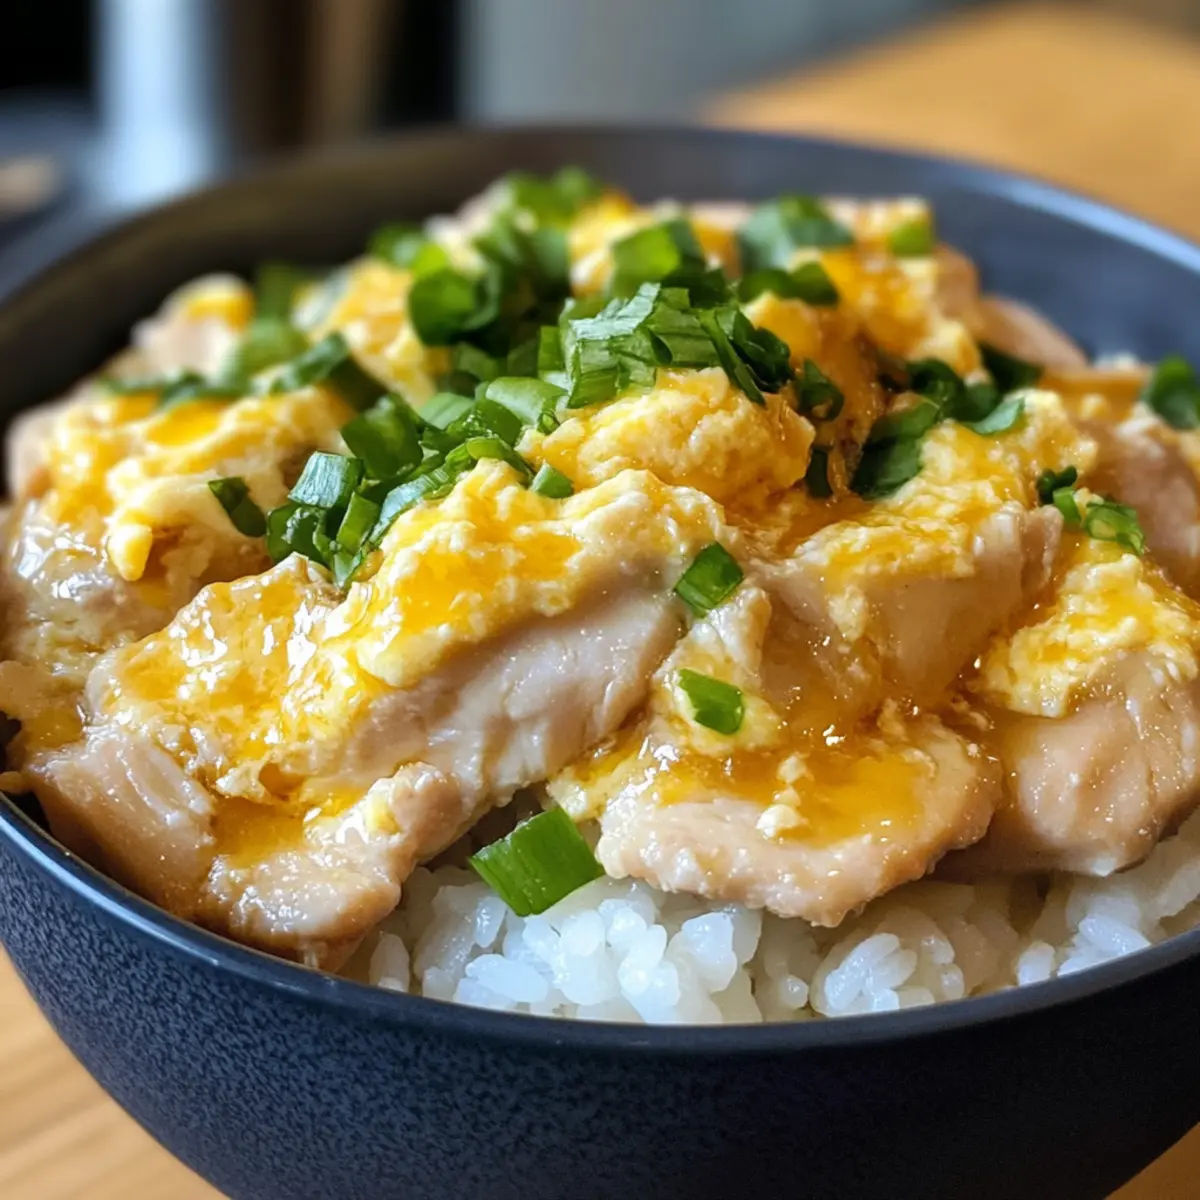
Spoon the flavorful chicken and egg mixture over a bowl of warm, steamed rice. For an added touch, feel free to garnish with sliced green onions, a drizzle of sesame oil, or even a sprinkle of nori. This simple yet comforting presentation will make your Japanese Chicken & Egg Rice Bowl a delightful meal, inviting everyone to indulge in this homemade comfort food.
How to Store and Freeze Oyakodon
Fridge: Store leftover Oyakodon in an airtight container in the fridge for up to 1 day. Gently reheat on the stovetop or microwave, adding a splash of water or broth to maintain moisture.
Freezer: Oyakodon can be frozen for up to 3 months. Portion it into individual servings, letting it cool completely before sealing in freezer-safe containers.
Reheating: When ready to enjoy, thaw overnight in the fridge, then reheat gently in a pan over low heat, stirring occasionally to prevent the eggs from overcooking.
Avoid Freezing Eggs: For best results, consider freezing only the chicken and broth mixture, then add freshly scrambled eggs just before serving for optimal texture in your Japanese Chicken & Egg Rice Bowl.
Make Ahead Options
These Quick & Easy Oyakodon bowls are perfect for meal prep, allowing you to save time on busy weeknights! You can marinate the chicken mixture (chicken thighs, soy sauce, mirin, and sugar) up to 24 hours in advance to enhance the flavor. Additionally, you can chop the onions and beat the eggs, storing them in separate containers in the refrigerator for up to 3 days. When you’re ready to serve, simply sauté the onions, add the marinated chicken, and pour in the eggs; this will ensure that the eggs remain fluffy and the chicken tender. By prepping ahead, you’ll have a delicious, homemade Japanese Chicken & Egg Rice Bowl with minimal effort!
Expert Tips for Oyakodon
-
Choose Quality Chicken: Use fresh, high-quality chicken thighs for optimal flavor and tenderness; avoid previously frozen meat for the best taste in your Japanese Chicken & Egg Rice Bowl.
-
Mix Eggs Just Right: Whisk the eggs until they’re about 70-80% combined for a perfectly soft scramble. Over-mixing can lead to tougher eggs.
-
Adjust Dashi Flavors: If using dashi, taste the broth as you cook; you may prefer a bit more or less soy sauce to fit your palate in the Oyakodon.
-
Cook Rice Just Right: Cook your rice with slightly less water to ensure it absorbs the broth perfectly, making each bite of your Japanese Chicken & Egg Rice Bowl a flavor-packed experience.
-
Customize with Veggies: Add sautéed veggies or mushrooms to your Oyakodon for extra flavor and nutrition. Fry them before adding for the best texture!
Japanese Chicken & Egg Rice Bowl Variations
Feel free to make this delightful dish your own with these fun and flavorful twists!
- Vegetable Boost: Add sautéed mushrooms or spinach to enhance nutritional value and texture. These will bring extra color and flavor!
- Spicy Kick: Stir in a dash of chili oil or grated ginger for a delightful heat that balances the dish beautifully. Your taste buds will thank you for this lively addition.
- Vegetarian Delight: Swap the chicken for tofu or tempeh for a vegetarian-friendly version. Just adjust cooking times to ensure they’re properly heated throughout.
- Coconut Infusion: Replace half of the dashi with coconut milk for a creamy, tropical twist. This will create an unexpected yet comforting flavor in every bite!
- Rice Alternatives: Use quinoa or cauliflower rice as a base for a lower-carb option while still keeping the heartwarming essence of this dish. It’s a perfect way to enjoy your comfort food without the heavy carbs.
- Herb Blend: Sprinkle fresh herbs like cilantro or basil as a garnish for a refreshing touch that elevates the dish’s flavor profile. A little green goes a long way!
- Umami Boost: Add a spoonful of miso paste to the broth for an extra depth of flavor—especially delightful for miso lovers! You’ll savor the richness in every bite.
- Savory Garnishes: Feel free to layer on toppings like toasted sesame seeds or a drizzle of sesame oil for added richness and aroma. It’s the finishing touch that brings everything together!
Once you’ve enjoyed this Oyakodon, why not try something different with our High Protein Bowl? With endless possibilities, you’ll never find yourself bored with home cooking again!
What to Serve with Quick & Easy Oyakodon?
Imagine a cozy table filled with a colorful array of dishes to complement your warm rice bowl, making every meal a delightful experience.
- Steamed Vegetables: Perfectly steamed broccoli or asparagus add a fresh crunch that contrasts beautifully with the tender chicken and egg.
- Japanese Pickles (Tsukemono): These pickled vegetables provide a tangy bite that cuts through the richness of the Oyakodon, enhancing every mouthful.
- Miso Soup: A warm, savory miso soup brings depth and umami, providing a soothing counterpoint to the flavors of your chicken and rice bowl.
- Edamame: Lightly salted, these protein-packed soybeans offer a satisfying texture and a touch of freshness, perfect for snacking alongside your donburi.
- Cucumber Salad: A refreshing cucumber salad with sesame dressing provides a crispy, zesty contrast, balancing the hearty flavors of the Oyakodon.
- Steamed Rice: For a more filling dinner, serve extra fluffy rice on the side for those who like to scoop up every bit of sauce.
- Green Tea: A steaming cup of green tea complements the meal beautifully, bringing a subtle earthiness that ties everything together.
- Chocolate Mochi: For dessert, a sweet chocolate mochi offers a delightful chewy texture, giving a playful finish to your Japanese-inspired night.
Each of these pairings enhances the homey feel of Oyakodon, ensuring your meal is not only satisfying but also a joyful culinary experience.
Japanese Chicken & Egg Rice Bowl Recipe FAQs
How can I ensure I select the best chicken for my Oyakodon?
Absolutely! For the best flavor and tenderness in your Japanese Chicken & Egg Rice Bowl, I recommend using fresh, high-quality chicken thighs. Look for chicken that’s rosy pink and has a little bit of marbling for extra juiciness. Avoid previously frozen chicken, as it may affect the flavor and texture of your dish.
How long can I store leftover Oyakodon in the fridge?
Oyakodon is best enjoyed fresh, but if you have leftovers, store them in an airtight container in the fridge for up to 1 day. When reheating, add a splash of water or broth to maintain moisture and prevent the eggs from drying out or becoming rubbery.
Can I freeze Oyakodon, and how should I do it?
Yes, you can absolutely freeze Oyakodon for up to 3 months! Portion the chicken and broth mixture into individual servings, allowing it to cool completely before placing it in freezer-safe containers. It’s best to freeze only the chicken and broth mix; scramble fresh eggs right before serving to retain that luscious texture.
What should I do if my eggs become too firm while cooking?
If you find that your eggs have become too firm during cooking, don’t worry! The key is to gently scramble them as soon as you add them to the chicken mixture, cooking on low heat. If you see the eggs beginning to set too quickly, immediately remove the pan from the heat. They should ideally be soft and slightly runny for the perfect Oyakodon texture.
Are there any allergens I should be aware of in this recipe?
Very much so! This Japanese Chicken & Egg Rice Bowl contains common allergens such as soy sauce (which includes wheat) and eggs. If you have gluten intolerance, you can use tamari sauce as a gluten-free alternative. Additionally, if you have egg allergies, you might want to explore using silken tofu as a replacement, adjusting the cooking times accordingly.
Can I modify the ingredients to cater to a vegetarian diet?
Absolutely! For a tasty vegetarian version of Oyakodon, I recommend substituting the chicken with tofu or tempeh. You can prepare the dish following the same steps while using vegetable broth instead of dashi. Just make sure to sauté your tofu until it’s golden and slightly crispy to add that layer of flavor you’re looking for in a comforting Japanese Chicken & Egg Rice Bowl.
Quick & Cozy Japanese Chicken & Egg Rice Bowl Recipe
Ingredients
Equipment
Method
- In a medium bowl, combine chicken thighs with soy sauce, mirin, and sugar. Marinate for 5-10 minutes.
- Crack the eggs into a separate bowl and lightly beat them until well combined—about 1-2 minutes.
- Heat a non-stick skillet over medium heat, add chicken stock or dashi, and bring to a gentle boil. Sauté the sliced onions for about 1 minute.
- Add the marinated chicken to the pan, cooking for 1-2 minutes per side until nearly cooked through and golden.
- Pour the beaten eggs over the chicken and broth. Let it set slightly, then gently scramble until slightly runny—about 1-2 minutes.
- Serve the chicken and egg mixture over warm rice, garnishing as desired.
Leave a Reply