
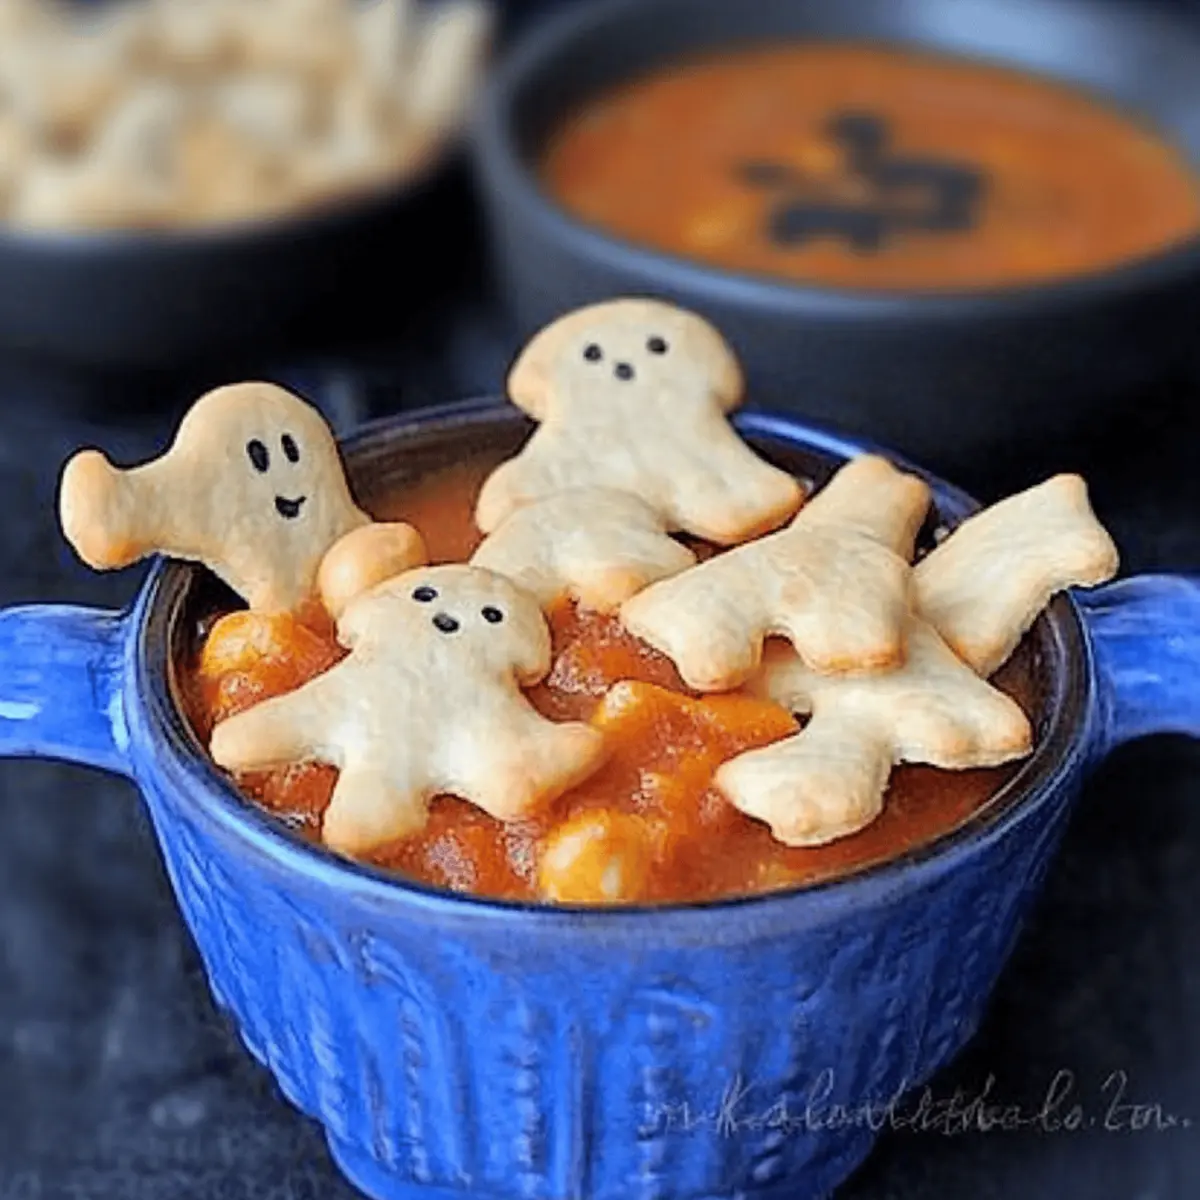
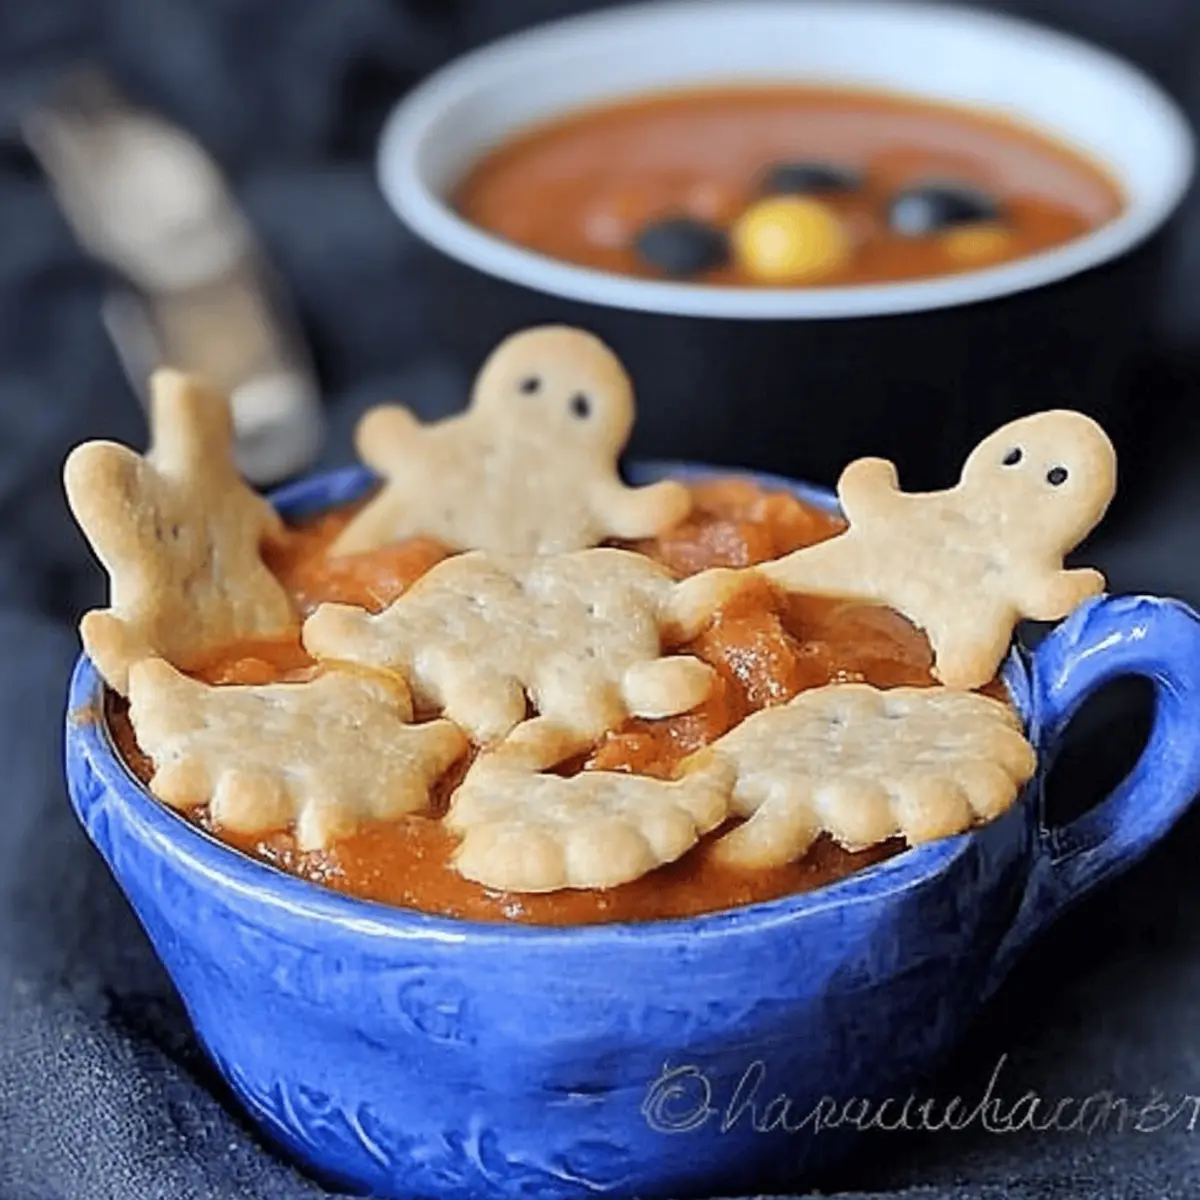
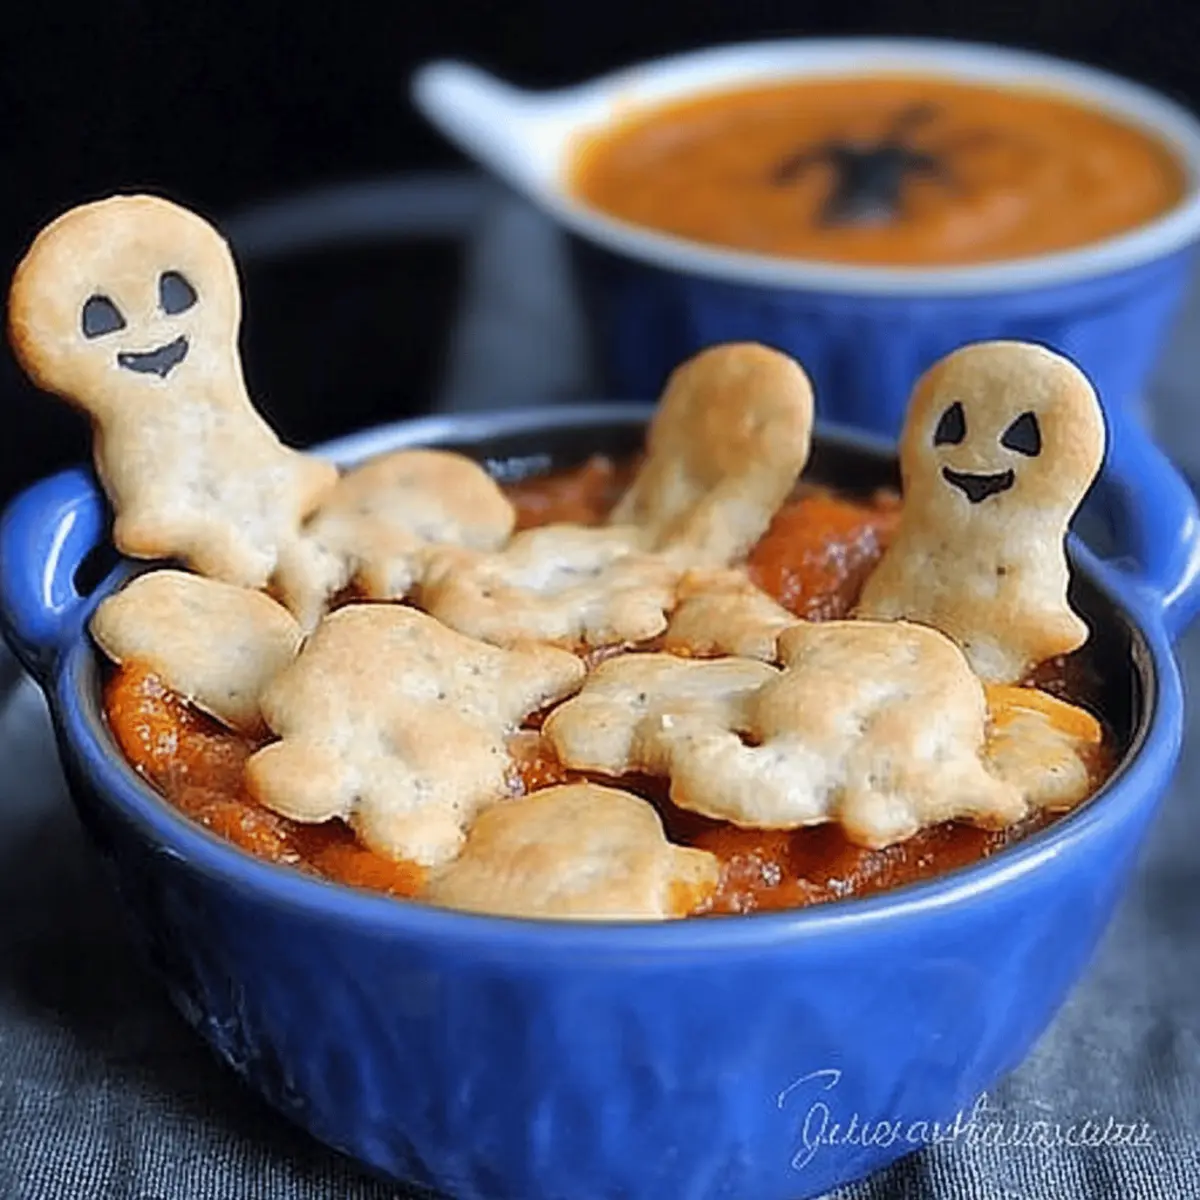
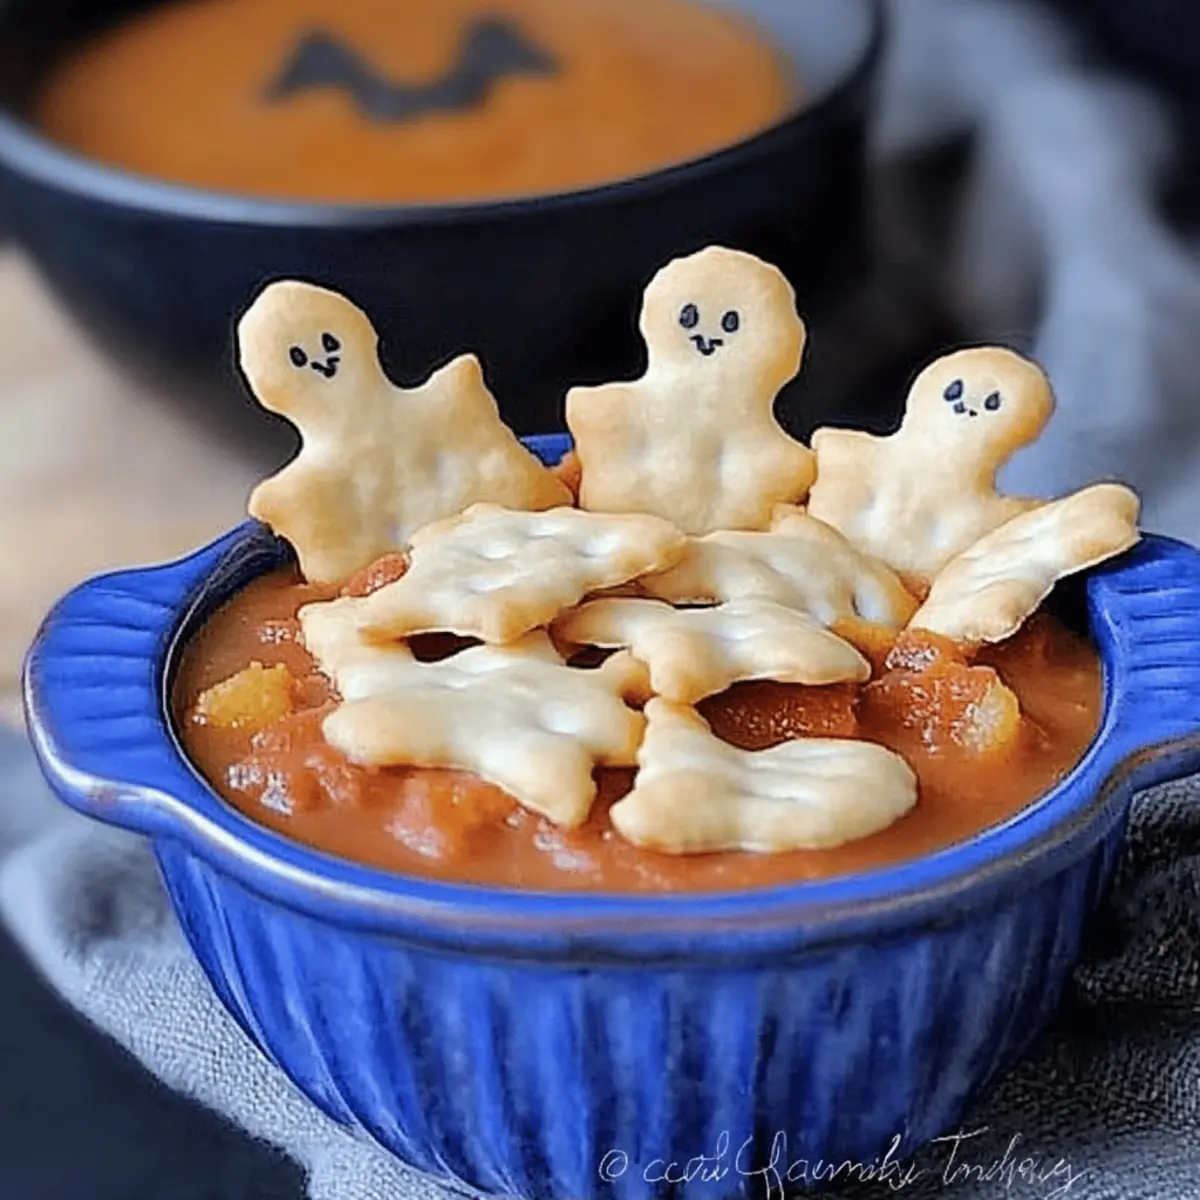
As I rolled out the dough, the kitchen filled with the enticing aroma of warm butter and flour, instantly whisking me back to my childhood days when Halloween meant playful treats and thrilling surprises. Crafting these Homemade Halloween Crackers has become one of my annual traditions—a delightful way to sprinkle a little festive fun onto the dinner table or charcuterie board. They’re not just easy to make, but their cute shapes—think pumpkins and ghosts—add a whimsical touch to any gathering. Plus, they offer that satisfying crunch we all crave, making them perfect for soup dipping or as a festive snack on their own. Are you ready to transform your meal with a dash of creativity? Let’s dive in and whip up these charming delights together!
Why Are These Homemade Halloween Crackers Special?
Crispy, Crunchy Perfection: These crackers provide a delightful crunch that’s hard to resist.
Easy to Make: With simple steps, even novice bakers can whip them up in no time.
Festive Fun: The playful shapes like pumpkins and ghosts bring cheer to any occasion, especially Halloween!
Versatile Treats: Perfect for pairing with soups, dips, or as part of a stunning charcuterie board—much like my Chicken Caesar Sandwich suggestions!
Nostalgic Appeal: They capture the spirit of childhood celebrations, making your gatherings extra special.
Customize to Your Taste: Experiment with seasonings and spices to create a flavor profile that suits your palate.
Homemade Halloween Crackers Ingredients
For the Cracker Base
• Flour – Provides structure; swap with whole wheat flour for a nuttier flavor.
• Baking Powder – Acts as a leavening agent to ensure crackers are light and crispy.
• Sugar – Adds a hint of sweetness; can be omitted for a more savory homemade Halloween cracker.
• Salt – Enhances flavor; use coarse sea salt to sprinkle on top for extra crunch.
For the Fat
• Unsalted Butter – Creates delicious richness and flakiness in your crackers; substitute with margarine or vegan butter for a dairy-free option.
• Olive Oil – Adds moisture and enhances overall flavor; melted coconut oil makes a great alternative.
For Binding
• Cold Water – Binds the dough together; using ice water will help keep the dough nice and firm for cutting fun shapes.
Step‑by‑Step Instructions for Homemade Halloween Crackers
Step 1: Preheat Your Oven
Begin by preheating your oven to 400°F (200°C). This ensures a perfectly crisp result for your Homemade Halloween Crackers. While it heats, grab a baking sheet and line it with parchment paper or a silicone mat to prevent sticking and aid in easy cleanup.
Step 2: Mix Dry Ingredients
In a food processor, combine flour, baking powder, sugar, and salt. Pulse the mixture for around 10 seconds until evenly blended, creating a dry mix that will be the foundation of your flavorful crackers. The right balance of these ingredients is key to achieving that delightful crunch!
Step 3: Incorporate Butter
Add the cold, cubed butter into the food processor and pulse until the mixture resembles coarse crumbs, about 15 seconds. The butter should be broken down into pea-sized pieces, which will grant your Homemade Halloween Crackers a rich, flaky texture.
Step 4: Add Olive Oil
Pour in the olive oil and pulse again just until fully combined. This should take another 10 seconds. The mixture will start to come together more cohesively, enriching the flavor and moisture of your crackers, prepping you for the next step of binding.
Step 5: Form the Dough
Gradually add cold water through the feed tube, pulsing until a dough ball forms—this should be around 30 seconds. Ensure you don’t overwork the dough; it should be soft but not sticky, ready for rolling out into playful Halloween shapes soon.
Step 6: Roll Out the Dough
Turn the dough out onto a lightly floured silicone mat and divide it into two portions for easier handling. Roll each piece out to about 1/8-inch thickness. The dough should be thin enough to ensure crispness, bringing your Homemade Halloween Crackers one step closer to perfection.
Step 7: Cut Out Shapes
Using Halloween-themed plunger cutters, punch out fun shapes like pumpkins and ghosts from the rolled dough. As you do this, take care to poke holes in each cracker with a fork so they can breathe while baking, allowing even crispiness throughout.
Step 8: Bake the Crackers
Place the cut-out shapes onto the prepared baking sheet and slide them into the preheated oven. Bake for 10-12 minutes, or until they are golden and crispy. Keep a close watch, as they can go from beautifully baked to burnt quickly!
Step 9: Add Finishing Touches
Once out of the oven, brush the warm crackers with melted butter and sprinkle them with coarse sea salt. This final touch enhances flavor and gives your Homemade Halloween Crackers a delectable shine. Allow them to cool slightly before serving, giving you a tasty treat that’s perfect for any festive gathering!
Expert Tips for Homemade Halloween Crackers
• Proper Flour Measurement: Use a kitchen scale or spoon and level your flour for accuracy. Too much flour can lead to dense crackers and a less enjoyable texture.
• Ideal Dough Consistency: The dough should be soft yet not sticky. If it feels too tacky, add a little more flour to balance it out for perfect homemade Halloween crackers.
• Thickness Matters: Roll the dough to about 1/8-inch thickness. Thinner crackers will bake crispier, while thicker ones might not achieve that desired crunch.
• Watch Baking Time: Keep a close eye on the crackers as they bake. Check after 10 minutes; they can go from lovely golden to burnt in seconds!
• Cookie Cutter Care: Lightly flour your cookie cutters to prevent sticking, ensuring that your playful Halloween shapes come out perfectly each time.
How to Store and Freeze Homemade Halloween Crackers
Room Temperature: Store your Homemade Halloween Crackers in an airtight container at room temperature for up to 1 week to maintain their crispy texture.
Metal Tin: For longer freshness, opt for a metal cookie tin, which helps protect the crackers from moisture and keeps them crunchy.
Freezer: If you want to make a batch ahead of time, freeze the unbaked dough wrapped tightly in plastic wrap for up to 3 months. Thaw in the fridge overnight before rolling and baking.
Reheating: To enjoy leftover crackers, simply pop them in a preheated oven at 350°F (175°C) for 5-7 minutes to restore crispness before serving.
Make Ahead Options
These Homemade Halloween Crackers are perfect for busy home cooks who want to streamline their festive meal planning! You can prepare the dough up to 24 hours in advance; simply wrap it tightly in plastic wrap and refrigerate to keep it fresh. Additionally, you can cut out the cracker shapes and store them on a baking sheet lined with parchment paper in the refrigerator for up to 3 days. To maintain their delightful crunch, ensure they are properly sealed. When you’re ready to bake, just pop them in the oven for 10-12 minutes until golden brown. This way, you’ll have scrumptious homemade snacks at your fingertips with minimal effort!
What to Serve with Homemade Halloween Crackers
These festive treats are not only delightful on their own but also pair wonderfully with an array of dishes to elevate your gatherings.
- Butternut Squash Soup: This creamy, seasonal favorite creates a delicious contrast with the crunchy texture of the crackers, enhancing the cozy autumn experience.
- Cheesy Herb Dip: Rich, creamy, and flavorful, this dip complements the lightness of the crackers while adding an exciting burst of flavor.
- Olive Tapenade: The briny depth of olive tapenade offers a savory twist, making each cracker a delightful basked vessel for good taste!
- Pumpkin Hummus: Seasonal and vibrant, this sweet and savory hummus is a fun twist that pairs perfectly with the Halloween theme, plus it adds healthy ingredients!
- Roasted Vegetable Platter: A mix of crunchy carrots, zucchini, and bell peppers provides freshness and color, creating a visually exciting experience that pairs well with these crackers.
- Festive Cheese Board: Selection of themed cheeses and cured meats will create a beautiful charcuterie display to impress your guests while offering endless crunchy bites.
- Pomegranate-Infused Sparkling Water: Add a splash of fall with this refreshing drink, which cleanses the palate and accentuates the flavors of your favorite dips.
- Spiced Apple Cider: This warm drink brings a touch of nostalgia and comfort, perfectly complementing the season’s vibe and the savory snack experience.
- Mini Pumpkin Muffins: These delightful bites add a touch of sweetness to your spread, creating a balance of flavors that showcases festive fun!
Homemade Halloween Crackers Variations
Feel free to get creative with these delightful Homemade Halloween Crackers, adding a unique twist that will surprise and please your palate!
-
Dairy-Free: Substitute butter with vegan butter or margarine for a cruelty-free treat. The taste remains rich without compromising on flavor!
-
Whole Wheat Twist: For a nuttier flavor, try using whole wheat flour instead of all-purpose. This small change can elevate the nutritional value while still keeping it delicious.
-
Herb-Infused: Add dried herbs like rosemary or thyme into the dough for a fragrant, savory upgrade. These herbal notes pair wonderfully with dips and spreads.
-
Spicy Kick: Mix in a pinch of cayenne pepper or chili powder to the dry ingredients for a delightful heat that will liven up any Halloween gathering.
-
Cheesy Goodness: Incorporate finely grated cheese like Parmesan into the dough for an extra layer of flavor. Imagine cheesy, crispy ghosts haunting your appetizer table!
-
Sweet & Savory: For a hint of sweetness, drizzle honey over the tops before baking or sprinkle with cinnamon sugar. It’s an unexpected twist that will have everyone coming back for more!
-
Flavorful Seeds: Sprinkle with sesame or poppy seeds before baking for a crunchy topping that adds texture and a lovely nutty flavor. It’s a simple but effective enhancement!
-
Themed Shapes: While Halloween shapes are fun, consider using cookie cutters for other holidays too! Festive shapes can enhance gatherings throughout the year, like hearts for Valentine’s Day or stars for New Year’s.
Feel free to mix and match these suggestions! If you’re looking for serving ideas, our Chicken Caesar Sandwich makes a delightful complement to these crackers. Enjoy your baking!
Homemade Halloween Crackers Recipe FAQs
How do I choose the right flour for Homemade Halloween Crackers?
Absolutely! For the best structure, all-purpose flour works wonderfully; however, if you’re seeking a nuttier flavor, whole wheat flour is a great alternative. Keep in mind that different flours absorb moisture differently—if using whole wheat, you might need to adjust your water slightly.
What’s the best way to store Homemade Halloween Crackers?
I recommend placing your Homemade Halloween Crackers in an airtight container at room temperature, where they will remain crisp for up to a week. If you want them to last longer, using a metal cookie tin is perfect—it keeps the moisture out and preserves that delightful crunch!
Can I freeze the dough for Homemade Halloween Crackers?
Of course! If you want to make ahead, you can freeze the unbaked dough. Just wrap it tightly in plastic wrap or a freezer-safe bag. It will stay good for up to 3 months. When you’re ready to bake, simply thaw it in the fridge overnight, then roll it out and cut your fun shapes before baking.
What if my dough feels too sticky while making Homemade Halloween Crackers?
Very good question! If your dough feels sticky, just sprinkle in a bit more flour, about a tablespoon at a time, mixing gently until it’s manageable. Also, ensure you’re using cold water, as this helps keep the dough firm and workable.
Are there any dietary considerations for Homemade Halloween Crackers?
Definitely! If you or your guests have dietary restrictions, you can easily adapt this recipe. For a dairy-free version, just swap the unsalted butter for margarine or a vegan butter substitute. To keep it gluten-free, consider using a 1:1 gluten-free baking blend instead of standard flour.
What if my crackers don’t come out crispy enough?
Don’t worry, it happens to the best of us! If your crackers aren’t crispy, it might be due to insufficient baking time or thickness. Make sure to keep a close eye on them; if they start to turn golden, they will crisp up nicely as they cool. Baking them a little longer might help achieve that sought-after crunch!
Homemade Halloween Crackers: Fun, Crispy Treats for All
Ingredients
Equipment
Method
- Preheat your oven to 400°F (200°C) and line a baking sheet with parchment paper.
- In a food processor, combine flour, baking powder, sugar, and salt. Pulse for around 10 seconds until blended.
- Add the cold, cubed butter and pulse until the mixture resembles coarse crumbs, about 15 seconds.
- Pour in the olive oil and pulse just until combined, about 10 seconds.
- Gradually add cold water through the feed tube, pulsing until a dough ball forms, around 30 seconds.
- Turn the dough onto a lightly floured surface and roll out to about 1/8-inch thickness.
- Using cookie cutters, cut out shapes and poke holes in each cracker for even baking.
- Place the shapes onto the baking sheet and bake for 10-12 minutes until golden and crispy.
- Brush warm crackers with melted butter and sprinkle with coarse sea salt before serving.
Leave a Reply