
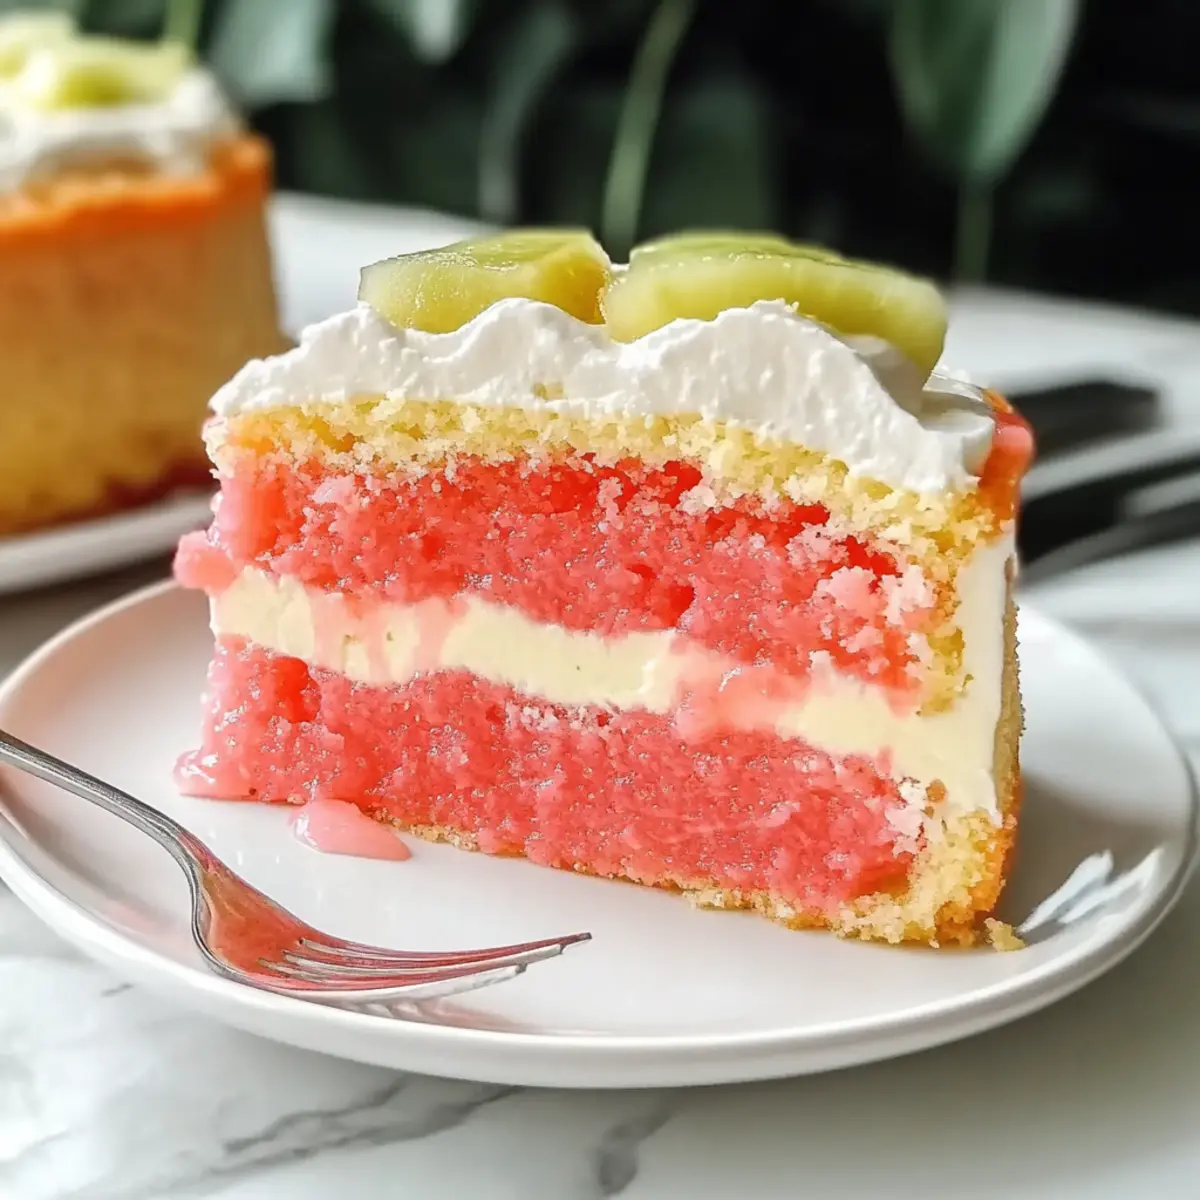
As I whisked a whirl of fruity sweetness into my cake batter, I couldn’t help but feel transported to a sun-drenched Hawaiian beach, with gentle waves lapping at my feet. This is the magic of my Decadent Hawaiian Guava Cake—a vibrant celebration of guava and coconut that transforms a simple gathering into a tropical escape. What I adore about this recipe is its effortless preparation and the ability to wow friends and family without any fuss. Whether you’re planning a summer party or just need a sweet escape from the everyday grind, this cake is your go-to crowd-pleaser, with a gluten-free option to boot! Curious about how you can bring a slice of paradise into your kitchen? Let’s dive in!
Why Is Hawaiian Guava Cake Irresistible?
Tropical Charm: The delightful fusion of sweet guava and coconut takes you straight to a sunny beach, making every slice a mini getaway.
Effortless Preparation: With a straightforward recipe that requires minimal baking skills, you’ll find it easy to whip up this beauty for any occasion.
Versatile Variations: Try adding pineapple or chocolate drizzle for a personal twist, ensuring each bake can be a new adventure! Don’t forget to check out Healthy Carrot Cake for another easy crowd-pleaser.
Gluten-Free Option: Inclusivity is key; simply substitute with a gluten-free cake mix and everyone can join in the yummy fun!
Crowd-Pleasing Appeal: Perfect for gatherings, this cake is sure to impress friends and family, transforming ordinary get-togethers into celebrations.
Hawaiian Guava Cake Ingredients
• Get ready to bake this tropical delight!
For the Cake
- Strawberry Cake Mix – Provides the base flavor and structure; substitute with a gluten-free cake mix for a gluten-free option.
- Guava Nectar or Guava Juice – Adds tropical sweetness; use any brand for authenticity.
- Eggs (3 large, room temperature) – Binds ingredients and adds moisture; can replace with ¼ cup unsweetened applesauce or a flax egg for an egg-free version.
- Coconut Oil (½ cup, melted) – Provides moisture and coconut flavor; can replace with neutral vegetable oil.
For the Cream Cheese Layer
- Cream Cheese (8 oz, room temperature) – Creates a rich, creamy layer; dairy-free cream cheese can be used for a dairy-free option.
- Granulated Sugar (½ cup for cream cheese layer) – Sweetens and balances the rich flavors; add another ½ cup for the guava gel.
- Vanilla Extract (1 tsp) – Enhances the flavor profile; using pure vanilla extract yields the best results.
- Cool Whip (8 oz, thawed) – Lightens the cream cheese mixture; homemade whipped cream also works well.
For the Guava Gel
- Cornstarch (2 tbsp) – Acts as a thickener for the guava gel; arrowroot powder can be used as an alternative.
- Water (¼ cup) – Combined with cornstarch to create a slurry for the gel.
- Sweetened Coconut Flakes (1 cup, optional) – Adds tropical flavor and crunch as a garnish; can be omitted or replaced with unsweetened flakes.
Now that you have all the ingredients ready, let’s create this stunning Hawaiian Guava Cake that will whisk you away to paradise!
Step‑by‑Step Instructions for Hawaiian Guava Cake
Step 1: Preheat and Prepare
Begin by preheating your oven to 350°F (175°C). While the oven heats up, grease a 13 x 9-inch baking dish with vegetable spray to ensure the Hawaiian Guava Cake releases easily after baking. This crucial step sets the foundation for a perfect cake.
Step 2: Mix the Batter
In a large mixing bowl, combine the Strawberry Cake Mix, Guava Juice, three room-temperature eggs, and melted Coconut Oil. Use an electric mixer to blend on low for 30 seconds, then increase to medium-high for 2 minutes. The mixture should be smooth and slightly fluffy, filling your kitchen with a delightful tropical aroma.
Step 3: Bake the Cake
Pour the batter into the prepared baking pan and spread it evenly. Place it in the preheated oven and bake for 24-26 minutes, or until a toothpick inserted into the center comes out clean or with a few dry crumbs. Keep an eye on it to avoid overbaking, which can lead to dryness.
Step 4: Cool the Cake
Once baked, remove the cake from the oven and let it cool in the pan for about 10 minutes. Then transfer it to a wire rack to cool completely. This cooling step is vital before adding the cream cheese layer, allowing the flavors to settle beautifully in the Hawaiian Guava Cake.
Step 5: Prepare the Cream Cheese Layer
While the cake cools, beat the room temperature Cream Cheese in a mixing bowl until light and fluffy. Gradually blend in the granulated sugar and vanilla extract, followed by the thawed Cool Whip. This creamy mixture should be smooth and airy, creating a rich layer for your cake.
Step 6: Layer the Cream Cheese Mixture
Spread the prepared cream cheese mixture evenly over the cooled cake, ensuring every slice will be decadent. Chill the cake in the refrigerator for at least 30 minutes to let this layer set, enhancing the overall texture and taste of the Hawaiian Guava Cake.
Step 7: Make the Guava Gel
In a small saucepan, combine Guava Juice and the additional sugar, bringing it to a low boil over medium heat. Meanwhile, create a cornstarch slurry by mixing the cornstarch with ¼ cup of water. Whisk this slurry into the boiling mixture, allowing it to thicken for about 1 minute while stirring consistently.
Step 8: Cool the Gel and Glaze
Remove the saucepan from heat and let the guava gel cool slightly. Once it reaches room temperature, pour it over the chilled cream cheese layer on the cake, creating a beautiful glossy finish. This vibrant glaze is what gives the Hawaiian Guava Cake its tropical charm.
Step 9: Chill and Garnish
Finally, return the cake to the refrigerator to chill for at least 1 hour before serving. This helps the flavors meld together beautifully. Before serving, you may sprinkle optional sweetened coconut flakes on top for a burst of flavor and a delightful crunch, elevating your delicious Hawaiian Guava Cake experience.
Hawaiian Guava Cake Variations and Substitutions
Feel free to explore your culinary creativity and make this Hawaiian Guava Cake uniquely yours!
- Gluten-Free: Substitute Strawberry Cake Mix with a gluten-free alternative to cater to those with dietary restrictions.
- Fruit Boost: Fold in diced fresh pineapple or mango into the batter for an extra layer of fruity goodness that complements the guava beautifully.
- Chocolate Drizzle: Elevate your cake with a rich melted dark chocolate drizzle over the guava glaze for a decadent twist that chocolate lovers will adore.
- Nutty Crunch: Mix in chopped macadamia nuts or toasted coconut for delightful texture and nutty flavor that enhances the tropical experience.
- Coconut Cream: Use coconut cream instead of Cool Whip for a richer, coconut-infused cream cheese layer, perfect for coconut aficionados.
- Zesty Kick: Add a splash of fresh lime juice or zest into the batter for a refreshing citrus note that brightens the tropical flavors.
- Dairy-Free: Swap the cream cheese with dairy-free cream cheese and use coconut whipped cream to keep it creamy while being dairy-free.
- Berry Bliss: Top the finished cake with fresh berries like strawberries or blueberries for a vibrant and colorful presentation, adding both flavor and visual appeal.
For more delightful dessert inspirations, check out my Healthy Carrot Cake or savor the tropical taste of a Coconut Dream Cake. Each option brings unique flavors to your table, making every special occasion sweeter!
Expert Tips for Hawaiian Guava Cake
- Room Temperature Ingredients: Ensure all ingredients, especially eggs and cream cheese, are at room temperature for smoother mixing and better texture in your Hawaiian Guava Cake.
- Watch the Clock: Avoid overbaking! Keep an eye on the cake during the last few minutes—checking with a toothpick helps prevent a dry outcome.
- Chill to Perfection: Allow the cake to chill thoroughly after assembly; this not only enhances flavor melding but also makes slicing easier.
- Smooth Gel Consistency: For a lump-free guava gel, whisk the cornstarch thoroughly into the water before adding it to the boiling mixture.
- Presentation Matters: Garnish with toasted coconut flakes for an eye-catching touch and an extra layer of tropical flavor to the finished Hawaiian Guava Cake.
How to Store and Freeze Hawaiian Guava Cake
Room Temperature: Enjoy your Hawaiian Guava Cake at room temperature for up to 1 day; simply cover it with a cake dome to keep it fresh.
Fridge: Store the cake in the refrigerator for up to 3 days, either wrapped in plastic wrap or in an airtight container to maintain its delightful creaminess.
Freezer: For longer storage, freeze individual slices of the Hawaiian Guava Cake tightly wrapped in plastic wrap followed by aluminum foil for up to 2 months.
Reheating: Thaw each slice in the refrigerator overnight; enjoy chilled or let it sit at room temperature for a sweeter taste.
Make Ahead Options
These delightful Hawaiian Guava Cake components are perfect for meal prep, saving you time during busy weeknights! You can bake the cake up to 24 hours in advance and store it, covered, at room temperature to maintain moisture. The cream cheese layer can also be prepared up to 3 days ahead; simply combine it and refrigerate until ready to use. For the guava gel, make it 1-2 days in advance and store it in an airtight container in the fridge to keep it fresh. When you’re ready to serve, layer the cream cheese mixture on the cooled cake and glaze it with the guava gel for a truly indulgent treat that’s just as delicious as when freshly made!
What to Serve with Decadent Hawaiian Guava Cake
Indulging in a slice of tropical delight is even better when complemented with the perfect accompaniments.
- Vanilla Ice Cream: A scoop of creamy vanilla ice cream adds a delightful contrast to the sweet guava flavors, melting into each bite.
- Sparkling Water with Lime: Refreshing and zesty, sparkling water cuts through the cake’s richness, enhancing the tropical experience.
- Tropical Fruit Salad: A medley of tropical fruits like pineapple, mango, and kiwi brightens the table and adds freshness to the feast.
- Whipped Cream: Extra fluffy whipped cream on top enriches the creamy texture of the cake, creating a beautifully indulgent dessert.
- Toasted Coconut Flakes: Adding a sprinkle of toasted coconut gives a crunchy texture that harmonizes perfectly with the cake’s soft layers.
- Mimosas or Pina Coladas: These fruity cocktails turn a simple slice into a festive experience, perfect for summer gatherings or brunch celebrations.
- Coconut Sorbet: A cool and refreshing sorbet offers a creamy yet dairy-free option that matches the cake’s tropical vibe.
- Key Lime Pie Bars: For a tangy twist, serve alongside these bars; their tartness wonderfully contrasts the sweetness of the cake.
- Chocolate Drizzle: A simple drizzle of dark chocolate elevates the dessert with a luscious bitterness that complements the sweetness beautifully.
Hawaiian Guava Cake Recipe FAQs
How do I select ripe guava for my Hawaiian Guava Cake?
When choosing guava for your recipe, look for fruit that is slightly soft to the touch and fragrant. The skin should be free of dark spots or blemishes; an ideal guava will have a smooth, vibrant skin that indicates ripeness. If using guava juice, ensure it is 100% fruit juice for the best flavor.
How should I store my Hawaiian Guava Cake?
To keep your Hawaiian Guava Cake fresh, store it in the refrigerator for up to 3 days in an airtight container or wrapped in plastic wrap. If left at room temperature, it’s best enjoyed within 1 day. This way, you’ll maintain its creamy layers and tropical taste for several days.
Can I freeze Hawaiian Guava Cake, and if so, how?
Absolutely! To freeze your Hawaiian Guava Cake, first slice it into individual portions. Wrap each slice tightly in plastic wrap, followed by aluminum foil. This method prevents freezer burn and preserves the cake’s flavors. It can be kept frozen for up to 2 months. Just thaw overnight in the refrigerator when you’re ready to enjoy!
What should I do if my cake turns out dry?
If you notice your Hawaiian Guava Cake has turned out dry, it likely has been overbaked. To avoid this, always check a few minutes before the recommended baking time by inserting a toothpick into the center; it should come out clean or with a few moist crumbs. If it’s already baked dry, you can enhance moisture by serving it with a drizzle of guava syrup or a dollop of whipped cream.
Are there any dietary considerations for my Hawaiian Guava Cake?
Yes, this cake can be adapted for various dietary needs. Use gluten-free cake mix for a gluten-free option, and for dairy-free, substitute cream cheese with a dairy-free variant. If you have a sensitivity to eggs, you can replace the three eggs with ¼ cup unsweetened applesauce or a flax egg made from 1 tablespoon of ground flaxseed mixed with 2.5 tablespoons of water.
Hawaiian Guava Cake: A Tropical Escape in Every Slice
Ingredients
Equipment
Method
- Preheat your oven to 350°F (175°C). Grease a 13 x 9-inch baking dish with vegetable spray.
- In a large mixing bowl, combine the Strawberry Cake Mix, Guava Juice, three room-temperature eggs, and melted Coconut Oil. Use an electric mixer to blend on low for 30 seconds, then increase to medium-high for 2 minutes.
- Pour the batter into the prepared baking pan and spread it evenly. Bake for 24-26 minutes, or until a toothpick inserted comes out clean or with a few dry crumbs.
- Once baked, let the cake cool in the pan for about 10 minutes. Transfer to a wire rack to cool completely.
- Beat the room temperature Cream Cheese until light and fluffy. Gradually blend in the granulated sugar and vanilla extract, followed by the thawed Cool Whip.
- Spread the cream cheese mixture evenly over the cooled cake. Chill in the refrigerator for at least 30 minutes.
- In a small saucepan, combine Guava Juice and the additional sugar, bringing it to a low boil. Mix the cornstarch with ¼ cup of water to create a slurry. Whisk into the boiling mixture and allow it to thicken for about 1 minute.
- Remove from heat and let the guava gel cool slightly. Pour it over the chilled cream cheese layer on the cake.
- Return the cake to the refrigerator to chill for at least 1 hour before serving. Optionally, sprinkle sweetened coconut flakes on top before serving.
Leave a Reply