
There I was, standing in my kitchen, surrounded by the warm aroma of baking bread and a sense of adventure. That’s when I decided it was time to reinvent the ordinary into something extraordinary with these Gluten Free Cruffins! Think of them as a delightful fusion between flaky croissants and sweet muffins, creating a pastry hybrid that’s as versatile as it is delicious. The best part? These cruffins are not just gluten-free, but they also offer endless flavor possibilities—whether you’re in the mood for something sweet or savory. Their unique spiral shape invites creativity, making them the perfect treat for any occasion. Plus, with quick prep time and the ability to freeze for later, you’ll always have a delightful snack on hand. So, are you ready to embark on a baking journey that promises satisfaction and smiles in every bite?
Why are Cruffins so Irresistible?
Decadent Layers: The rich, buttery texture combined with flaky layers creates a mouthwatering experience that no one can resist.
Versatile Flavor: You can easily adapt these cruffins with sweet or savory fillings, making them perfect for any time of day.
Quick Preparation: With straightforward steps, you’ll have these delightful treats baked in no time, perfect for busy schedules.
Crowd-Pleaser: Impress your friends and family with this unique pastry hybrid, making any gathering feel special.
Make-Ahead Convenience: Bake a batch and freeze them for quick, heavenly snacks whenever you want! For another indulgent treat, don’t forget to check out our Gluten Free Cookies that are equally delightful.
Gluten Free Cruffin Ingredients
For the Dough
- Active Dry Yeast – A crucial leavening agent for creating that lovely rise; can be swapped with instant yeast if needed.
- Cane Sugar (1 tablespoon + ½ cup) – Sweetens the dough and cinnamon sugar topping perfectly.
- Milk (1 cup) – Adds moisture to the dough; feel free to try dairy-free milk for a non-dairy option, though it’s untested.
- Gluten Free Flour Blend (3 cups) – Essential for the structure of your cruffins; ensure it’s suitable for yeast recipes to achieve the best texture.
- Unsalted Butter (6 tablespoons frozen + 3 tablespoons melted) – Provides richness and flaky layers; can be replaced with dairy-free butter for a non-dairy treat.
- Salt (¼ teaspoon) – Balances the flavors; you can omit it if you’re using salted butter.
- Pure Vanilla Extract (1 teaspoon) – Introduces deep, inviting flavor to the dough.
For the Cinnamon Sugar Coating
- Ground Cinnamon (2 teaspoons + ½ teaspoon) – Adds warmth and sweetness to the dessert-like finish.
These Gluten Free Cruffins are sure to delight, whether enjoyed straight out of the oven or with your favorite fillings!
Step‑by‑Step Instructions for Gluten Free Cruffins
Step 1: Activate the Yeast
Begin by warming 1 cup of milk to about 110°F. In a mixing bowl, combine the warm milk with 1 tablespoon of cane sugar and 2 teaspoons of active dry yeast, stirring gently. Let this mixture sit for about 5 minutes until it becomes frothy, indicating that the yeast is active and ready to rise. While the yeast activates, preheat your oven to 200°F and then turn it off, creating a warm environment for the dough.
Step 2: Combine the Dry Ingredients
In a large mixing bowl, combine 3 cups of gluten-free flour blend, ½ cup of cane sugar, and ¼ teaspoon of salt. Stir these dry ingredients together thoroughly, ensuring an even distribution of flavors. This mixture will provide the main structure for your Gluten Free Cruffins. Creating a solid base is essential for achieving the perfect texture and rise of the pastries.
Step 3: Incorporate the Butter
Next, take your frozen butter and grate it into the flour mixture using a box grater. The grated butter should resemble small flakes, which will help create those delightful flaky layers in your cruffins. Gently mix the grated butter into the flour blend until it’s evenly distributed, resembling coarse crumbs. This step is vital to achieving that rich, buttery flavor in your Gluten Free Cruffins.
Step 4: Combine Wet and Dry Mixtures
Pour the activated yeast mixture and 1 teaspoon of pure vanilla extract into the bowl with the dry ingredients. Stir carefully until a cohesive dough forms. If the dough appears too dry, gradually add a little more milk; conversely, if it’s too wet, sprinkle in more flour until you reach a smooth and workable consistency. Your dough for the Gluten Free Cruffins should now be soft and slightly sticky.
Step 5: Roll Out the Dough
Transfer the dough onto a floured silicone mat or clean surface. Gently flatten the dough with your hands before using a rolling pin to roll it out to about ¼ inch thickness. Aim for a rectangular shape, which will make it easier to layer and roll the cruffins later. Once rolled, visualize the delicate, flaky layers that will emerge once baked!
Step 6: Add the Cinnamon Sugar
Spread the 3 tablespoons of melted butter evenly over the rolled dough, ensuring every part is coated for that delicious richness. Then, in a small bowl, combine 2 teaspoons of ground cinnamon with ½ cup of cane sugar. Sprinkle this cinnamon sugar mixture generously over the melted butter, enticingly sweetening the cruffins and setting the stage for flavor.
Step 7: Shape the Cruffins
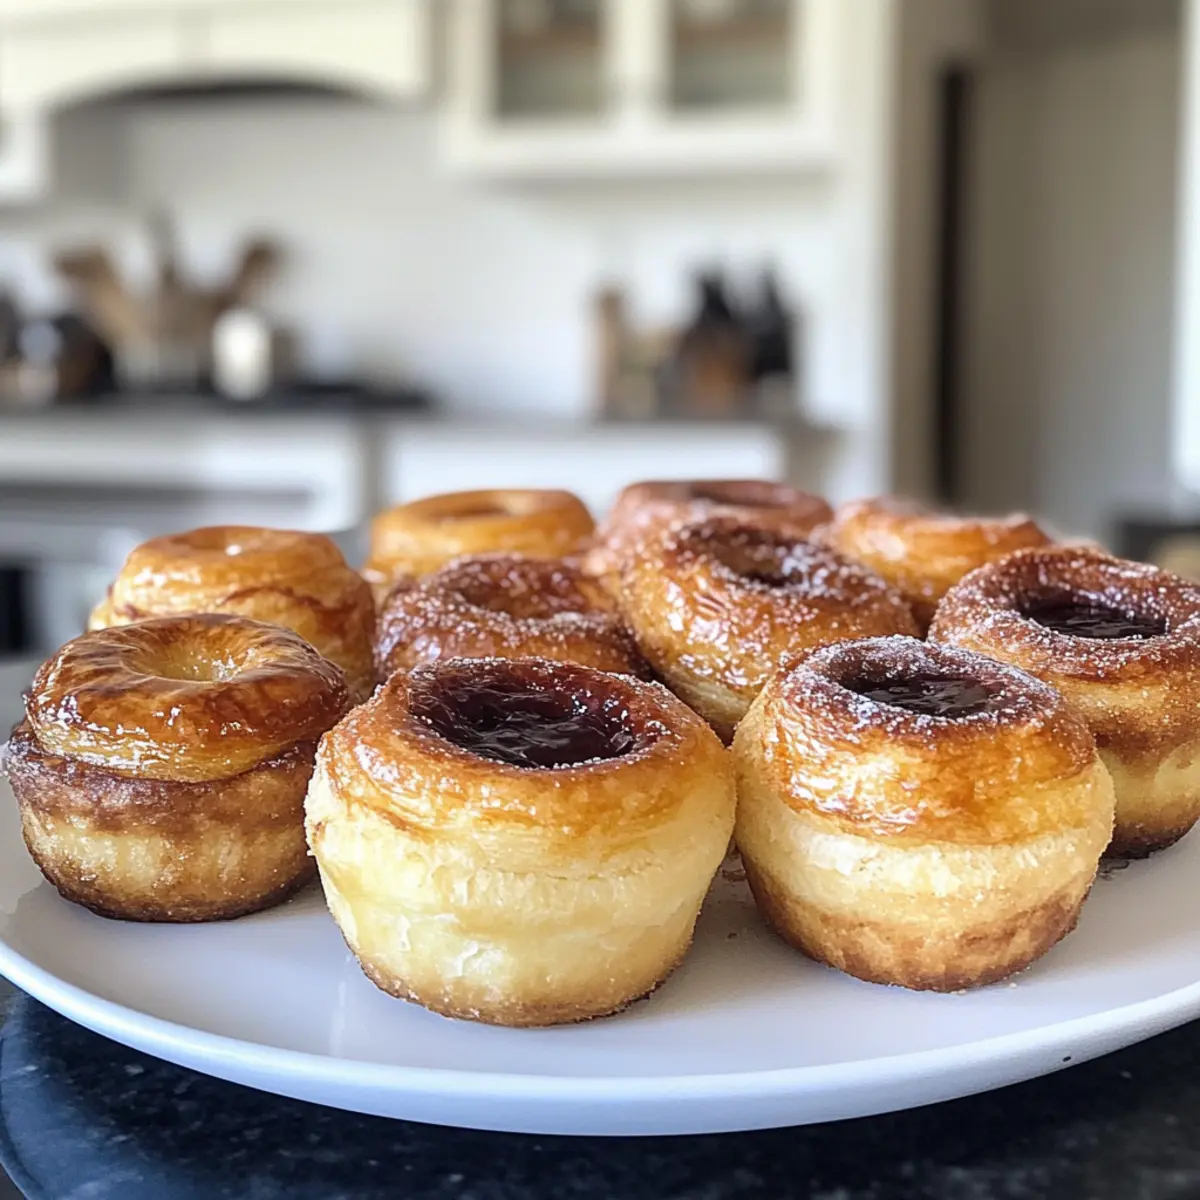
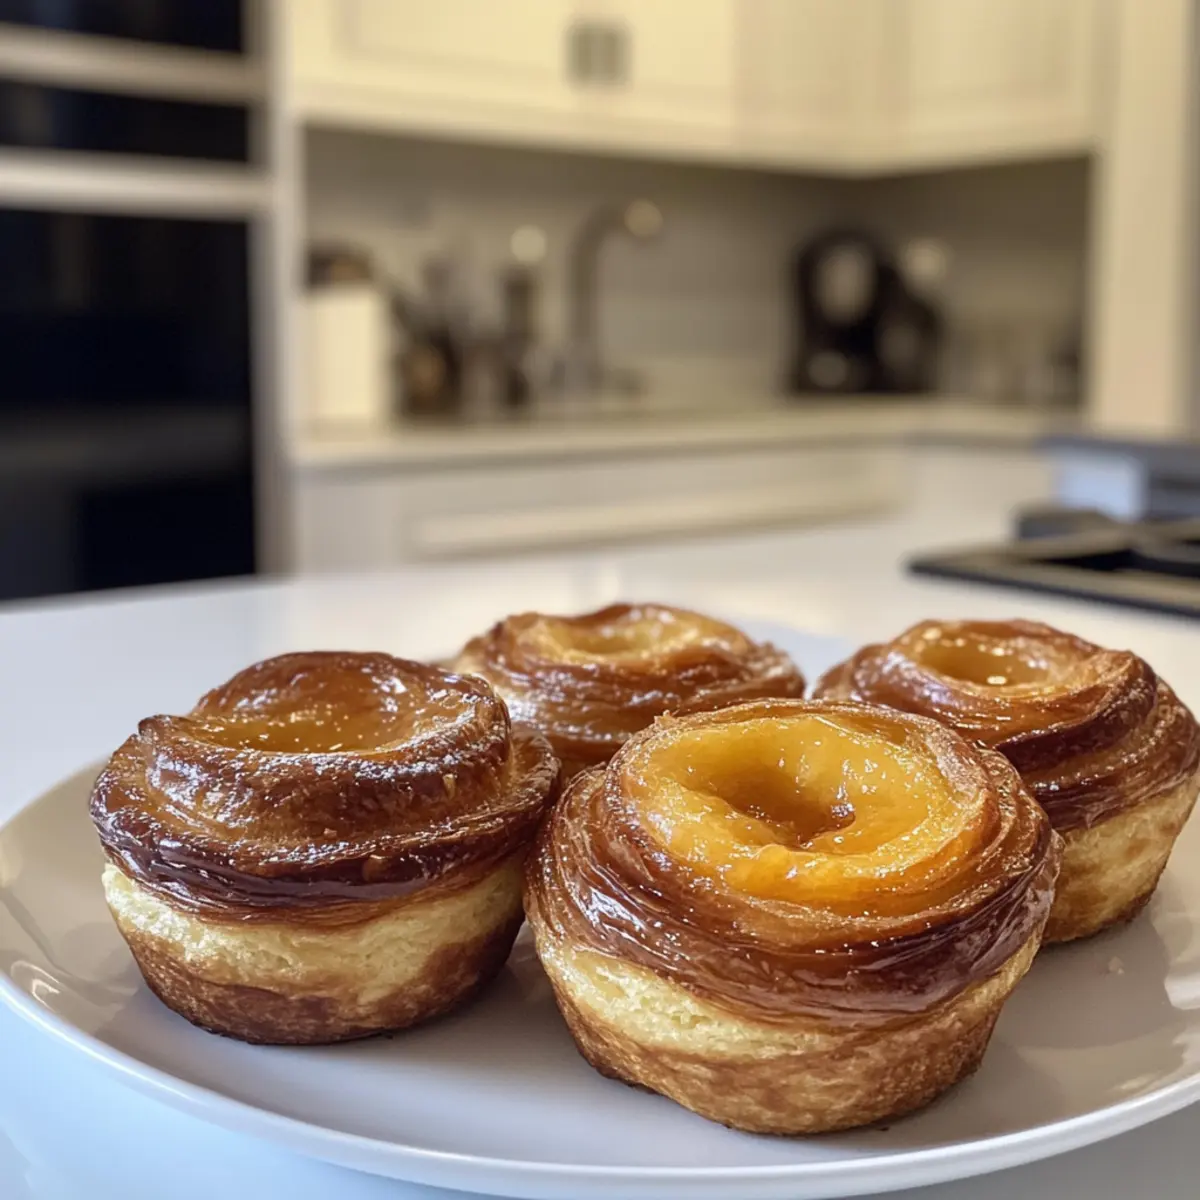
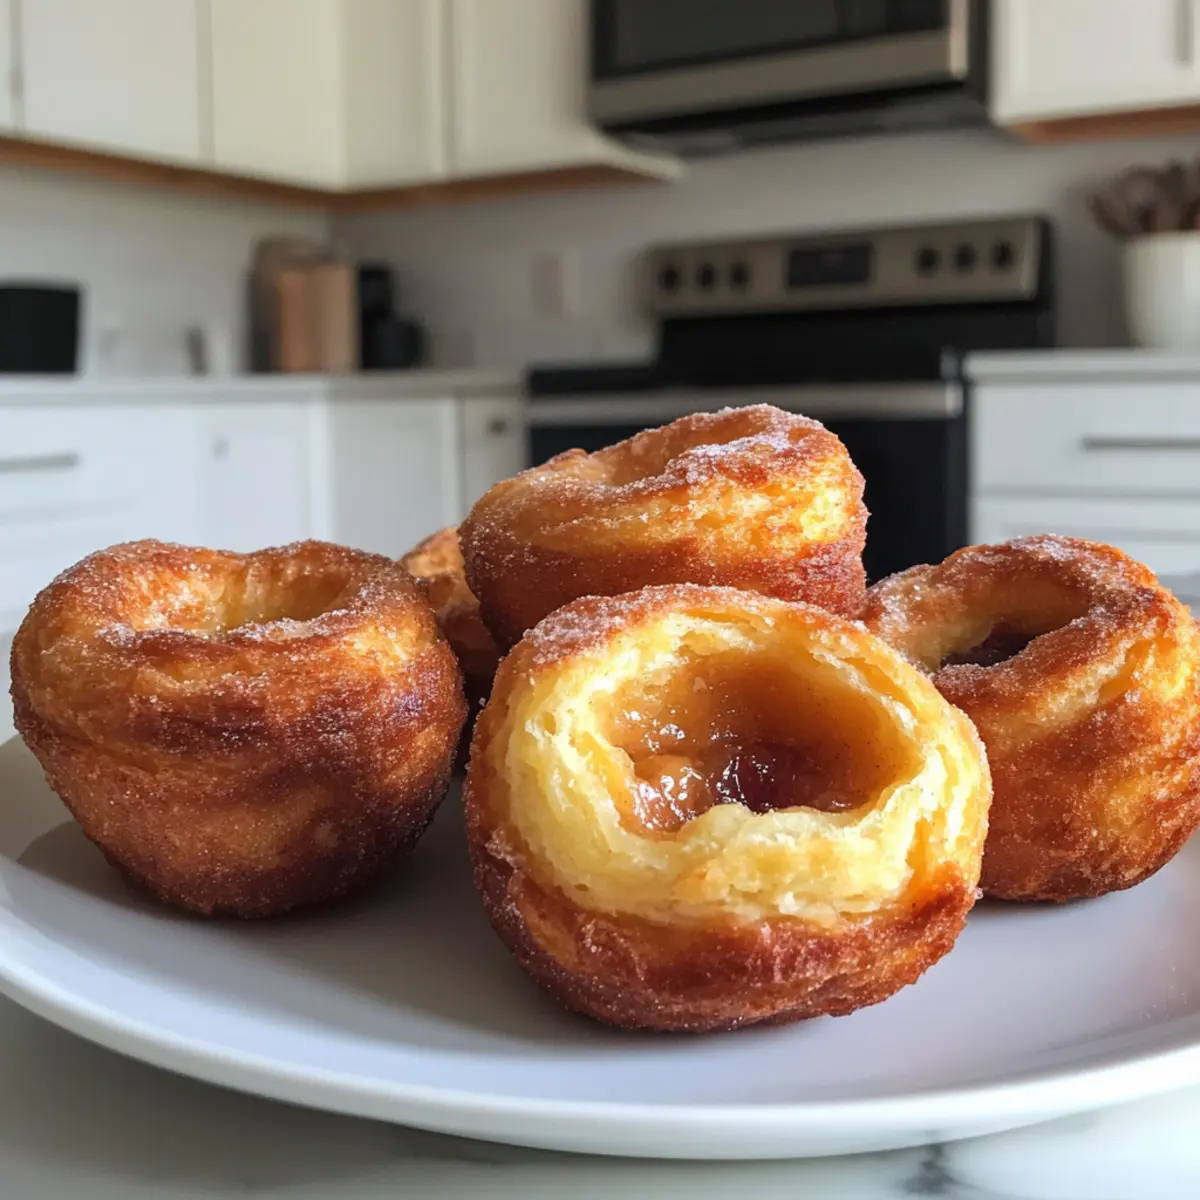
Using a sharp knife or pizza cutter, slice the dough into long strips, approximately 2 inches wide. Starting from one end of the strip, begin rolling the dough tightly to form a spiral shape, reminiscent of a croissant. Once rolled, place each cruffin into a greased muffin pan, ensuring they sit snugly against each other. This creates that beautiful spiral shape that defines these Gluten Free Cruffins.
Step 8: Allow to Rise
Now, cover the muffin pan with a clean kitchen towel and place it in the warm oven you prepared earlier. Allow the cruffins to rise for approximately 45 minutes or until they have doubled in size. This step is crucial for achieving a light and airy texture, so keep an eye out for their delightful puffiness.
Step 9: Bake the Cruffins
Preheat your oven to 375°F. Once the cruffins have risen beautifully, remove them from the warm oven. Brush the tops with a little more melted butter for an added layer of flavor and a lovely golden color. Bake in the preheated oven for 25-30 minutes until the tops are golden brown and the cruffins are fragrant, filling your home with their irresistible aroma.
Step 10: Final Touch of Cinnamon Sugar
As soon as you take the cruffins out of the oven, let them cool for a minute before rolling them in a little more cinnamon sugar. This final touch adds a delightful sweetness and makes these Gluten Free Cruffins utterly irresistible. Serve warm and enjoy the crispy exterior paired with the fluffy interior for a truly satisfying treat.
Make Ahead Options
These Gluten Free Cruffins are perfect for meal prep enthusiasts! You can prepare the dough and shape the cruffins up to 24 hours in advance. Simply follow the recipe until you form the rolls, then cover the muffin pan tightly with plastic wrap and refrigerate. This method keeps the cruffins fresh and ensures they rise just before baking. When you’re ready to bake, let them sit at room temperature for about 30 minutes to come back to life, then brush with melted butter, and bake as instructed. The result? Fluffy, flaky cruffins with minimal effort, ready to impress your family with that fresh-baked goodness!
Expert Tips for Gluten Free Cruffins
-
Butter Temperature Matters: Grate frozen butter directly into the flour mixture for optimal flakiness. Room temperature butter will lead to a denser cruffin.
-
Choose the Right Flour: Make sure your gluten-free flour blend is compatible with yeast recipes. Blends like Bob’s Red Mill or King Arthur Measure for Measure can ruin the texture.
-
Time Your Shaping: Shape your cruffins right before the rise. Gluten-free dough only has one good rise, and shaping too early may affect the final puffiness.
-
Adjust for Consistency: If the dough is too sticky, sprinkle in more flour; if too dry, add a splash of liquid gradually. Achieving the right dough consistency is key to fluffy Gluten Free Cruffins!
-
Experiment with Fillings: Don’t hesitate to personalize your cruffins with various sweet and savory fillings. Think fruit preserves, chocolate, or herbs for added creativity.
-
Keep an Eye on Baking: Ovens can vary, so check on your cruffins a few minutes before the end of the baking time to prevent over-browning.
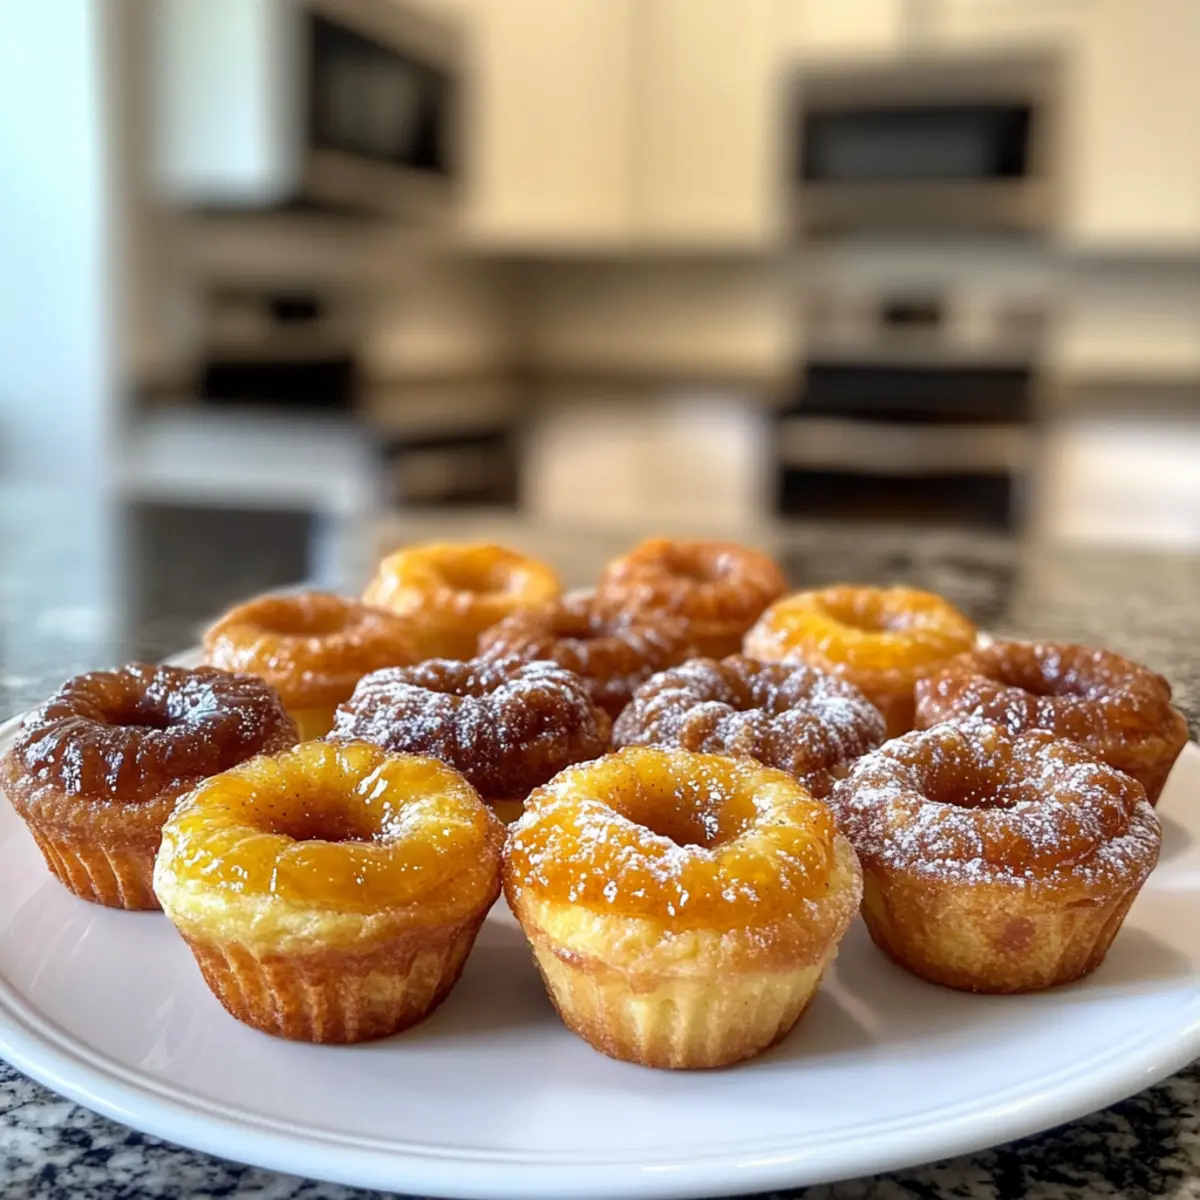
Gluten Free Cruffins Variations
Feel free to get creative with these delightful cruffins and customize them to suit your tastes.
-
Sweet Fillings: Add chocolate chips or fruit preserves like raspberry or blueberry for a fruity explosion. These sweet surprises will transform your pastries into a blissful dessert treat!
-
Savory Twist: Consider adding grated cheese or sautéed herbs to mix into the dough. Picture the fragrant aroma of herbs melding with the buttery layers – simply irresistible!
-
Spiced Up: Swap out ground cinnamon for nutmeg or pumpkin spice to introduce a whole new flavor profile. Each bite will transport you to a cozy café, all while being gluten-free!
-
Dairy-Free Delight: Utilize coconut oil or dairy-free butter instead of regular butter. This will ensure that everyone can enjoy these pastries while still having that rich flavor you love!
-
Nutty Crust: Incorporate finely chopped nuts like almonds or hazelnuts into the cinnamon sugar coating. This will add a delightful crunch and amplify the flavors.
-
Gluten Free Little: You can even try mini versions by using a mini muffin tin! This is a fun way to create bite-sized treats perfect for parties or snack time. For another easy gluten-free treat, don’t miss our Gluten Free Cookies that are just as delightful!
-
Fruity Glaze: Brush the cooled cruffins with a simple glaze made of powdered sugar and fruit juice for a sweet finish. This adds an elegant touch everyone will love!
-
Spicy Kick: Add a pinch of cayenne or a dash of paprika to your dough for a spicy twist. It’s a unique flavor combination that will surely surprise your taste buds!
What to Serve with Decadent Gluten Free Cruffins?
Indulging in these delightful pastries opens the door to a world of perfectly paired accompaniments, enhancing every bite.
-
Fresh Fruit Salad: A colorful mix of seasonal fruits balances the richness of cruffins; think berries, melon, and citrus for a refreshing contrast.
-
Creamy Yogurt: A dollop of your favorite yogurt adds a tangy twist, making each cruffin experience both creamy and delightful. Mix in honey or granola for extra flavor and texture!
-
Savory Cheese Platter: Pair with a selection of cheeses, like brie or aged cheddar. The saltiness of cheese beautifully complements the sweet layers of the cruffins.
-
Herb-Infused Tea: A steaming cup of herbal tea, like chamomile or mint, soothes the palate and elevates your cruffins from a mere snack to a wholesome mini-meal.
-
Cinnamon-Spiced Coffee: Enhance the experience with a cup of coffee infused with cinnamon. The warm spices echo the flavors of the cruffins while providing a delightful kick.
-
Decadent Chocolate Sauce: Drizzle warm chocolate sauce over your cruffins for a decadent dessert treat. The gooey sweetness can turn breakfast into an indulgent affair!
-
Maple Glaze: A sweet maple syrup drizzle reflects rich flavors, creating a comforting, cozy vibe anytime you serve cruffins.
Explore these pairings for a brunch spread that captures every chocolatey or fruity whim, transforming your table into a feast of love!
Storage Tips for Gluten Free Cruffins
Room Temperature: Keep your cruffins in a cool, dry place for up to 1 day, wrapped in wax paper for tenderness without moisture loss.
Fridge: Store cruffins in an airtight container in the refrigerator for up to 3 days to maintain freshness and flavor.
Freezer: Freeze your cruffins individually wrapped in plastic wrap and placed in a zip-top bag for up to 3 months, ensuring they retain their delightful texture.
Reheating: To enjoy, heat frozen cruffins in the oven at 350°F for about 10-15 minutes and blissfully rediscover that flaky goodness of your Gluten Free Cruffins.
Gluten Free Cruffins Recipe FAQs
What type of gluten-free flour blend is best for this recipe?
Absolutely! It’s crucial to choose a gluten-free flour blend that is specifically compatible with yeast recipes. Blends like Bob’s Red Mill or King Arthur Measure for Measure do not work well here. Instead, look for blends labeled as “yeast-compatible,” which will provide the necessary structure for your cruffins to rise beautifully.
How should I store leftover cruffins?
You can store your Gluten Free Cruffins in an airtight container in the refrigerator for up to 3 days. This helps maintain their freshness and flavor. For longer storage, freeze them individually wrapped in plastic wrap and then placed in a zip-top bag to keep them for up to 3 months.
Can I freeze cruffins, and if so, how?
Yes, you can definitely freeze your cruffins! First, allow them to cool completely. Then, wrap each cruffin in plastic wrap and place them in a zip-top freezer bag. They can be stored in the freezer for up to 3 months. To enjoy, simply reheat them in the oven at 350°F for about 10-15 minutes to regain that warm, flaky texture you love.
What if my dough is too wet or too dry?
Not a problem at all! If your dough feels too wet, gradually add more gluten-free flour—just a tablespoon at a time—until you reach a smooth, workable consistency. Conversely, if the dough is too dry, add milk a splash at a time until it becomes soft and slightly sticky. The key here is to aim for a dough that holds together but isn’t overly tacky.
Are there any dietary considerations I should keep in mind?
Certainly! If you’re making these for someone with allergies, be sure to check the labels on your gluten-free flour and any other ingredients, as some blends might contain allergens. Additionally, if preparing these for non-dairy eaters, you can substitute the butter with a dairy-free alternative and use almond or coconut milk instead of regular milk, though I’ve yet to test it myself.
Can these cruffins be made ahead of time?
Very much so! You can prepare the dough ahead of time, shape it, and store it in the refrigerator until you’re ready to let it rise and bake. I often recommend this method for busy mornings—you’ll have freshly baked Gluten Free Cruffins whenever the craving hits!
Irresistible Gluten Free Cruffins: Flaky, Buttery Bliss
Ingredients
Equipment
Method
- Warm 1 cup of milk to about 110°F, then combine with 1 tablespoon of cane sugar and 2 teaspoons of active dry yeast in a mixing bowl. Let sit for 5 minutes until frothy.
- Combine 3 cups of gluten-free flour blend, ½ cup of cane sugar, and ¼ teaspoon of salt in a large mixing bowl.
- Grate frozen butter into the flour mixture until it resembles coarse crumbs.
- Pour the activated yeast mixture and 1 teaspoon of vanilla extract into the dry ingredients and stir until a cohesive dough forms.
- Roll out the dough on a floured surface to about ¼ inch thickness.
- Spread 3 tablespoons of melted butter over the rolled dough, then sprinkle with cinnamon sugar mixture.
- Slice the dough into strips and roll tightly to form a spiral shape, placing each into a greased muffin pan.
- Cover the muffin pan and allow it to rise in a warm oven for approximately 45 minutes.
- Preheat the oven to 375°F, brush the tops with melted butter, and bake for 25-30 minutes until golden brown.
- Roll the hot cruffins in additional cinnamon sugar before serving.
Leave a Reply